DrkAngel
1 GW
I've achieved a sustainable 20mph from a 24v battery pack.
The "stock" EZIP Trailz, Mountain Trailz also, has a typical top speed of about 16mph, with some "assist" up to about 18mph. I felt that they must have made some mistake in their concept since the USA legal limit is 20mph. I felt it my duty to try to fix their mistake!
The most reasonable, (simplest), method would be to change the motor's gear ratio.
Two methods are possible: note:T = teeth.
1. Increase the size of the motor drive sprocket, OEM is 9T, 11T would be about right. 22% increase.

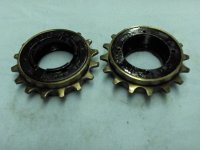
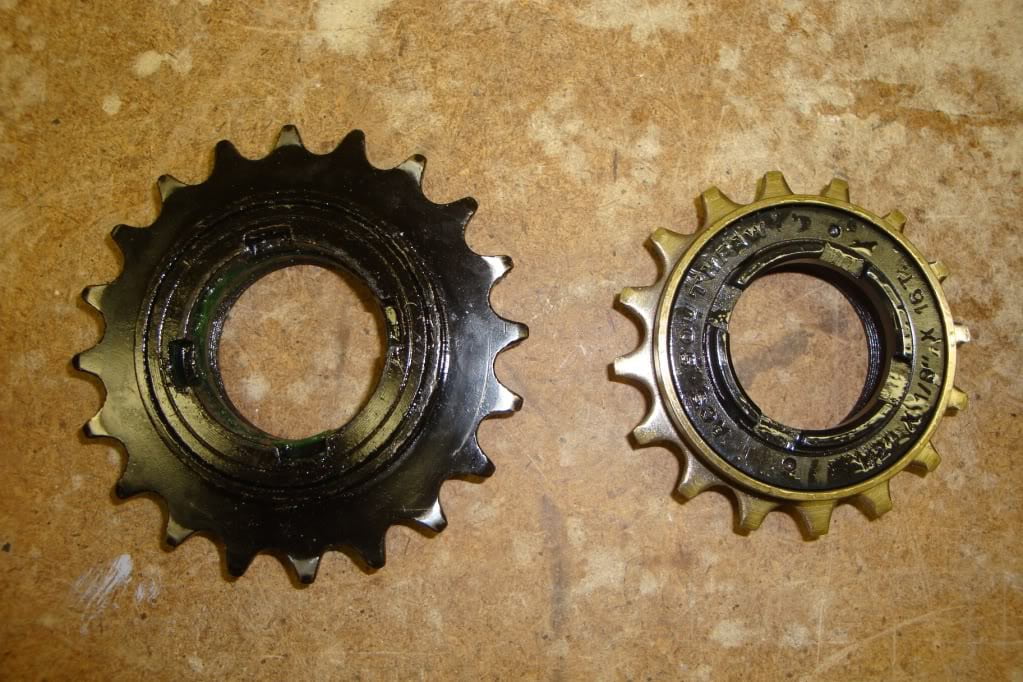
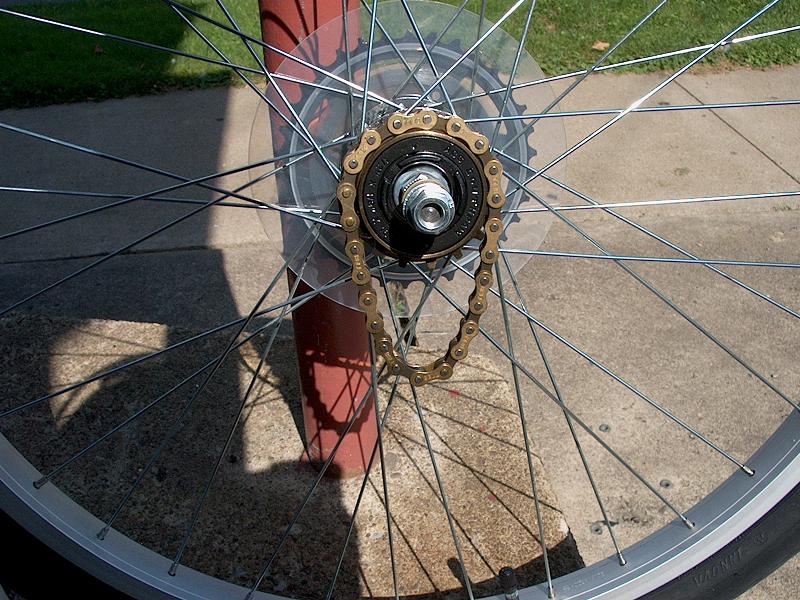
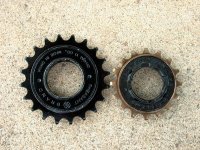
2. Decrease the size of freewheel on the rear wheel, OEM is 20T, 16T would be perfect.
After an exhaustive search, I was unable to find, any compatible motor sprocket, anything close required, modification, custom adapters, machining, or all 3.
Edit - Compatible motor sprockets11T and 13T have been found! See - eZip motor sprockets
Took me quite a while but I finally found an acceptable 16T freewheel. The difficulty is that it must have a Left-Hand thread, comparatively rare. After a few "wrong" purchases I finally came across the: ACS (manufacturer), Southpaw (model), 1/2" x 1/8" x 16T freewheel. Perfect, (well almost).

Going from a 20T to a 16T would increase top speed , from 16 MPH up to 20MPH, a 25% increase, "torque" however, would be lessened by 20%, requiring more pedal assist on, the same, hill climbing.

Instructions:
Parts:
1. ACS Southpaw 1/2" x 1/8" x 16T freewheel.
Note: 14T is also made, but, will not fit!
2. A "single speed" chain repair link.

Special tool:
Small grinder - Dremel tool with small grinding wheel, or similar.
Step 1
Remove motor. I securely taped it to the battery rack.
Loosen motor mount bracket, 2 adjustment & locking bolts.
Step 2
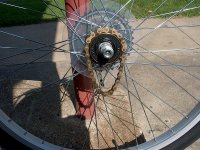
Remove rear wheel.
Place bike, upside down, or on side, and loosen 2 rear nuts. Remove wheel, an extra pair of hands is helpful, managing chain, etc. Careful you don't pinch or mash your friends fingers! - Now comes the hard part.
Step 3
Remove the freewheel.
Edit - Some 2010, and newer eZips use an easily removable freewheel = standard freewheel removal tool
Method 1
The OEM freewheel is designed as cheaply as possible, which means, no notches for removal, hence the grinder.
The freewheel is loosened by turning in a clockwise direction.
There are 2 indentations, designed for a spanner wrench, but only suitable for the original install. You can try, but wear gloves to protect you fingers, and place something on top of spokes to protect them.
I ground 2 opposite side notches and used a freewheel wrench to remove. Any method that lets you get a grip on the, non-spinning, center, is acceptable. 2 synchronous tapping with hammers & screwdrivers might work. My method let the freewheel survive, just in case.

Method 2
Works on "new" unused, possibly slightly used, freewheels!
Personally have removed 2 new & 1 slightly used.
Was able to replace freewheel with 16T, method explained.
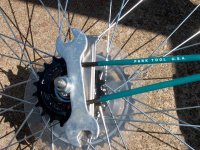
Requires Park tool SPA-1 spanner wrench. $10 - $15 shipped.
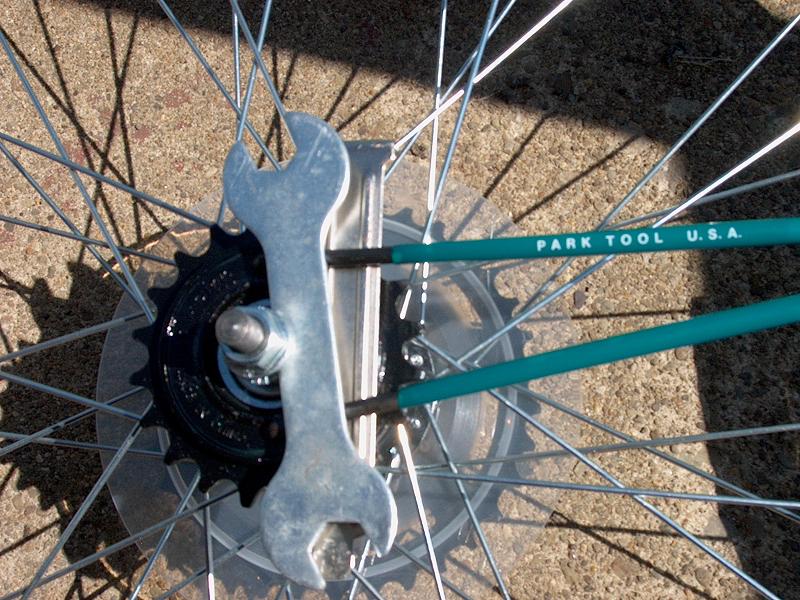
Most important is that wrench is securely seated and supported.

Turn clockwise, to loosen!
Note: Stock freewheel comes, smothered in a "gruesome" green grease. Yuck!

Step 4
Install new freewheel.
I mentioned the Southpaw was "almost" perfect...
Being a "quality" freewheel it has removal notches, unfortunately they make it slightly wider.

Two possible solutions:
1. Seal all joints, I used duct tape, to keep grinding residue out of freewheel. Grind notches down, about half way. Remove tape and install.
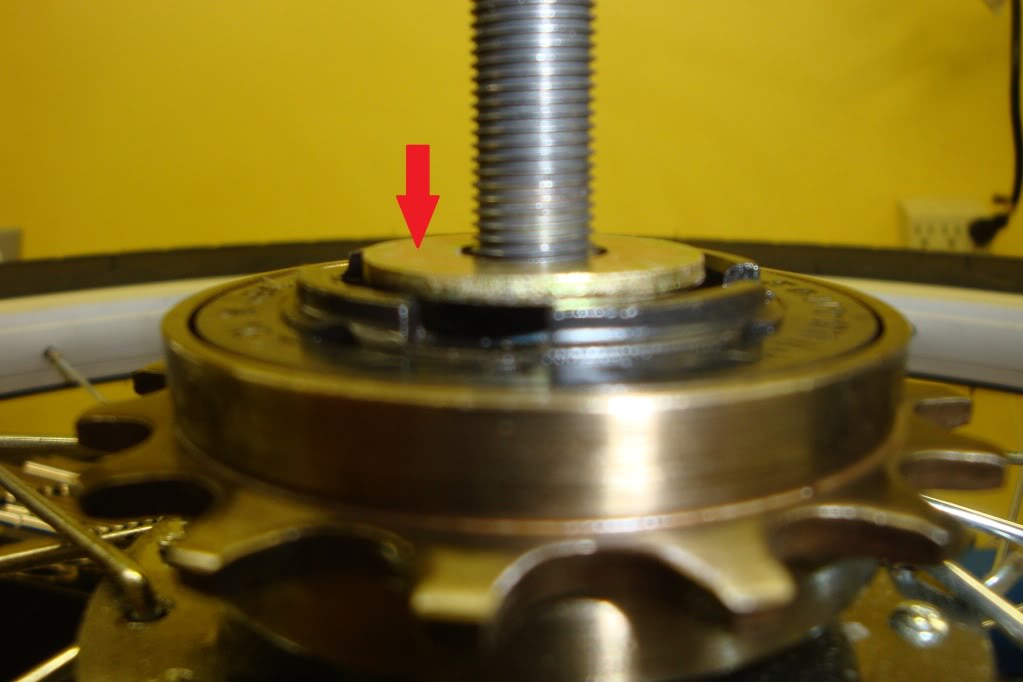
2.(Recommended method!) Insert a 3/8" standard washer as a spacer, clearance is very close, 1/16" might be enough, 1/8" thicker than necessary.
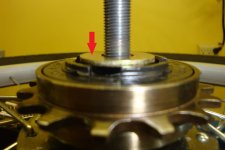
Install freewheel, check for clearance, before tightening. Center nut, or washer, must rise slightly above freewheel.
Step 5
Shorten chain, by 1 link, this would be 2 segments. Remove 3 segments and install repair link. I've done similar with hammer & screwdriver, or 2 pair pliers. Chain breaker, works perfect, any bicycle shop should do the job for you very cheaply. Get them interested in the project and they might jump at the chance to help, with the whole project.
Step 6
Reassemble.
Don't worry if you forgot to put the motor chain back on, open the link, install, close link.
Done!
Fresh battery - 65lb tire pressure - full throttle - level road = 20 mph. Tested on slight downgrade and confirmed, some assist through 22mph, slowed down when throttle released.
Added Bonus!
OEM freewheel is very stiff, even after being "broken in".
Southpaw spins easily.
Like stirring a pot of grease, compared to stirring, a pot of water.
Which means ... pedaling, without motor assist, is less work, more work goes to the wheel, less to the crummy freewheel!
Will add pictures and updates.
EZip Engineering 101
The "stock" EZIP Trailz, Mountain Trailz also, has a typical top speed of about 16mph, with some "assist" up to about 18mph. I felt that they must have made some mistake in their concept since the USA legal limit is 20mph. I felt it my duty to try to fix their mistake!
The most reasonable, (simplest), method would be to change the motor's gear ratio.
Two methods are possible: note:T = teeth.
1. Increase the size of the motor drive sprocket, OEM is 9T, 11T would be about right. 22% increase.
2. Decrease the size of freewheel on the rear wheel, OEM is 20T, 16T would be perfect.
After an exhaustive search, I was unable to find, any compatible motor sprocket, anything close required, modification, custom adapters, machining, or all 3.
Edit - Compatible motor sprockets11T and 13T have been found! See - eZip motor sprockets
Took me quite a while but I finally found an acceptable 16T freewheel. The difficulty is that it must have a Left-Hand thread, comparatively rare. After a few "wrong" purchases I finally came across the: ACS (manufacturer), Southpaw (model), 1/2" x 1/8" x 16T freewheel. Perfect, (well almost).
Going from a 20T to a 16T would increase top speed , from 16 MPH up to 20MPH, a 25% increase, "torque" however, would be lessened by 20%, requiring more pedal assist on, the same, hill climbing.
Instructions:
Parts:
1. ACS Southpaw 1/2" x 1/8" x 16T freewheel.
Note: 14T is also made, but, will not fit!
2. A "single speed" chain repair link.
Special tool:
Small grinder - Dremel tool with small grinding wheel, or similar.
Step 1
Remove motor. I securely taped it to the battery rack.
Loosen motor mount bracket, 2 adjustment & locking bolts.
Step 2
Remove rear wheel.
Place bike, upside down, or on side, and loosen 2 rear nuts. Remove wheel, an extra pair of hands is helpful, managing chain, etc. Careful you don't pinch or mash your friends fingers! - Now comes the hard part.
Step 3
Remove the freewheel.
Edit - Some 2010, and newer eZips use an easily removable freewheel = standard freewheel removal tool
Method 1
The OEM freewheel is designed as cheaply as possible, which means, no notches for removal, hence the grinder.
The freewheel is loosened by turning in a clockwise direction.
There are 2 indentations, designed for a spanner wrench, but only suitable for the original install. You can try, but wear gloves to protect you fingers, and place something on top of spokes to protect them.
I ground 2 opposite side notches and used a freewheel wrench to remove. Any method that lets you get a grip on the, non-spinning, center, is acceptable. 2 synchronous tapping with hammers & screwdrivers might work. My method let the freewheel survive, just in case.
Method 2
Works on "new" unused, possibly slightly used, freewheels!
Personally have removed 2 new & 1 slightly used.
Was able to replace freewheel with 16T, method explained.
Requires Park tool SPA-1 spanner wrench. $10 - $15 shipped.
Most important is that wrench is securely seated and supported.
Turn clockwise, to loosen!
Note: Stock freewheel comes, smothered in a "gruesome" green grease. Yuck!
Step 4
Install new freewheel.
I mentioned the Southpaw was "almost" perfect...
Being a "quality" freewheel it has removal notches, unfortunately they make it slightly wider.
Two possible solutions:
1. Seal all joints, I used duct tape, to keep grinding residue out of freewheel. Grind notches down, about half way. Remove tape and install.
2.(Recommended method!) Insert a 3/8" standard washer as a spacer, clearance is very close, 1/16" might be enough, 1/8" thicker than necessary.
Install freewheel, check for clearance, before tightening. Center nut, or washer, must rise slightly above freewheel.
Step 5
Shorten chain, by 1 link, this would be 2 segments. Remove 3 segments and install repair link. I've done similar with hammer & screwdriver, or 2 pair pliers. Chain breaker, works perfect, any bicycle shop should do the job for you very cheaply. Get them interested in the project and they might jump at the chance to help, with the whole project.
Step 6
Reassemble.
Don't worry if you forgot to put the motor chain back on, open the link, install, close link.
Done!
Fresh battery - 65lb tire pressure - full throttle - level road = 20 mph. Tested on slight downgrade and confirmed, some assist through 22mph, slowed down when throttle released.
Added Bonus!
OEM freewheel is very stiff, even after being "broken in".
Southpaw spins easily.
Like stirring a pot of grease, compared to stirring, a pot of water.
Which means ... pedaling, without motor assist, is less work, more work goes to the wheel, less to the crummy freewheel!
Will add pictures and updates.
EZip Engineering 101

")