GNG Drive Gen2

Thanks Mike, am grateful for your advice.

I found another freewheel in the shed, it is Chinese but seems robust.
If I can somehow unscrew the central boss-keyway, is it likely that the old crank arm will fit in its place? (the crank arm is shown screwed into the old duff GNG sprocket freewheel) I assume I would need a freewheel removal tool also?
Or would it be more sensible to buy new crank arms and an ACS freewheel from eclipsebikes?
Is the gng2 primary chain #35 ? Is that the same as bmx 1/2"* 1/4" ?
Is there room to fit a 55tooth chainwheel and 13tooth sprocket on the primary drive?
Answer all the above and you may win a big fluffy toy :D
 
I just took a ride with me GNG gen 2 with a 48v SLA pack. I am very impressed by the gear ratios available. WIth the stock 38 tooth in the front and a 34/11 casette in the back it can climb until you fall backwards and it can go fast on the flats. However, for the ultra commuter, i think it would be nice to trade the low end a little for the high end so you can go faster on the flats while pedaling.

I'm having a little trouble on getting the motor square with the frame, it appears to angle a little backwards and up and making the chain a little noisy. Anyone have this problem?

I also tried using my ebikekit half throttle with it and it fails to work. I'm not really a fan of the full throttle grip, it pulses as I try to hang on.
 
Ok, so I was able to remove the cheap crap stock gng freewheel from the crank arm using a cunning device called a freewheel removal tool. I replaced it using an old toothless tonaro freewheel which looks much more robust, though it does lengthen the chainwheel hub by 3 or 4 mm. I was quite relieved because GNG had quoted £40 odd for a replacement crank and hub and wern't very interested in the warranty argument. The chain for the motor drive is 1/2"*1/8" which is standard bmx or single speed chain and required because of the width of the drive sprocket teeth.
I can see now that these drivetrain issues have been discussed at great length on other threads and that an ordinary bicycle drivetrain may well need beefed up to reliably handle middrive motors at 1000w and more. In the future I will keep my pink fluffy toys to myself here at home where they are safe and appreciated.
 
Geez. This may be a tad too far down the thread but W/E, F it.

I still have this thing I bought ALMOST A YEAR AGO. It just sits here looking at me. And taunts me to just get it working I'd be 1HappyCustomer :| :arrow:
 
New build using the 400w Gen 2 , using the Nuvinci Harmony auto shift hub. 29er Tomac flint frame and a few other nice little bits.
Weve been pottering around with this build for a while, ordering little bit as we went. Its designed for major offroad use and
has proven itsself to be a real hill climber. Were running it on a 48v 16.8ah lithium ion battery from QB Bikes in Spain,(nice and light!! and lasts forever)
Were just running stock controller as the power is ample for steady hill climbs not wasting too much battery power in doing so.
We opted to get a 13tooth sprocket made for the motor to engague more teeth. And put a smaller chain wheel 22teeth on the primary side. The stock freewheel from the chain wheel crank set up, has been changed for a GT 120 click one, a lot stronger.
We stayed standard 38t on the chain wheel secondary side delivering power to the 22 tooth on the Nuvinci Harmony.

Lovely set up.

The first build we did was with the 450w 48v GNG Belt drive system. This is a really good hill climbing setup. but the GEN2 is far less maintenance. its the winner.
 

Attachments

  • ebike new.JPG
    ebike new.JPG
    22.3 KB · Views: 3,632
Thanks for posting this, bryn. If someone wasn't riding extra fast (30+ MPH, 48 k/h), I think the Thudbuster on a hardtail is a great combo.

The big question is, how many amps are you using at @48V, and how hot is the motor getting?

Also, is that a battery box in the triangle? or, is a box for something else that you re-purposed into a battery box? If yes, do you have a link? Looks good...
 
The battery is from http://www.qbbikes.com in spain.(great customer service if you can get round the English problem !) Yea its a nice small light battery that bolts on securely to the bottle cage holes.
Ive got a small triangle bag full of the wiring, controller etc and the voltage dropper to 12v for the Nuvinci Harmony.
Ive got a Turnigy wattmeter wired in, which says peak on a ride of 980W, 20A. A nice helping hand for thoes hills. The motor gets warm over a ride but nothing excessive,
Yea the thudbusters great, that was the best purchase we made! The bike weighs in at 20k
I will upload some more pics later.
 
Nice Set up Bryn, I wish I have same bike with Nuvinci, how fast can you go with that set up, 29er wheels and all.

I am new to e bike ,I am using GNG gen 2 on Intense M1 downhill bike, temporary set up is using stock controller with Turnigy nano tech 2x6S 5Ah (need more batteries next time ) run 44.4volt.
I tried about a mile from brand new batteries start at 45,8 volt and run out juice at 44,8 volt, then I charge the battery (one brick 6S) using hobby king eco six ac/dc after charging 3 minutes, the charger made a loud pop and dead leaving my battery charged 0,2 volt increase.

Now I am stuck with uncharged batteries and broken charger.
What I need to ask you guys is the stock controller has low voltage cut off at 44,8 volt?
Is anyone do ever has pop charger before?
Confused :?
Thanks
 

Attachments

  • photo (51) (640x478).jpg
    photo (51) (640x478).jpg
    111.9 KB · Views: 3,503
Sorry to hear about your charger. Make a seperate thread WITH PICTURES OF YOUR CHARGER'S INSIDES DAMAGE, then hopefully a veteran here can see it and diagnose your problem. Hopefully it's something manageable to do yourself. :idea:
 
Thanks melodious, I have my charger returned to hobby king, hope they'll credit back .
The problem is order something new from hobby king took forever, the last one took 3weeks and one i need for replacing it is in backorder, so hate to wait.

I'm looking for 66,6volt setup,so I'll going to need new controller .
Which one better is it Infineon C 7225NC from ebike.ca,or lyen 6fet 4110 ? Any sugesstion ?
 
888kt24 said:
What I need to ask you guys is the stock controller has low voltage cut off at 44,8 volt?
48v controllers normally cut off at about 38.5v. It's fortunate that your bike cut off at 44.8v, because your battery's voltage would have dropped off rapidly after that, which could easily put you in the damage zone. You should charge to 50v, and discharge to about 44v. It's essential that you have some sort of on-board monitoring - alarms or voltmeter.
 
888kt24 said:
Thanks melodious, I have my charger returned to hobby king, hope they'll credit back .
The problem is order something new from hobby king took forever, the last one took 3weeks and one i need for replacing it is in backorder, so hate to wait.

I'm looking for 66,6volt setup,so I'll going to need new controller .
Which one better is it Infineon C 7225NC from ebike.ca,or lyen 6fet 4110 ? Any sugesstion ?

Actually you don't need a new controller, just update the caps you have from 63v to 100v and the fets are rated for 75v, 66.6v nominal is 18S and it should work fine, you will need to adjust the power resistor in the stock controller to accomidate the higher voltage but that's simple and more or less straight forward, anyone of us who have fussed with infineons and many who I think have modded LVC of the controllers to work at 36v and if not.... I can explain howto in a wiki article in days time (preparing to move and moving the 5th so busy till at least the 6th - just taking a break right now) but look for the trace from the variable LM317 voltage regulator and follow it back to the VCC line - those resistors in there, those are the dividers - check their color codes to get their values online using a calculator and then using a same calculator figure a proper R1 and R2 (generic term for voltage divider) - I like to rate mine at 2-4w depending but if they are selected properly my CA claims I pull through .02-.05 A or roughly (on 18S pack) 1.52w to 4.536w idle with the power switch on (ignition wire connected).

The trick is knowing the range of operation and ensuring you have 12v coming in at absolute LVC... so a divider configured for max voltage of 75.6 (okay you will want to charge your lipo to 4.15v but you won't miss much capacity, trust me - and it's safer for your LiPos) so your actual Max Voltage off charger will be 74.7v - I know many would advise against this and yeah a newer controller might be better but I've used these FETs (in our controllers which came with the Gen2 48v controller) up to 18S with no issues once I replaced the caps.

In either case, in your calculator you can specify the LVC or 3.0v (trust me, this ensures proper high enough voltage at the variable regulator input to sustain the 12V FET Rail) so basically do this:

Input Voltage: 54v
Resistor R1: Specify the R1 you already have on board
Resistor R2: Leave Blank, the calculator will tell you what to replace this one with
Output Voltage: 12.5v

Click calculate and you have the proper R2 which you will put in place.

Now your voltage regulator will work from LVC through nominal and all the way to maximum charge.

That said, I do prefer a programmable controller with multiple speed settings (power levels) such as an ed lyen or eCrazyman - my preference is the infineon EB2XX or EB8XX series controllers, direct drive I prefer the 8XX series for variable regen since your using a Gen2 regen isn't important (freewheeling) so an EB200 series would be fine, there are some minor issues (covered in the forums) about the EB3XX series controllers and there are simple enough work arounds for the various issues - if normal power levels 20A primary and maybe 30A phase (don't do the 2X phase stuff with geared motors, they don't need the low end torque multiplier like DD).

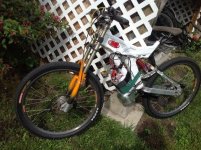
Check my next post for a few suggestions and solutions I've come up with over the past few days / weeks with my GNGv2 on a Dahon Jack 26"

Hope this helps and feel free to PM me if you'd like to be in touch via PM/Email or Phone I can likely help you a bunch!

-Mike
 
Hey all,

I know, double posts are improper ediquite but I'm taking a short break from packing and getting ready to move and have run into another issue with my GNGv2 one I'm sure many have had (after going over this thread and others) and a solution I came up with for the issue.

First of all... I'm not happy with the rigidity of the mount, even on the stock controller at 12S (or 15S) it seems to flex, I wasn't positive but I epoxied a few force sensing resistors to the bracket where I anticipate the flexing was occoured and though I can't tell you how much, they all indicated varying levels of FLEX.

Although I haven't had them made yet - I've created a new top mount (thought that was the problem before testing) instead of hose clamping you take apart the top - replace their hose mount with my solid mount, which goes the entire width between the mounts and is a snug fit - these will be 6061 aluminum in their first run and if needed 7005 aluminum, the run is planned to be 20 pieces. Basically I combine a 2 part aluminum clamp with two threaded holes which will allow direct bolting of the top end to the down tube... the down tube can be clamped much more securely this way, filed to fit if needed and so it's a SOLID mount - adding the bolts and then securing the actual GNGv2 mount provides not just a much stronger mount but I can also include spacers of 1, 1.5 and 2mm which are also solid aluminum and will enable proper tension to be placed on the motor to freewheel drive chain... eliminating the need for odd spacers, etc...

For those with frame vibration issues at stock power levels - I will also have spacers made from a very hard and strong plastic composite (similar to gears in a hub) which should help to absorb them but not recommended in high power levels.

Next I had the same problem many do of the freewheeling chain ring bolting too tight before stopping and allowing insufficient spacing for the chain or the chain line, adding insult to injury today on my way back from a quick run to the Post Office I threw the chain (the drive from crank to rear) and couldn't undo it - I did a half walk of shame and half coast (had to save face past the pool at my house) - in either case, I unbolted the right crank arm and used my puller and 3-4mm later I could free the chain. It had wedged past the bolt on the GNG mounting bracket and into one of the four retaining hex bolts used on the freewheel. This is the second time I've tossed the chain but the first where it was so caught I couldnt muscle it out (not many tools but a bike key).

The solution I came up with is fairly simple in theory but I've not implemented it yet.... I am taking an aluminum tube which will fit over the square tapered crank arm and into the bottom bracket - the diameter needs to be proper to fit the inner ring of the bearing of the bottom bracket and the width needs to be sufficient to allow the crank arm to bolt up against it but no further... this will prevent the crank arm and freewheeling chainring from traveling on the arm and may even assist in keeping the crank arm from bending if done right (just a theory, since I've only ever had the right bb shaft bend).

With the move I don't have time to do this and measurements now and I want to determine if I need to produce it for everyone in sections or if we all need the same depth, the BB recession of a bike may be the difference so if everyone could measure how deep their bottom bracket is from the actual bearing to where the freewheel chainring should be located.... string or wire work good if your measurement devices won't fit... If you will all post back bike type, and this dimension I will determine if we should do stackable (lipped for interlock) or singular spacer to solve this issue.

Finally - I've noticed even at 12S and on the stock controller this GNG motor warms up considerably, about 90 seconds to 3 minutes after being run is it's hottest time, once the move is completed I will attempt boring out the case (upside down to prevent shards and bits of metal) and will begin with 1/4 oil fill to see if I can get the transfer of heat to improve which will handle more continuous power and reduce chance of issues with thermal failure of all kinds.

I only have the one GNGv2 kit and to be honest, it's great at 12S, on a 7 speed 38t front ring (no room for larger without changing mounting bracket hardware and spacing the freewheel chain ring out further.) but I can pedal along in top gear (11t) at about 28-29 mph with a flat out speed on level ground of 31/32 at nominal voltage.

For the size and weight it's a great kit just needs a touch of work to make it more stable and robust for a permanent daily drive style bike.

For those who've asked, my ignition wire failed a week ago (my fault) and I rode the bike as a bike for 5 hours and didn't even notice the drag from the motor freewheel, I have about 140 miles on this unit between 12S and 15S (stock unmodded controller) and indeed within the first 15 miles of powered use the freewheeling on the geared motor got much smoother!!

One last thing, I am planning to make replacement mounts for the motor and bottom bracket - after lightning rods example of much stronger (and a touch heavier) cold steel, as of now I was going to have a single set made - they are more or less a direct copy of the existing mounts but done right they will not flex nearly as much - that's the BB bracket sheets (2x) and the motor mount brackets which attach to the BB mount sheets (2x)... Now I hadn't planned on making these in quantity but if there is enough interest in them here in the forum (PM me if your interested) I will get small quantity run pricing from my machinist and offer everyone here to jump on a pre-order at cost + s&h (to them it's just as easy to make 10/20 as 1 if not easier with the CAM laser cutting bed or the sand stream cutter).

Final FYI: I am actively seeking replacement geared motors which will produce the proper RPM output, weigh reasonably close to the same (I'm willing to add a single pound if in fact it will assist in power handling and longevity) but with power handling to surpass and heat dissipation - I have 5 candidates on order now to the new house (due in 2-3 weeks) and of them 2 are literally bolt on replacements (they have the same outer flange bolt pattern) - the others would require custom drilling to mount the same but will be bolt into my new sheets. The best news all of them have built in temperature sensing resistors and 2 of the samples will come Delta/Wye or alll 6 phase lines brought out - they are the lowest of kV 40 per volt in wye and 67 kV in delta - I thought it may be useful for more aggressive riding with a sealed unit such as off road, downhill, etc. With flex in mount eliminated it should also assist in large or heavy loaded startup.

Hope this helps everyone!

-Mike
 
Thank You d8veh, I do have volt meter attached in my handlebar, and I did mark it about 40 volt to be save, but the controller likely cut off at 44.8 volt
I think I will buy Cycle analyst next, but now I still waiting for my new order of 4 more batteries and turnigy 4x6 s charger.

For Mike, mwkeefer Thanks a lot for the tips of modified controller.
My electronic knowledge a bit rusty, but trying to keep up, hope I can do it.
Thanks,
Ken
 
Your postings have helped me decide to go for a mid drive motor for my bike conversion, for all the advantages it offers over a hub motor (better weight distribution and so on). I'm rather new to this, so here are my noob questions :?

I'd like to have a Germany Street Legal bike, is their a way to undervolt the GNG Drive Gen 2 so the 350w motor gets a 250w rating? If so could I do the same with 400w motor? And is the 400w just a overvolted 350w?

Is this done adjustement done at the controller level, and for this reason would it better to use a Lyen controller to achieve this? Or is the stock controller good enough?

Is it possible to add a Thun sensor to such a setup and connect to a CA?
 
spinningmagnets said:
Neiler106 is getting a Gen-2 running, and has posted some of the issues he had to fix:

http://endless-sphere.com/forums/viewtopic.php?f=3&t=49594
file.php

Everything is broken in and she runs great.

I can honestly say that after all of my woes my only complaint is the cheap steel and threading issues. The pedal sproket wobble doesn't seem to be an issue.

She climbs me home over an 18 mile stretch up 1000ft of elevation (1%avg incline) with no troubles, and if fully charged could probably do so without my light pedaling.
 
DIY_turbo said:
Your postings have helped me decide to go for a mid drive motor for my bike conversion, for all the advantages it offers over a hub motor (better weight distribution and so on). I'm rather new to this, so here are my noob questions :?

I'd like to have a Germany Street Legal bike, is their a way to undervolt the GNG Drive Gen 2 so the 350w motor gets a 250w rating? If so could I do the same with 400w motor? And is the 400w just a overvolted 350w?

Is this done adjustement done at the controller level, and for this reason would it better to use a Lyen controller to achieve this? Or is the stock controller good enough?

Is it possible to add a Thun sensor to such a setup and connect to a CA?
The Gen 1 is completely different to the Gen 2 and offers no advantage for you. You would probably be OK with the Gen 2 if you make a nice 250W label and stick it on. The kit doesn''t come with a PAS sensor, and throttles aren't allowed in Germany, so you'd need to buy an extra controller from somewhere else with a nice LCD display, several levels of PAS, wheel-speed sensor and PAS sensor. You can fit a PAS sensor on the GNG kit, but it doesn't have a comfortable power algorithm. You can't use a Thun Torque sensor because the GNG has its own bottom bracket. I'd say that considering everything, the GNG is not a good solution for you.The Bafang kit would be much more suitable.
 
The TMC unit is similar to the Bafang one

Hey thanks for the info and POV. Must appreciated d8veh. :)

You mention that the TMC unit is similar to the Bafang one. I like the fact that the controller is external on that one and if the form factor is similar to the Bafang (BBS01) that would be great. Where can I find it. I have been scouring the web to no avail.

Thx
 
DIY_turbo said:
You mention that the TMC unit is similar to the Bafang one. I like the fact that the controller is external on that one and if the form factor is similar to the Bafang (BBS01) that would be great. Where can I find it. I have been scouring the web to no avail.

Thx
The TMC is probably not yet available as a kit. They used a non-standard bottom bracket diameter, and they had a tricky anti-rotation system: there's two pins on the inner part of the BB that engage in two notches in the BB. I think that they want to change these two things before releasing a kit.
 
I had to address a lot of clearance issues for the crankset.

1. I added a bottom bracket shim to the crank threads so the freewheel bolts would clear the crank arm.

2. I added a BB shim to the drive side BB shell to push the chainrings away from the mounting bolts.

3. Bought a bunch of nylon spacers that worked out perfectly to adjust motor positioning.

4. Used extended bashguard E13 chainring bolts to hold the chainrings in place

5. Cut the washer off of the crank bolts because they would only thread 2 turns....now i can get a few more.

6..Flipped the orange chain tensioner for clearance issues.

And on my to do list.

1. Buy another set of chainring bolts because i need two more.

2. Buy longer M12 fine thread crank bolts because i want them to thread in more

3. But countersink bolts for the freewheel adapter for a better look.

4. Bolt or glue the GNG plates together
 

Attachments

  • SGSBB3.jpg
    SGSBB3.jpg
    103.4 KB · Views: 3,091
  • SGSBB$.jpg
    SGSBB$.jpg
    107.6 KB · Views: 3,091
Can the motor be used with a 30 amp controller if the phase wires are upgraded? i am planning on oil cooling the motor so before i patch it up and was wondering if i am going to run into problems soldering them up.

I really like how the clean the kit installs that's why i want to bandaid it a little.
 
Thinking about taking the plunge on one of these GNGs. A couple of questions:

-Anyone have problems when doing curb drops/hops? I see a lot of full suspension mtb builds and those just beg for curb dropping. Dont want a drop to take out the motor. Is it just the case of moving the hub further up the downtube?

-In looking for a frame/bike, are you guys looking for downtubes that are rounded (to strap the motor)? Or, is it better to look for those square-type downtubes? I think the schwinn s80s had those squarish frame tubes that allowed you to strap bigass battery packs that held sturdy (dogman!).

-Is the BB size 69mm pretty standard here in the U.S for mtbs? I'd like to get the motor first then look for a suitable bike frame. Want to get the size that is most common.

-the website has a gen 3 model. Any difference between that one and this gen 2 one that is the subject of this thread?
 
Hi ,

I recently bought the Gen2 Kit. But when i first installed the wires to the battery -> controller i hear a Pop sound. I never got the kit running. I am wondering if something is wrong with my controller? It wont move/spin, I tried to unplug everything and redo it but no success. I dismounted the battery from the bike and tried to run it without a load, still nothing

How should I trouble shoot this? Everythign is practically new.. my thoughts are some loose wires?
 
I think the controller had a red jumped wire that needs to be soldered in line with the positive battery wire to turn the unit on. Best case scenario it's zapping because you are plugging in the battery and the red jumper is not soldered..

Worst case is the controller is fried.
 
Back
Top