
astilwell611
100 W
- Joined
- Aug 23, 2015
- Messages
- 100
Hello Everyone,
I want to start off by saying that I do not take responsibility if you get hurt during any part of this process. Power tool are dangerous as is riding a deck that you built. So build at your own risk. I also want to say that I know there are endless possibilities of how to do this process. I chose this way because I only used the tools that were available to me.
Now that my little safety rant is over… I wanted to make my own all-in-one deck but could not find any helpful videos on YouTube or any helpful info on the web in general. I know plenty of folks on here have built their own all-in-one but nobody has really posted up any information as to where they started or how they did it. There are options to buy an all-in-one deck such as onloops carbon deck, which is super sexy btw. However, being a college student I can’t afford to cough up the $338USD plus shipping for just a deck. So I started out to build my own.
I started my gathering the material to make my deck out of. Since an all-in-one will have the center cut out for the electronics you need something that is at least ¾” in my opinion. I happened to have used some material that my dad had left over from building custom upholstered headboards for beds. This material is a nice 7/8” thick ply. I forget the number of ply’s off the top of my head. I knew from riding my old deck that I wanted something wide enough that my feet didn’t hang off the edges. I also knew that this board would be sporting 5” pneumatic wheels.
So to start I stripped down my current board bare. I used this as a starter template since I have nothing large enough to print off a proper paper template. After tracing my current deck onto the material I marked my holes for my trucks and also marked the center mark of the template. From this center mark I measured out five and a half inches from the center along both edges. I then used a gallon paint can to mark the wheel wells using the preexisting nose/tail and the new edges I drew out. I then cut my deck out of the material using a jig saw.
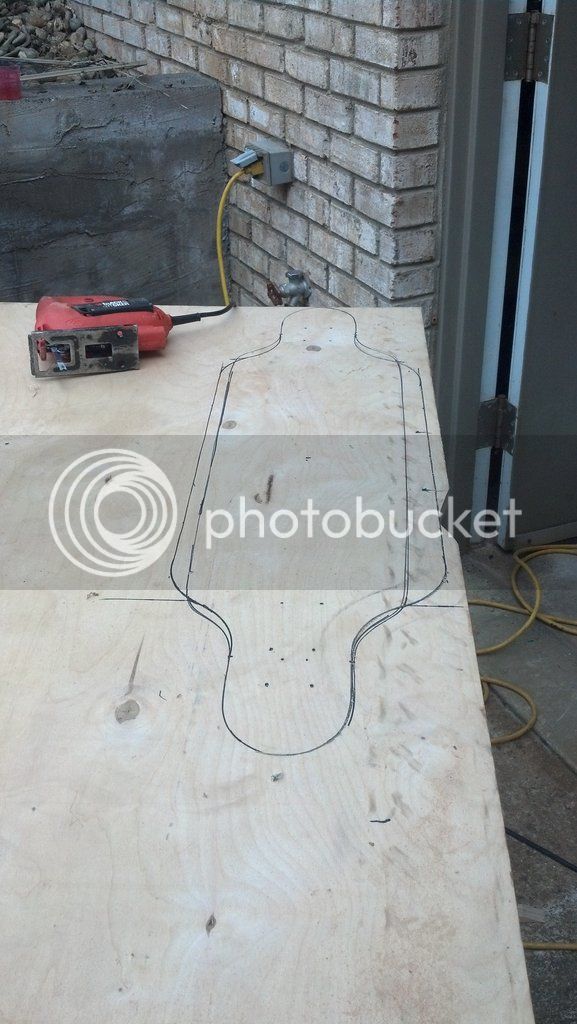
*Deck drawn out ready to cut.
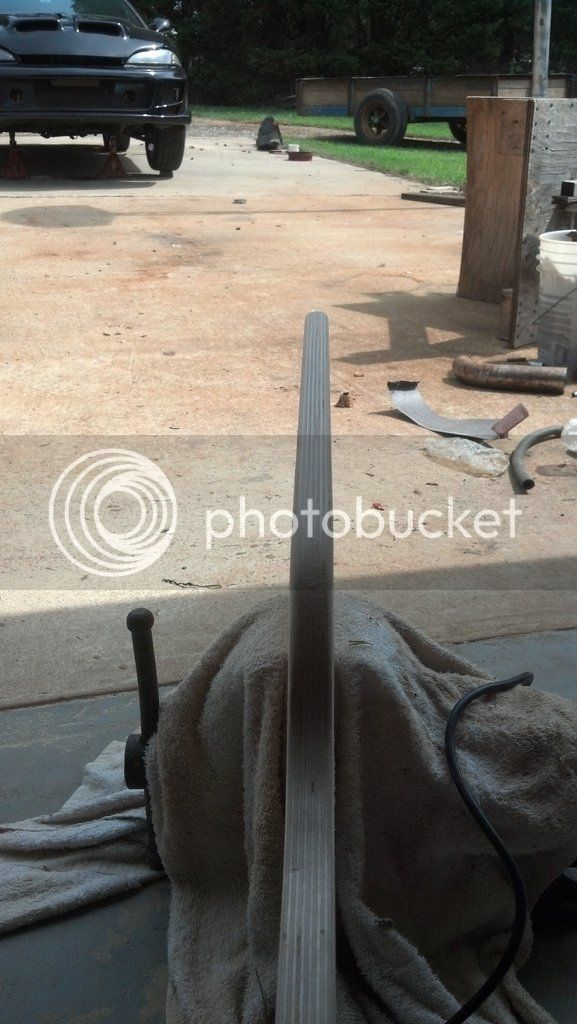
Since the deck was cut out with a jig saw the edges were not perfectly straight. In order to straighten the edges I threw the deck into a vice and sanded the edges with a foot long flat sander. I also used an orbital sander to round the edges of the deck.

*This was before sanding the deck. You can see how wavy the top edge is.
*After sanding the deck is nice and smooth/straight.
Next I drilled the holes for my trucks and test fitted them. I recommend waiting on this step till the end because I have decided to actually move my trucks forward to allow even more clearance for the 5” pneumatics. I also marked out where I wanted to cut my hole that will allow me to access the electronics. I knew the overall length I would need based off the length of the batteries that I was going to use as well as ESC’s. Since this board will be a dual diagonal drive I wanted to make sure I could place everything with a little extra room to spare. You can see in this picture that my board isn’t 100% symmetrical. I think this is because I used my old deck as a template instead of using a paper template.
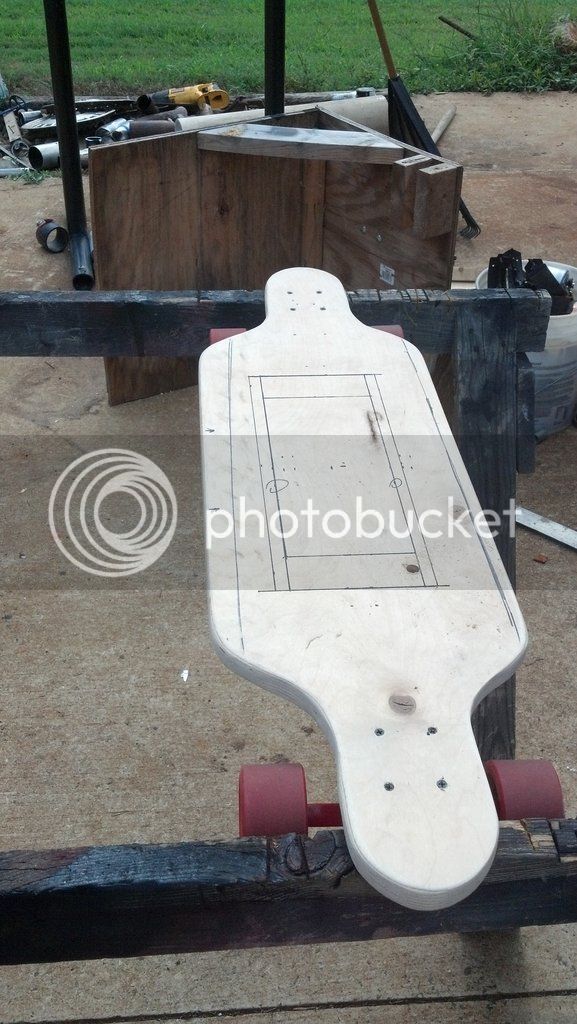
*Ready to cut my hatch.
I cut out the hatch again using a jigsaw. I also smoothed out the straights using my flat sander and rounded the edges using my orbital sander.

*Hatch cut.
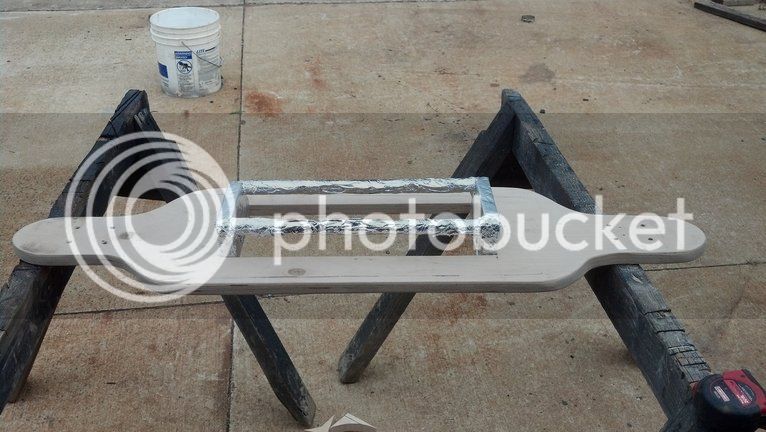
Next I needed to figure out how to shape the bottom of the enclosure. I used the piece of material that I cut out to make the hatch for the side pieces. My Turnigy 6s lipos are right about 2” tall. So I knew I wanted my enclosure just large enough to house the lipos. The width of these pieces were already the correct width because they were the piece that was cut out. I cut two pieces to three inches tall. This would give me an enclosure that would only hang two inches below the deck. I used a broom handle to form the long edges of the enclosure. Everything was wrapped in aluminum foil to keep the fiberglass from sticking to the “mold”.
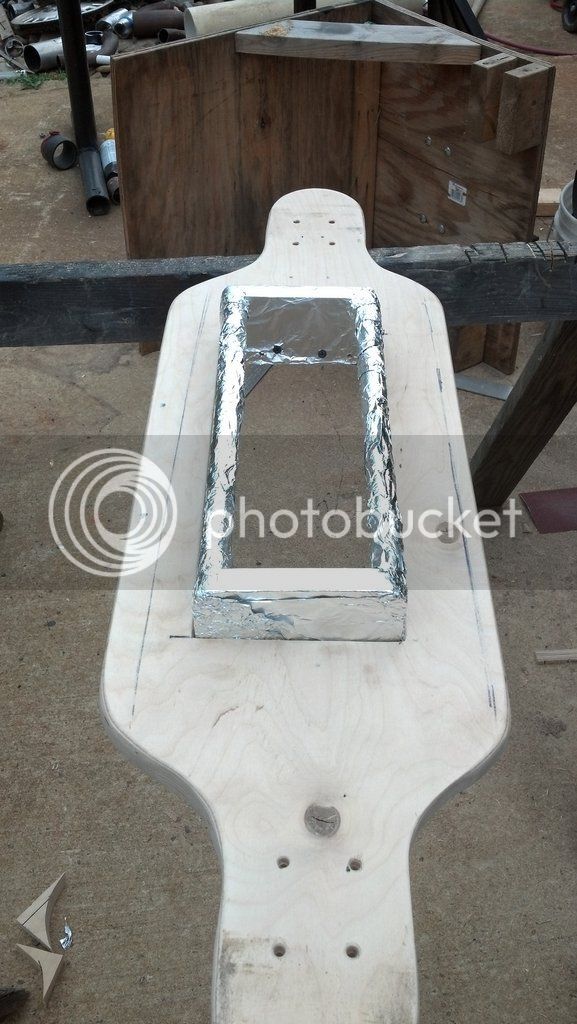
*Wrapped in aluminum foil and ready for glass.
I have my fiberglass experience from auto body and speaker housing work. So I used techniques from that on this build. You need a base material to wrap the shape in to start laying glass. A commonly used material in the speaker world is felt. I didn’t have any felt but I did have an old sheet lying around. I cut the sheet to the size I needed and draped it over the deck. I then stapled around the deck about a half inch from the edge. You want to make sure you start in the middle and work outward toward the edges.
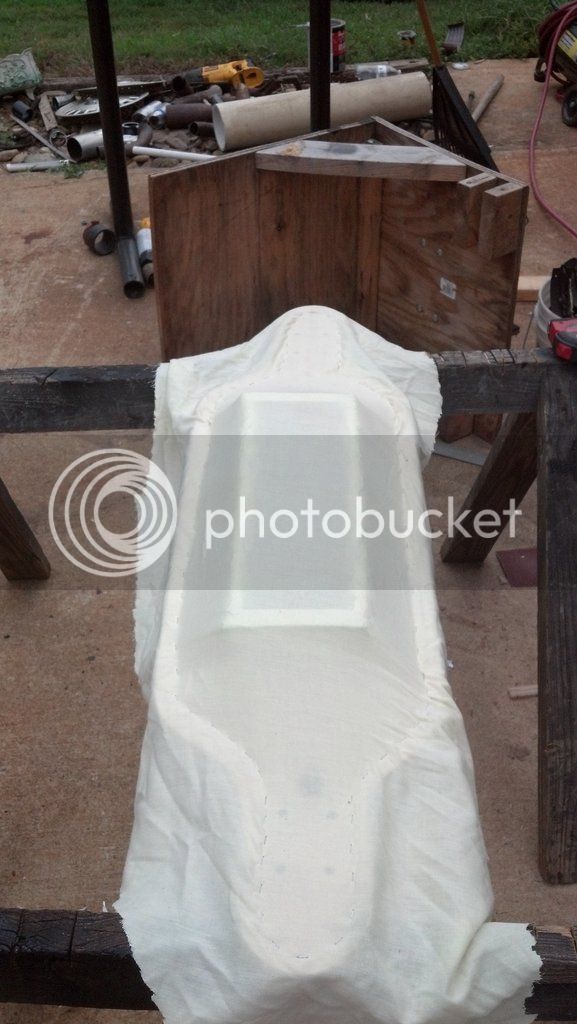
*Ready for glass.
For this first layer we only need to brush epoxy onto the material because the material acts like the fiberglass to form the shape of the entire deck.
*First layer of resin.
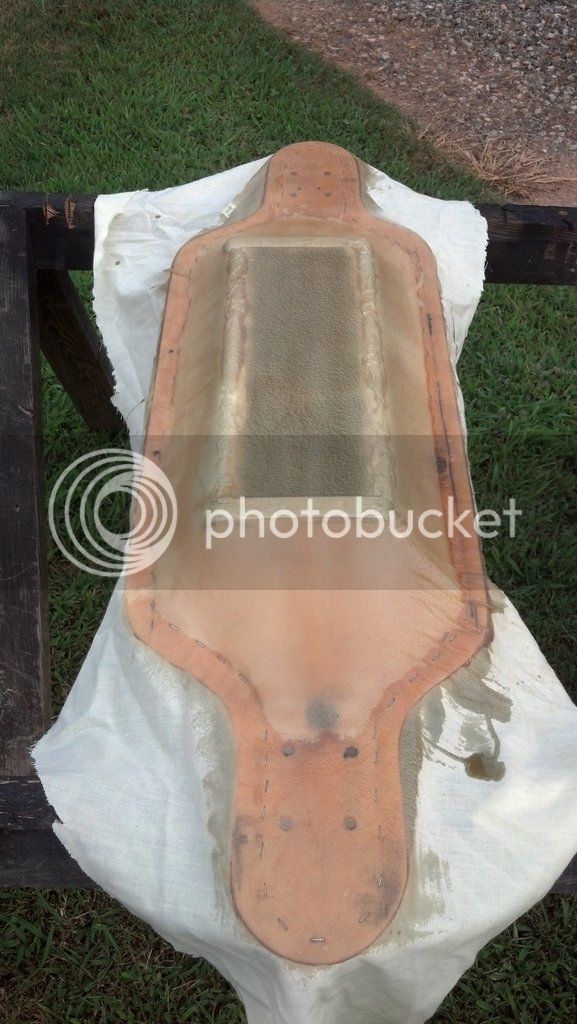
I like to use fiberglass resign I found at Lowes. You are able to sand it in two hours which is awesome! After the first layer of resign dried I used some 50 grit sand paper to scuff up the dried resign to give the new layer something to stick to. After the first layer was scuffed I blew off all the sanding dust using an air compressor with a nozzle on the end. Then I began laying the second layer of resign this time with fiberglass mat. First I painted resign over the entire deck. Then I lay the mat down over the deck. Once the mat has been laid I go back over the top of the mat with another coat of resign. After this second layer was hard I sanded the entire deck with 100 grit sandpaper on my orbital sander to start smoothing down the fiberglass.
*First layer of fiberglass mat sanded
After this first layer of mat was dry I felt the deck was strong enough to pull the "mold" out from the inside.
I used a total of three layers of fiberglass mat on this build, the process I used goes like this:
1. Scuff/sand the surface to give the resign something to stick to.
2. Blow off sanding dust using some sort of compressed air or a vacuum.
3. Paint on a layer of resign.
4. Lay down a layer of fiberglass mat.
5. Paint on a layer of resign over the mat.
6. Let the resign fully dry before sanding.
7. Repeat for desired number of layers.
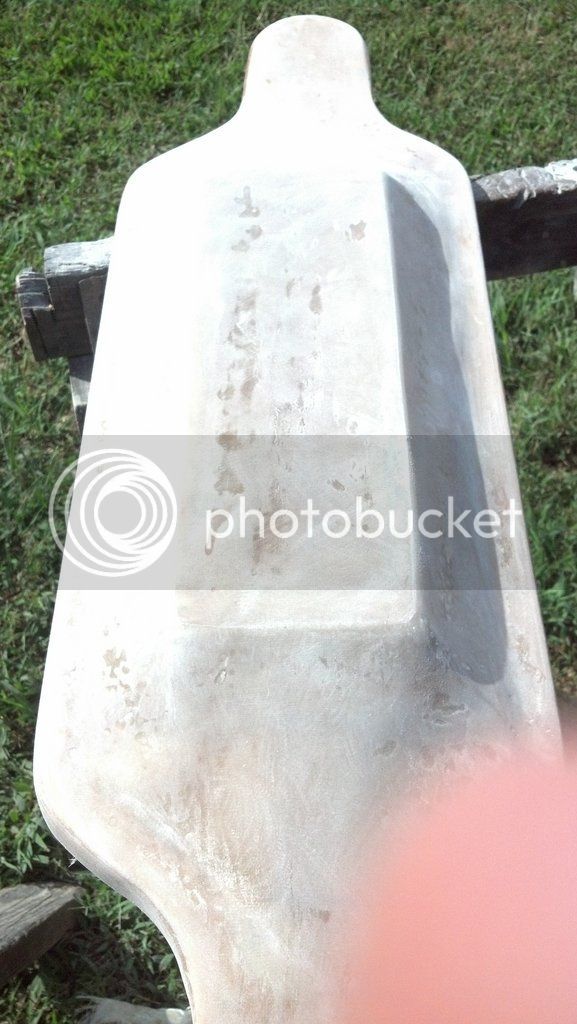
After the final layer of mat was sanded body filler (bondo) was applied to help give a smooth surface once sanded. The bondo acts to fill small dips and holes in the fiberglass.
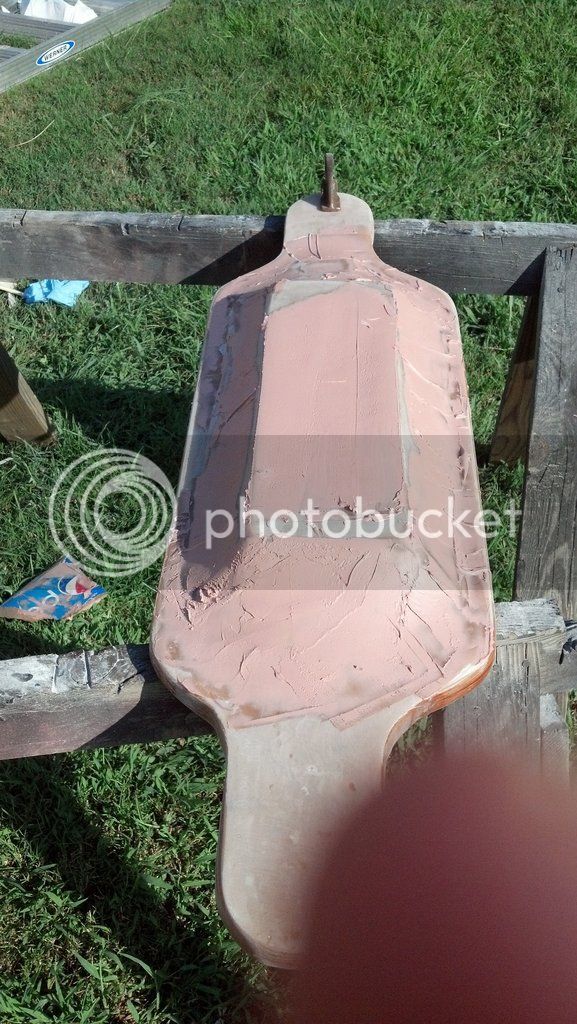
*Seems like a lot of bondo but a lot will be sanded off.
Once the bondo was dry I sanded it down using my flat sander everywhere possible.
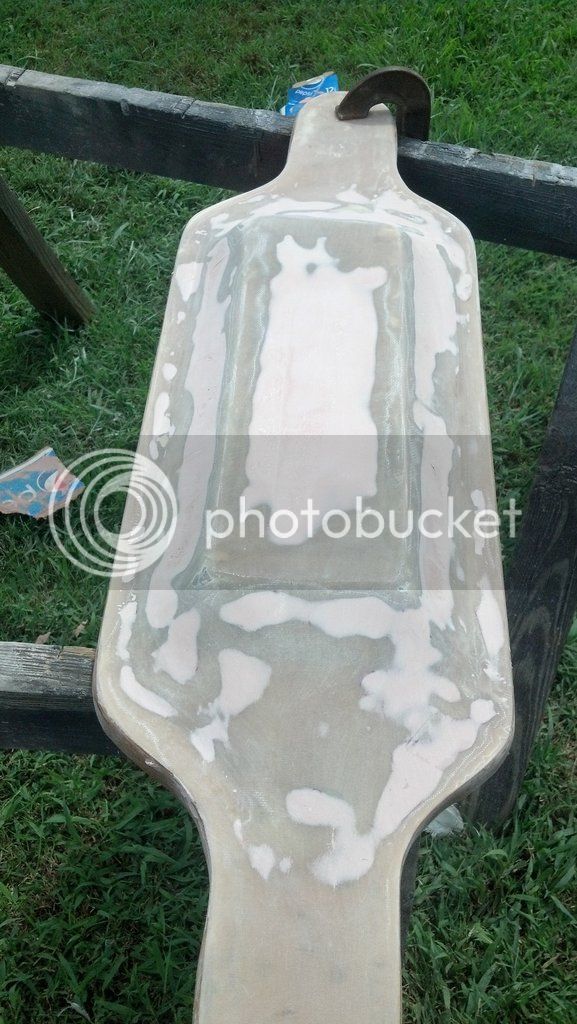
*First layer of bondo sanded down.
You want to continue this process until you get a smooth surface that you are happy with. I will update this post as I continue work on the deck. Like I said I’m a college student so this only really gets worked on during the weekends. Hopefully this weekend I will be able to finish it up.
Thanks for viewing,
Austin
I want to start off by saying that I do not take responsibility if you get hurt during any part of this process. Power tool are dangerous as is riding a deck that you built. So build at your own risk. I also want to say that I know there are endless possibilities of how to do this process. I chose this way because I only used the tools that were available to me.
Now that my little safety rant is over… I wanted to make my own all-in-one deck but could not find any helpful videos on YouTube or any helpful info on the web in general. I know plenty of folks on here have built their own all-in-one but nobody has really posted up any information as to where they started or how they did it. There are options to buy an all-in-one deck such as onloops carbon deck, which is super sexy btw. However, being a college student I can’t afford to cough up the $338USD plus shipping for just a deck. So I started out to build my own.
I started my gathering the material to make my deck out of. Since an all-in-one will have the center cut out for the electronics you need something that is at least ¾” in my opinion. I happened to have used some material that my dad had left over from building custom upholstered headboards for beds. This material is a nice 7/8” thick ply. I forget the number of ply’s off the top of my head. I knew from riding my old deck that I wanted something wide enough that my feet didn’t hang off the edges. I also knew that this board would be sporting 5” pneumatic wheels.
So to start I stripped down my current board bare. I used this as a starter template since I have nothing large enough to print off a proper paper template. After tracing my current deck onto the material I marked my holes for my trucks and also marked the center mark of the template. From this center mark I measured out five and a half inches from the center along both edges. I then used a gallon paint can to mark the wheel wells using the preexisting nose/tail and the new edges I drew out. I then cut my deck out of the material using a jig saw.

*Deck drawn out ready to cut.
Since the deck was cut out with a jig saw the edges were not perfectly straight. In order to straighten the edges I threw the deck into a vice and sanded the edges with a foot long flat sander. I also used an orbital sander to round the edges of the deck.

*This was before sanding the deck. You can see how wavy the top edge is.

*After sanding the deck is nice and smooth/straight.
Next I drilled the holes for my trucks and test fitted them. I recommend waiting on this step till the end because I have decided to actually move my trucks forward to allow even more clearance for the 5” pneumatics. I also marked out where I wanted to cut my hole that will allow me to access the electronics. I knew the overall length I would need based off the length of the batteries that I was going to use as well as ESC’s. Since this board will be a dual diagonal drive I wanted to make sure I could place everything with a little extra room to spare. You can see in this picture that my board isn’t 100% symmetrical. I think this is because I used my old deck as a template instead of using a paper template.

*Ready to cut my hatch.
I cut out the hatch again using a jigsaw. I also smoothed out the straights using my flat sander and rounded the edges using my orbital sander.

*Hatch cut.
Next I needed to figure out how to shape the bottom of the enclosure. I used the piece of material that I cut out to make the hatch for the side pieces. My Turnigy 6s lipos are right about 2” tall. So I knew I wanted my enclosure just large enough to house the lipos. The width of these pieces were already the correct width because they were the piece that was cut out. I cut two pieces to three inches tall. This would give me an enclosure that would only hang two inches below the deck. I used a broom handle to form the long edges of the enclosure. Everything was wrapped in aluminum foil to keep the fiberglass from sticking to the “mold”.

*Wrapped in aluminum foil and ready for glass.

I have my fiberglass experience from auto body and speaker housing work. So I used techniques from that on this build. You need a base material to wrap the shape in to start laying glass. A commonly used material in the speaker world is felt. I didn’t have any felt but I did have an old sheet lying around. I cut the sheet to the size I needed and draped it over the deck. I then stapled around the deck about a half inch from the edge. You want to make sure you start in the middle and work outward toward the edges.

*Ready for glass.
For this first layer we only need to brush epoxy onto the material because the material acts like the fiberglass to form the shape of the entire deck.

*First layer of resin.
I like to use fiberglass resign I found at Lowes. You are able to sand it in two hours which is awesome! After the first layer of resign dried I used some 50 grit sand paper to scuff up the dried resign to give the new layer something to stick to. After the first layer was scuffed I blew off all the sanding dust using an air compressor with a nozzle on the end. Then I began laying the second layer of resign this time with fiberglass mat. First I painted resign over the entire deck. Then I lay the mat down over the deck. Once the mat has been laid I go back over the top of the mat with another coat of resign. After this second layer was hard I sanded the entire deck with 100 grit sandpaper on my orbital sander to start smoothing down the fiberglass.

*First layer of fiberglass mat sanded
After this first layer of mat was dry I felt the deck was strong enough to pull the "mold" out from the inside.
I used a total of three layers of fiberglass mat on this build, the process I used goes like this:
1. Scuff/sand the surface to give the resign something to stick to.
2. Blow off sanding dust using some sort of compressed air or a vacuum.
3. Paint on a layer of resign.
4. Lay down a layer of fiberglass mat.
5. Paint on a layer of resign over the mat.
6. Let the resign fully dry before sanding.
7. Repeat for desired number of layers.
After the final layer of mat was sanded body filler (bondo) was applied to help give a smooth surface once sanded. The bondo acts to fill small dips and holes in the fiberglass.

*Seems like a lot of bondo but a lot will be sanded off.
Once the bondo was dry I sanded it down using my flat sander everywhere possible.

*First layer of bondo sanded down.
You want to continue this process until you get a smooth surface that you are happy with. I will update this post as I continue work on the deck. Like I said I’m a college student so this only really gets worked on during the weekends. Hopefully this weekend I will be able to finish it up.
Thanks for viewing,
Austin
")


