lightbulb010
100 mW
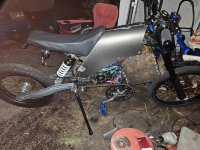
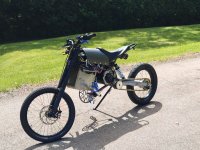
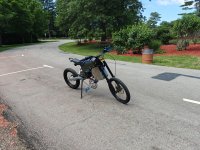
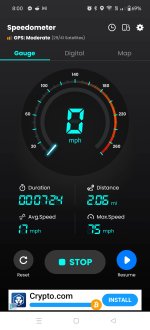
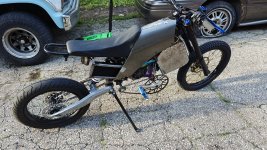
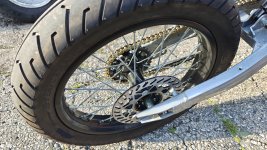
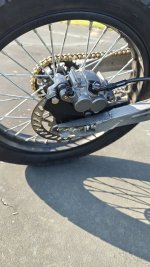
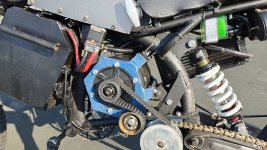
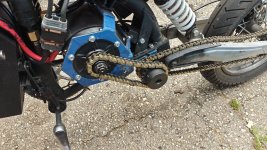
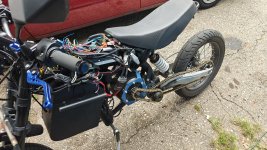
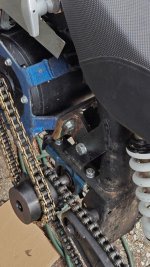
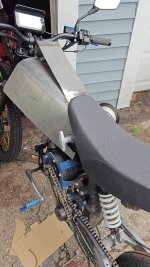
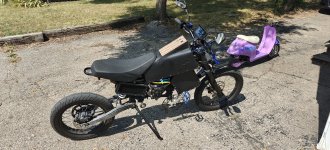
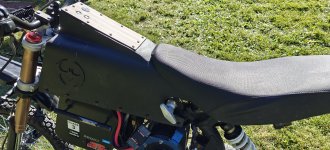
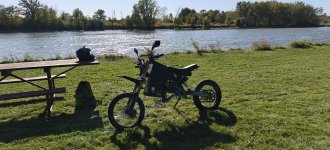
I got the disc brake on the front Sunday. I test rode it again and it's pretty fast. It's quieter than I expected with the 530 chain. Not loud at all. Got the belt aligned properly. I had an issue with the rear sprocket. I think I forgot to torque down all the bolts because it developed a wobble and the adapter plate bent. This ultimately led to two of the little m6 bolts pulling the threads out of the hub. So I have to solve that problem next weekend. On one of my runs I used a speedo app on my phone. 42 was as fast as I felt comfortable with although its still pulling hard at that point. The tire rubs the battery under hard braking so when I tear it down for paint I'll have to extend the frame out an inch or two to prevent that. I was worried that might happen which is why I made that corner of the battery box round. The cheap fork performs well, even with so much weight on it. Plenty of damping and with the rebound adjustment set, the front end stays squatted down long enough to maintain traction on the front tire. All in all it's a blast to ride and once I get all the kinks worked out i think it will be reliable. I took a few more pics of the bike out in the daylight.
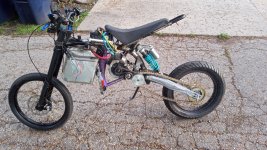
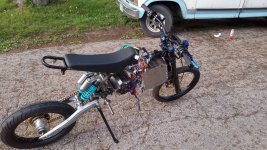
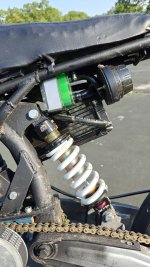
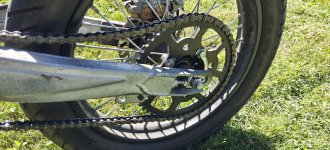
The rear sags quite a bit when you sit on it. The chain looks super loose in the pic because of the angle of the swingarm when the bike is unweighted. The position of the front sprocket causes the swingarm to push downward when torque is applied. I tried doing a little burnout standing on my feet but the swingarm just pulls down and the seat rises. It won't break traction easily.
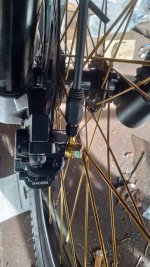
Magura MT5 estop
The front brake was a whole ordeal. I ordered a whole assortment of different lines and fittings to get this working. Much of them were not needed in the end but I just wasn't sure how I would connect the mountain bike caliper to the motorcycle brake levers I have on it. I failed to realize that the caliper doesn't come with the M5 banjo bolt needed to attach the fitting. I had these M6 banjo bolts that came with some of the other fittings I ordered to experiment with and I just drilled and tapped the caliper for M6 threads. The gold banjo fitting is a Jagwire quick fit banjo. I drilled that out as well. I used the Jagwire hose which is very nice by the way. I recommend it. It's much more flexible and pliable than the other cheaper hoses I also purchased from Amazon. I did buy the actual Magura banjo fitting too, which fits an M6 bolt however the Jagwire stuff is nicer/more convenient so I opted to drill their fitting for the M6 bolt.
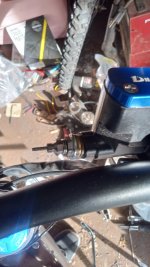
This is the lever end/master cylinder end. The master cylinder uses an M10x1.25 banjo bolt. I got a banjo bolt with a bleeder screw for the rear brake and the bleeder turned out to be M6x1.0 thread so I was able to screw in the small MTB brake line fitting where the bleeder is supposed to go. Basically using the M10 banjo bolt as a thread reducer. This particular MTB fitting was sold described as "for Formula" I'm not too savvy about MTB brakes but I think formula is either a brand or model of bike brake. The fitting just had a straight M6x1.0 threaded end with the correct barb/olive for the Jagwire line(5mm OD). I trimmed the M10 banjo bolt down so that I could thread it into the master further without it interfering with the spring and piston inside. This allowed it to go in past it's banjo hole and seal with the sealing washers. I also faced the head of the M10 bolt with the grinder so that it's flat and provides a good sealing surface for the M6 sealing washer. I trimmed the M6 thread down on the MTB fitting too because it was too long to fit inside the M10 bolt. In the end it all worked out and I'm happy with it. I put DOT 5 brake fluid into the system. This is the silicone based kind. It should be compatible with both the Nitrile/buna n seals in the caliper and the EPDM seals in the master cylinder but we'll see. That's the main obstacle I was facing with this setup. Magura brakes are designed for mineral oil based fluids and the motorcycle stuff is for DOT 3/4/5.1 glycol based fluids. The silicone based fluid should work with both seal types from what I've seen on various chemical supplier and seal manufacturer websites. There is conflicting information about this however. So time will tell. If all else fails I will replace the seals in the caliper with EPDM rubber. I'm running a 2mm thick 203mm diameter rotor which, seems to perform satisfactorily despite the weight. I was easy on it but it did stop me from 40+mph without fade. I'll admit that it seems too small for the bike just looking at it. If I end up overheating this brake frequently I'll probably change the whole fork setup over to motorcycle stuff and take the weight penalty. 230mm rotors are available too so that's another option.
Still wiring to do and I need to make fairings/covers for the controller and set up the cooling system. More updates next weekend.
I want to thank all who have posted here, especially amberwolf for your input about the wheels and forks early on in the build. That really led me in the right direction. I've also been having a great time tinkering with the Lebowski stuff so thank you for turning me on to that. The stuff about crimps was enlightening too and I bought my very first set of crimpers. Very similar to the ones you showed me in your post. I don't know how I lived so long without them honestly. Ive been using them on all the pins and such for the bike. I still solder the crimps afterward but thats just me being paranoid, the crimpers work great! At some point I'd really like to invest in a high quality hydraulic crimper for the larger gauge wires.


The rear sags quite a bit when you sit on it. The chain looks super loose in the pic because of the angle of the swingarm when the bike is unweighted. The position of the front sprocket causes the swingarm to push downward when torque is applied. I tried doing a little burnout standing on my feet but the swingarm just pulls down and the seat rises. It won't break traction easily.

Magura MT5 estop
The front brake was a whole ordeal. I ordered a whole assortment of different lines and fittings to get this working. Much of them were not needed in the end but I just wasn't sure how I would connect the mountain bike caliper to the motorcycle brake levers I have on it. I failed to realize that the caliper doesn't come with the M5 banjo bolt needed to attach the fitting. I had these M6 banjo bolts that came with some of the other fittings I ordered to experiment with and I just drilled and tapped the caliper for M6 threads. The gold banjo fitting is a Jagwire quick fit banjo. I drilled that out as well. I used the Jagwire hose which is very nice by the way. I recommend it. It's much more flexible and pliable than the other cheaper hoses I also purchased from Amazon. I did buy the actual Magura banjo fitting too, which fits an M6 bolt however the Jagwire stuff is nicer/more convenient so I opted to drill their fitting for the M6 bolt.

This is the lever end/master cylinder end. The master cylinder uses an M10x1.25 banjo bolt. I got a banjo bolt with a bleeder screw for the rear brake and the bleeder turned out to be M6x1.0 thread so I was able to screw in the small MTB brake line fitting where the bleeder is supposed to go. Basically using the M10 banjo bolt as a thread reducer. This particular MTB fitting was sold described as "for Formula" I'm not too savvy about MTB brakes but I think formula is either a brand or model of bike brake. The fitting just had a straight M6x1.0 threaded end with the correct barb/olive for the Jagwire line(5mm OD). I trimmed the M10 banjo bolt down so that I could thread it into the master further without it interfering with the spring and piston inside. This allowed it to go in past it's banjo hole and seal with the sealing washers. I also faced the head of the M10 bolt with the grinder so that it's flat and provides a good sealing surface for the M6 sealing washer. I trimmed the M6 thread down on the MTB fitting too because it was too long to fit inside the M10 bolt. In the end it all worked out and I'm happy with it. I put DOT 5 brake fluid into the system. This is the silicone based kind. It should be compatible with both the Nitrile/buna n seals in the caliper and the EPDM seals in the master cylinder but we'll see. That's the main obstacle I was facing with this setup. Magura brakes are designed for mineral oil based fluids and the motorcycle stuff is for DOT 3/4/5.1 glycol based fluids. The silicone based fluid should work with both seal types from what I've seen on various chemical supplier and seal manufacturer websites. There is conflicting information about this however. So time will tell. If all else fails I will replace the seals in the caliper with EPDM rubber. I'm running a 2mm thick 203mm diameter rotor which, seems to perform satisfactorily despite the weight. I was easy on it but it did stop me from 40+mph without fade. I'll admit that it seems too small for the bike just looking at it. If I end up overheating this brake frequently I'll probably change the whole fork setup over to motorcycle stuff and take the weight penalty. 230mm rotors are available too so that's another option.
Still wiring to do and I need to make fairings/covers for the controller and set up the cooling system. More updates next weekend.
I want to thank all who have posted here, especially amberwolf for your input about the wheels and forks early on in the build. That really led me in the right direction. I've also been having a great time tinkering with the Lebowski stuff so thank you for turning me on to that. The stuff about crimps was enlightening too and I bought my very first set of crimpers. Very similar to the ones you showed me in your post. I don't know how I lived so long without them honestly. Ive been using them on all the pins and such for the bike. I still solder the crimps afterward but thats just me being paranoid, the crimpers work great! At some point I'd really like to invest in a high quality hydraulic crimper for the larger gauge wires.
Last edited:


