KONA Entourage Build Thread - middrive (pic heavy)

Just mount it on the bottom and be done with it. ;)

It probably looks worse when you have the bike lying on the floor than it will with the bike upright. You can make a snazzy shield around it with alu sheet to hide it or something.
 
tahustvedt said:
Just mount it on the bottom and be done with it. ;)
that's what the friend i'm building it with said as well ;) i had it installed there already and wasn't really happy with it. but this was with the sharp edged frame box. now that it's rounded it may look better - i hope!
but before i try the mounting holes (for the fourth, and hopefully for the last time) i will double check that front wheel clearance it ok with the controller in the lower position (as i said i rode that way and it hasn't been a problem, but i was riding very carefully and didn't do any jumps)
the coil itself is for 65kg riders. it's #2 of 5 grades. i'm 92kg heavy and need #5. but i will not do heavy freeriding *ggg* so #4 will surely do it as well.
 
normally i don't say that i'm proud of myself. but today is such a day. i'm really happy with the outcome.
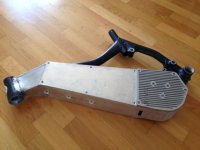
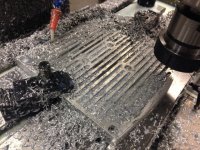
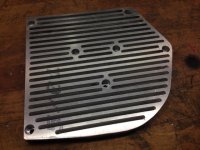
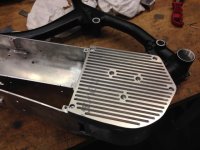
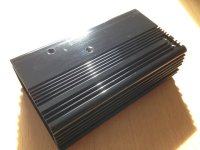
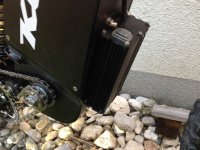
i finished the heat sink which is screwed to the motor case. it's a perfect fit to the motor and to the frame and just looks beautiful. i bought a new 4mm miller especially for alluminium and cooled it constantly. what mess!!

IMG_0056.JPG
but this is the outcome:

IMG_0057.JPG
and mounted to the frame:

IMG_0058.JPG
 
i wanted to weld the little cable housing guides to the frame but as this was my first try WIG welding i gave up. i'm so happy that i let a pro welder weld my frame. i never could have done it.
the guides are now glued to the frame with high temp epoxy. i hope it will stand the powder coating. before letting the frame being painted it will do a test in the oven and see what temp the exopy can stand before getting lose.
 
thanks ron. i kept all high res pic as well and they are ready to dl for you from my dropbox as soon as you wish.

yesterday i did an epoxy stress test. i used "uhu endfest 300" and jb weld.

jb weld claims to be able to stand higher temps than uhu. which is 150°c vs 250°c. uhu300 has to be heat treated up to 180°c just after the application to reach it's highest strenght. have found no info about that for jb weld. they just say that a bit heat (from a lamp's bulb) will speed up the drying process.
so first of all i sanded the both contact surfaces, cleaned with brake cleaner, mixed the epoxy, applied it and put everything in the oven at 200°c. both epoxies where super dry after 10min and ready to use. i took a little wire, attached it to one housing guide and the wrapped the other end around a heavy table's foot ;) i could lift the very heavy table and nothing broke. then i turned the heat up to 250°c and let the epoxy "bake" for another 30min. i repeated the test, and both epoxies passed the test.
with some force a pliers i could break the guides off. force was quite equal for both. big difference: most of the uhu was removed from the surface whereas the jb weld still sticked to the contact area but just broke in between. so i guess uhu is stronger, but jw weld sticks better. the outcome still was the same for both.

i used jb weld to epoxy all housing guides to the frame as it can stand more heat which is good for powder coating. when i went to bed at 1:30am it hit me like a stroke: the epoxy acts as an electrical insulator and so those parts can not be powder coated. so when i got up in the morning i drlled one 1mm hole through each guide into the frame. using some solid copper wire which was cut in length and hammered in the hole i now have a solid connection. :)

everything ready for powder coating. i expect to get i back in 7-10days. i will prepare exerything now so i can quickly assemble everything when i get the frame back :)

IMG_0061.JPG
here you can see the housing guides on top.
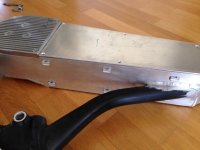
IMG_0062.JPG
 
nice review about jb weld and uhu epoxy. i hope the powder coating process will turn out to be good and provide a good looking surface.
do you have to sand off all the paint from the rest of the frame or can you leave it on?
 
madin88 said:
do you have to sand off all the paint from the rest of the frame or can you leave it on?
this is all handled by the powder coater. they remove paint, oil, and everything else, then sandblast it and then powder coat. and all for €78 plus tax. so this is much cheaper and MUCH less work than doing it by my own. and the result will be much better as well.

i tried painting the controller's case yesterday. i cleaned it, then applied base coat and starting spray painting with RAL9005 mat paint. base coating looked great, applying the first two or three layer's of black paint still looked good, but after the last one (maybe too much paint, or i didn't shake the can long enough) turned out glossy and had bad (orange skin) surface. :( i will try to bring it to the powder coater as well, and hope he can add it to my order w/o additional cost.

IMG_0063.JPG
 
HI Izeman, I just stumbled onto your project again as I guess I forgot to open one of the email notifications from quite a while back through the subscribed function of the forum. I think if I forget to visit the thread after a notification comes through I don't get any more notices till you visit the thread which makes sense.

Glad you have been up and running and tweaking your design. Looks really good, way to go.
 
waynebergman said:
HI Izeman, I just stumbled onto your project again as I guess I forgot to open one of the email notifications from quite a while back through the subscribed function of the forum. I think if I forget to visit the thread after a notification comes through I don't get any more notices till you visit the thread which makes sense.

Glad you have been up and running and tweaking your design. Looks really good, way to go.

happened to me as well. strange. i had subscribed to a thread but didn't get any update notification.
good to see you back ;)
i went to the powder coater today again and handed over my controller case. he said he would throw it into my frame order w/o any additional costs. so i handed over €10 and asked him to move my order in the "fast lane" to get it back by thursday. i'll keep my fingers crossed so i can post some pics of the ready to ride bike this weekend.
 
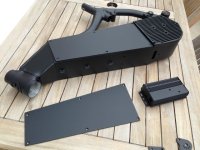
ok. i AM happy now! parts came back from powder coating, and the result is AMAZING. really nice mate surface. exactly the same color as the other parts of the bike.

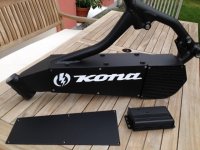
all parts on the table:

IMG_0072.JPG
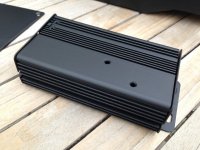
the controller case. MUCH better than my can spray work. and a really durable surface.

IMG_0073.JPG
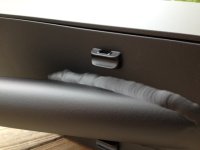
some details:

IMG_0074.JPG

View attachment 1
and with decals attached. i think it looks quite professional.

IMG_0076.JPG
now i will start assembling everything. there is still some customizing of the controller wires needed, but i'm close to riding it :)
 
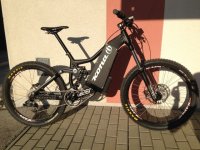
so it's done. at last :) more or less. some minimal wire adjustments, new connectors and hiding those wires coming from the CA, but i guess i can call it FINISHED. and it looks REALLY great.
the heat sink i installed may need some adjustment as well, as the contact surface may be a bit too small. i guess i can solve this with some heat transfer pad on the motor cover.
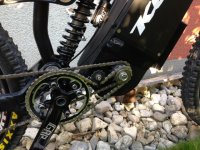
the mac's clutch/freewheel is a different story. it seems to not like those 2kW. it get's stuck. :(

so here is a quick pic. i wanted to take more, but i have to ride it now. sorry. i will make some hq pics afterwards.

 
what does the clutch do in the Motor? Is there a need for it if you already have a freewheel?

btw: now every interested person will ask you where to buy because it doesn't look self made. perfect :)
 
the motor's freewheel is needed if you pedal. when the motor stands still and the motor's axle is turned, then you need the freewheel. if it doesn't run smooth it adds a lot of drag to pedalling. it doesn't matter if the motor is running of course.
i already ordered a replacement but i'm afraid that that much power just may be too much :(
 
That's a really nice build, congratulations!

How much does it weight?
 
izeman said:
the motor's freewheel is needed if you pedal. when the motor stands still and the motor's axle is turned, then you need the freewheel. if it doesn't run smooth it adds a lot of drag to pedalling. it doesn't matter if the motor is running of course.

now i know what you mean. would it be possible to install the motor sprocket freewheel on the motor axle so you can override the internal one?
 
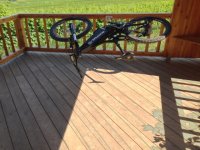
i was planing to do some scenic pic of the bike with a nice background and thought it could be a good idea to put the bike on the ceiling and have the vineyards in the background. so i lifted the bike and to my surprise it stood there still.
so walked two steps back to take the picture, and this was the result. it's a good snapshot, but not what i wanted to acchieve. for those who think this i wanted: i just captured the moment before it HIT THE GROUND :(

IMG_0095.JPG
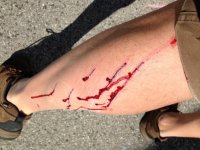
the handle bar moved a bit to the right and the wheel was not in line, so i corrected that. standin in front of the bike with my right hand on the throttle i turned to the bike which moved my wrist and WOT. the bike launched like a rocket and the gears hit my leg. quite a bloody experience. not only my leg was hurt, the CA's case is broken as well :(

IMG_0098.JPG
 
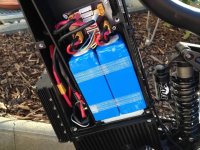
scorpionice asked my to do some pics of the charging system and wiring itself. here you go:

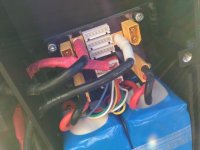
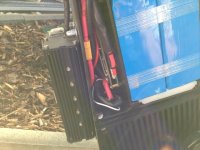
here you can see 2 packs per side installed. so it's 10Ah only. the other 2 packs will be installed later as there needs to be some mod done to the batteries. each side looks identical, and there are 4 batteries on each side. connected in parallel - power wires and balance wires. then there is a serial connection to the other side (the red plug) with a 60a fuse in line. so i take positive from one side, and negative from the other. those power wires, as well as all 12 balance wires go to the hcx-131 bms located between the batteries and the controller (in the little triangle). all the wires to the motor run inside the box.

IMG_0100.JPG
here you can see the parallel harness

IMG_0101.JPG
and from another view:

IMG_0102.JPG
 
madin88 said:
izeman said:
the motor's freewheel is needed if you pedal. when the motor stands still and the motor's axle is turned, then you need the freewheel. if it doesn't run smooth it adds a lot of drag to pedalling. it doesn't matter if the motor is running of course.

now i know what you mean. would it be possible to install the motor sprocket freewheel on the motor axle so you can override the internal one?
yes. theoretically. but i'm not sure that i can find the right freewheel. with the right dimensions, size, teeth etc. i will see if it get's worse, and swap the clutch/freewheel once i receive the replacement parts.
 
Back
Top