

Lebowski
🏍️ Giga poster
Code:
config __FBORPOR, PWRT_64 & PBOR_ON & BORV42 & MCLR_EN & RST_PWMPIN & PWMxL_ACT_HI & PWMxH_ACT_HIlooks like brownout is at 4.2 V ....

config __FBORPOR, PWRT_64 & PBOR_ON & BORV42 & MCLR_EN & RST_PWMPIN & PWMxL_ACT_HI & PWMxH_ACT_HI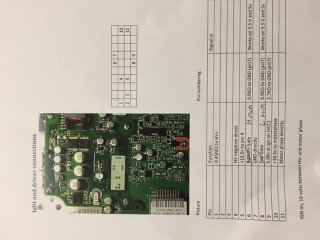


Lebowski said:Maybe it is worthwhile you guys try out de 'buffered' approach I use on my own PCB. you may already have this, maybe not.
Basically what it does is from the high voltage it has a DCDC to 15V, and then from 15V it has a second DCDC going to 5V .
This makes that the 5V hardly sees any spikes from the high voltage, as the 15V is kind of an extra buffer in-between.
In my case the 15V is the gate drive supply...
Tomdb said:If that is true, then even bigger reason to doubt it being the 5v rail.
Biggest pointer to that is, at 100v it works fine even at 20 and 30 amps for the FOC test current, it does not generate and overflow error and then runs the motor just fine.
Once I get some aluminium tape I will start on my EMC shielding.
Thank you very much guys for the advice, I will just keep plugging away at it.
I can help.Lebowski said:Maybe ask Arlo1 for tips about how he has set up the 5V supply, he's succesfully running over 140kW with a 470V battery...
The ACPL-C87 is kinda expensive.Arlo1 said:Lebowski said:Which is Using a Acpl-C87 and a op amp 4.7v = 470 volt at the battery.
$7 for optic isolation is pretty cheap. How much do yoy think a small pic would be to do the same thing?Futterama said:The ACPL-C87 is kinda expensive.Arlo1 said:Lebowski said:Which is Using a Acpl-C87 and a op amp 4.7v = 470 volt at the battery.
Lebowski, would it be possible for the controller IC to accept a digital reading from a small PIC on the HV side through a digital isolation barrier to the controller IC?
$0 as I have hundreds laying around from other projects :wink:Arlo1 said:$7 for optic isolation is pretty cheap. How much do yoy think a small pic would be to do the same thing?

Futterama said:$0 as I have hundreds laying around from other projects :wink:Arlo1 said:$7 for optic isolation is pretty cheap. How much do yoy think a small pic would be to do the same thing?


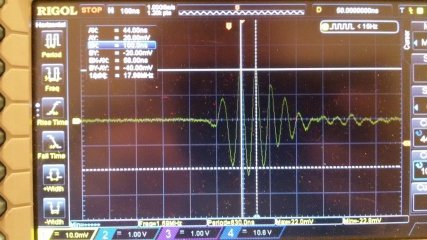
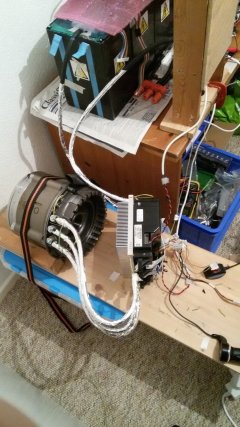
Arlo1 said:$7 for optic isolation is pretty cheap. How much do yoy think a small pic would be to do the same thing?Futterama said:The ACPL-C87 is kinda expensive.
Lebowski, would it be possible for the controller IC to accept a digital reading from a small PIC on the HV side through a digital isolation barrier to the controller IC?
The analog way would be to build an opamp based oscillator with the output duty cycle dependent on the to measure voltage. Pass the PWM signal through an optocoupler and low pass filter on the receiving end...
0x3D31	0x004A	0x1364	0x5F5A	0x0443	0x00A3	0x06DC	0x0051
0x0036	0x0026	0x7FBC	0x0116	0x0000	0x0046	0x8000	0x015C
0x00AE	0x0294	0x03F7	0x03F7	0x03F6	0xAAAA	0xAAAA	0xAAAA
0x0BB7	0x04AF	0x008F	0x05DB	0x0006	0xE67E	0x06E0	0x2000
0x0000	0x0000	0xF000	0x0000	0x0000	0x00BC	0x02A4	0x0000
0x03FF	0x0570	0x0063	0x0570	0x022D	0x03E8	0x0258	0x0064
0x0890	0x0190	0x000E	0x0298	0x0000	0x999A	0x0030	0x0000
0x01E0	0xFFFF	0x6666	0xFFD0	0x0000	0xFE20	0x0000	0x07AE
0x0030	0x0000	0x01E0	0xFFFF	0xF852	0xFFD0	0x0000	0xFE20
0x0003	0x0000	0x0078	0x0000	0x0000	0xFFFD	0x0000	0xFF88
0x0000	0x0000	0x0000	0x0000	0x0003	0x0000	0x00C8	0x0000
0x0000	0xFFFD	0x0000	0xFF38	0x0000	0x0000	0x000C	0x0000
0x00F0	0x0000	0x0000	0xFFF4	0x0000	0xFF10	0x05AB	0x1A45
0x001F	0x028E	0x02B8	0x006D	0x01D4	0x7530	0x028E	0x0010
0x03BA	0x0042	0x0010	0x071C	0x0000	0x03E8	0x00C8	0x2716
0x03B6	0x6000	0x018E	0x028F	0xFFFF	0xFFFF	0xFFFF	0xFFFF
0xFFFF	0xFFFF	0xFFFF	0xFFFF	0x4000	0xFFFF	0xFFFF	0xFFFF
0xFFFF	0xFFFF	0xFFFF	0xFFFF	0xFFFF	0xFFFF	0xFFFF	0xFFFF
0xFFFF	0xFFFF	0xFFFF	0xFFFF	0xFFFF	0xFFFF	0xFFFF	0xFFFF
0xFFFF	0xFFFF	0xFFFF	0xFFFF	0xFFFF	0xFFFF	0xFFFF	0xFFFF
0xFFFF	0xFFFF	0xFFFF	0xFFFF	0xFFFF	0xFFFF	0xFFFF	0xFFFF
0xFFFF	0xFFFF	0xFFFF	0xFFFF	0xFFFF	0xFFFF	0xFFFF	0xFFFF
0xFFFF	0xFFFF	0xFFFF	0xFFFF	0xFFFF	0x0000	0x0000	0x0000
0x0032	0xFFFF	0xC519	0x764B	0x5482	0x41B3	0x35C3	0x2D7A
0x276B	0x22C9	0x1F1E	0x1C28	0x19B5	0x17A6	0x15E6	0x1463
0x1312	0x11EB	0x10E4	0x0FFB	0x0F28	0x0E6B	0x0DC0	0x0D23
0x0C94	0x0C10	0x0B97	0x0B27	0x0ABF	0x0A5F	0x0A05	0x09B1
0x0962 *0x159B 0x0105 0x01F0 0xF7ED 0x0443 0x00A3 0x06DC 0x0051
0x0036 0x0026 0x7FBC 0x0116 0x0000 0x0046 0x8000 0x015C
0x00AE 0x0294 0x03F8 0x03F4 0x03F3 0xAAAA 0xAAAA 0xAAAA
0x0BB7 0x04AF 0x008F 0x10BB 0x0002 0xE67E 0x0A00 0x2000
0x0000 0x0000 0xF000 0x0000 0x0000 0x00BC 0x02A4 0x0000
0x03FF 0x0570 0x0063 0x0570 0x022D 0x03E8 0x0258 0x0064
0x0890 0x0190 0x000E 0x0298 0x0000 0x999A 0x0030 0x0000
0x01E0 0xFFFF 0x6666 0xFFD0 0x0000 0xFE20 0x0000 0x07AE
0x0030 0x0000 0x01E0 0xFFFF 0xF852 0xFFD0 0x0000 0xFE20
0x0003 0x0000 0x0078 0x0000 0x0000 0xFFFD 0x0000 0xFF88
0x0000 0x0000 0x0000 0x0000 0x0003 0x0000 0x00C8 0x0000
0x0000 0xFFFD 0x0000 0xFF38 0x0000 0x0000 0x000C 0x0000
0x00F0 0x0000 0x0000 0xFFF4 0x0000 0xFF10 0x05CC 0x276E
0x00A3 0x04DF 0x011C 0x006D 0x01D4 0x7530 0x074F 0x002E
0x05B2 0x0042 0x0010 0x071C 0x0000 0x03E8 0x00C8 0x2716
0x03B6 0x6000 0x018E 0x028F 0xFFFF 0xFFFF 0xFFFF 0xFFFF
0xFFFF 0xFFFF 0xFFFF 0xFFFF 0x4000 0xFFFF 0xFFFF 0xFFFF
0xFFFF 0xFFFF 0xFFFF 0xFFFF 0xFFFF 0xFFFF 0xFFFF 0xFFFF
0xFFFF 0xFFFF 0xFFFF 0xFFFF 0xFFFF 0xFFFF 0xFFFF 0xFFFF
0xFFFF 0xFFFF 0xFFFF 0xFFFF 0xFFFF 0xFFFF 0xFFFF 0xFFFF
0xFFFF 0xFFFF 0xFFFF 0xFFFF 0xFFFF 0xFFFF 0xFFFF 0xFFFF
0xFFFF 0xFFFF 0xFFFF 0xFFFF 0xFFFF 0xFFFF 0xFFFF 0xFFFF
0xFFFF 0xFFFF 0xFFFF 0xFFFF 0xFFFF 0x0000 0x0000 0x0000
0x0032 0xFFFF 0xC519 0x764B 0x5482 0x41B3 0x35C3 0x2D7A
0x276B 0x22C9 0x1F1E 0x1C28 0x19B5 0x17A6 0x15E6 0x1463
0x1312 0x11EB 0x10E4 0x0FFB 0x0F28 0x0E6B 0x0DC0 0x0D23
0x0C94 0x0C10 0x0B97 0x0B27 0x0ABF 0x0A5F 0x0A05 0x09B1
0x0962 *0xFFFF 0xFFFF 0x795E 0x0010 0xE038 0x3F98 0x0122 0x000A
0x0000 0x07AE 0x0018 0x0000 0x01E0 0xFFFF 0xF852 0xFFE8
0x0000 0xFE20 0x0000 0x4CCD 0x0018 0x0000 0x01E0 0xFFFF
0xB333 0xFFE8 0x0000 0xFE20 0xFAB5 0xFF06 0xFFFF 0xFFFF
0x2916 0xFFFF 0xFFFF 0xFFFF 0xFFFF 0xFFFF 0xFFFF 0xFFFF
0xFFFF 0xFFFF 0xFFFF 0xFFFF 0x0524 0x80F2 0x0194 0x0103
0x00A2 0x00FD 0x028A 0x001A 0x0019 0x0005 0x00C2 0x0151
0xFFFF 0x7FBC 0x0000 0x011C 0x008E 0x03F7 0x03F4 0x03F4
0x0BB7 0x0474 0x008F 0x0592 0x0006 0x08F9 0xFFFE 0x0A00
0x1000 0x0000 0x0000 0xF000 0x0000 0x0000 0x00B1 0x02AF
0x0000 0x03FF 0x0473 0x0038 0x0473 0x01AB 0x0418 0x0258
0x0064 0xFFFF 0xFFFF 0xFFFF 0xFFFF 0x0003 0x0000 0x0078
0x0000 0x0000 0xFFFD 0x0000 0xFF88 0x0000 0x0000 0x0005
0x0000 0x0064 0xFFFB 0x0000 0xFF9C 0x000C 0x0000 0x00F0
0xFFF4 0x0000 0xFF10 0x05CC 0x267B 0x00B5 0x019F 0x011C
0x0067 0x01BD 0x026F 0x000F 0x001F 0x0E10 0x0000 0x03E8
0x03B6 0x6000 0x0155 0x009B 0x4000 0xFFFF 0xFFFF 0xFFFF
0xFFFF 0xFFFF 0xFFFF 0xFFFF 0xFFFF 0xFFFF 0xFFFF 0xFFFF
0xFFFF 0xFFFF 0xFFFF 0xFFFF 0xFFFF 0xFFFF 0xFFFF 0xFFFF
0xFFFF 0xFFFF 0xFFFF 0xFFFF 0xFFFF 0xFFFF 0xFFFF 0xFFFF
0xFFFF 0xFFFF 0xFFFF 0xFFFF 0xFFFF 0xFFFF 0xFFFF 0xFFFF
0xFFFF 0xFFFF 0xFFFF 0xFFFF 0xFFFF 0xFFFF 0xFFFF 0xFFFF
0xFFFF 0xFFFF 0xFFFF 0xFFFF 0xFFFF 0x0000 0x0000 0x0000
0x0005 0x0000 0x0000 0x0000 0x0000 0x0000 0x0000 0x0000
0x0000 0x0000 0x0000 0x0000 0x0000 0x0000 0x0000 0x0000
0x0000 0x0000 0x0000 0x0000 0x0000 0x0000 0x0000 0x0000
0x0000 0x0000 0x0000 0x0000 0x0000 0x0000 0x0000 0x0000
0x0000 0x0000 0x0000 0x0000 0x0000 0x0000 0x0000 0x0000
0x0000 0x0000 0x0000 0x0000 0x0000 0x0000 0x0000 0x0000
0x0000 0x0000 0x0000 0x0000 0x0000 0x0000 0x0000 0x0000
0x0000 0x0000 0x0000 0x0000 0x0000 0x0000 0x0000 0x0000
0x0000 0xFFFF 0xAAAA 0x6666 0x4924 0x38E3 0x2E8B 0x2762
0x2222 0x1E1E 0x1AF2 0x1861 0x1642 0x147A 0x12F6 0x11A7
0x1084 0x0F83 0x0EA0 0x0DD6 0x0D20 0x0C7C 0x0BE8 0x0B60
0x0AE4 0x0A72 0x0A0A 0x09A9 0x094F 0x08FB 0x08AD 0x0864
0x0820 *0xFFFF 0xFFFF 0x795E 0x0010 0xFFFF 0x3FE3 0x00FF 0x000A
0x0000 0x07AE 0x0018 0x0000 0x01E0 0xFFFF 0xF852 0xFFE8
0x0000 0xFE20 0x0000 0x4CCD 0x0018 0x0000 0x01E0 0xFFFF
0xB333 0xFFE8 0x0000 0xFE20 0xFAB5 0xFF06 0xFFFF 0xFFFF
0x2916 0xFFFF 0xFFFF 0xFFFF 0xFFFF 0xFFFF 0xFFFF 0xFFFF
0xFFFF 0xFFFF 0xFFFF 0xFFFF 0x05E0 0x1903 0x0207 0x0207
0x008C 0x008C 0x0343 0x001A 0x0019 0x000A 0x0000 0xFFFF
0xFFFF 0x7FBC 0x0000 0x0164 0x00B2 0x03FA 0x03F8 0x03F8
0x0BB7 0x0474 0x008F 0x0592 0x0006 0x0DF9 0xFFFE 0x0A00
0xFFFF 0xFFFF 0xFFFF 0xFFFF 0xFFFF 0xFFFF 0xFFFF 0xFFFF
0xFFFF 0xFFFF 0x0590 0x0047 0x0590 0x0356 0x0418 0x0258
0x0064 0xFFFF 0xFFFF 0xFFFF 0xFFFF 0x0003 0x0000 0x0078
0x0000 0x0000 0xFFFD 0x0000 0xFF88 0x0000 0x0000 0x0005
0x0000 0x0064 0xFFFB 0x0000 0xFF9C 0x000C 0x0000 0x00F0
0xFFF4 0x0000 0xFF10 0x05CC 0x26A8 0x009F 0x019F 0x01AB
0x0067 0x01BD 0x026F 0x000F 0x0010 0x0E10 0x0000 0x03E8
0x03B6 0x6000 0x01AB 0x009B 0x4000 0xFFFF 0xFFFF 0xFFFF
0xFFFF 0xFFFF 0xFFFF 0xFFFF 0xFFFF 0xFFFF 0xFFFF 0xFFFF
0xFFFF 0xFFFF 0xFFFF 0xFFFF 0xFFFF 0xFFFF 0xFFFF 0xFFFF
0xFFFF 0xFFFF 0xFFFF 0xFFFF 0xFFFF 0xFFFF 0xFFFF 0xFFFF
0xFFFF 0xFFFF 0xFFFF 0xFFFF 0xFFFF 0xFFFF 0xFFFF 0xFFFF
0xFFFF 0xFFFF 0xFFFF 0xFFFF 0xFFFF 0xFFFF 0xFFFF 0xFFFF
0xFFFF 0xFFFF 0xFFFF 0xFFFF 0xFFFF 0x0000 0x0000 0x0000
0x0005 0xFFFF 0xFFFF 0xFFFF 0xFFFF 0xFFFF 0xFFFF 0xFFFF
0xFFFF 0xFFFF 0xFFFF 0xFFFF 0xFFFF 0xFFFF 0xFFFF 0xFFFF
0xFFFF 0xFFFF 0xFFFF 0xFFFF 0xFFFF 0xFFFF 0xFFFF 0xFFFF
0xFFFF 0xFFFF 0xFFFF 0xFFFF 0xFFFF 0xFFFF 0xFFFF 0xFFFF
0xFFFF 0xFFFF 0xFFFF 0xFFFF 0xFFFF 0xFFFF 0xFFFF 0xFFFF
0xFFFF 0xFFFF 0xFFFF 0xFFFF 0xFFFF 0xFFFF 0xFFFF 0xFFFF
0xFFFF 0xFFFF 0xFFFF 0xFFFF 0xFFFF 0xFFFF 0xFFFF 0xFFFF
0xFFFF 0xFFFF 0xFFFF 0xFFFF 0xFFFF 0xFFFF 0xFFFF 0xFFFF
0xFFFF 0xFFFF 0xAAAA 0x6666 0x4924 0x38E3 0x2E8B 0x2762
0x2222 0x1E1E 0x1AF2 0x1861 0x1642 0x147A 0x12F6 0x11A7
0x1084 0x0F83 0x0EA0 0x0DD6 0x0D20 0x0C7C 0x0BE8 0x0B60
0x0AE4 0x0A72 0x0A0A 0x09A9 0x094F 0x08FB 0x08AD 0x0864
0x0820 *


