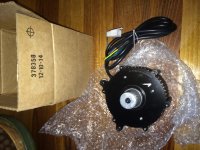
LightningRods mid drive kit

Hey! Thats a great idea! i thought about using some kind of plastic... but couldnt find the right size...looks like it will be lighter than sheetmetal!?
so this is like plastic PVC downpipes for roof gutters?? will have to look for some..
Tim
P.S. if its PVC... maybe it can be bonded together with PVC pipe Glue? to make it stronger...just a thought..[/quote]

KONAKID,
Sorry for the wrong info but the material is vinyl and they call it downspout at homedepot but I'm planning to use PVC pipe glue on it. Cover the ends with 1/2 or 3/4 plywood and screw it so it can be remove easily when needed and spray it with black paint. But if you're planning to join them together, might as well look into the PVC fence post cover. As for mine, I don't want my top tube to be higher so I positioned it squeezing my top tube with the "wee ride" brace (for my kids bike seat) to have a flat surface to rest on. Glad I can help. I just wish I can finish this project after my up coming vacation. Let me know your solution too. Thanks
 
LightningRods said:
If you're still having some flex issues due to the monstrous torque of the big block (remember, I fixed the flex issues for the small motor- now we're talking twice as much motor) the round lug on the top of the right upper sheet is for a torque brace. Attach a solid link between that lug and some solid point like the mounting point for the shock and there is just no way the sheets are twisting if your torque brace doesn't bend..

Last night I flattened the ends of some 4130 tubing in the vise as a quick fix. One of the shock linkages is in the perfect location and with a few extra washers it was roughly a 30 minute job (I'm going to replace it with some thinner walled and no sharp edges) . It absolutely works as advertised and if it's an easy mod for your frame I think everyone should do it.

Single speed stuff coming this week, I'm curious what's going to happen when i can actually twist the throttle... maybe I'll just find the next weak point (my money is on the spokes/hub).
 
The torque brace is a great idea for the big block or a small block being pushed hard. With the setup that stonezone has, a big block on a stretch lower bracket, the torque brace is pretty much mandatory.

You can buy any of my parts or kits by PMing me here. I'd post my e-mail here except that I'm already drowning in spam.

Lot of kits shipping in the next two weeks. I took last week to move forward with the Lunacycle mid drive, the Surley Big Dummy cargo bike mid drive and the Quilbix mid drive. All three are very close to running in prototype form. This week and next I hope to ship a total of 13 mid drive kits.
 
You're bolting the upper bracket directly to a huge battery box built into the frame, correct? You won't need a torque brace unless it's for your bike's frame.
 
LightningRods said:
You're bolting the upper bracket directly to a huge battery box built into the frame, correct? You won't need a torque brace unless it's for your bike's frame.

The torque arm is for others that don't have the luxury of a custom frame. Thought the info would help. -The cheeky one.
 
@ eTrailster: I dindt know about the X-sync system, sounds good, but anyway, i think if they have to made a special system to allow to use a 10T sprocket for normal Bycicle-use... it will probably not last long with the Power of the LR-Kit :mrgreen:
On the singlespeed-Setup i will do the same like Mike said --> try to use a 14T at first (@ ~2500W)
I think it will work, since it is a Hardtail and i can do the Bycicle-Chaintension with the adjustable Dropouts. So no need of a chaintensioner there.
think with this setup its more likely that the chain brake, then that it slips over cogs.(?) will see. Parts will arrive this weekend, so many new things to build and test.

Thanks for the Idea with that torque-Arm-lever, but i think i will do a taylored Braket (above the Jackshaft) to the downtube of the Bike. (Bike-Suspenison-system gets in the way for the Torque-lever)

Will raport when work is done and tested.

KONAKID said:
It's not the weight on my back that bothers me, it's the crash that's bound to happen... how long do i have to get that bomb off me before the lipos become the center of the sun?

Haha, right! thats a problem :mrgreen: i try to protect my Backpack-batterys (Li-Ion) with 1.5 to 2.5cm "Hard-foam" and PVC-Sheets. Have ordered Carbon-Kevlar-sheets and 1.5 Liter Epoxy from Hobbyking, to upgrade them some more, but i think when it hits you against a tree...everything could brake :(

Keep on riding hard guys!
 
Alright!!!! :D :p :lol:
Finally Got My motor out of customs (small block) ... and today the rest of the parts arived!!! i now have a full kit! and am ready to start building my new bike!

Id like to say A BIG THANKS here to Michael.. who is a real pro...and a great help.
He REALLY helped me out... on a sunday morning! .. sending me papers to help me release my motor from customs!
Great guy! Great Service!
Thanks
Tim
 
Thanks for the kind words Konakid. I work seven days a week. You just had to wait a bit while I finished having Sunday brunch with my wife.

I'm glad that you were able to pry your motor loose from Customs. Israeli Customs is the most restrictive and difficult to deal with, hands down. I feel like I'm shipping contraband whenever I ship mid drive parts to Israel.
 
KONAKID said:
Alright!!!! :D :p :lol:
Finally Got My motor out of customs (small block) ... and today the rest of the parts arived!!! i now have a full kit! and am ready to start building my new bike!

Id like to say A BIG THANKS here to Michael.. who is a real pro...and a great help.
He REALLY helped me out... on a sunday morning! .. sending me papers to help me release my motor from customs!
Great guy! Great Service!
Thanks
Tim

Happy for you Tim! :D

Hey do you have a camera? Maybe you could record some build steps of your project.I know many people dont like to take the time and video shoot their projects but we sure need more of this from those with LR's kits.

Thanks Tim 2.
 
Thanks Michael and archer..
and yes.. i will take lots of pics.. as im doing this as final project for my degree..so have to take lots of pics anyway :D
will post pics till your tired of me! :p :D :)
here is what a well packaged product looks like!
Tim
IMG_9654 (Medium).JPG

IMG_9655 (Medium).JPG

IMG_9657 (Medium).JPG
 
I've seen some great build logs (I especially liked r3volved's pictures and notes as to which wrench to use where) but so far they all seem to assume I know how to put the pieces together.

This is my absolutely first build (small-block) and after unboxing Mike's kit I"m... a bit befuddled. Can anyone recommend an "insert tab A in slot B" how-to guide?

Greatly appreciated!
 
I'll give you whatever help you need. Just e-mail me and I'll talk you through it. If talk doesn't work I'll send photos.

I need to get this done as a resource for everyone. I've just been too busy trying to get the kits out.

BTW, we're caught up to a 60 day wait and closing in. If I can get it down to 30 I will be a happy cat.
 
So a little update on my big block. I switch to single speed and am working on the gearing trying to get a handle on the massive chain growth and proper pedaling speed. I'm thinking about going down to the stock 36t up front to see if that reduces growth a bit, but for now with my makeshift tensioner mod and a 20t in the rear it seems to be holding well. Per suggestion on this thread i went with a 3/16 bmx chain, 2 x 3/16 cogs sandwiched together and a 1/8 up front (instead of sandwiching 2). I did find some nice 3/16 104bcd sprockets at 44t and 36t that I might upgrade to but we'll see. Initially i went with a 15t in the rear and had the tensioner pushing the chain up (as you can see in the photo below) like moto style but was still getting slip (the chain was super slack unsprung, but as soon as i sat on it that went away, but there wasn't enough slack to cover the full chain growth, amazing when you look at the photo). Now i've switched to a 20t and traditional derailleur style tension and it seems to be working a lot better. The tensioner is still the weak spot, so i'm going to have to do some fab on it to make it a bit more solid (for the second roller i added) or have a buddy make one on his CnC, but as of now it seems to work well enough (until it doesn't). Unfortunately, I can't use a standard derailleur as a tensioner like i've seen, since my chain is so fat.

Also the tension bar fixed my twisting issue, and luckily there was a perfect mount point for it.
 

Attachments

  • makeshift-tensioner-working.jpg
    makeshift-tensioner-working.jpg
    113.8 KB · Views: 1,574
  • dual-cogs-15t-and-fatty-chain.jpg
    dual-cogs-15t-and-fatty-chain.jpg
    54.1 KB · Views: 1,574
  • not-enough-grab-never-even-tried.jpg
    not-enough-grab-never-even-tried.jpg
    99.8 KB · Views: 1,574
  • push-tensinoer,-not-enough-for-growth.jpg
    push-tensinoer,-not-enough-for-growth.jpg
    110 KB · Views: 1,574
  • temp-motor-tensioner-that-will-cut-your-leg.jpg
    temp-motor-tensioner-that-will-cut-your-leg.jpg
    153.1 KB · Views: 1,574
My twisting (small block but maestro suspension on an anthem) is in the swing arm I think not the main frame, but I like the arm.
I should probably make something like that and see if it improves things for mine.

What about putting a tensioner closer to the front sprockets, mounted on the front of the swing arm?
 
t0me said:
What about putting a tensioner closer to the front sprockets, mounted on the front of the swing arm?

The good thing about putting the tensioner at the rear where stonezone has it is that it increases the wrap around the small rear sprocket. That was why he added the second wheel to the tensioner arm. The more wrap around the sprocket, the more teeth of the sprocket engaged in the chain.
 
t0me said:
I was thinking he could keep a guide at the back but have the tensioner at the front, both single wheel, avoiding the double wrap s-path he has now.

yeah that's another possible option, the only thing is the chain growth on this frame is out of control. I think the only way to allow for that is a variation of the current setup. I guess that's why bikes have derailleurs this way...
 
Back
Top