LightningRods mid drive kit

Can anyone tell me the CAV3 settings for the temperature sensor on this kit please? I had them changed when to suit the probe on the clyte 4065....

when unplugged it's like 465 degrees c for the clyte

now the reading on big block plugged in is like 265 degrees c...


thanks

PS I have ordered the pedro's wrench because it was in Australia... should be on next weekend.

EDIT It was as simple as changing off from the linear type that I had customised back to 10k :oops:
 
Got my Pedro and next step

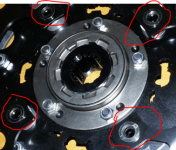
What's the name of the tool that I need to remove the default bicycle chainring on the LR kit? I have a hex for the outside but the inside looks like it needs something like a huge flat head screw driver but with added point in the centre of it to keep it in place. I have already tried a few bits of steal but not holding in place and damaging the relatively soft head.

Also which way do you loosen this lefty loosy for the hex side?

thanks again.

EDIT also what is the name of those "blot / nut or whatever because I think by trying to remove them they will get damaged. With just hand power they are losing shape...
 

Attachments

  • how to remove chainring.PNG
    how to remove chainring.PNG
    85.2 KB · Views: 3,044
Those are your chainring nuts. The side with the M5 hex drive is the chainring bolt. Here is the tool for the nut:

http://www.parktool.com/product/chainring-nut-wrench-CNW-2

I made my own tool by bending a piece of 20mm wide flat bar steel over in the vise and then grinding the end to the thickness of the slot in the nut.
 
I bought a similar tool from LBS, having no luck.

Is this blue loctited?

Any tips for this?, keeping the pressure down seems to require more than hand power and more than that the nut heads are going. I tried putting the hex key in a vice to give me two hands at holding this but the nut heads just keep getting more more eaten.

I am starting to fear I will have to dremel the whole lot out to get the smaller chain ring on this that I wanted and buy new bolts and nuts.

EDIT Also Are they regular nuts? that I can just buy at the lbs? If I grind them off will the bolt just fall out and still be usable?

thanks
 
I don't add any thread lock to the chainring bolts. They come with a dry red thread lock applied that does clamp them down pretty good.

The nut wrench that we've already discussed is better for holding the nut still than turning. When I run into a difficult phillips socket bolt I use a phillips socket attachment on my socket wrench. The tee handle wrenches or little bent L wrenches can't put much grunt on it.

Try to save the chainring hardware if you can. It's unusual length stuff that I have to special order from Race Face.
 
LightningRods said:
I don't add any thread lock to the chainring bolts. They come with a dry red thread lock applied that does clamp them down pretty good.

The nut wrench that we've already discussed is better for holding the nut still than turning. When I run into a difficult phillips socket bolt I use a phillips socket attachment on my socket wrench. The tee handle wrenches or little bent L wrenches can't put much grunt on it.

Try to save the chainring hardware if you can. It's unusual length stuff that I have to special order from Race Face.

Can you describe how these work as I have just pulled out two chainrings sets / cranks from other bikes and they came off in seconds.

How does it interface inside? If I cut of the nut head is it still connected to the bolt headless? so the bolt also becomes useless?

Please involice me asap for these since you are the only person I can get them off.

In case I just use the 44t while waiting, if there is a tool which is necessary for getting everything off the BB again to be able to put the chainring on that I want after it has all been tightened down you can invoice me for that too, as I really want to get this thing ridden, but the large chainring will not do for the continual steep riding that I do.


We can go back to email mode if you like.


thanks

EDIT the tool looks similar enough to me

TL6123.jpg
 
When bolts have some loctite on them I've always found that it helps to heat them with a propane torch. I heat a little then try to break them loose, if it doesn't go I heat a little more. At some point the loctite melts and the bolts break easily.
Pete
 
Dogboy1200 said:
When bolts have some loctite on them I've always found that it helps to heat them with a propane torch. I heat a little then try to break them loose, if it doesn't go I heat a little more. At some point the loctite melts and the bolts break easily.
Pete

Ah man that is ingenious I wish I knew this after spending the whole day fruitlessly trying every method possible.

I gave up, the guy across the road with a million tools gave up, and my dad who was mechanic for 40 years gave up....

I just put on the 48t or how ever many while I wait for more of these custom size from Mike.

However now that I have decided to put on the cranks they don't clear the primary guard, they don't clear the the motor shaft screw what ever its called with the guard removed either.

Mike do you put cranks on to test if the design fits before you ship?

12196292_10153620775344845_1477305272368723643_n.jpg

12227576_10153620775419845_3618676895379266314_n.jpg

11693923_10153620773484845_6704576151310484580_n.jpg
 
Ray's Surly Moonlander fat bike frame with Big Block mid drive installed was picked up by Fed Ex this morning. Right on cue about 20 minutes later Estes Freight dropped off a huge wooden palette with this Utah Trikes recumbent fattie tadpole on it. Caleb ordered this beauty from Utah Trikes and had it shipped directly to my shop to have a Big Block mid drive fitted. It's going behind the seat with two jackshafts similar to the Luna Cycle and Big Dummy drives.

UtahTrike.jpg


Speaking of the Luna Cycle drives tomorrow I should be picking up the custom 40T 219 secondary sprocket for the Luna. 219 sprockets normally have a gap between the largest driver (18T) and smallest driven (64T). I needed a 40T to get the reduction where I wanted it so I CAD designed a custom sprocket and had it laser cut from .135" stainless steel.
 
Yeah it's sick. Complete with Rohloff. I'm very jealous. I feel like the cobbler whose kid's have no shoes. (Although I have three bikes. I just don't have this one.)
 
Dogboy1200 said:
When bolts have some loctite on them I've always found that it helps to heat them with a propane torch. I heat a little then try to break them loose, if it doesn't go I heat a little more. At some point the loctite melts and the bolts break easily.
Pete

when you say "propane torch" I say "blue wrench".
 
LightningRods said:
Speaking of the Luna Cycle drives tomorrow I should be picking up the custom 40T 219 secondary sprocket for the Luna. 219 sprockets normally have a gap between the largest driver (18T) and smallest driven (64T). I needed a 40T to get the reduction where I wanted it so I CAD designed a custom sprocket and had it laser cut from .135" stainless steel.


Sweet! One step closer!
 
stonezone said:
Dogboy1200 said:
When bolts have some loctite on them I've always found that it helps to heat them with a propane torch. I heat a little then try to break them loose, if it doesn't go I heat a little more. At some point the loctite melts and the bolts break easily.
Pete

when you say "propane torch" I say "blue wrench".
Nice! I'm gonna start using that term!
 
Take it from an old gear-head. When you are working on a stubborn bolt/nut...the usual suspects are penetrant fluid, heat, and an impact wrench (1/2-inch is used for wheel lugnuts and car suspension jobs, smaller stuff is handled by a small 3/8ths impact). There is something about the rapid "slapping" action that will break loose a fastener, that would other-wise be snapped in half from adding a long breaker-bar to the hand-wrench for more leverage...
 
Finally have power running first time, in temporary run.

I am still working on the chain rub and have loosened up the guard to fine tune to pass the crank and will pull it back a touch if the rub continues... yes it was rubbing..

This my first external chain drive so yeah the sound is like an F1 and have now tried on the street between rain clouds.

It's a sexy sound that I love but will keep away from people as much as possible.

When I give this thing full juice it's a screamer, it would seem nothing can handle the power for now, The less teeth the better the chain line, the more teeth the worse chain line, so the 9 speed is kind of cool when babying the throttle but nowhere is it perfect. Still granny seems to avoid the nasty clack of a chain slip the most. I reckon 20t with a straight line should be the win.

Still got lots to do to get the bike off road ridable but I can see a custom rear sprocket will be on call.

Love it MIke. :mrgreen:

[youtube]fQOeBg_yeiI[/youtube]
 
John Bozi said:
Finally have power running first time, in temporary run.

I am still working on the chain rub and have loosened up the guard to fine tune to pass the crank and will pull it back a touch if the rub continues... yes it was rubbing..

This my first external chain drive so yeah the sound is like an F1 and have now tried on the street between rain clouds.

It's a sexy sound that I love but will keep away from people as much as possible.

When I give this thing full juice it's a screamer, it would seem nothing can handle the power for now, The less teeth the better the chain line, the more teeth the worse chain line, so the 9 speed is kind of cool when babying the throttle but nowhere is it perfect. Still granny seems to avoid the nasty clack of a chain slip the most. I reckon 20t with a straight line should be the win.

Still got lots to do to get the bike off road ridable but I can see a custom rear sprocket will be on call.

Love it MIke. :mrgreen:

[youtube]fQOeBg_yeiI[/youtube]

You're just about getting to the fun part :)

My suggestions:
Remove the guards, wear shin/knee protection (have health insurance).
Stack and weld as many 1/8 cogs as you can fit on your freehub (and use 1/8 minimum chain).
Repurpose an old DH deraileur (add spacers for wider chain) as a tensioner. Lots of chain growth, and fat chains are bouncy.
Never twist throttle past 20% and always park downhill of the riding area if possible.
 
One of the great aspects about the time that we live in is the availability of technology to make things. I needed a #219 sprocket that didn't exist. 219 driver sprockets range from 11T to 18T. 219 driven sprockets range from 64T to 93T. To get my reduction where I want it on my mid bike drives I need a 40T 219 driven. I'd also like the center to fit a five bolt freewheel. Doesn't exist.

Here is my new 40T sprocket in the gap of what was previously available:

18-40-64_219.jpg


It's laser cut from .135" stainless steel, fits the freewheel down to .001" and the finish on the teeth is better than it needs to be. This is going to be a great part:

40T_219.jpg


But as always seems to be the case with me, the first pass had to have a problem. I've designed pulleys in the past and have gotten used to that. This is my first sprocket. When I looked up the sprocket diameter for a 40T 219 sprocket I assumed that "sprocket diameter" meant the outside of the sprocket. No. It means the diameter of the center line of the chain. The 219 chain doesn't fit this pretty part. So I carefully measured the roller diameter and pin to pin distance of a 219 chain and went back to my sprocket drawing.

045_219.jpg


Luckily the tooth profile was correct so all I had to do was plot the chain roller diameters and pin spacing on the correct diameter. I resized the 40T tooth profile and everything fits like a glove.

So back to the laser cutter on Monday. I know that sometimes it's difficult to understand why projects take as long as they do. If I knew everything going into them they would go a lot faster.

I plan to use the lessons learned from making this secondary reduction sprocket to make freehub final drive sprockets. My plan is to design and laser cut cogs from 16T to at least 34T and then fit them on a steel freehub with spacers to create six speed spacing. Six speeds is more than we need but the derailleur will shift better with more steps from 16T to 34T and with any luck at all it will be possible to use a six speed indexed shifter instead of a friction shifter. We shall see.
 
Back
Top