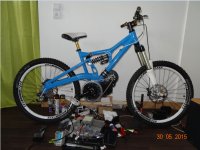
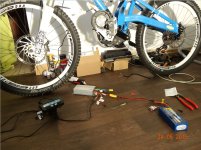
LightningRods mid drive kit

John Bozi said:
I came across this quite funny video, but got me a bit worried about how complex the install will be...

For those who have put on an LR did you run into difficulties? What were they? And what do you think this guys problem is?

[youtube]dE6de2wO9gM[/youtube]

I had lots of issues mounting my bb kit as well, but that's to be expected considering the VAST variety of frame geometry out there. I ran into basically the same chainline issue that you had and I shaved off the inside of the sprocket on the jackshaft to get it those few mm needed for alignment. Biggest problem with me and the alignment was chain tension. I ended up putting a spring-loaded tensioner on that side and that made my life so much easier. Problem for me is that i initially wrangled this kit on to a nomad, and doing so I pretty much stripped my jackshaft collars to the point where they wont clamp well enough. I've since resolved that, but aligning the chain is what did it.

I finally picked up a used lathe, so as long as I have the time I can make new parts finally.

I haven't been able to ride since July 4th...and wont get to ride all Sept but after that, it's petal to the metal!
 
John Bozi said:
t0me said:
The chainring maximum size would be an issue for sure. Also from 2010 onwards I think the Giant Anthem and glory has the curved bottom bar of the frame, they suck for a mid-drive without changing the bottom brackets so you can have it a lot further forward, otherwise the motor will point right down and totally stuff your clearance. Would make for a crappy bike offroad.

Yeah I know LR has the stretch kits to accomodate for the bar and Im fine if the inner chain ring is smaller, its just whether or not the outer one that comes from the motor will clear or not.

17422_10155400722530494_4502505077596332579_n.jpg


If Zack Jordan on LR facebook could confirm there was no clearance issues on his glory (which type and year too) and if I could work out if the design spacing is the same I could go ahead and buy...

EDIT: also note his "torque arm" which basically would destroy any chances of mounting a few batteries in the triangle.

Sorry, been out of town and finally getting back...

2014 Giant Glory with LR's "stretch" BB adapter. There are NO issues with his kit and the BB. I attached a torque arm to the upper pivot of the shock linkage (under the seat) and it's a 5 minute job (I just cut a bit of 4130 and smashed each end in the vise, drilled and mounted with a longer bolt, washers and nuts from ace). The BB has so much torque it was twisting the kit and slackening the drive chain under load. I also had to ditch the belt since no matter how tight i got it (to the point of flexing the pulley and jackshaft) it would still skip. Now it's a lot louder but I think I have it worked out as bombproof. For the drivetrain, I'm running 3/16 kmc chain with 2 18t cogs sandwiched together in the rear (and about 8 others welded on each side to keep it from slipping on the freehub). I grabbed an old deraileur and added some washers to each side of the rollers so the 3/16 fits perfectly with no slip (I still want to install a hanger that takes that last bit of slop out since the kmc chain is heavy). Oh, I also added a spring loaded tensioner to the chain on the drive side since i was seriously having issues with sprocket/pulley alignment vs chain tension... I'm pretty close to having it worked out, we'll see today if i get a chance to ride.

If you want pics of any of this, let me know the specifics.
 
Thanks Stonezone,

I would love some pictures of the mods you have done which are beyond off the shelf stuff on the kit and your bicycle.

How much power are you running?

Have you noticed any damage to the pivot hole? (stretching it?)

Michael suggested that the torque arm is required for big block and even more so for the stretch kit, so I gave up on the giant and went Intense m6 with straight down tube. (see signature) Once I install I'll have to work the Torque arm geometry...

How many hub rebuiilds have you done?

thanks.
 
Hi Mike,
Just to say your kit is really great !
I must improve the battery integration and waterproofing (during next winter), but I'd like say here the kit is great !
Riding with is a pleasure ! (Between 20 & 30 km without pedaling, max 55 km/h but with a really good torque !)

Bought with Lyen 12FET, nice combination.
"Small" kit (1500w nominal) / 20S1P (8Ah) Lipo, after riding 200km = no problem, no heating ! (I limit to 35A & 2500w with CAv3DPS)

See pictures below !

David, from France
(apologies for my bad english :D)
 

Attachments

  • DSC00500.JPG
    DSC00500.JPG
    176.1 KB · Views: 978
  • DSC00529.JPG
    DSC00529.JPG
    192.9 KB · Views: 978
  • DSC00536.JPG
    DSC00536.JPG
    226.3 KB · Views: 978
  • DSC00542.JPG
    DSC00542.JPG
    187.2 KB · Views: 978
  • DSC00550.JPG
    DSC00550.JPG
    173.3 KB · Views: 978
  • DSC00564.JPG
    DSC00564.JPG
    190.6 KB · Views: 978
  • DSC00581.JPG
    DSC00581.JPG
    238.8 KB · Views: 978
  • DSC00602.JPG
    DSC00602.JPG
    308.5 KB · Views: 3,161
  • DSC00608.JPG
    DSC00608.JPG
    338 KB · Views: 3,161
  • DSC00610.JPG
    DSC00610.JPG
    310.2 KB · Views: 3,161
I directly changed the rear hub : a Hope pro evo 2 with option steel cassette body. The old was a Reverse without possibility to change the bearing (ratchet side) ( :evil: ) and it was with only 3 Pawl Ratchet
 
DAvdav,

thanks for your hd pics,

I am most interested in your mid chain tensioner, please explain. what are you using there?

EDIT

I imagine you are amazed with no overheating because you are using gears and keeping it at relatively low power levels.... can you comment more on that?
 
John Bozi said:
Thanks Stonezone,

I would love some pictures of the mods you have done which are beyond off the shelf stuff on the kit and your bicycle.

How much power are you running?

Have you noticed any damage to the pivot hole? (stretching it?)

Michael suggested that the torque arm is required for big block and even more so for the stretch kit, so I gave up on the giant and went Intense m6 with straight down tube. (see signature) Once I install I'll have to work the Torque arm geometry...

How many hub rebuiilds have you done?

thanks.

I'll be able to post some pics after i get my phone replaced thursday.

Pivot hole damage: yes, alignment of 1 (of 3) on each side is, off but structurally sound.

The chain tensioner i'm using on the secondary drive chain basically eliminates the need to deal with that pivot. Maybe not the best solution, but it doesn't seem realistic for me to have everything tensioned correctly with stretch, flex and correct alignment. spring loaded tensioner literally added 5 years to my life from stress reduction.

Not a single rear hub rebuild but I went through a bit of a process getting the cogs and chainline correct. I have spare cogs now, I'm thinking about dropping down to 16t. I'm running 84v 15Ah on the Lyen 18FET. Things get warm when I hammer it, but that means pulling like a motorcycle for long periods in uphill windy single track so i'm not sure what going down a couple of teeth would do to that.
 
Look forward to them thanks stonezone. Stretching the pivot hole even more over longer periods = a few years, sounds like a possible future issue would you say? It could lead to first clacking suspension and if unchecked with a worse case scenario a full suspension collapse during riding and bike right off. Call me a pessimist...

Another concern is that I see most people are going high voltage low amps. I was hoping to go the opposite but looking at the photos only, I wonder if the phase wires are up to the task of 80 amp continuous for say 5-10 minute section of mountain climbing.

I thought the need to go higher voltage could be done away with since we have the liberty of sprocket changing for higher speeds. Higher voltages are also more dangerous and can be more of hassle for charging.

Anyway I was planning to start of with 12s3p with a 3kw continuous 80amp max set up = suits my lipos, greentime controller and charger.

Michael said the big block is good for 60 amps, which I presume is the recommended maximum continuous rating for the kit...... Not sure if I am misunderstanding something here too....
 
Better check out a wire gauge table before proceeding. 80 amps requires a 6-8 awg wire, depending on the run length; phase wires are usually around 12 awg, although I don't know the specs for LR's motor. Please re-evaluate the cabling for your system if you are intent on running high amps/low volts. Safety first!
 
sparkz said:
Better check out a wire gauge table before proceeding. 80 amps requires a 6-8 awg wire, depending on the run length; phase wires are usually around 12 awg, although I don't know the specs for LR's motor. Please re-evaluate the cabling for your system if you are intent on running high amps/low volts. Safety first!
just wanted to reply the same. even if the wire can handle it w/o melting it will get very hot. had a 30min ride full power and my 10awg power wires (no air flow) were hot afterwards (2.5kw peak, 50a). i would no do 80a on 10awg for a longer time.
 
izeman said:
sparkz said:
Better check out a wire gauge table before proceeding. 80 amps requires a 6-8 awg wire, depending on the run length; phase wires are usually around 12 awg, although I don't know the specs for LR's motor. Please re-evaluate the cabling for your system if you are intent on running high amps/low volts. Safety first!
just wanted to reply the same. even if the wire can handle it w/o melting it will get very hot. had a 30min ride full power and my 10awg power wires (no air flow) were hot afterwards (2.5kw peak, 50a). i would no do 80a on 10awg for a longer time.

It is starting to sound like 60 amps is a peak burst figure....

Izeman yours is stock wiring big block?

Thanks all can anyone confirm big block wiring as 12 or 10 gauge for the record please. I am going to have to reorganise my battery pack now. Since they are 4s packs either 16 or 20s and probably drop down to 2p and buy a new charger (hope Justin brings out his HV satiator soon).....

bummer because if I was to stay around 40amps, I would have bought 10c multi star packs.... if I have to go over the 60v satiator I run now, I might aswell go right up to 20s with a 3 way switch, buy a new charger.... just buy one more pack to have 5 a side (16s 2p is neat but not enough juice)...

11898690_10153456453114845_8440985145648832264_n.jpg
 
Hey Guys-

I just logged on here to post a video and saw that the thread has been running for some time without sending me e-mail prompts. I don't know if I missed one and then it didn't try again or what. Sorry for not responding to your posts. I've been crazy busy with work and then was out of town for about ten days. I was wondering why my thread was so quiet. LOL

Here is a video outlining the various connections for the electrical components. I know it's super basic for a lot of you but other folks keep asking for this information so here it is.

https://www.youtube.com/watch?v=QBJfvwPkKDg&feature=youtu.be
 
I almost never build finished bikes. David F called me last week from Portland, OR (about 90 minutes from my shop) to tell me that his LBS was having a hard time installing one of my big block kits on his Specialized full suspension bike. They were also charging him by the minute. So I had him bring his bike down so that I could sort it out.

It turned out that David's bike needed an extended lower bracket to clear the curved front downtube. The LBS had bolted a piece of square frame tube in between the upper mount and the bike's actual frame. I took everything apart and installed a stretch lower bracket. There were no problems fitting the kit after that. The hardest part was getting the right side crank arm back off of the ISIS axle. David insists that the mechanic at the LBS was not an 800 lb gorilla so he must have used a 6' breaker bar to tighten the crank bolt with.

Since I was already working on the bike I made a simple torque brace out of about $2 worth of aluminum angle stock purchased at Home Depot.

1.jpg


2.jpg


3.jpg


4.jpg


5.jpg


6.jpg


7.jpg
 
I still get PMs and e-mails from people wanting adjustable sheets for their GNG kits. Because of the 10mm difference in motor widths between the GNG and my small block mid drives, my current brackets and jackshafts won't fit the GNG motor. I'm already extremely busy producing complete mid drive kits so I've stopped making the GNG width parts. I've also noticed recently that GNG has integrated the upper bracket into the motor case. So now not only is the geometry wrong and the tensioner useless, Jon has made it much more difficult to fix the problems.

Sorry pchen.
 
Rotem- Since you seem to like corresponding in public, here is my last e-mail to you from July 21 that I have not received a response to. I need measurements from your jackshaft housing and axle before I can complete your order. I'm too busy to chase you for this information.

July 21, 2015

Hi Rotem,

I'm not sure that I've explained that my new mid drives use a motor that is 10mm wider than the GNG motor. This changes the spacing and alignment on EVERYTHING since the kit is bolted to and built around the motor. Most of my new parts like the jackshaft and axle will not fit your GNG motor.

Here is what will work or new old parts for GNG that I have not sold out of yet:
25mm drive belt (new)
ACS freewheel (new)
#219 to freewheel adapter plate (new)
Upper sheets main side plates (new)
Lower mounting sheet, 68mm BB side (new)
Lower mounting sheet, GNG motor side (remaining old stock)
Lower adjuster (new)
18T 25mm GT driver to fit over GNG pulley (remaining old stock- last two)

Parts that I can modify to fit the GNG width motor:
Upper adjuster plate (new)

Parts that I can have made to fit the GNG width motor:
Aluminum jackshaft housing (new)
Stainless steel jackshaft axle (new)

Parts that I do not have and can't get:
GNG width motor
Motor shaft for GNG motor

Here is your parts order:
upper mounting sheets with tensioner- $58
68 mm lower mounting sheet with tensioner- $65
#219 to bb freewheel adapter plate
jackshaft + axle- Aluminum housing- $75
25mm wide GT drive belt- $40
two freewheels - 28*2 = $56
two aluminum pulleys that slide over the GNG steel pulley ? You are taking the last two. No longer available after this.
two 90T pulley - 60*2 = $120

The jackshaft axles and housings that I have in stock fit the new 78mm wide motor and are too long for your GNG motor. Also my jackshaft axles are now 12mm diameter on the secondary sprocket side instead of 11mm like the GNG. This is to fit my #219 secondary chain system instead of the GNG freewheel driver and bicycle chain. Are you running 219 chain or the original GNG 1/2" bicycle chain?

I've decided that I will not be taking any more GNG parts orders. Because the GNG width motor is not available anywhere except through GNG, and because the wider motors are better and far less expensive, it becomes a waste of time and resources dealing with the GNG parts.

We will either have to work through exactly what you need in terms of the jackshaft housing and axle or I will refund your money. I have to get those two parts custom made for you. I'm willing to do it because I said that I would. You will have to be patient so that I can work those parts in with the production of the standard length parts. My machinist would charge a fortune to do the setup for just one of each.

I apologize for how long this has drug on. You've helped me decide that I do not want to do this GNG work any longer. Please let me know if you want to deal with providing dimension for a custom jackshaft or if you would prefer a refund.

Thanks,
Mike
 
Hi Mike,

Now check if you have emails from:

‎July‎ ‎23
‎July‎ ‎30
‎ August‎ ‎5
‎August‎ ‎10
‎ August‎ ‎30

The title is "Parts Shipment!!!"

If you don't see them, so something is wrong, lets check it.

Thank you
Rotem
 
The last e-mail I received from you was July 20.

Everyone, please do NOT start sending me e-mails asking me if I'm getting your e-mails! Please only write when there is something specific that you need help with. I get more e-mail than you can imagine. It takes up to four hours of my day to deal with it.

Rotem if you have those measurements please PM them to me. I'm getting ready to have jackshafts made and can get your custom length ones done.
 
LightningRods, may I ask you about your kit for the Surly Big Dummy bike?
Is the right side mount plate the same as the right side plate?
Is the lower jackshaft housing and the axle the same as the upper one? Are the adjusters differ?
And what is total width of the mounted kit from the left side chain to the right side belt edge?
 
I would LOVE to talk to you about the Surly Big Dummy kit!

The left and right side plates are completely different. The left side plate is one large piece. The right side plate is two pieces, upper and lower.
The upper and lower housings and axles are different lengths. The upper adjuster is my standard bolt adjuster, the lower adjuster is a custom eccentric snail adjuster that I designed for the lower adjuster on the Luna and Big Dummy kits.
I don't have an assembled B-D kit to take that measurement at the moment. I'll see if I can get Dean, the owner of the prototype bike that is running now to take that measurement.
 
Here is something that Dean and I are working on with Grin Technologies for the Big Dummy kit.

Since the human power is isolated from the motor power on this drive there is a chain run that's ideal to take strain readings from for a torque sensing throttle. We've started out with a BeamTS strain gauge and a magnetic PAS cadence ring. The information from these two sensors feeds into the CA3 and provides basically the same data that the torque sensing bottom brackets do. Except that we are reading the pedal drive chain which is the output of both cranks instead of just the left one. On torque sensing bottom brackets only the left side crank is measured for strain. Starting out with the right crank (most people's dominant leg) will not produce any throttle input.

Dean just has the components physically hooked up on the bike. Hopefully it will be working this week. Thanks to Justin, Robbie and the other brainiacs at Grin for their support with this project.

BeamTS-PAS.jpg
 
Anyone have a good way of locking out their upper adjusters (jack shaft)? I've got over 1000km so far and over the last few days (~60Km) I've noticed my adjustment nuts have been coming loose...should I be locktighting with removable?

I tried doubling up the nuts but they both seemed to vibrate loose. Any ideas?
 
Back
Top