• Hello ES! We could use some help to get us past the finish line on building the new knowledgebase for the forum.
    Can you donate? Please see our fundraising page. Thank you!

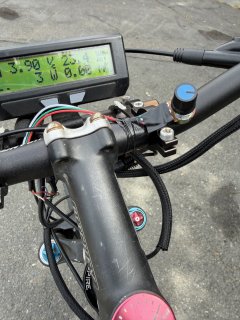
My econo-e-bike

My full suspension build has finally got me back on the bike and motivated. I stripped down my bike to the frame, swapped out the bottom bracket with the torque sensor, and fit the chainring and cranks. The chainring spider and bolts rubbed on the chainstay and needed some "adjustment". I used my bench belt sander to shave a small amount of material from the corner of the bolts and spider so now I have a half millimeter or so of clearance.
I also used a round file to touch up my right dropout so the rear wheel is aligned better (something that's been bugging me).
I'll probably do the heat sinks next and figuring out if its feasible to relocate the controller. I need to go to the plastics store to get some ABS for the new connector box and battery tray (under the rack). I'm saving the electrical stuff to the end, including the cable consolidation.
 
Now with the torque sensor, do you notice a difference in your chainline? Maybe the spindle lengths were very similar?
The chainline is very close to what it was. With the old bottom bracket, my chainring had about 1mm or clearance with the chainstay, after adding a set of washers on the spider to space it out that amount.
 
The chainline is very close to what it was. With the old bottom bracket, my chainring had about 1mm or clearance with the chainstay, after adding a set of washers on the spider to space it out that amount.
I’ve been noticing that method of mounting the chainring. If I did that with my existing spider, it would be a 3-5 mil difference. I’m not sure if that’s noticeable or not.
 
I"m glad your bike is still hanging in there as well as you. finally read up your accident (thought mine was bad) Need to drag out my trike and start to work on it. your an inspiration, best of luck.
Thanks. I really needed to get back on the bike. Sitting around the house has been killing. After finally getting started on it, it hasn't been too bad.

Here's how it looks stripped down. Almost a clean slate. I think I need to paint the Leaf's side cover. It's scratched from the derailleur dragging on it. The new hanger was an exact match. I still have to trim the new shifter cable, from replacing the destroyed grip shifter.
Stripped.jpg
 
Current Configuration (04-18-24) of my e-bike:
tsunami-jpg.351369


Motor:
Previous:
MXUS 1000W slow wind 9C clone, 26" generic rim
Current:
Leaf 1500W 5T, 24" Halo SAS rim

Controller:
Previous:
18 FET KT 30A Sine Wave
18 FET 7kW PowerVelocity controller
Current:
No name "80A" Sine Wave w/3-speed switch, cruise; shunt mod to 91A

Display:
Previous:
KT-LCD3
Current;
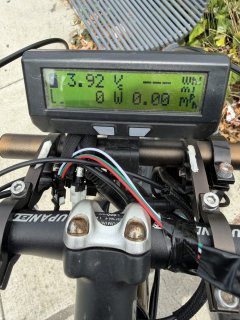
Cycle Analyst 3.2

Battery:
Previous:
14S8P 30A 20Ah, UPP hard cased triangle, generic cells
Current:
Series packs:
Pack A - 14S8P 40A/80A 28Ah, UPP hard cased triangle, Samsung 35E paralleled with (2 x 7S 5Ah 60C in series) Turnigy Heavy Duty Lipos
Pack B - 6S 24Ah 45C, (3 x 6S 15C 8Ah in parallel) Turnigy Graphene Lipos


Frame:
Previous;
Yokota chromoly
Current:
Cove Stiffee aluminum

Fork:
Previous:
Specialized 80mm travel
Fox Talas 160mm travel
Current:
Fox Vanilla 160mm travel

Brakes:
Previous:
Shimano side pull
Avid BB7
Current:
Tektro knockoff 4 piston hydraulic (Meroca M4), 203mm front, 203mm rear

Tires:
Previous:
Numerous
Slick road tire
Forté Tsali 26x2.2
Schwalbe Crazy Bobs 26x2.4
Goma TNT 26x2.4
Arrow Racing Prime Bite 24x2.75
Mongoose Fat Tire 24x2.8/3
CST Fringe front 24x2.8
Specialized Big Roller rear 24x2.8
Current:
Maxxis Hookworms 24x2.5

Seatpost:
Generic pogo stick suspension
Current:
Thudbuster LT

Seat:
WTB Rocket
WTB Pure
Current:
Cloud 9 medium


Planned upgrades:
Replace undersized breaker
Torque sensing BB
Hub heat sink mod


Thoughts on Initial Build:
12-29-18
I’m really loving my economy e-bike conversion. I wasn’t sure at the onset whether I’d like the e-bike thing, so I decided to go with an economy build, but decent enough to give it a good chance. I started with the least expensive (i.e. cheapest) 1000 watt, 48 volt, rear hub kit that I could find on e-bay. Actually it wasn’t the cheapest, since that one would have taken too long to deliver, but at $144, it was pretty cheap. The motor I received was a MXUS (XF 40 1000W 1610 0020 stamped on the side cover). Looked good, spokes were all tight, rim straight, etc. I knew I wanted the bike to be silent, so I bought an 18 FET sinewave KT controller, and KT-LCD3 display and chucked the kit controller. For the battery, I decided to go with something with decent capacity, and 52 volts for a little extra power; ordered a UPP 52 volt 20 Ah triangle pack in a hard plastic case (cheap Chinese cell version).

The donor bike was my first steel framed mountain bike, which I had upgraded about 25 years ago with a suspension fork (when they first started getting popular). The original brakes were cantilevers, but I upgraded to v-brakes when I converted the bike for street riding, after getting a full suspension mountain bike.

The parts arrived, and everything went together pretty easily. I only used the brake levers, throttle (switched out later) and PAS sensor from the original kit, and everything else went into my parts bin. I charged the battery for a couple of hours, not nearly to capacity, but since I was anxious to test it out, decided to head out for a short test ride, cables hanging all over and controller held in place with duct tape. My driveway slopes upwards to the street, and as I started to pedal up, I twisted the throttle, and the bike wheelied right way, but fortunately came down straight as I zipped out onto the street. Big smile; I could tell this was going to be fun!

I rode down the hill to a walking/biking trail for my first short ride. The bike got up to 24 mph on the flat paved trail, no pedaling. I was expecting more, given the 52 volt battery and upgraded controller, but wasn’t too disappointed. I ended up riding about 4 miles out, then back, smiling all of the way. Then I came to the hill up to my house. 5% grade at the bottom, 6% for the last 3 blocks. The bike zipped up the hill effortlessly.

Posted a few messages on the forum, asking about the top speed, since I had been reading a lot and watching YouTube video, so I was expecting to get 30 mph. Found out that my motor has a slower wind, but since 20 mph or so felt good, didn’t sweat it.
The issue I noticed right off was that the PAS, even on level 1, had the motor contributing more that I wanted. My single front chainring (I chucked the other two and the derailleur when I had converted the bike for street use) was 36T, with 13-34 cogs on the rear. I ordered a 40T and 46T so that I could dial in the bike for a comfortable cadence at 20 mph. 46T worked out perfectly, allowing me to pedal and keep the motor pulling 250 watts at 20 mph, and me making up the difference at level 1, with 46:13 gearing. I could either downshift or up the PAS level if I needed more motor on hills.

Now to what I love about my econo-e-bike setup. First, the range is great. By my calculations, with the above levels of contribution, the range should be about 80 miles. That’s assuming I consider the battery empty at 47 volts. This seems to be consistent with the real world, since I did a 48 mile ride and the battery settled to around 50.5 volts when I got home (charged to 57 volts at the start).

The second thing I really like is how the motor pulls off the line at an intersection. I apply a little throttle while pedaling lightly, since too much pedal and throttle and the front wheel gets light or pops off the ground. I usually forget to downshift for an intersection, but I can zip across the intersection starting in high gear without a problem.

The third thing I like is the regen. At first I was only using level 1 for regen, which works great for charging, but without much braking. But on level 2, it’s noticeable, and since I live on a hill and ride mostly on the hills, the extra braking power is great.

The fourth, and best thing I like about my bike is the hill climbing power. After several rides, I’ve found that it’s not the motor that is the limiting factor for my, but traction. On pavement, 15%-20% segments of road aren’t a problem. I pedal a lot, which I like, but the motor never has fallen short or let me down. Everything has stayed cool so far, too. Until I replaced my slicks with some 2.2 trail tires (not full on MTB knobbies), I wasn’t able to make it up 20% grade loose dirty/rutty trails, but after switching over, the bike made it up a 400ft section with a 25% grade. I didn’t think it would, but when I crested the hill, I was amazed and overjoyed. I love it. Of course the power is pegged at 2000 watts, the highest the display will read, under those conditions. I'm glad I opted for the 18 FET controller!

I’ve been climbing every hill I could find within a 15 mile radius of my house, on my side of the bay, which is probably all of them. There’s on mountain, 3800 ft, but that’s about 20 miles from my house, but a lot further, not using highways, by bike. Since all my rides start out basically at sea level, anywhere I go usually includes a climb. I love this economy e-bike!!!

This is the hill behind my house; actually the hillside. The top of the hill is about 700 ft elevation, but this is partway down at about 500 ft. I never cared to ride this trail when I was more into mountain biking, since there lots of real mountains to choose from, but it turned out to be a hidden gem, with some really steep trails, that the bike eat up.View attachment 322057
Google Maps

This doesn’t really qualify as a hill, but I rode 48 miles this day. This is a shot from Yerba Buena Island, in the middle of San Francisco Bay. This half of the Bay Bridge has a walking/biking path from my side to the island. My house is on the side of the hill in the far distance. This spot is only about 200 ft elevation, but I rode up over the top of the island, 250 ft, to go over to the other side of the island. Actually, Yerba Buena is a real island, and the other side, Treasure Island, is man-made, built for the 1939 World’s Fair. There still a Naval facility there, but they’re tearing up the island to build a multi-billion dollar housing complex for the rich. Unobstructed panoramic view of SF and both bridges from that side. I was still testing the 40T chainring on this ride...too small.
View attachment 257545

This is a funny little hill down the street. Funny because it just juts up above basically flat land all around it, down near the bay. I looked it up, and it something to do with the many geological plates in the area, cramming together to form a hill. There’s a lot of plates and faults here in earthquake country, and my house is very close to a major one (I have lots of disaster supplies in my backyard, ready for the BIG ONE). 300 ft at the top, riding up a few steep streets, and a nice steep single track trail down the other side. If you squint, you can see one of the towers of the Golden Gate. First ride with the 46T chainring. Perfectly dialed in now. View attachment 277300
Here’s what the funny hill looks like from the inland side.
View attachment 277299

This is the trail on the other side of the hill from my house. I ride downhill from my house and over a couple of miles to one of the trail heads. Then ride up about 1000 ft, take a loop trail back down, then back up another 600 ft or so to the top of the hill behind my house, so I can ride down to my house. This shot is from the top, above the 20% hill that I couldn’t make it up with my slicks. Still, there were plenty of 12%-17% segments that the bike had no problem with. The sinewave controller came in handy on this ride, since there were a couple of places on the trail where herds of cattle were hanging out. I rode between cows, about a foot on either side of me, and they just looked at me while chewing on grass. The e-bike is totally silent; the only noise was my huffing and puffing.
View attachment 277298

This is the last hill I’ve found so far on my side of the bay. Similar to the other funny hill, this one also jut up near the shoreline, about 10 miles from my house. This was my first ride on my new knobbies. I told my wife I was going around the block a few times to test my tires, but then the e-bike just decided to go further on its own. Got home 35 miles later. This shot at the top of the hill is at 350 ft.
View attachment 277297
I saw that there were a bunch of trails leading down from here, when looking at Google Maps before my ride. I decided to descend this trail, but didn’t realize there was a 25% drop off right where the bushes start. Even with the knobbies, the wheels were skidding and locking up. I decided that descending on anything steeper might be a little iffy, with the extra 30 lbs of e-bike and v-brakes. I stopped at the bluff in the background to reassess, when I saw that both trails that forked off were much steeper than the one I came down, so I turned around. I really didn’t think the bike would be successful going up, but the tires gripped and 400 feet later, I crested the steep section. Wow, I love this bike!
View attachment 277296

After I got home, I checked what the grade was on those two trails. One was about 30%, but the steeper one was a 50% grade! I’ll leave those for another day, if I ever decide to put on some beefier tires.

I’m going to build another bike for offroad, with a mid-drive for better hill climbing, within the next year or so. I'm already acquiring parts. Of course there’s always trade-offs when building something more narrow in scope. But, right now I’m really enjoying this combination of long range, silent riding, and decent climbing that I have now.

Thanks for reading, and for all of the help I've received on this forum! :bigthumb:
I like the battery configuration. Currently I'm doing this ..uh..36v 30A + 24V 25 series configuration.

It looks like the controller treats it like a 60v battery.

Your configuration gives me inspiration. :geek:
 
I like the battery configuration. Currently I'm doing this ..uh..36v 30A + 24V 25 series configuration.

It looks like the controller treats it like a 60v battery.

Your configuration gives me inspiration. :geek:
I don't know about inspiration. It's pretty scary, but I'm always there while charging and monitoring the voltages. Plus, there's only one BMS in the configuration; in the 52V triangle. It will protect itself, but nothing else is protected or damaged if it trips. I only use about a third of the capacity and never fully charge or discharge.
If you have multiple BMS's involved, then it gets more complicated.
 
I don't know about inspiration. It's pretty scary, but I'm always there while charging and monitoring the voltages. Plus, there's only one BMS in the configuration; in the 52V triangle. It will protect itself, but nothing else is protected or damaged if it trips. I only use about a third of the capacity and never fully charge or discharge.
If you have multiple BMS's involved, then it gets more complicated.
Well, you could say I "fully discharged" mah 72v 2 36v 30A batteries in series today, but it didn't hit the BMS cutoff.
I should have like 4-6 volts to go. The controller cuts it off @ 62-64v. Should be able to run until 58v or so.
Those batteries are identical and have been very good. That setup is a win for what it is.
It's fairly nimble and has good top end and decent range.
 
Last edited:
If your going to take it off and paint it, you can inspect it for frayed wires, make a ferofluid hole, open it up and inspect it. That's what I need to do to mine.

maybe a new set of bearings.
 
Last edited:
My neighbor stopped by yesterday to try out my TSDZ8 build. He tried it when I had the stock firmware, and like me, wasn't too impressed. He was suitably impressed after trying it now with the updated firmware and on 52v. The firmware made the biggest difference, even at 48V. Anyway, we both looked at my stripped down bike, still in the same state, with just the torque sensor and cranks installed, sort of sad, but I'm still holding off on the rebuild until I'm in better physical shape.
However...since getting my new battery for the TSDZ8, with the fancy bluetooth BMS, I'm now spoiled by more data. Ugh. Now I'm trying to think of ways, besides replacing my batteries, to monitor battery temps. I have a lot of notes/data on my motor temp testing in various conditions, which has been helpful, at least to me, but nothing on how the battery is impacted by running higher current, etc. If I replace the battery, then the BMS will be part of the specs, but I'm not sure how hard it would be to just add a sensor to the pack. The two in the TSDZ8 pack monitor cell and BMS/FET temps.
 
I’ve been thinking about how to go about adding a temp sensor to an existing pack as well. Seems like the best way is to replace the BMS for one that has that function, to accept the sensor, as well as Bluetooth, but that’s beyond the scope of my abilities.
 
One simple way would be to use a standalone remote temp sensor. They can be obtained very cheaply on AliExpress:

1753190507984.png
Batteries last about 2-3 years.

Replacing a BMS with a "smart" one probably doesn't make sense with old cells, but it's a good idea when building a new battery.
 
My econo-e-bike is currently apart on my patio. This may be it's last upgrade/version, and I'm lightening it up a bit and getting al of the batteries in the triangle. I decided the Bicycle Motorworks battery was too good for my TSDZ8 dog, so I'm putting the old crappy hailong back on the mid drive, and moving the 14S BM battery to replace the Samsung 35E triangle pack, which would give me the space to hopefully get the BM battery and a couple of 6S 12Ah lipos in the triangle.

After test fitting the batteries, I realized that I still need about a 1/4" clearance to fit them once the box is built.
1785704039325.png

Here's where the 1/4" is coming from, by angle grinding off the cable routing stops on top tube.

1785704135305.png


I got most of them ground down, but need to finish up with a straight file.**
1785703950260.png

After test fitting again within the ABS perimeter of the pack, and rotating the lips so they are side by side instead of stacked to gain another 1/8", I still need between 1/16" to 1/8". ***which I believe I will get once I file the rest of the cable stops flush with the frame. If this doesn't work, I'd need to opt for 1/8" ABS instead of the 3/16" I'm using. In any case, I'm pretty sure I'll be able to squeeze them in in the end. It got too hot out to keep going, so I'll clean things up and hopefully get in to all fit tomorrow.
1785704324032.png
The improvements are eliminating the extra helper lipos for the 14S pack that I was using, since this pack will have no problem supplying what I need with minimal voltage sag, and based on the charge rates of the lipos and BM pack, I can bulk charge at 12A (or more) without breaking a sweat.
I'll also be able to mount my circuit breaker switch on the triangle enclosure, and reduce, or possible eliminate my connection box.

EDIT 08/03/26 - I had to go with 1/8" ABS which provided a perfect fit with very little room to spare.
1785796445146.png

I'll add some small ABS "shelves" to support the ends of the big pack, and another under the lipos. I plan on cutting a channel in the bottom of the case to route the larger pack conductors under the pack and series connect to the lipos, and also mount the breaker swtich in bottom rear under the lipos.


1785796488094.png

The fixed side panel rough cut and cemented to right side of the case. I'll reinforce the seam once it sets, then sand and blend it in the side cover with the perimeter part of the case.
1785797083151.png

I'm still deciding on how to attach the door on the other side, but I have a bunch of these for replacing them on my cars, so probably the way I'll go. I'll cover the whole thing in the faux carbon fiber wrap. There’s still a chance that I may add some skunkworks sticker ala SR71 blackbird, or maybe bring back the flames.

1785798141672.png
1785797261494.png

The case is screwed (4) to the two bottle mounting points on the downtube and seat tube. I'll probably add another attachment using 1/2" zip ties, securing it to the top tube, somewhere in the middle.
 
Last edited:
I keep staring at the case with the batteries inside, and ways to minimize the visible e-stuff. I did a few more measurements, and have tentative plan. I can place my controller behind the seat post and still have about 3/8" clearance with the rear tire. So I'll get some paint and paint the controller to match the bike. It won't disappear, but it will be less noticeable than silver, and this moves it from it's previous location under the rack.
The motor cable will route directly to the controller, and I'll shorten the cable as needed to keep it clean. The location of the controller will allow a very short routing into the battery case from the rear. I'll likely cut a u-shaped opening to make routing easier into the case when the side cover is open. I'll add a small hole at the lowest corner of the case to route the PAS cable which will also function as a weep hole in case any water makes it into the case. One additional opening for routing the CA cable, key switch, and a cable from the buck converter that the case also has room for. So the case will replace my connector box, house the buck converters, and keep my breaker switch near the batteries.
For the side cover, I'm going to bring back the piano hinge, along the top of the case, with weather stripping around the perimeter, with three of the automotive push fasteners to hold the door closed.
In the end, most of the e-stuff will be together, and minimizing exposed cables (any exposed will be wrapped). I'm also looking at those longer saddlebags to make the hub stand out less, but I kind of like the cleaner look with just the rack in the back.
 
Mounted most of the e-stuff temporarily with a bunch of zip ties. Switches, throttle, and grips mounted on the handlebars. Still need to put on my front brake lever and caliper, but ran into a slight hiccup with the rear brake lever, that has interference with the throttle body, preventing the lever from fully disengaging. I may just notch the throttle body housing to see if that provides enough clearance, so I don't have to rearrange the controls on that side.

The battery case is sanded and prepped for the carbon fiber wrap, but I need to reinforce the seams of the fixed cover more, since I accidentally spilled my can of ABS cement before finishing it up, ugh. I'm thinking of just adding a bead of JB Weld on the inner part of the seam which should do the trick. I need to go to Home Depot and get a piano hinge for the access cover, but I'm going to decide whether to go that route, or get some heavy duty magnets and use them to secure the cover as another option.

1785872537466.png

I need to shorten the stainless bottle cage mounting screws to mount the case, and slightly modify the case's mounting holes to align it before bolting it down.
1785872593294.png

I needed to grind off another cable routing anchor in order to mount the controller behind the seat tube. Not sure that I need to hit it with some spray paint or not, but probably will when I get to painting the controller.
1785872627670.png

Usually at this stage I'd be rushing to duct tape and bungie parts onto the bike to take a quick test ride, but I'm resisting and hoping to take another day to get it closer to completion.
I won't do the final cleanup items, like shortening the motor cable, and wrapping the loose cables, until after some testing, to make sure I like the controller mounting position.
1785872643633.png
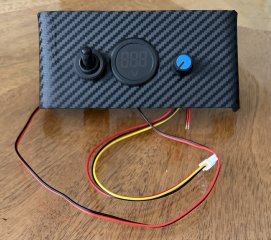
I'll be adding two small two wire voltmeters on the top front of the case for monitoring my battery voltages, so I still need to order those, but if I ignore all of the zip ties and loose cables, the bike is pretty close to how it will look finished. It will have less stuff hanging on it than the last iteration, and will lose a few pounds in the process, :bigthumb:
1785873449248.png
 
I'm just happy to see you building again and think econo ebike is cool :)
Thanks. What I like about it is that it started out dirt cheap, and has been on a continuous upgrade path ever since, mainly from things I learned while riding and testing, and the knowledge shared by folks here on ES along the way. After a couple of years, and learning how to leverage the Grin Simulator, it became possible to get the exact type of performance/behavior I wanted for the riding environment I live in. I really didn’t know what I wanted on day one. I may have thought that I did, but it was nothing close to what I wanted after a year of riding. The “econo” part of this bike, isn’t that it’s made with a bunch of cheap parts, even though it started out that way. It’s that I got value out of each dollar spent along the way, avoiding having to plunk down a ton of money on what I thought I wanted, and then having to live with it.

I hope it will look very finished/clean after this round. I’ll probably sell the Tsdz8 and battery once this is done. It didn’t really perform the way I wanted, and my neighbor may be interested for converting his old road bike. Even though I’d pedal the whole time, I think I got more exercise with my hub drive since I’d ride longer, pedaling/exercising on and off. If I’m far from home and tired, I could just throttle back, with some pedaling here and there. With the Tsdz8 I’d limit my range, knowing I’d need enough in the human tank to get home.

The next build will likely be a recumbent of some sort since it’s harder to stay in the saddle too long for me now. Age kind of sucks, and I see now why a lot of older ESers go that route for one reason or another. The standup scooter has been relaxing, and I’m having fun at 15mph and it’s good for quick trips to the donut shop or taco truck too. I have two 14S triangle packs with plenty of life left in them, so a super long range stealth recumbent build is what I’m picturing.


Off topic observation: I had another first siting today. Previous first were the first Surron, Stealth Bomber clone, RC motor mounted on the rack powered belt drive, all the popular mid drives, etc. Today I saw a short Asian gal with big glasses and half helmet streaking by on what looked like a small Stealth Bomber, but not the cheap kind the kids are riding now. It exhibited some real power when she accelerated across the street intersection of the path. She was very focused. Must have been a trap/square wave controller, but it sounded real good lol. Interestingly, I’ve seen fewer of the intense old ladies on mid drives lately, so the path is a little more relaxed. It’s a whole new mix from two years ago. Now the kids are practicing wheelies on e-bikes, while they were on wide tire’d 29er pedal bikes back then.
This will be better for my build anyway, since if they start enforcement, it’ll be a target rich environment for the cops, with a lot of others attracting their attention before they notice me. ;)

EDIT 08-05-26

The JB Weld worked great and the box feels nice a stiff now. With the 4 botte cage screws tightened up, the box is totally solid, so I'll probably skip any additional mounting points. Adding the access slot down by the controller wiring, and one in the front to route the CA, three speed switch, and power lock switch cables, all connections should happen in the case, but I haven't decided on the location of the breaker switch yet.
1785954748977.png

I've decided not to shorten the motor cable for now and found that the space between the battery case and controller can be utilized for the excess cable. The plan now is to add some ABS panels to hide the cabling, probably using velcro to hold them in place. The panels might even help the controller disappear or be less obvious.
1785954834228.png

The front access hole is big enough to route an XT90 through, but I'm only using it to route the cables from the handlebars to the controller for now, unless plans change.
1785954874221.png
Once I finalized the location of the breaker switch, I can get that mounted and add the carbon fiber wrap to the case.

EDIT 2:
I didn’t get much done today, besides cutting the holes in the case for the conductors. I’ve been thinking more about the ABS panels I’ll make to clean up the controller area and it should be easy. I’ll cut a separate top piece with a cutout for the seat tube which won’t be hard but will look cleaner.

But I’m staying motivated by planning out next steps. I’ll reuse the harness for the batteries, but will swap out the xt60 bulk charging connector for a panel mount version that will have access from the bottom of the case.
1785988669151.png


I’m going to mount the panel connector from the inside, and only cut a hole big enough for the male xt60 to plug in through. I can use a dummy connector to plug in when not charging.
1785986643889.jpeg
I’m getting rid of the PIA pre charge circuit and going back to a 60A AC breaker for my switch. I don’t have to worry about it tripping from peak current, and I don’t envision ever running over 60A continuos for any length of time so no thermal trip. I cut a #8 connector to fit snuggly in the breaker slot. The other side has a screw lug, I think I’ll only be metering my 6S lipos to monitor voltage. It’s simple math to check the 14S pack, but I’m not as concerned as with the lipos. Plus I can see it on my phone via Bluetooth.
 
Last edited:
Back
Top