fingret said:
... Could someone be kind and give me ebay-links to the things I need to make the connection? I bet there are more people than me who does not want to order things that dont work....
Here's how I built a programming cable. It's probably not the cheapest but it's pretty easy and straightforward (meaning hard to mess up!). First, I ordered the genuine
Bafang Display Extension Cable that satcamel posted about back on Page 8. This is the most expensive piece but ensures that the connectors will fit without having to modify or substitute or otherwise jury rig a connector. Here's what it looks like when it arrives from Germany (Update - the Bafang Extension Cable can now be purchased from several sources - check newer pages of this thread for the latest info):
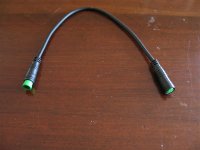
Next, I ordered this
USB-to-TTL converter from Amazon. Others have used similar converters from eBay and other vendors. I like this one because the circuit board is built into the USB connector and it has a nice cable attached. This converter uses the PL2303HX chip which, as aushiker noted upthread, means you can download the
ProlificUSA drivers for Windows. Here's what the converter looks like:
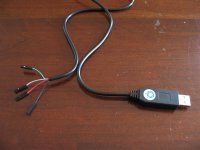
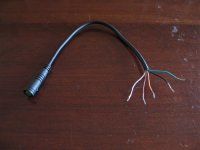
Now the fun begins. On the Bafang Display Extension Cable, you need to cut off the connector that you're not going to use. That is the MALE connector (the one with the pins). Then trim back the insulation to expose the individual wires. You will see 5 wires: Black (GND), Green (TXD), White (RXD), Brown (P+), and Orange (PL). Here's what the Bafang cable looks like now:
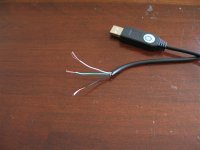
The USB-to-TTL converter has 4 exposed wires: Black (GND), Green (RXD), White(TXD), and Red(VCC). Cut off the individual TTL connectors and then cut off the Red wire completely as it will not be used. Here's what the USB-to-TTL Converter looks like now:
Now all you have to do is a little splicing. Between the Bafang Cable and the USB Cable, splice the Black to Black, Green to Green and White to White. Lastly, on the Bafang Cable, splice together the Brown and the Orange. This jumpers PL and P+ for power to the Motor Controller. (Update - cautionary note from Ken Taylor downthread: "If you connect Brown (P+) to anything other than Orange (PL) expect to wreck your controller in an instant. Maybe it matters if you connect the wrong thing to Black (GND). It doesn't do any harm if you get Green (TXD) and White (RXD) back to front but it will not work.") I soldered the connections and used heatshrink tubing but use whatever splicing/insulation techniques you prefer. Here's a pic:
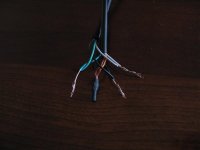
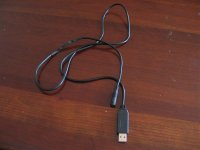
Here's a pic of the completed cable:
That's it! Follow the instructions posted by others upthread to download and install the Bafang software and you're good to go. Have fun!


