RadRunner Plus Rebuild

Joined
Sep 8, 2019
Messages
627
Location
USA, CA, Bay Area
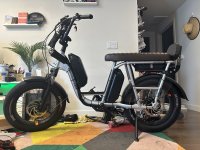
About a year ago my very customized RadRunner Plus was stolen. I've had a few projects under the belt since then, and even some high power bought two wheelers (Luna XXX) but nothing felt quite right.

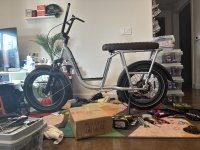
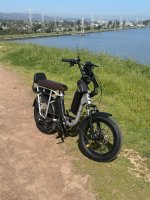
So when I saw a guy selling a RR+ with the OC Cafe Racer seat already included, I jumped on it:
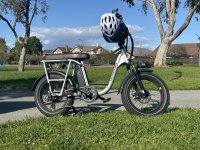
2024-04-07 16.48.48.jpg
(How I got it)

Having been down this road before, it was time to scavenge some parts and begin the rebuild.

What's going to be going on this frame:
  • 72v Dual Batteries (21ah)
  • Phaserunner
  • Cycle Analyst
  • (Eventually) Grin All Axle 45mm Fat motor
  • ERider torque sensing bottom bracket
  • Motorcycle Dash Camera (records front and back, screen as a rear-view)
  • Upgraded, quieter tires + tannus armor and some kind of slime
  • Magura MT5e brakes + 203 rotors
  • A passenger backrest
  • GPS+LTE Tracker
  • Key switch + Throttle
 
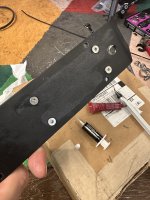
Drilled out the original controller plate and mounted the phaserunner. Added some thermal compound to help heat transfer a smidge.
2024-04-09 10.42.57.jpg2024-04-09 10.43.13.jpg

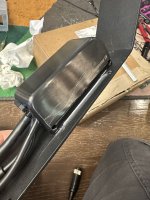
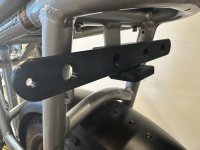
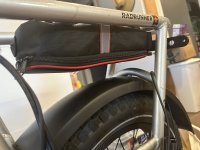
After that, put on the 3d printed adapter for my gigantic brake light (super long, LED row) and tossed in a generic controller case for the "bag of wire shame" storage.

2024-04-09 11.00.58.jpg2024-04-09 13.11.30.jpg
 
2024-04-09 21.38.45.jpg

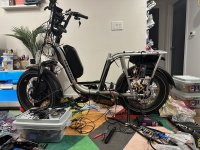
At this stage I've got the battery trays mounted and paralleled. The controller is wired up with a rudimentary, and temporary, motor wire splice + wago's. Many of the connections are wago'd, tbh, to get everything up and running. You can see some of the relays + dcdc's hanging out of the bag as well. The dash camera screen is mounted along with the Cycle Analyst on the stem post. Brakes are installed and wired in, along with the throttle and key switch.

When the batteries are "on" nothing really happens to the bike (except the GPS unit gets power). You must turn the key with turns on the Phaserunner. The PR turning on sends power out of its PAS plug for 12v -- which is used to open a relay that let's battery power to the 12v dcdc converter. Then all the lights and such come alive. (The GPS unit also sees that the 12v converter is on and goes in "online" mode as opposed to "offline protection" mode it's normally in.)

I've diagramed the wiring a bit in "Mermaid". It's pretty rough to read, but I believe everything is there:

pako:eNqlV21v4jgQ_itWpN6XlqoJhQLfWrq3e2pvD9HVrnTOfTCJIRHGiRxDl0X895s478YJ5Q5VhczzeGY8L_bkYHmRT62JdXV1CHkoJ-jgWksWvXsBEdK11LNPl2TL5JxynwoqUqlrUbZ2reMRHa-uXO7ycg1yOYJPsl2sBIkDtAn9RbimKQflnxJbEGkj_ESkpGKP7H8qSvpJ0RjPosQg5_grXdXk4Fr1YLbkVJacU41OiyXnP1jyKkszIghjlJ0q9loMekaDJpMG47FAeBaQhKL5lnMqNPWxeI9H-MdspMlr62OSgIrHN42RrQbQdrDt7NrQFffx56_PGtwImWZvQ0IOFv9Mv4xaU8Jghwe7VnSBn65bwTV-ub7AHUhAmTyjTiCYEleCevZODJYPtbxqLRMQ7jO6ICIxpNgjCE_3HqPokRO2T2RbLj0iAxFJCUz8Lf9l8LqitUW5YkBqDeltcpJwhd_CFfh2LuwegUrsqkaPLMQa4U9PgqzNrgP-6ekFGC9tsNll8EXvoXN9vaZ7hF-oXhUgTt5D_PYeSi9Af3ATHBXwX1t5wUlyNn1dietOWWeyzvml0pG05GyRgumhnn6jV7qUhsxkpBCfhKsCI9wMlrGCunxwCh_m4SpodcLpcsI564R2NlcdvIBDEhlOSgWYDhAFnDn6S_U-SQKEn9P_U7KhgmjKUtxkJJVfep8tGcK_i4hL9GoI5JKZ7CxZq5XalkoTdBH9NO4TQuJ7Plyn_bve-G6HZASi7-h5Cn-ayZwaxpDPeCvRqVMFg-eM03M6Z0RxmvZOJREvKJcFM9gJyggcJF--o3n6S6-CDAf9UkQQ2mn2A1138njJ65l5kfK13NZ1F6vcWe-CfbFiX6_mfbEP7ot9cF_sQ_ti_3tfqxhmk88zfRoCcZyKDQUCEFfQaXkBRBT0OJ22tkaHMwI6cU6JMDaiMDaiYKZ5RLAAjqYvoMV81qjBG_2WjcWo1-tl82oF8hzkJchra71sTTYrVVJeSU-4aUB1ZhrJQmsaOiUsW_TUXrPWdW1l92dAs-QbjLg-k9WnI8WqHnUC3LINBjzrFLhuGxR4LveRXYkKLuaaGuK0InZUIaXJ_PrSkMIdGLnyXMDrQCbMJ2klzkaaTJ7NLzlbzdOFmvxtoB76or0bIS56OdeRvSQUSrRzoWaniC8zaKmikHHKolAodAKUZ3bR5p6o3wpcKlDdj_pqnq_mxWpeW83z1TxfXVYm9JKCmmdNw_e8Ipv1a91YcHHDTn14-T6kfNeSAd3Q7O06f-V2LZcfgUq2Mnrbc8-aSLGlN9Y29omkzyGBk2FTCGPCrcnB-mlNBoPbvmMPnfv70UN_8NC_sfbWpNe3727HzmB8N-rf3w_74-HgeGP9iiJQYN8OR0OnPxoPx3Z_ZNsPjlL3twJT7cd_ASCElCc


You can edit/explore it with the online editor here.
 
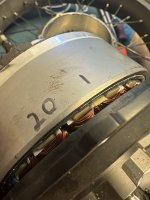
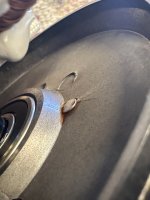
Pulled open the stock RadRunnerPlus motor to check it out. 20 magnets, not suuuper tall, 1 speed sensor magnet on the shell.

2024-04-11 14.20.31.jpg2024-04-11 14.21.00.jpg
Nothing too fancy. I plan to push 1000w through the motor; should hold up fine.
 
Now I'm waiting on a few extension cords so I can clean up all the wiring, bundle it up nicely in sleeve wrap and get it on the road. Hopefully by the weekend.
 
I like the mermaid diagram. Looks like useful software, worth checking out.

It’s a short wheelbase step thru frame. Are you sure you want a rear passenger? The only configuration I can see working is rear facing, with you riding standing, and then without a passenger you having to sit on top of the folded down backrest. Not that there’s anything wrong with that, just that there’s frames better suited to carrying pillion passengers, where you could both be seated.
 
About a year ago my very customized RadRunner Plus was stolen.

So when I saw a guy selling a RR+ with the OC Cafe Racer seat already included, I jumped on it:
That’s a really popular bike here on the east bay. Commuter for parents with one kid.
A 72v version is going to make it a real sleeper. Can’t wait to see how it performs.
 
It’s a short wheelbase step thru frame. Are you sure you want a rear passenger? The only configuration I can see working is rear facing, with you riding standing, and then without a passenger you having to sit on top of the folded down backrest. Not that there’s anything wrong with that, just that there’s frames better suited to carrying pillion passengers, where you could both be seated.
I used it for me + kid behind me for well over a year with zero issues. It works awesome with the bench seat and even the regular passenger setup. One of the other bikes I tried to fill the void with was a Blix Packa Genie, which is a more traditional long-john style cargo bike. I didn't like it much at all, by comparison. It was just waaaay too long and felt...wobbly. The RR+ is significantly more stable in my experience.
 
Fair enough. I couldn’t envisage it, so did an image search. Looks suitable with a kid. 2x adults seems obviously throttle only. Most of the configurations in the photos are with regular telescoping post, so that the parent gets proper leg extension.

My requirements are a little different … parent on the back and me pedalling my guts out. So, need a longer frame.
 
I see. From the previous picture, it kind of looked like the seat was only bolted to the rear rack. My wife has the same bike. I’m thinking about maybe adding a front motor. It’ll take some convincing though. Lol
 
I see. From the previous picture, it kind of looked like the seat was only bolted to the rear rack. My wife has the same bike. I’m thinking about maybe adding a front motor. It’ll take some convincing though. Lol
Lots of options with the 135mm front drop out. I know, with my last one, adding the battery to the front tube really helped to make the bike feel more planted by putting a bit more weight forward. Between that and some extra pull, it'd be a nice setup.
 
Got everything wired up and working except I missed one extension cord to get the PAS signal into the "ebox" bag.

I also updated the wiring diagram to include all the dash camera connections.

Last extension should get here tomorrow, and hopefully I can get this fully operational. Though, based on others' work, maaaaybe I'll take the time to jam all the cables through the internal routing along with, sigh, the brake cable and then bleed it. On the bright side, magura brakes are at least a bit easier to top up since you can do the operation from just the brake lever side.
 
Ran into some torque sensor issues, but settled on cadence just to get it going.

Took it out for a test ride and at half battery hit about 30mph. Top speed at full charge is likely somewhere around 32-35mph. I'm currently, well, current limited as I don't want to push the motor past 1000w. It can freewheel up to about 37, but I don't think it'll reach that without cooking the stock motor. 40 would certainly be possible with field weakening, but that leads back for more amps in the windings, which I'm avoiding :) I'm being nice to the motor because I have another frame to transplant it onto once the 45mm all axle comes in.

2024-04-15 11.15.54.jpg

Waiting on the front basket to get shipped out so I can tidy up the front end a bit more and add the front flood light. Should be wrapped up for a while after that.
 
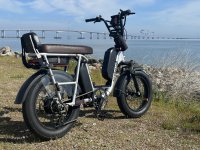
Took it out for a break in ride and just kept going. Covered about 20 miles and it's working pretty much flawlessly. Motor's kicking in great, no weird jutters/noises/grinding/etc/etc. Brakes aren't rubbing. Nothing is bonking around the bike where it should be secured and isn't. Easily my best build so far, really excited to get out on this one.

2024-04-16 09.55.13.jpg2024-04-16 10.13.44.jpg

Very excitedly waiting on the 45mm all axle from grin, though. The geared hub did well pulling up some tough hills (with some help ;D) but as most of my riding is flat/<5%, I'm really looking forward to having regen back and the silence of a DD motor.
 
2024-04-17 10.26.19.jpg

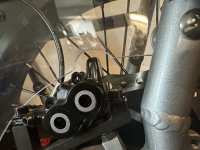
Did a little dremel cutout on the rear side plate wheel protectors for the caliper which is taller due to upgrading to 203 rotors. A bit of scuff where it wasn't intended, but overall I'm happy with it.
 
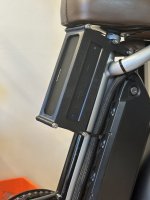
Now I can be that annoying guy with the loud music! Anker Soundcore 3 speaker mounted under the seat in the step through area. Still enough room to get through, but I'll probably end up kicking this at some point.

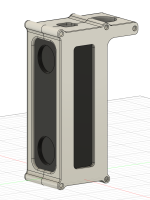
Uses five 80mm bolts (which are a bit long, 70/75 would be better) to pull the two side together and clamp over the speaker and seat tube. Holds pretty well, but the PETG I printed it in is a bit slippery -- should probably add a slice of rubber to the clamp area to keep it from rotating around.

Otherwise, came out great! The files (fusion and step) are included in the ZIP attached.

2024-04-19 13.57.11.jpg2024-04-19 16_24_58-Autodesk Fusion.png
 

Attachments

  • speaker-mount.zip
    453.4 KB · Views: 2
Now I can be that annoying guy with the loud music! Anker Soundcore 3 speaker mounted under the seat in the step through area. Still enough room to get through, but I'll probably end up kicking this at some point.
I like the printed mount.

To put moozikals on the SB Cruiser trike, I simply hose-clamped a Vizio soundbar to the back fo the canopy just behind my head. Usually only has to be at the first level of the first LED to be loud enough to hear over the wind, without being annoying to anyone else around me, even playing bass-heavy stuff like Neotenous Chordata . It's powered by the 40Ah "12v" (16v full) lighting battery, so it doesn't affect my traction battery, since it doesn't have an internal battery (is meant to run off it's own little wallwart and sit under a TV, but it has bluetooth to connect to my phone, where I can use VLC to play my music).

I don't often use it while riding; it's more so I can have some music while sitting at lunch, etc.

I don't have a clear shot of the soundbar directly, but you can see it's grey-silver ends sticking out from the top back of the canopy frame, and below that some raw pics of the soundbar from a image search
main-image-20230427_165131-jpg.338793


1713587238873.png 1713587258302.png
 
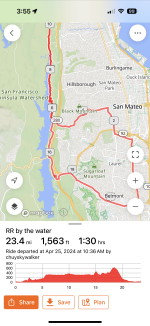
Took it out for another good haul. Saw some dear.

2024-04-25 11.35.23.jpg 2024-04-25 12.14.07.jpg 2024-04-25 15.55.01.png

Fully charged, flat ground top speed is about 27. Due to the self-imposed wattage restriction (1000w) it simply doesn't have enough amps to push to the full rpm power.

I did, however, cruise down a very nice, very long, very steep hill in which the power readings hit zero watts because at 37mph, the motor is slower than the wheel :D So, in theory, if I was willing to burn up the motor, I could supply enough amps to hit 37 (and, frankly, help the torque a lot as well) -- but I've smoked enough motors, thank you very much.
 
Nice work! Ralston is great going down isn't it... Less traumatic than San Bruno Ave. and burning up brakes trying to stop for the lights 😛

Are you going for the 7KV or 8.7KV fat GAA? Like you, pondering one for replacing the tired old banshee of a G062 in my Juiced Hyper scorpion...
 
Nice work! Ralston is great going down isn't it... Less traumatic than San Bruno Ave. and burning up brakes trying to stop for the lights 😛
Yeah, really pining for that DD regen braking, lol.

Are you going for the 7KV or 8.7KV fat GAA? Like you, pondering one for replacing the tired old banshee of a G062 in my Juiced Hyper scorpion...
Dunno yet; ideally I want to maximize torque but maintain an easy 35mph top speed. We'll see what Grin has to say when it's pre-order fulfilling time.
 
Was out shuttling the little ones around and a pedal fell off! Fortunately, got home under throttle power (yay throttle + hubs) and started looking into things.

Couldn't get the pedal back on (I recovered it) because, while on the way out, the pedaling action seems to have fully knackered the threads in the crank arm.

Also found out the same has happened in the other side as well, it just wasn't always the way unscrewed yet.

Then took the arms off to measure/shop for replacements...and found out I had them on the wrong sides.

At least replacements are cheap and plentiful, lol.
 
Last edited:
Then took the arms off to measure/shop for replacements...and found out I had them on the wrong sides.
So [Completing the forensics commentary] that's why the LH side crankarm/pedal are reverse threaded-- to avoid pedal loosening from threaded fastener precession. By having the crankarm/pedal assemblies on the wrong sides you (inadvertently) mostly guaranteed the pedals to self-loosen with use. Glad it did not cause accident or injury! :whistle:

That LH side reverse-threading has messed me up a few times (both when disassembling and when reassembling) and I wondered if it was really necessary. Evidently it is! ;)
 
Back
Top