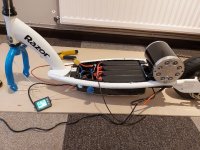
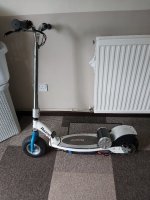
Razor e300 heritage scooter mod heavy.

IMG_20210417_203824747.jpg
IMG_20210417_204026323.jpg
IMG_20210417_204015965.jpg
_IMG_000000_000000.jpg
IMG_20210417_204036832.jpg

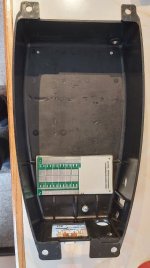
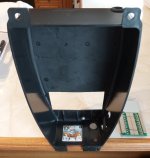
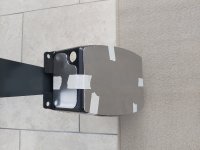
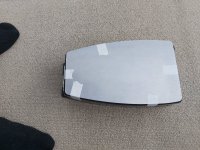
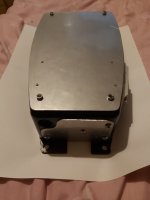
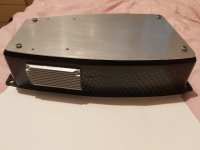
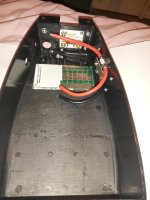
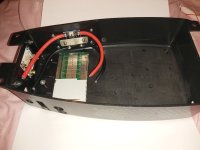
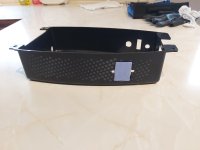
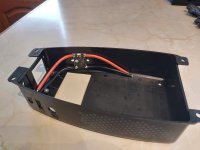
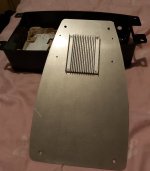
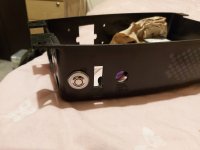
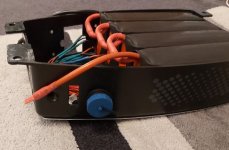
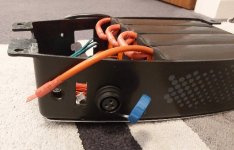
When the battery box sits inside the frame theres a 2mm gap clearance to the bars that protect it from ground out, I've decided to fit 1.5mm alloy plate to the battery box so i can get some outside cooling for the bms, shunt and antispark while leaving enough space to get the box back in.

There's no room for the battery wires, throttle and brake to pass through the battery box to the controller so im going to have to work a solution with a bit of small conduit, everything is tightly packed and i dont want it to be a mess all lose and enclosed no heat path just waiting to catch fire so theres abit more work to be done.

I'm waiting on a flipsky watercooled antispark, I'm going to convert to aircooled and run it way less than rated, then i can test see how everything works and then fineese.
 
IMG_20210420_234327361.jpg
IMG_20210420_234256704.jpg
IMG_20210420_234156553.jpg
IMG_20210420_234053569.jpg
IMG_20210420_233810698.jpg
IMG_20210420_233752119.jpg
IMG_20210420_233650858.jpg

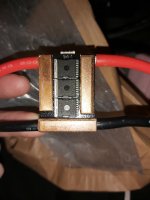
Got my anti spark switch i removed the water cooling block and pinched the heatsink from the razor controller and cut it up to suit, i got one more to add to the bottom plate for the bms and thats the battery box taken care of.

The shunt only has 3w waste heat at max output so the alloy plate on the front is enough to keep that cool im not to sure on the anti spark i imagine its alot when at its so called rating of 26s 150amp (14kw) but ill only be at 16s 45amp (3kw) so im hoping my solution will be overkill.

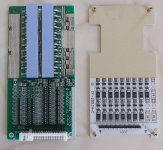
The bms will need cooling not sure how far i can push this either but ill add a heat sink and see how it goes when i charge ill increase the c rate each charge over time in small increments to find where its comfortable and not getting to warm.
 
IMG_20210423_005828655.jpg
20210421_212609.jpg
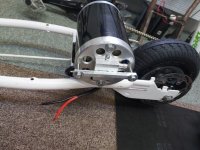
Not to much progress ive finalised all the heatsinks and added silicone grease to them so hopefully that keep the battery area in check and ive fitted the power switch with a filled off washer to give it a flush look I've just got a raging hot brushed motor to deal with but with the magnets been ferrite based theres a bit more tolerance than the brushless younger brother thats based on this zy1020 that is a rip off of the my1020 brushed motor.

On my old scooter i used a pc cpu heatsink hanging off the side off the motor to cool the brushplate down with some success the cool down period reduce by half when outdoors in the shade with a cool breeze.

I found it a pain in the arse and it got in the way but ive got a spare water block going to waste and if i get a radiator i could make a sealed cooling loop that just uses convection to move the fluid, if i keep the fluid to a minimum i can allow for expansion with flexible rubber pipes alone hopefully.

I won't use any special cooling fluid as i know theres a lot of hype about nothing, water is best then a little rust inhibitor and something is needed to brake surface tension so a bottle of water wetter will do., if i was freezing the system id need some level of antifreeze but for a ride that lives in a shed and has batterys that won't perform in very cold conditions i can stick with a basic fluid setup that provides superior heat transfer im not sure what pc uses but i will use my own setup as mentioned.

Ive planned the wiring so one big push forward and a test will happen soon enough just keep fitting bits of time in.
 
IMG_20210423_220728514.jpg
IMG_20210423_220617809.jpg
Had a look if the water block would fit and it just sit in the centre of the brushplate screws, i had an old bit of bar from a door that links the handles i drilled and cut it and used that for the support in the spare holes that are already there.

I've spotted a 120mm radiator for £12 thats cheap enough to take a gamble on, ill place the rad at a 45 degree angle just before the rear wheel to get as much air through as i can.

I don't want any pumps or to overcomplicate the system basic as possible is the way forward and cheap as can be if i could wrap copper around the motor id get even better results but theres no room for a complete jacket i may be able to make a half jacket that sit on the top 2/3rds and avoids its base and the frame but that's down the line im going to finish the wiring up and test first.

Ive got a anl 60amp fuse and holder to protect the pack and then im going to use a xt90 by the controller for a failure killswitch so i can easily isolate same as how robot wars do it, The drivetrain would have made a decent robot maybe 10 years ago lol.
 
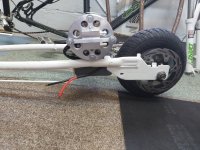
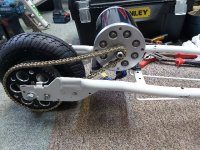
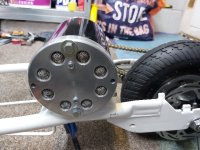
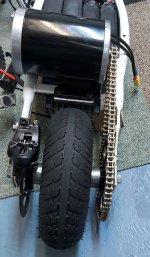
Not to much done i got a few bits ive had to take things back apart to fit but its the name of the game so theres new bearings in the rear wheel i found 17mm smokers pipe gauze that fits my 15mm motor vent holes a treat with the original surround to hold them all in from the rear, plus they are conical for increased surface area i placed them in reverse so they help keep the dirt out rather than letting it gather in a little well and fall in the case.

I got a sp21 connector for charging i needed a 3 pin so i can use the charge lead to form a bridge and turn my shunt gauge on so when i charge the gauge can log the Wh on both charge and discharge without me touching a thing.

IMG_20210505_180149755.jpg
IMG_20210505_180201075.jpg
IMG_20210505_180213626.jpg
IMG_20210505_180222327.jpg
 
IMG_20210514_204149798.jpg

Its been a game of snakes and ladders all the way but ive got the final throw of dice now theres no more traps left just connect the floating xt90 to the controller and add my charge relay and its ready to spin it up on the stand and see if the shunts measuring decent with a clamp meter cut a 4mm alloy deck plate and get it out and about under load for a real life test.

Its going to come in under weight its 16kg in the pic with bars and wheel ill be around 20kg mark so not light but not heavy either
 
Test run at full power fully charged pack and all went well seemed spot on nice and angry and geared low 24mph from my math next is get the controller cables sleeved and enter the box with a gland make a deck plate and go load test it no brakes for now so nothing to daring just yet.
[youtube]fnzn3TIBDP4[/youtube]
 
So i turned the scooter on tested it then started talking and lost track, 10 mins later i tryed to fit the grips to the handlebars and you can guess the rest it lite up the back wheel spun like mad and climbed the wall left a lovely mark on the floor.

Lucky it was not a bit to the side or it would have not hit my wall but gone straight through my window and out the back least to say its only slow buy its got big heart its a chugger i can feel that already.

IMG_20210518_162706912.jpg
 
Discovered the antispark switch has a automatic on off feature so soon as i push the scooter its live and off it goes not throttle delay its off like a guns gone off but dangerous so im going to switch the throttle power so i can have it shut down not move even if it auto powers up.

Good thing about it is the scooter turns itself off and when i want to ride it just jump on and off it goes i do like it alot but it does mean the throttle needs a safety feature and im going to use a thumb throttle rsther than full twist to eliminate whisky throttling it as much as possible as its got some serious chugging power.
 
Been following your build, looks fun and burly enough for a scooter build. Can't wait for a walk around, ride video.

Wanted to ask what the black pieces are that you coiled the motor wires through? Picture in your Apr 05 post. I don't think I have seen anyone else use those before.
 
MorbidlyObeseKoala said:
Been following your build, looks fun and burly enough for a scooter build. Can't wait for a walk around, ride video.

Wanted to ask what the black pieces are that you coiled the motor wires through? Picture in your Apr 05 post. I don't think I have seen anyone else use those before.

They are ferrite beads they stop high frequencys escaping up the leads and in to other electronics they tend to be fitted to anything with a a high frequency or spark potential and been a brushed motor the sparks throw off radio waves so it suppress that getting back at the controller fets and blowing them up.

Ive seen the bead used wrong in the past the core needs at least one loop around the ferrite ive managed 3 loops because 16s causes some nice sparks in the night the inside of the motor lights up bright white for a few millisecond on full chat.

Ill do a walk around vid for definate the weathers changing next week its been a real wet one in wales uk none stop rain and winds trees fallen all over the roads.
 
IMG_20210605_053738662.jpg
IMG_20210605_053818301.jpg

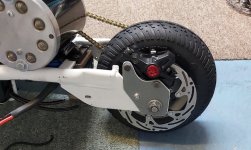
Got my brake mounted fitted my bars and the brake hose was 2 inch short so got to order that next week, this build has been a fighter from day one but ill get it there ill make an alloy deck plate today then there will be radio silence for a week with a break then when back ill sort out the brake and give it a shake down over a few full discharges get it finalized and well run in.
 
IMG_20210614_212602606.jpg
Got back from my break and managed to get a test run in, theres no lack of power it leaves rubber on the spot full throtle climbs even steep as hell dirt bankings, i didnt think it would get up but ill have to get a video of this how well its running .

I done a 25% discharge from full and went up and down the largest hills we got i ended up hill climbing down the park its such a beast and it didnt get to warm at all performed well all round.

Few teething problems the handlebar position is too high its sketchy the rear brake needs a new hose and i got to get some flat cable to run to the controller but iron a few issues out and this is going to be just a bit less of a handful still no kids toy lol.
 
Somethings fight and fight till you got to know when to call it and this is one them times, the antispark switch is stuck on so a fet has blown, scooter still works just won't turn off so im gonna put this one away and never take it back out ive had enough anyone want it or a broken kuberg give me a shout ill practically give them away to be shot of them.
 
Hi do you still have the scooter? I would like to know more about the 12mm axle. Where did you get it? And also about the disk brake calipers mount. If you have a scaled drawing of the mount plate. That's is the cleanest looking one I seen. Thanks
 
That is a cool way of putting a bigger motor on these childrens stand up scooters.

So why not use some XT90 A/S connectors and buy a new controller?
 
Ive not got no drawings it was all eyeballed, the axle is a 12mm pitbike axle thats been cut down and rethreaded to length i wanted its about 165mm if i remeber correct, scooter sat in shed motor cooked so if you want it in uk to covert to brushelss be my guess it will fit the foot version of the motor no problem just need a new controller.
 
Believe it or not i found a way to direct drive a 6.5inch wheel with a qs138 motor.
428 gearing range of 65-135mph.

Only thing left is find a ride thats suitable, i was thinking a minimoto with 30kw peaks it be setup like a large superbike but miniature, lipo battery and not alot of range but hell of alot of personality and fun like the wife you shouldnt have but want none the less.
 
Started reading this site a month or so ago, as I have a Razor E300 my sister never used and a few years ago her partner fried the motor....electricians racing!!!....I thought I'd see how to stick in a bigger motor, so I can accommodate my 100kg frame.

Never did I think I would see such glorious work on a scooter and while I'm not keen on top mounting, it's clearly the best solution for such a motor. Fascinating learning in your thread, especially regarding the capacitors and ferrite beads. Two things I think I could handle doing. Reminds me of building and fixing PCs!

The thread is as much a work of art as the scooter. Cheers for posting, you've curtailed my ambitions, which is exactly what I needed! At this stage, I just need to go right, not go big.
 
Back
Top