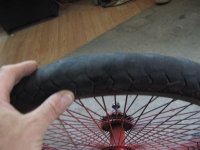
Since Tiny had a really good day today and kept herself moslty occupied with Yogi and yard explorations (and nappies) after breakfast and settling-wait time, I got some work on the trike done, over several hours between watchingthem play and stuff.
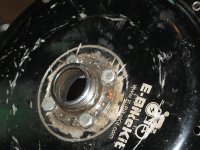
First was to finish the lacing/tensioning of the wheel above,. then to move the stator into it out of the 26" wheel itw as tested in, along with the side covers, and install the freewheel threaded flange onto it that I'd used on it when i used this front motor as a rear on CB2 a few years ago.


This part was the most interrupted, as Yogi kept running past me out the door whenever I clanged something (whcih happend a lot); he really doesn't like noises, worse than Tiny in some respects about this. Poor Yogi...then I'd go after him to try to get him to see it's ok; and he did get better over time but stillw asn't having any of it.
Eventually I got the stator in, covers on and bolted halfway down (only have about half the amount of cover bolts needed, no idea where most of them went, as these motors have all been apart since before the fire and many of the little bits are lost, including all the axle nuts and hardware--teh only hardware I have is one axle nut, two torque washers, a couple of regular washers that happen to fit the axle, and an old "torque arm" that originally came with t his motor.
Then I set up the wheel on that test frame and hooked it up to the black 12fet, and made sure it worked. Then i trued up the wheel, and jacked up the trike to get the regular wheel off and put the motor wheel on.

That was quite a mess, because I'd screwd up and put the covers on teh wrong sides, having intended to put the freeewheel on the wire side, so that no cables stick out the side of the trike and instead run under teh deck. So off the wheel comes, and then I had to swap the covers, and put it back on. About an hour and a half wasted on that part, including the time I spent doing it int eh first place.
also, the freewheel I happened to have available for this (can't get the other off teh old wheel) is 16T, old was 18T. Had to take otu a link pair from teh chain to make ti fit.
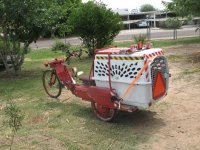
Since I only have one axle nut, I had to come up with something to help secure teh outer end of the axle (left side) and used the axle nut itself on the wrie side (right),

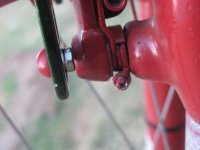
so I used that torque arm (which is tight enough to reuqire tapping onto the axle with a rubber mallet). and a long 10mm wrench. The werench is hose clapmed to the fender frame at it's far (ring) end, and the torque arm and wrench are clamped around the frame near the axle, ina way that should prevent it fom moving forward in the dropout slot, or rotating.

View attachment 10
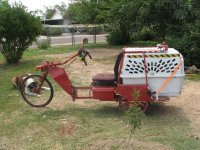
I tried a couple of clamping methods before arriving at that, one of which is picutred below. That one didn't work out cuz once the motor was started with a load, the hose clamp twisted and began wearing the metal off teh cover's bearing retainer hump in the cetner of the cover.

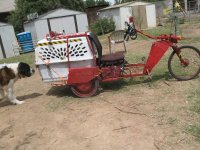
I added the centering spring for the front wheel, to keep it from pivoting when i'm trying to push it thru the door. it's not how I wanted to do it but the only way that will work until i can put something on the front fork to stick out towards it's rear and let it be cetnerable, but rightnow that doesn't work so i used it on the tiller itself to the frame, which does work, if imperfectly. I think this spring was froma screen door, can't remember.

the second wheel/cotnroller has it's own throttle, on the left side, so ti's like cb2 where i have left for rear, easy for me to remember. I also replace the intermittently defective wuxing ebrake lever with an older version that while not water resistant like the new kind, does at least never accidentally "come on" even though the lever is not being moved, or even is actively held in it's disengaged position. Suspect problem with switch itself, or wiring to it, but was qujciker to replace than to troubleshoot, will deal with othe rone later.

I took it out for a spin around the block after dinner for the doggies (which itself takes around an hour and a half now; half of what it has been recently but mahy times longer than before Tiny's illness).
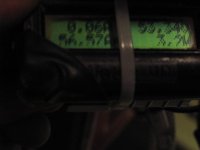
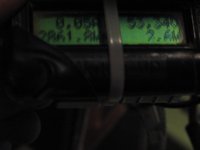
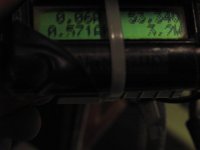
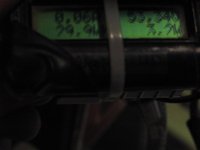
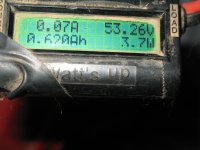
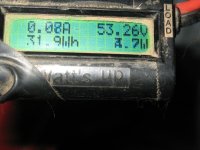
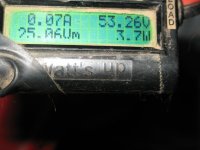
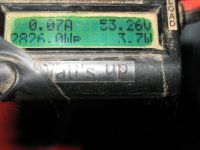
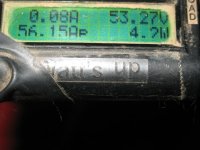
NOW it has POWER and can actually get out of it's own way pretty qcuick. it's not as quick off the line as CB2 yet, but it's close. It has about 2800W now, around 56A battery current. No speedo on it yet but I would guesstimate it takes about 6 seconds to get to 20MPH (vs the several times that with just the front 26" x5304).
There is some grinding as it starts up, if I only throttle up the rear motor, btu not if I use both, so it's probably something about how the curretn limiting on the black 12fet works.
I also paralleled the regen braking of the rear motor to teh same brake handle that the frotn one uses, and that gives some POWERFUL braking, more so even than on CB2, because these two controllers don't just do regen, they actually actively brake the wheel using power to do it. On CB2 with regen I can use it to "slowly" brake down from speed, but on SBC with active braking I'm gonna stop several times faster than on CB2, without applying the mechanical front rim brake even.
When i got back from teh trip around the block, I verified no loosiening of the axle/etc so far, even with the hard braking and accell.
Then i got the grin tech taillight wired up, and since it' needs ground for it's falsh mode, I had to use the regen brake lever to trigger it, instead of the brake light lever, cuz the BLL shorts across the diodes on the main taillight that dim it down wtih 13v instead of the 16v full voltage. So when braking that light flashes, and my main taillight about doubles in brightness. Should make it even more obvious I'm braking, since on SBC I don't have the intense brightness of the braking lights that I have on CB2.

View attachment 5
And apic of the matching grin tech headlight, which presetnly is wired in aprallel with the car headlight. I'd prefer tow ire it separelyt so it can be used without the headlight, like on bike paths, etc. wehn i don't need a super bright light to see the road, etc.

First was to finish the lacing/tensioning of the wheel above,. then to move the stator into it out of the 26" wheel itw as tested in, along with the side covers, and install the freewheel threaded flange onto it that I'd used on it when i used this front motor as a rear on CB2 a few years ago.
This part was the most interrupted, as Yogi kept running past me out the door whenever I clanged something (whcih happend a lot); he really doesn't like noises, worse than Tiny in some respects about this. Poor Yogi...then I'd go after him to try to get him to see it's ok; and he did get better over time but stillw asn't having any of it.
Eventually I got the stator in, covers on and bolted halfway down (only have about half the amount of cover bolts needed, no idea where most of them went, as these motors have all been apart since before the fire and many of the little bits are lost, including all the axle nuts and hardware--teh only hardware I have is one axle nut, two torque washers, a couple of regular washers that happen to fit the axle, and an old "torque arm" that originally came with t his motor.
Then I set up the wheel on that test frame and hooked it up to the black 12fet, and made sure it worked. Then i trued up the wheel, and jacked up the trike to get the regular wheel off and put the motor wheel on.
That was quite a mess, because I'd screwd up and put the covers on teh wrong sides, having intended to put the freeewheel on the wire side, so that no cables stick out the side of the trike and instead run under teh deck. So off the wheel comes, and then I had to swap the covers, and put it back on. About an hour and a half wasted on that part, including the time I spent doing it int eh first place.
also, the freewheel I happened to have available for this (can't get the other off teh old wheel) is 16T, old was 18T. Had to take otu a link pair from teh chain to make ti fit.
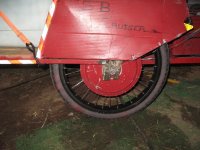
Since I only have one axle nut, I had to come up with something to help secure teh outer end of the axle (left side) and used the axle nut itself on the wrie side (right),
so I used that torque arm (which is tight enough to reuqire tapping onto the axle with a rubber mallet). and a long 10mm wrench. The werench is hose clapmed to the fender frame at it's far (ring) end, and the torque arm and wrench are clamped around the frame near the axle, ina way that should prevent it fom moving forward in the dropout slot, or rotating.
View attachment 10
I tried a couple of clamping methods before arriving at that, one of which is picutred below. That one didn't work out cuz once the motor was started with a load, the hose clamp twisted and began wearing the metal off teh cover's bearing retainer hump in the cetner of the cover.
I added the centering spring for the front wheel, to keep it from pivoting when i'm trying to push it thru the door. it's not how I wanted to do it but the only way that will work until i can put something on the front fork to stick out towards it's rear and let it be cetnerable, but rightnow that doesn't work so i used it on the tiller itself to the frame, which does work, if imperfectly. I think this spring was froma screen door, can't remember.
the second wheel/cotnroller has it's own throttle, on the left side, so ti's like cb2 where i have left for rear, easy for me to remember. I also replace the intermittently defective wuxing ebrake lever with an older version that while not water resistant like the new kind, does at least never accidentally "come on" even though the lever is not being moved, or even is actively held in it's disengaged position. Suspect problem with switch itself, or wiring to it, but was qujciker to replace than to troubleshoot, will deal with othe rone later.
I took it out for a spin around the block after dinner for the doggies (which itself takes around an hour and a half now; half of what it has been recently but mahy times longer than before Tiny's illness).
NOW it has POWER and can actually get out of it's own way pretty qcuick. it's not as quick off the line as CB2 yet, but it's close. It has about 2800W now, around 56A battery current. No speedo on it yet but I would guesstimate it takes about 6 seconds to get to 20MPH (vs the several times that with just the front 26" x5304).
There is some grinding as it starts up, if I only throttle up the rear motor, btu not if I use both, so it's probably something about how the curretn limiting on the black 12fet works.
I also paralleled the regen braking of the rear motor to teh same brake handle that the frotn one uses, and that gives some POWERFUL braking, more so even than on CB2, because these two controllers don't just do regen, they actually actively brake the wheel using power to do it. On CB2 with regen I can use it to "slowly" brake down from speed, but on SBC with active braking I'm gonna stop several times faster than on CB2, without applying the mechanical front rim brake even.
When i got back from teh trip around the block, I verified no loosiening of the axle/etc so far, even with the hard braking and accell.
Then i got the grin tech taillight wired up, and since it' needs ground for it's falsh mode, I had to use the regen brake lever to trigger it, instead of the brake light lever, cuz the BLL shorts across the diodes on the main taillight that dim it down wtih 13v instead of the 16v full voltage. So when braking that light flashes, and my main taillight about doubles in brightness. Should make it even more obvious I'm braking, since on SBC I don't have the intense brightness of the braking lights that I have on CB2.
View attachment 5
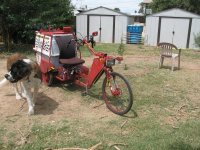
And apic of the matching grin tech headlight, which presetnly is wired in aprallel with the car headlight. I'd prefer tow ire it separelyt so it can be used without the headlight, like on bike paths, etc. wehn i don't need a super bright light to see the road, etc.


 I'd rather this than tipping, so, I just need much much better tires, like moped or motorcycle tires.