The SB Cruiser : Amberwolf's 2WD Heavy Cargo Trike & Dog Carrier

If you rough the inside of the rim up with some sand paper, the bead might grip better. I imagine that the inner tire isn't letting the tube put as much pressure on the rim wall as is normal. On my old rock crawler, because of the low gears and supercharger, I actually put a few screws through the rim to keep the tires from spinning on the rims when aired down. Poor man's beadlocks. I guess that could be an option too but it might weaken the rim too much. I'm keeping an eye out for some scooter wheels for you!

Also, some tire manufacturer should be sponsoring you by now. Worst carnage I've seen and that includes the big bikes in baja! lol!
 
ErnestoA said:
If you rough the inside of the rim up with some sand paper, the bead might grip better.
I'll probably do that; I can do it without taking the wheel off just by de-airing the tube.


I imagine that the inner tire isn't letting the tube put as much pressure on the rim wall as is normal.

Well, it's not an issue on the rightside tire, just the left. Differences are:
--dryrotted inner tire on left, old but intact inner tire on right
--narrow 1.25"-ish rim on left, wide 2.5" rim on right
--significantly higher torque on right vs left, as well as higher usage on right
--singlewall rim on left, doublewall on right
On my old rock crawler, because of the low gears and supercharger, I actually put a few screws through the rim to keep the tires from spinning on the rims when aired down. Poor man's beadlocks. I guess that could be an option too but it might weaken the rim too much.
I don't think that's a good idea on this cheap alloy rim, and it would also prevent using it as a brake surface once I have time to actually add the brake bosses and stuff to the frame (possibly in mid-late September when I get some time off work).

Plus, I'd have to do something to the screw tips before isntalling them to ensure they cannot pierce the tube or damage it. That would also probably keep them from holding onto the tire bead, too, though.


I'm keeping an eye out for some scooter wheels for you!
Thanks--I'm sure those types of rims and tires would work better, as long as I can still use the same spokes I already have for the motors in the existing wheels.

FWIW, the rightside rim is actually a good one (same as the one on CB2's rear). It's just the leftside one that's a very basic one (not junk, but not intended for what I'm doing). Even so, it works ok, and hasnt' even had any problems with truing/etc, despite teh sideloads and bumps/potholes it's hit so far, with the loads on this thing. It's just not very wide, especially versus the right wheel.

Good thick sturdy 16" tires taht would fit on these wheels, though--those would be nice, along with thick heavy duty MC/moped tubes.

At present I have some 20" bicycle tires on the way from Skedgy Sky, which while used don't look (in the pics) to be very worn yet, especialy compared to what I have here. ;)

Also, some tire manufacturer should be sponsoring you by now. Worst carnage I've seen and that includes the big bikes in baja! lol!
That'd be nice--I could beta test their "heavy duty" tires for them. ;) If you know how I might contact such a manufacturer and "apply" for such a status, I'd be willing to try.

FWIW, the tires are in worse shape than you can see in the pics. If I can get better pics tomorrow I'll post them up.
 
Separate post for this:

On the way to work today, I had a couple of years' worth of close calls in just 5 minutes.

First, at the 29th Ave / Dunlap intersection, a car turned left off Dunlap onto 29th, as I was nearing the last street before Dunlap while on 29th. It swerved over onto the sidewalk and then turned sharply to it's left, U-turning around and then into the left turn lane to get back onto Dunlap in the same direction it had just left. At that moment I was now passing it in the right turn lane, and then it suddenly changed it's mind and gunned it out in front of me, and into traffic on Dunlap, narrowly missing me and then other cars already on Dunlap.


Then, while I was waiting in the median-barrier left turn lane on Dunlap, to get into the parking lot there, a moron gunned his truck across a narrow gap in traffic and straight at me, trying to go the wrong way into the lane I was in. I didn't have time or any place to go, with a car behind me I couldn't back up, and with heavy traffic in front of me couldn't just go forward and to the side.

At the last instant, he actually looked in front of his vehicle to see us in the lane, (he'd been looking only to his left to watch for the gap in oncoming traffic), and first he laid into his horn, like that was going to do any good :roll: and then he swerved to his right (my left), since both the car behind me and my trike were toward the right portion of the lane, and then he went up onto the median curb divider and juddered to a stop in the gravel/concrete there. I think that was when he finally realized he was in the wrong and had just done something stupid, because his angry face turned into an embarrassed face, and he turned away from us.

Traffic passed us all and then I and the other car went on, while that truck was still on the median by the time I passed out of sight of it.


Next, after I'd passed Cheryl on Metro Parkway, approaching a common place for cars to just zoom on out or across even when othe rcars are coming, I did my usual watch-super-careful at the car waiting to go. Well, it did go, just after I'd passed that point, and it swerved out first into the lane left of me, but me not being the trusting type prepared to brake or swerve, and just then it swerved directly into the place I was occupying, so I braked and swerved right, almost into the curb, just barely managing to avoid being hit by them.

They continued accelerating and going right and almsot went up onto the curb themselves, as if they had been *trying* to hit me. But since they didn't, and since the police here would never bother to be involved in something that didnt' actually happen and kill someone, I didn't bother calling it in. I also didn't just follow them into the parking lot they eventually turned in to, to let them know they could have killed me, because then they might have if they were armed and prone to that sort of thing. Safer just to continue on to work....


So there's three in the space of 5 minutes or less, that normaly wouldn't happen in a whole year or more, that close to me. (within sight of me, yes, every day I see more than that...just not directly involving me usually).
 
I've had days like that, both on bikes and in cars. Days you just feel like it's just plain the wrong day to get out of the house, and then if you stayed home, god knows what would have happened to you there.

Weird, But your case of this worse than I can ever remember. Just not your day to die, but sure was your day to think it was coming.
 
I guess that's one way to put it. :lol:


I didnt' get to the trike stuff today (had been thinking about doing the hitch mount, and swapping out the quckly-wearing tire on teh right, couple other things). Ended up building a gate to keep Tiny and Yogi in the backroom while I am not home, so they will have access to outside either becuse they want it or in the unlikely event of the worst case happening again, but leave the rest of the house accessible to my little sister so she won't have to be "stuck" in her room the whole time I'm away from the house each workday.

Then when I'm home they can have the run of the house, unless she lets me know she needs to do stuff.

More in the housefire updates thread:
https://endless-sphere.com/forums/viewtopic.php?f=1&t=49550&p=1089965#p1089965
 
Left tire is now worn thru so far that it's herniating it's inner tire out, too, so much so that it's like going over a speed bump every rotation.

So I'll be riding CB2 until the tires from Skedgy Sky show up, estimated on next Monday per the tracking.

(I could change the tires now, but it's a lot of work and I'd rather only do it once, and the ones I have to use right now are not very good and wouldn't last long, so Id' rather just wait and only do it once.)
 
New light:
IMG_2666.JPG
trike on back porch up against the back wall of house, with new light as only light source in pic.

out in the yard:
IMG_2667.JPG

it is another aquatics light bar, has blue "moon" lighting that I had to tape over cuz blue lights are for emergency vehicles only, but the rest are all white ligths and are bright enough to light up the trike almost as if car headligths were shining on it from the rear. :)
IMG_2672.JPG

That's kinda the idea, so that even if someone is an idiot and hasn't turned on their lights, or are another bicycle or pedestrian or wahtever with no light source of their own, they will still most definitely see the whole trike, including the SMV (slow moving vehicle) sign, which being orange and reflective shluld be quite visible already, along with the red/white reflective tape on teh back of the trike, but that's only if there are external ligths shining on it.
IMG_2671.JPG


Without external lights, there is only the little taillight from Grin and the other from HF, which while brigth are small in area.

Lighting up the whole trike (and the ground around it) makes it MUCH "larger" and more visible.

Theoretically, that means "safer"....assuming others are actually *looking*. :lol: :/

from directly in front, no other lights on, you can see it lights up the SMV sign thru the sign's plastic. ;)
IMG_2668.JPG

From the right side in middle of yard, no other lights:
IMG_2669.JPG


The light bar itself snaps into a mount that lets it swivel so I can change the angle up or down, right now it is one click down from straight forward. Two clicks down it doesn't light up the whole SMV sign, and al lthe way up it is too bright for oncoming vehicles (well, not really, it's not as bright as car headlights), All the way down it lights up teh bed pretty thorougly, and the ground around the trike, but not the rest of the trike body.

The mount is presently attached to the rear bar of the cargo rack up top, right in front of the taillights. The switch that came with it is mounted at the lower right of the seat bottom, so I can turn it on and off--eventually I'd like to put it up on the handlebars, but this is it for testing phase. It's powered by a little wallward that came with it to convert 115VAC to 15VDC, and I've got wires run from the motor controllers' power connector to the pAC input prongs on the wallwart; it starts and runs fine on the EM3EV pack so far (at least, at full charge).

The switch can turn on both bliue and white or just the blue, or all off. The blue mode isn't useful due to legalities, while on-road, but could be useful on off-road bike paths like the canal trails, etc., where extra ligth would be useful but not quite as much as the whole thing puts out. I'd ahve to stop and take the black electrical tape off of it for those times, but at least it's there if I need it.


I actually don't think anyone would care that I have blue lights on there along with the white, as you can't really tell--only if the white lights are not on can you definitely see the blue ones. But for that "just in case" situation of someone that decides to pick on me as an example to fully enforce the laws, they're taped over.


BTW, the first thing I thougth of when I furst turned the light on after mounting it was "gee, that reminds me of those ground vehicles the colonials used on the original 1970's Battlestar Galactica"..... :)


Oh...and these pics show the increasing problems with the camera; I think it's a conenction or solder joint inside it at the CCD or whatever, but I don't want to open it up utnil it doesn't work at all cuz I'm afraid I wont' be able to put it back together again, ro else will just make it worse, and at least right now it does still work most of the time, if I take enough pics I get some usable ones. (video is pretty much always got corruption in it).
 

Attachments

  • IMG_2665.JPG
    IMG_2665.JPG
    29.8 KB · Views: 3,802
4 of the tires arrived this morning, but not in time to do anything before work.
IMG_2688.JPG

There are two knobby-ish ones and two street ones; I don't think any of them are exactly the same but each type is close enough to make a pair with the other of the same type. I will probably put the street ones on the trike, and keep the other pair as spares. I have another tire that's not great but should fit inside one of the street ones to make it's "safety layer" inner tire, so that when the actual tire wears thru it won't leave the tube herniating out and being shredded by the road, if this happens during a ride.

Cuz that would suck. ;)


I considered also using the street tires inside the knobby ones...and still might.


Also, here's some pics of the actual light bar, in daytime, no lights on. First across the rack to see it's face, then the knob used to "aim" it, then the best closeup I could get of the LEDs (the camera is getting worse and worse at doing any kind of close-up focusing, too, even in macro mode I can't usually get any closer than that to things, usually even farther away, couple of feet or more!).

There's also a pic of the switch at the seat base, and of the power converter under the seat on the "toptube".
 

Attachments

  • IMG_2674.JPG
    IMG_2674.JPG
    45.9 KB · Views: 3,775
  • IMG_2681.JPG
    IMG_2681.JPG
    25.8 KB · Views: 3,775
  • IMG_2680.JPG
    IMG_2680.JPG
    22.7 KB · Views: 3,775
  • IMG_2683.JPG
    IMG_2683.JPG
    42.6 KB · Views: 3,775
  • IMG_2684.JPG
    IMG_2684.JPG
    47 KB · Views: 3,775
FINALLY changed the tires today, some 14 hours after I started early this morning.

As usual, nothing was simple. Too many things went sideways to list them all (even to remember them all!), so we'll just keep it to stuff directly related to the trike, other than to mention that for every step of fixing stuff on the trike, there were several other steps needed to do other things otherwise-totally-urelated-to-the trike, including dealing with achies and hurties, just so I could do the trike stuff.


First, some pics of the tires being removed, still on the trike and then after taking them off the wheels. Rode on them like that for most of a week before it was bad enough to not risk any further, and switched to teh bike till the tires arrived.
IMG_2689.JPG
IMG_2690.JPG
IMG_2691.JPG
IMG_2692.JPG


Changing the left tire turned out, surprisingly, to be relatively easy and quick, only taking about 1.5 hours or so, with the complications that arose outside of the trike itself. So I don't have any pics of that, as there wasn't anything interesting, other than the pics above of teh worn tire.


The right tire....wow, what a cluster.... :shock:


First, getting it off was really easy (unlike the left side, which is a huge messy deal), because I built that clamping dropout for the inner axle end, and so far the nut and torque washer work fine on the outer axle end. Takes like 5 minutes to undo it, take it off, and put it back on and retighten it, pretty much like any other bike wheel. (left side takes at least 30-45 minutes just for that part).


However, that's where simplicity ended, because first my left hand went numb (happens randomly) for a second and I dropped the motor wheel, which being an x5304 went fast and hard and bounced as the tire was still well-inflated, and it then pulled two of the phase wires apart at the motor-controller connection.
IMG_2694.JPG
IMG_2695.JPG


If you remember from a previous post, I didn't have any solder left (well, not enough) when moving the controllers to under the cargo deck, and butt-spliced the phase wires, then ziptied around them to clamp them together, then electrical tapeda round that. Well, I guess these two zipties weren't tight enough, cuz the wires just slipped past each other.

Alright, that's not so bad.. .annoying, but fixable easily enough.

So now I'm working the tire off the rim, and still having some trouble with my hands, plus I'm on the ground kneeling and my knees and ankles hurt, but I can't sit in a chair or on anything and do this, cuz the reach of wires, seeing what I'm doing, etc, and I drop the wheel again...thsi time the last phase wire rips out at the axle exit instead. :(
IMG_2693.JPG

THAT I can't just splice back together, I'll have to open up the motor to fix.


Sigh.


At that point (when I should have had the whole thing already long done), I was hot, tired, and hungry, and Bill was due to show up for lunchtime soon, so I just went in and cleaned up, putting thoughts of repair to the back of my mind to let it work out what I would need to do and if I had the stuff for it.


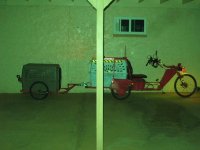
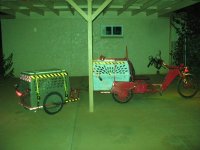
While at lunch, we went to goodwill as usual, and I found a large plastic dog crate/kennel actually a teeny bit bigger than the one I have now (maybe a couple inches longer, inch or so higher and wider). This means Yogi will fit in it easier, and having two means I can use one on the trailer and one on the trike, add the trailer hitch to the trike, and be able to take both Tiny and Yogi somewhere at the same time. (Bill bought it for me, which was really nice cuz I've been getting short on money).
IMG_2696.JPG
IMG_2697.JPG
IMG_2698.JPG
View attachment 20


The only problem at the moment is that it's larger size means it wont' directly fit on the trike until I make the vertical rack supports about an inch or two longer. (I tested it, and it won't quite reach and bolt on...though in the process I did find where the rattle was coming from--I somehow never ran the front right support bolt thru the hole in teh lower attachment point on the fender--so when it is tight enough it pinches the top end of that support into the uppoer support, but as it vibrates it wears and ratttles....so now that's fixed, and the rattle should stay gone).


After lunch, about two hours after the above, I dug out some 10 gauge AC-electrical wire, already in a 3-wire group of white, blue and green (close enough to ybg), which was the fattest wire I could possibly fit in teh slot of the axle, along with hall wires (whcih I am not using right now, as the cotnroller ignores them, but I will once I get or fix a better controller).
IMG_2704.JPG
IMG_2705.JPG
View attachment 14
I considered using this old drivyer cord which is some huge wire maybe 4g or 6g, but no way would it firt in there.
IMG_2703.JPG

I changed the tire first before opening up the motor, just to get it done.
IMG_2701.JPG

I think the original wire was 16g, maybe 15g.
View attachment 18

Because fo the muich bigger new fphase wires I wound up leaving the outer jacket off the hall wires so I could fit them flat over the 3 phase wires laid flat/parallel on the axle slot, and it was still a tight fit inside the bearing's ID.


Wires fixed (and upgraded), I then reattached the wheel, and spliced the phase wires back to teh controller, this time using a bit of the tiny amount of solder I have left (there is not enough to fully solder even one, so there's just enough to prevent them being yanked apart if I have to change a tire), and heatshrinking the splices.

For now I also left about 3 feet of phase wire, until I have a more permanent controller connection and placement (proably they['ll stay under the cargo rack, but that's still under test).
IMG_2708.JPG


Rode around the yard and the neighboorhood, tested both wheels and motors ok, and the tires worked out too.

Both tires have inside them a second tire, whcih in this case is the old kenda flames off my original chariot trailer from dayglo avenger. the one on the right side has worked fine there for the whole time it's been there, so using the other on the left seems it should be ok.

Also, the two outer tires from Skedgy Sky are different widths, so I put the 2.0" on the left as it has the narrower rim, and the 2.125" on the right, with the wider rim (whcih is about twice as wide as the left side rim).


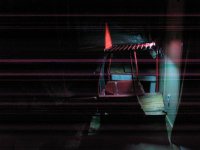
I also added a "hood" over the headlight, been planning that for a while, to shield the glare off it's top from traffic, and only put light on the ground where I need it. previously, the scatttering of light upward was pretty high, and this thin plastic hood (just taped on for now) still gives me the same beam and such but eliminates the scattered light shining over in the oncoming traffic lanes, and above the top of the beam.
IMG_2719.JPG
IMG_2720.JPG

IMG_2717.JPG
IMG_2718.JPG


I tehn also added another headlight, with no hood yet, used to be a fog lamp I think (slightly yellowish tint on it's reflector), for the occasional times I really need more light than this, or farther away. It's much tighter beam in a rectangle, less scatter, and would like to use it as the main headlight, but can't because it gets so hot that unless there is LOTS of airflow over it constantly, I can see "smoke" or vapors rising from it that appear to be from the plastic of it's housing (it ahs a metal refletor and glass lens, but the mounting and housing is all plastic). Hasn't warped or anything yet but it's obvioulsly softer than normal when hot, which only takes about a minute to become too hot to touch on the glass, and too hot to hold a thumb on even lightly on the plastic.


IMG_2724.JPG

IMG_2725.JPG

IMG_2723.JPG
IMG_2721.JPG
IMG_2722.JPG

IMG_2727.JPG
IMG_2729.JPG

I will probvably change ti's moutn to something else made of metal and move it down below the present main headlight, but for now it'll stay where it is to see how it behaves in situations i need it.

presentl y to turn it on i have to hook it's wires up parallel to the main headlight, but i'll run longer wiers down to a new swithch nect to the main headlight tolgle switch, for this secondary light.

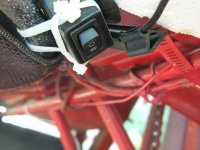
teh led grin tech light is now moved up onto the tiller tube near the stem, where i can reach it's switch to turn it on or off if I need it. it, too, needs longer wires to run to power separately from the other headlights.


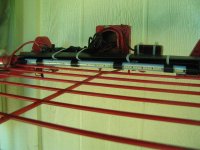
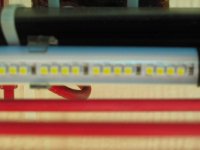
during my test rides i also found a problem i should have anticipated: the new rear rack light bar shines into the mirrors, and looks as if there is a car follwong me all the time, very bright. I taped off the end lights and it helps, but it's not enough; i'd have to tape off all but the center four lights to fix the problem. :(

so for now I just pointed the light bar downward, straight, to avoid any glare in the mirrors. This means the SMV sign ins't lit up much, but ti does light up the road around the trike much much better. Oh, well. can't win them all.
IMG_2714.JPG

IMG_2716.JPG
 
It's been behaving in the rides so far, though the rattle of teh cargo rack has gotten rattly again since I loosened up the fasteners to try fittng that other kennel/crate in there. I need to find my 1/4"-20 bolts and nuts long enough to fit in those so I can crank them down good with a wrench, welding the nut onto the rack support itself so it only takes one wrench. ATM it's a flatblade countersink-style bolt, and a wingnut. Can't hold either one well enough to really tighten them down.


Ther'es another rattle/buzz from the left wheel area; I'm pretty sure it's the inner-axle mounting, and need to spend Sunday (next day off) re-finding the parts to build the clamping dropout like I'd done on the right wheel.


Also, I think I am going to go ahead and weld a torque arm onto the outer axle end of both left and right motors, then cut and smooth the axle end, so these motors will be customized to fit on this trike and wont' be usable on a standard frame anymore, but they will definitely stay where I put them on the trike, and be WAY easier to change tires on, cuz it seems like that is going to be a high-rate wear item on this design, with the way I end up riding in traffic around corners to stay out of cars' way.
 
Above was suppose to happen Sunday, but clogged drain for my sister's bathroom used so much time and energy that I could not get to it.

https://endless-sphere.com/forums/viewtopic.php?f=1&t=49550&p=1095381#p1095381

Yesterday on the way to work, the wood block preventing the leftside inner axle from shifting forward came off when I went over a rough section of road. Hasn't caused it to come out or anything, but it means that every turn makes the wheel shift in one direction or another, at the inner end, just enough to make the tire rub it's sidewall on the fender frame here and there, and be very noisy.

Since today will rpobably be taken up with more plumbing, I won't likely get to do more than make a new wood block and screw it in place (last one was friction fit), but we'll see if I can at least get the outer-end torque plates made and welded to the axles.


(edit: also, as of late sunday night, i've caught a throat cold, and as long as i don't talk or exert myself much, the coughing is minimal and doesn't hurt, but I need to rest as much as i can to make it go away before work tomorrow, becuase if i have to be at register i will have to answer phones, etc, and monday i had no voice at all, and it hurt even to whisper, which can't be heard on the phone/paging system/etc. so i was not on register monday, but may not have that option tomorrow--won't know till it happens).
 
Rather than a wood block, I took the wheel off entirely and ground away a little of the washer tab and the dropout front edge, which now allows the original hardware setup I'd made to "work', by letting the tab go back into the dropout and keep the wheel from going forward on the inner axle side. It's not as perfect a fit as before, but it can't get forward enough to rub tire on frame, so it will do for now, till I can do the other stuff..
 
No issues with the repair so far, but this week I have off so the plan is to tackle the super-dropout clamp for the left side, and welding torque arms to the outer (solid) axles, sometime early this week.

My cane repair has also held up for two days at work so far, after snapping under my weight sometime after I got home Thursday night.
https://endless-sphere.com/forums/viewtopic.php?f=1&t=49550&p=1099694#p1099694


If I can, tomorrow will be spent adding the trailer hitch and modifying the trailer and/or trike to hold the new slightly larger kennel/crate so both Yogi and Tiny can travel with me at the same time, and then test it with a trip up to work with both of them (though the trip probably wont' happen until Monday or Tuesday).

Assuming the hitch stuff all works out quikcly enough, I'll do the dropout / wheel / axle stuff too, but that requires more precision and care, and less brute-force, than the hithc stuff. :)
 
It took an extra day to get to it, but I got the trailer hitch added today. Still gotta wire up the lighting connector, and add the security cable (so if the hitch fails for any reason, unlikely as it is, the cable will keep the trailer attached to the trike).
View attachment 7
IMG_2814.JPG
IMG_2817.JPG
IMG_2819.JPG
IMG_2821.JPG
IMG_2820.JPG

It's setup so that they face each other, cuz that will probably make them feel more secure on trips.
IMG_2822.JPG


Since the hitch sticks so far out behind the cargo bed,
IMG_2776.JPG
because it has to clear the back of Tiny's crate when that is on there, I made it removable so that I can still use the trike by itself for work commute, etc., and park it in the breakroom. With the hitch on there, it would not be possible to turn the trike around to get it back out of the breakroom and out thru teh store, without quite a lot of trouble backing it out and into an aisle, then around the corner, then forward a little, etc, etc. I can almost turn it around in a circle without the crate on there, but even with just the crate adding length it's almost impossible to turn it around...so with the hitch on there, it *would* be impossible.


So I welded a new crossbar close to the rear of the cargo bed for support,
View attachment 35

and cut an old bike wheel axle in half to use for bolts on that front crossbar, first fed down thru holes in it and then welded at each end of those holes.
View attachment 29

At the rear crossbar (back of cargo bed) I drilled holes for two 1/4"-20 bolts, and just welded the heads to the top of the rear crossbar, with space etched out of the bed planks to clear the heads.
View attachment 28

That makes the bolts be part of the cargo bed/trike, and also means I can use them for another thing I intend to add at some point: a tailgate. I'd need to add another pair at the outer corners of the bed, too, but it could be done in a way that works with both the empty bed as an upright gate, or a ramp, or an extension of the bed, and also with the crate as a "step" up into the crate for Tiny, and with the hitch in place as well.

I'm still not exactly sure when I'll do this, but I'm probably going to try to do it this week.


The rest of the hitch was easy enough; forming the main part of it with 1" square tubing, notches cut out to make corners so I don't have to cut and weld the whole thing of separate pieces.
View attachment 34
IMG_2773.JPG
IMG_2774.JPG
Then drilling holes for the bolts to go thru, and nuts and washers to secure it.
IMG_2775.JPG

IMG_2785.JPG
IMG_2786.JPG
IMG_2787.JPG

Tehn welded some plates originally meant to hold "endcaps" to aisles on retail displays, one at each end, to stiffen the assembly. They're 1/8" thick steel, pretty tough given their original use.
IMG_2788.JPG
IMG_2789.JPG
IMG_2790.JPG
View attachment 21


One of them is also used to weld the hitch ball to (I don't have a bolt that fits it, so welding was my best option; less worry about it coming off).
IMG_2792.JPG
View attachment 19
View attachment 18


IMG_2796.JPG
IMG_2797.JPG


Test hitched it up, with the crates on the trailer and the trike, and checked for problems, found only that the hitch latch slightly interferes with teh trike crate door, but is easy to lift the door up and twist to get it over it. May mod the door so I don't have to do that, at some point.
IMG_2802.JPG
IMG_2800.JPG
IMG_2801.JPG

Trailer sits pretty level, about like it does on teh bike. I didn't have a lot of choice on what level it would sit at, given the spacing/height of the trike and stuff, so if it hadn't been level I would have just had to live with it, or else modify the trailer's hitch end and then mod CrazyBike2's hitch height to match (since that has a lot more option about that sort of thing).
IMG_2799.JPG

I rode around the block with it setup this way, and it worked fine, though unloaded. Storm looked like it might come soon so I didn't load up the dogs for a real test, that will happen tomorrow.
IMG_2803.JPG


Turning a very tight circle is still possible, I can go in a circle around the center post in teh driveway and the trailer follows me fine without dragging wheels, so that means I can turn around in the width of two cars, basically, probably even less if I practiced it.
IMG_2809.JPG
IMG_2810.JPG
IMG_2811.JPG

I can even tilt the trike on two wheels (like in a fast turn) without the trailer being pulled over onto one wheel by it's hitch, the trike could go up at least 10" off the ground on one side before the hitch would begin twisting the trailer up too, and that has never happened in any of my riding so far (only just barely off the ground at all, cuz when it does happen I can hear the off-ground tire touch intermittently).
 

Attachments

  • IMG_2816.JPG
    IMG_2816.JPG
    34.5 KB · Views: 3,732
Looking nice AW. Hey tipping the trike onto two wheels sounds cool and would look very trick with your set up. Any chance of making up kind of an outrigger to balance on to stop the trike from tipping over too far for u-turns or parking lot manuevers. Even if it was just on the left side to start to see if it works as most u-turns are turns to the left.
 
waynebergman said:
Looking nice AW. Hey tipping the trike onto two wheels sounds cool and would look very trick with your set up. Any chance of making up kind of an outrigger to balance on to stop the trike from tipping over too far for u-turns or parking lot manuevers. Even if it was just on the left side to start to see if it works as most u-turns are turns to the left.

I've been pondering that for a while, actually. :) Been thinking about a little upside down "V" frame coming off the headtube, with little bitty wheels (16" or less, maybe little scooter wheels?) at the ground end, a couple inches off the ground, so that if the trike starts to tilt too far that'll hit first and prevent further tipping, without breaking the law about "3 wheels in contact with teh ground" that defines what a bicycle actually is, here in AZ.

The wheel would be canted "inward" quite a bit, so that it's tire contact would be as close to perpendicular to ground contact as possible when that occurs, and ti's axle as clsoe to parallel with the ground at that time.


Only reason no experiments have been tried yet is lack of time and laziness. ;)


I'm a little worried that if I depend on it to stop me tilting in a turn, and I don't build it right, it'll either overturn the trike using that as a pivot, or simply collapse under the trike if it's not strong enough--it'll be taking a lot of force at that point.


I'm certainly open to design suggestions!


In other news, I tested the trike and trailer setup with the dogs yesterday, on my usual commute route. It took about 6.8A to recharge after that instead of the usual 4.something, so between the extra rolling resistance of the trailer tires, plus having ~240-ish lbs of dog in addition to the 30+ lbs of trailer on there, I'm not surprised that it took at least a third more power to do the trip with all the stops and starts it has on the route--since it's nearly doubling the total mass I'm surprised it didn't take *more* power!


Performance was good, actually didn't feel much different than when it's just me on teh trike, without even Tiny's crate on there. Smooth riding, trailer follows triek in turns very well, not being dragged around corners, etc., unlike some of my trailer setups have in the past. I might've accidentally found a really good combination. :)


Only issue to be careful of so far is that when either dog is getting in or out and one is already in there, I have to hold the hitch part up, or block it, cuz the weight on the tongue at that point tips them both toward each other--trike front wheel way off the ground. Not a problem when I'm on the trike too.


Both of them get in and out just fine, on their own (Yogi sometimes needs a little encouragement or guidance, Tiny needs a little cheering on to get down and out; she's afraid of falling. A step might fix that).


Both of them together on leashes is quite a handful when they're both excited about a walk; at work it was worse than usual cuz of all the dog and people smells, but they had fun.


It took basically all day to fix up the connection for the trailer lights, cuz a whole bunch of little things went wrong along the way, most of them unrelated to each other, except being electrical. Eventaully got it all done, so now the trailer can be quickly hooked up to either SB Cruiser or CrazyBike2, for either dog or cargo hauling.


Still gotta make the reinforcement and cargo rack for the trailer, that goes up from the wheel "forks" and over the crate, similar to what's on the trike.

Also still gotta make the super-dropouts for the left trike wheel, and the welded-on torque arms for both.


Due to the excitement I forgot to take pics until I got home; these are what it looks like now with the trailer lights working and the reflective tape on the trailer and crate.
 

Attachments

  • IMG_2824.JPG
    IMG_2824.JPG
    42.3 KB · Views: 3,716
  • IMG_2827.JPG
    IMG_2827.JPG
    38.7 KB · Views: 3,716
... we got a great big convoy rockin' thru the night!
Yeah we got a great big convoy aint she a beautiful sight ...
Come on and join our convoy aint nothin' gonna get in our way
We gonna roll this truckin' convoy across the USA

Maybe you could put a big paddle inside the rear cage to activate brakes on the trailer when the dog's bum hits it ;)
(Assuming the dog faces out the back.)
 
Haha....there's a thread about the trailer itself where some discussion of automaticlaly activated brakes has happened; still haven't done any experiments though.


FWIW, I might need to work on that double-wide trailer or trike...when the rescue dropped off one of Tiny's meds refills today, they asked if I might want to take on another one: Bernie, 9 years old, loves other dogs and cats, was just fixed so is healing up from that adn then we can try a meetup with Tiny and Yogi.

They don't have him up on the site yet, so I don't have any pics (dunno what he looks like myself).
 
I don't know yet; I didnt' ask. :lol:

When I was (not all that much) younger, I would have only thought of myself...nowadays I have learned to try to balance my own needs with what I can do for others; I'm not always very good at it though.

Mostly I'm not so good at it with people, especially in person, but I'm a lot better at it with animals, especially dogs.

I figure that if Bernie gets along with Tiny and Yogi, we can at least try it out. He's older, and if he's a really big one, he might not have a lot of time, so if I can give him an actual home for whatever time he's got left (months, years, whatever) he probably deserves that.

I don't know his original situation, because these big dogs come to the rescue for many reasons. For example, a pair of big girls (Cheyenne & Gretchen) I'd love to have here are only looking for a new home becuase the little girl in the family they started out with turned badly allergic to them. Another (really giant one, Marty) that I saw at the rescue when I was first there had ended up at the rescue because his original owners had abused and starved him, and he'd been remanded to the rescue after their trial for it. And many other reasons for other dogs...

http://saintrescue.org/arizona.html


And this says a lot about how I feel about the whole thing.
http://saintrescue.org/Meaning_of_Rescue.html
'Baggage'
By Evelyn Colbath

Now that I'm home, bathed, settled and fed,
All nicely tucked in my new warm bed,
I'd like to open my baggageLest I forget.There's so much to carry,
So much to regret. Hmmm--yes, there it is, right on the top. Let's unpack Loneliness, Heartache and Loss. And there by my leash hides Fear and Shame. As I look on these things I tried so hard to leave, I still have to unpack my baggage called Pain. I loved them, the others, the ones who left me. But I wasn't good enough, for they didn't want me. Will you add to my baggage? Will you help me unpack? Or will you just look at my things And take me right back? Do you have the time to help me unpack? To put away my baggage, To never repack? I pray that you do-I'm so tired, you see. But I DO come with baggage.

Will you still want me?
 
With a trip to teh store today (which only took about 5.6Ah recharging for 8 miles, even with the trailer attached, since it was empty), SB Cruiser has passed about 550 miles now, assuming I've remembered all the trips made with it so far.


Since the only major failure has been the wheel ripping off during initial powered-rear-wheel testing, I'd say so far it's a success. ;)
 
Sounds like you're good to go to come visit! Load up the poochies, recharge in Black Canyon City, recharge in Cordes lakes, coast down the hill. :) The trike and trailer are awesome!

The only suggestion/engineering nerd thing I have to add is adding some spacers inside the hitch mount tubes so the bolts don't slowly crush the tubing and loosen up. The geometry, aside from the door but no big deal, worked out perfect on the trailer! I wish I had a third of your gumption... :wink:
 
A trip like that is a little more involved than you might think--I've been pondering it for a while, to see what it would take to go on a country-wide trip (even though I doubt I could ever manage enough time off for even a short trip of that type, much less the months or more that it would take to ride all teh way across the country).

In the below estimates, I've been very pessimistic about range, because I'd rather charge before I need to than run out...without the motors, there's about zero way I could pedal this monstrosity with the load and trailer and dogs at more than a mile an hour, most likely, based on my previous experience. Tha'ts on the flats--I doubt I could even make it move on any uphill grade. :/


I don't know what the actual travel time is, assuming about 15MPH average. If there is anything but flat terrain, the battery probably won't last long, even if I use both the EIG and A123 packs (which can't be used in parallel as tehy're not the same voltage).

Flat terrain with a number of stops and starts (every half mile or so) gives a max range with just the trike, no trailer, of perhaps 15-17 miles on the A123 pack. If there's much of a slope uphill I'd knock that down to 10 miles with teh trailer, and hope for better. I might get 20-25 miles out of the EIG pack under the same conditions, maybe.

So I'd need to recharge at best at say every 30 miles, and it would take at least 6 hours with the Satiator as the single charger, probably more like 8 to be sure.

The lighting pack could be charged separately with the Accucel6 RC charger. That's another limiting factor: IIRC it's about 2-3Ah to run the lighting (including headlight) just for my 10-15-minute work commute round trip. So for a full 30 miles, about 2 hours of riding at 15MPH average, it would probably take about 16-18Ah, possibly more, maybe less. (a lot less if the headlight isn't used).

So let's say I get 30 miles in 10 hours, "worst case". Might get a lot better than that, maybe 40 miles in 8 hours.

How far is it to where you are? About 100 miles-ish?

So assuming I rest (and feed/water/walk the dogs) while charging, then ride the couple hours it will go before needing charging again (or however far it is to the next charging spot), it would take about a day and a half or so to get there, assuming no troubles.

I'd need at least a week's vacation time to do it; and have any time to be there before heading back. ;)

I'd also need to pre-make a bunch of blendered-up food for Tiny, and keep it refrigerated/cooled so as not to spoil over the time to get there, be there, and come back. 5 cups / day for her, and about 6 cups a day of dry for Yogi (which I usually blender up some of each time, cuz he's not spoiled at all... :oops: :lol:)


A cargo rack on top of the trailer could hold most of the stuff needed for a week's worth of food, water, etc, and the rack on the trike could hold most of the rest. I might need to add some bags on the frame of teh trike near the front for some other stuff, which would work fine if I don't need to pedal (would be in the way).


It's unlikely I'd actually ever get even the short trip up to your place done, much less a longer one to anywhere else, but it's still something to think about.


I'd need to carry a small generator and gas for it on the longer country-wide trip, as there are probably a lot of stretches longer than 30 miles with no outlets. ;) Solar would be nice, but isnt' guaranteed to work, and panels large enough to quickly recharge would add so much bulk and weight that I would probably have to leave other essential stuff behind, or add a whole second trailer for it, and it would shorten the range between charges (even though they could be setup to do charging during the ride if in daytime--so could the generator).


I do also have the 60Ah Thundersag(sky) cells, but there are only 10 of them, and I expect my controllers probably have an LVC above their average voltage, possibly above their max charged voltage. I expect they are probably mroe like 40Ah cells by now, with their age despite being essentially unused. If I had 6 or 7 more of them (whatever matches the A123 pack's series count), I could easily use them to double (or more) my range between charges.


For a really long trip I'd also want to put at least moped tires on all the wheels, and to also change out the rim on the left wheel for a matching one to the right (ex-Zero rim), and use similar rims (and good spokes) to build better wheels for the trailer. I'd also want to carry at least one spare 20" wheel/tire for teh trailer (which could also be used to replace a motor wheel on the trike, albeit at the cost of half the motor power), and a spare 26" front wheel/tire for the trike, just in case.


Anyway, it's all just a thought experiment at this point, unlikely to proceed further cuz of realities of life.
 
Actually got two and a half things finished this weekend, which is mroe than twice as many as usual. ;)

First thing I got done was getting the "mirror edge" turn signals built and mounted and wired up, though I don't yet have the "marker light" function in there. The plan is to add a lower-voltage constant connection to them, to keep them lit up at about 1/3 or less brightness; I need to dig out a little voltage regulator for that and wire it up with diodes into each light. Actually, I guess I already havea 12V regulator for the downtube striplighting, so I could tap off of that.

Presently each of the 3-LED mirror-edge-mounted turn signals is just a turn signal, and is completely off when not signalling.

They are made from more LED lights from goodwill, designed to run on 12VDC according to the markings, there were three groups of 3 LEDs, each meant to be waterproof AFAICT. My system runs on 16.4v fully charged, down to about 15V for most of a commute or other trip, so while I might'n't wanna run these on that constantly, using them as intermittently-on turn signals should be fine.
IMG_2834.JPG

But they are white LEDs, and I need amber...so out comes an old junk pedal, and pulled the reflectors off of it, then the plastic backs off of those, to leave me with the transparent amber reflectors themselves.
IMG_2837.JPG
View attachment 7

IMG_2839.JPG

Gorilla-glued the edges to teh LED modules,
View attachment 5
View attachment 4

and then doublesided foam tape to fit them on the front outer edges of the mirror housings, so that they are at the widest point of the trike, easy to see from front or sides. Also, because of the way the reflector scatters light, they are brighter from the sides than the front, which is good, because I already have front turn signals at the headlight.


The half thing I got done:

I didn't take pics but I also fixed the righthand turn signal on the trailer again; the wires brok off at the back of the glass housing again, so this time I had to break apart the entire glass housing and get to the internal wires. Unfortunately I also broke one of the LEDs from the PCB, which because they are in 3s groups, disables 1/3 of the LEDs in the unit. It's still very bright, and I can probably pull an LED off one fo teh old stripligths on CrazyBike2 to replace it, if I need to.


The second complete thing was to finish adding the security cable to the trailer hitch, so that should the hitch ever fail, it will not allow the trailer to come off the trike, nor allow the tongue to hit the pavement and cause a problem by digging in.

I finally found the little U-bolt clamp meant to create loops in the cable, and bolted one end of the short cable to the trike end, with the other loop simply slipped into the hitch-lock padlock's U when I am lockign the trailer to the trike.
IMG_2851.JPG

So now it is both easy to attach the trailer to teh trike and it will be doubly secure while it is attached.
IMG_2852.JPG

IMG_2853.JPG

IMG_2854.JPG

I also dug out the toggle switches to setup individual control over each headlight, and eventually every light (system) on the trike. Datecodes on teh switches show many were made the same year I was born! (others were made in the subsequent few years).

I have to make a dashboard plate for the handlebars to mount them on, before I can install tehm and wire them up.

Hopefully while I am doing all that, I'll get the CAv2.23 setup so it can be quickly transferred from CB2 to SBC and back, only having to note down and change the Odometer/etc readings, and the shunt value (since the 26" front wheels of both would have the speedo sensor and both use the same brand/model of tire).
 
Back
Top