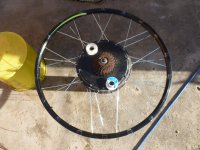
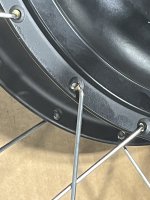
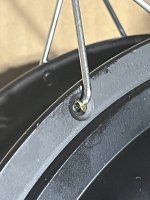
I am a newbie 2 months in and change, though no stranger to two wheels, a year of arduous commuting mid 90's put me off 2 wheel transport for a while, but a noname el cheapo cycle is generally at hand for local light shopping trips and summer visits to riverside pubs. bdlc motors and lithium batteries are familiar to me from dabbling with rc though these days i just lurk on forums and watch vids..
The above wheel is part of a bundle dropped off by a pal wanting to free some room in his own yard of residue left behind by sons who have left home.. I mentioned my 'new' ebike and it was 'oh u like ebikes u want some??'
I converted my 'daily ride' cycle after pondering too long on trips of a certain distance, not being as young or quite as active as i have been I was considering alternatives when i should have been cycling.. so the ebike conversion of my step through shopping bike took place..
So thats ebike #1, in need of new brake blocks for the first time in 4 years, see how the brake block residue has stained my nice cream coloured tyres.
ebike #2 one of the freebies, is an amazon 699 special ebike with some great design features like holes in the top of the bars for cable runthrough and catching rain to gather at the bottom bracket, and rear stays that require wedges to open wide enough for the back wheel to fit. (i checked its the stock freewheel fitted, and the wheel itself is pretty unique)
Beyond bike bits about £60s worth cables, bottom bracket, brake pads,chain, the 'e' aspect required a new kt controller and headset,
this bike was expensive to get roadworthy and the gears took ages to soak in oil and free up from the seized position, i failed to get the front changer to stretch over the 3 chainrings so it only selects between the 2 larger drives.
Both the above are eu/uk street legal 250w limited to 15.5mph etc..
and ebike #3, well i had to drop the motor with the 'wrong' spokes in the frame to test

excuse the gaffer tape and old travel toilet bag controller enclosure. I had invested in an extra large ebike controller box from those nice folk over at aliexpress, No way was the 28a controller and excess wiring going to fit.
this is a 500/750/1000?w motor the controller headset is cracked and the display is useless. Plans for this bike are vague atm it was more of a challenge to get it up with the seized bottom bracket (yeah 2 bikes with seized bottom brackets) and completely destroyed back wheel. Its brakes need a complete overhaul the rear caliper attempts to bend the rotor/disk atm!! and the cables are far from pristine, My neighbor who drives some evenings for food delivery services has been interested in this bike for some reason..
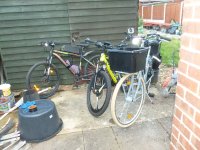
So lots still to do with this bike but knowing that once all together it will work well is very nice to know.. so far i had only spun the motor up once in the garage vice and that was not fun..
 )
)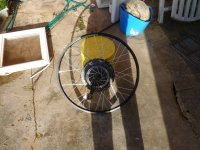 having a sit n sup atm Sunday afternoon etc... and will try to true the wheel in the up ended frame using cable tie markers later, Not for use but to check a) my ability, and b) the length if any of spoke protruding from the nipple end or laving mms of thread when taught. as to properly size the 14g spokes ..
 having a sit n sup atm Sunday afternoon etc... and will try to true the wheel in the up ended frame using cable tie markers later, Not for use but to check a) my ability, and b) the length if any of spoke protruding from the nipple end or laving mms of thread when taught. as to properly size the 14g spokes ..

