Loaded Vanguard Carbon Cast Ronin Single VESC 10S4P

whitepony

10 kW
Joined
Feb 19, 2015
Messages
663
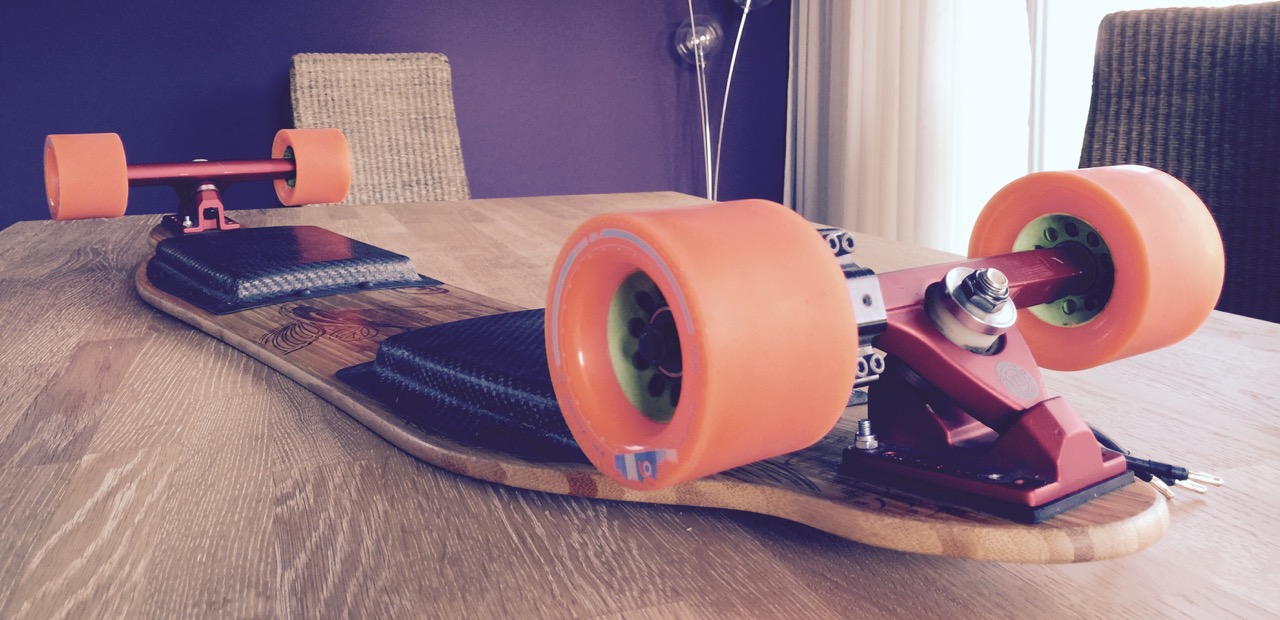
loaded vanguard flex 2 build with

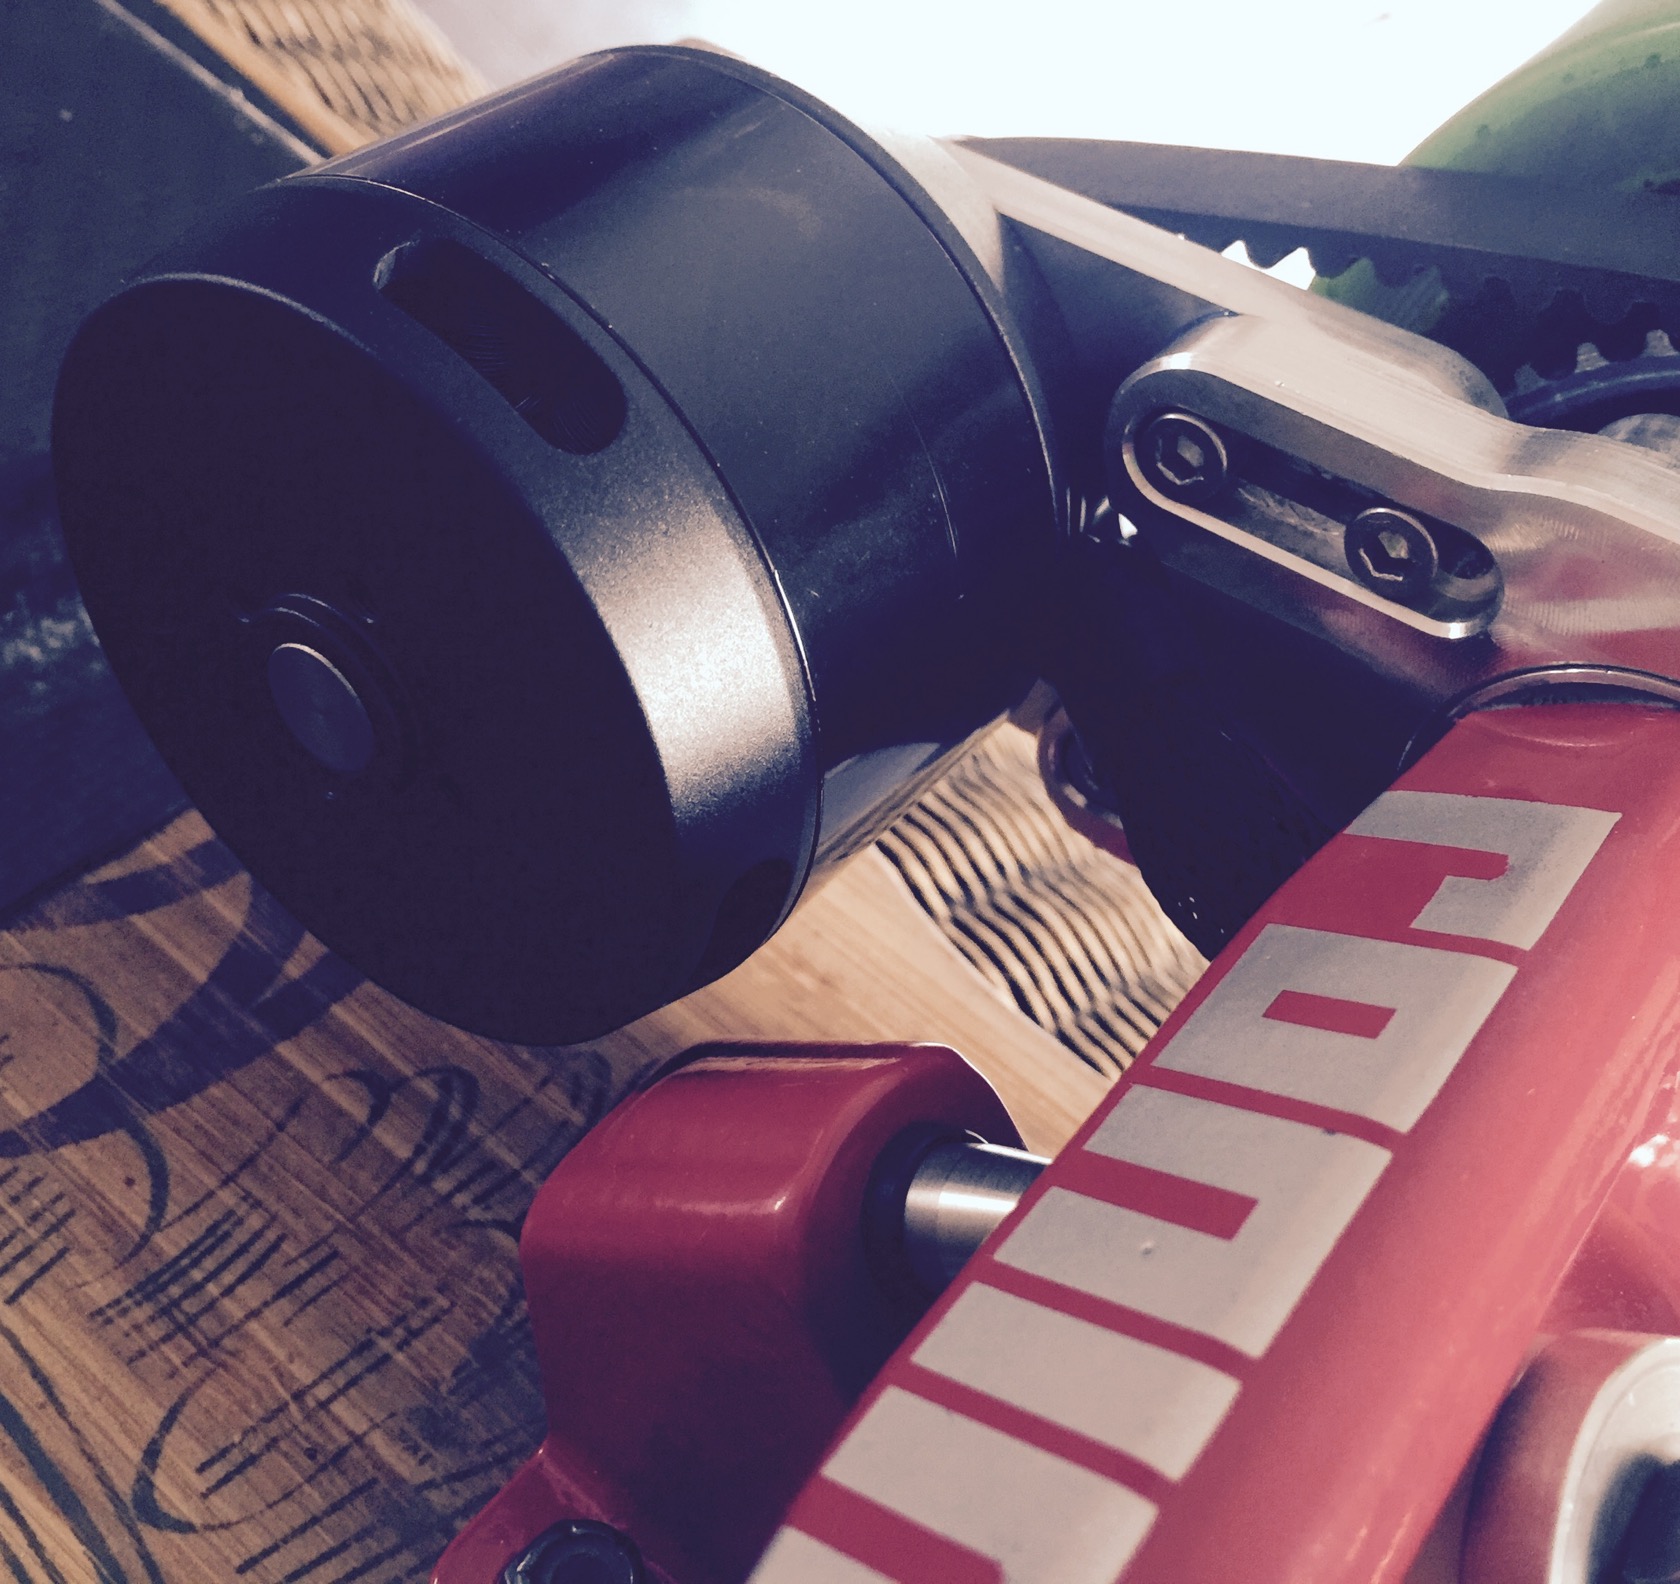
* Single SK6374 168KV (APS 6355 HEV by now)
* DIY 10S4P dual-segment battery from LG HG2 cells
* VESC in FOC mode
* 2.4Ghz Mini Remote
* Enertion Motor Mount (APS mount by now)
* 15mm 16/36T gearing by DIYElectricSkateboard (changed to 15/36t with 190KV)
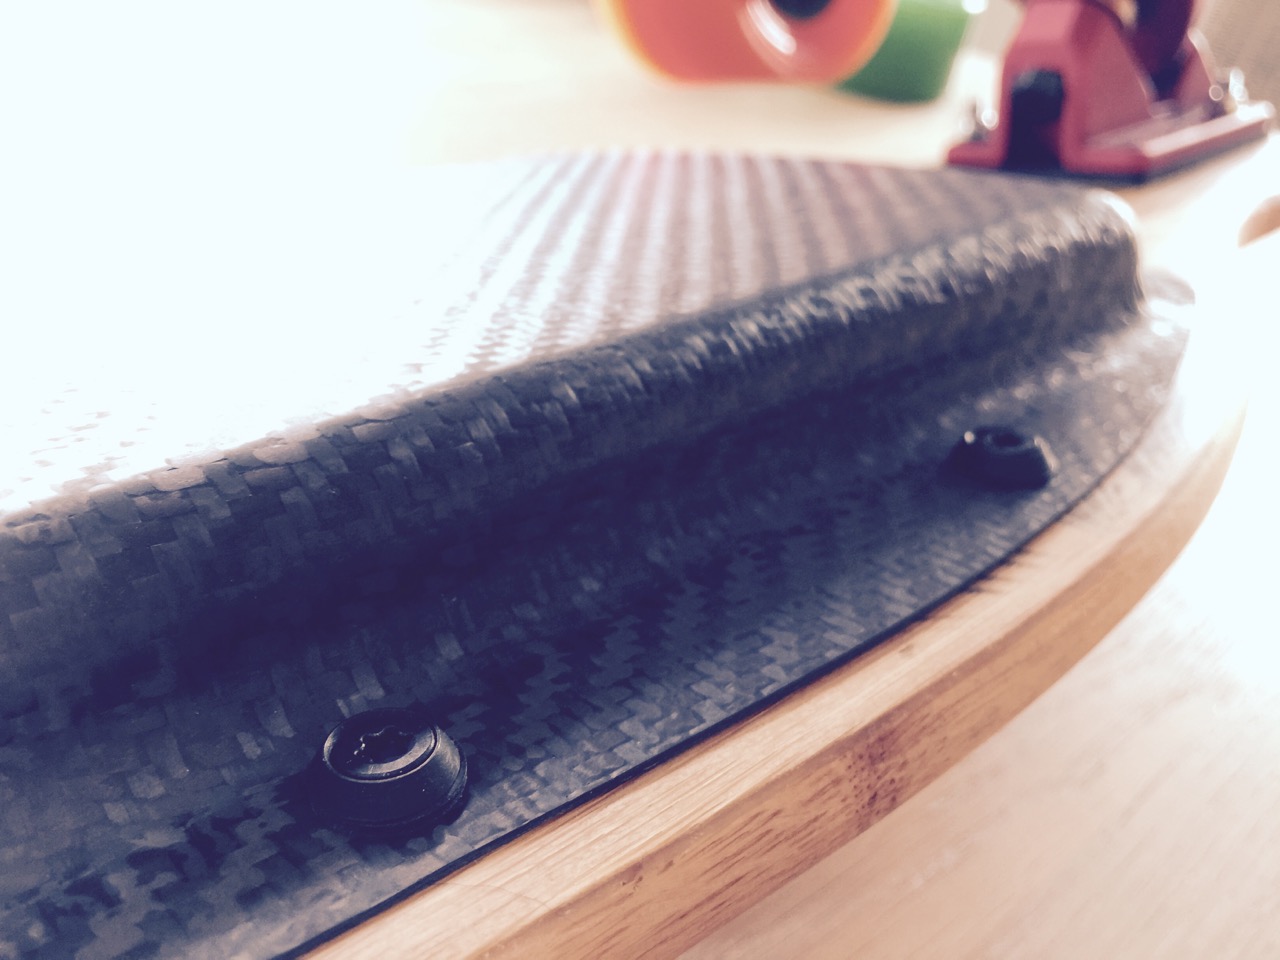
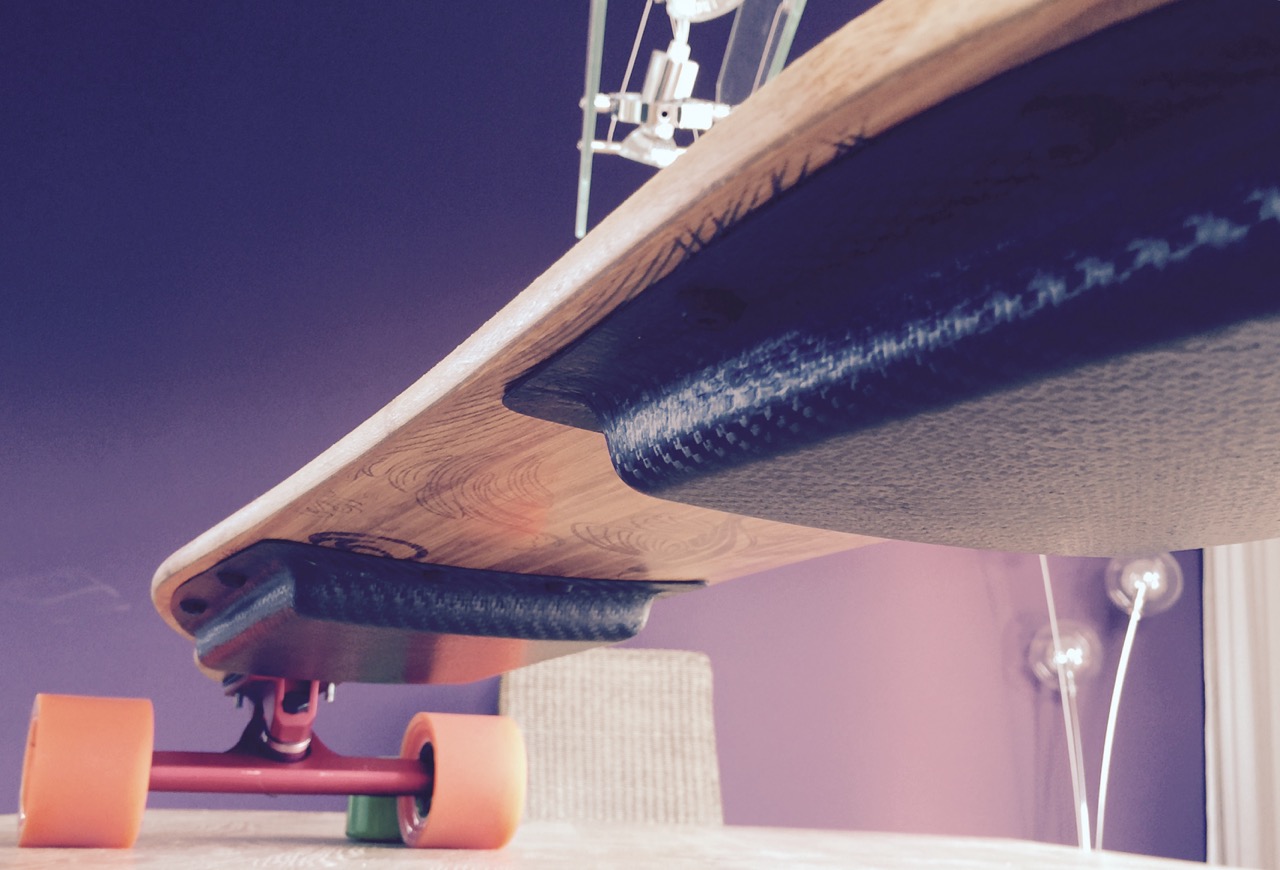
* DIY Carbon Vacuum Bagging Enclosures (very slim)
* inserted battery & motor wires
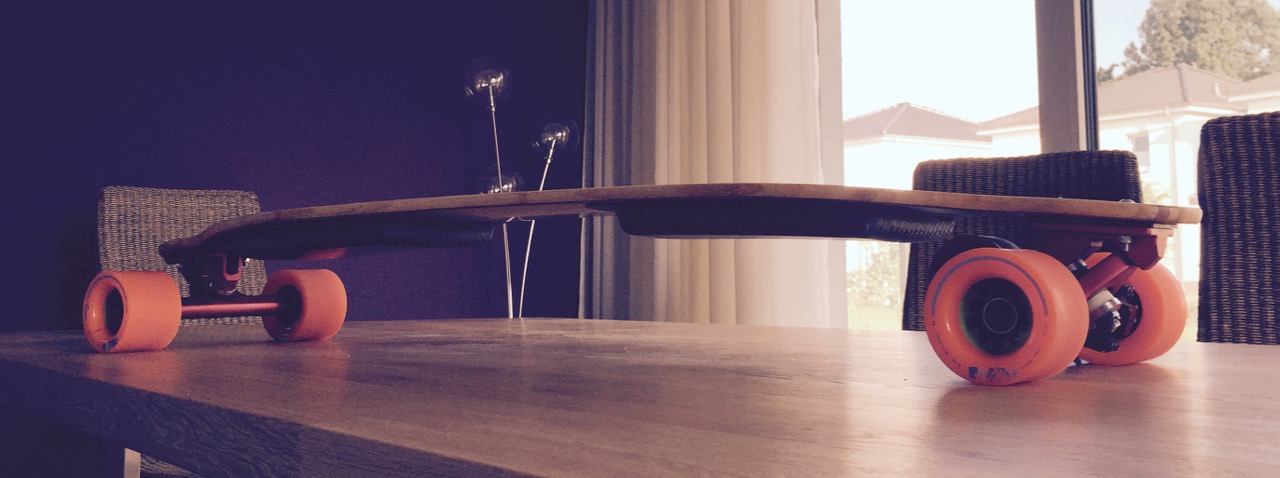
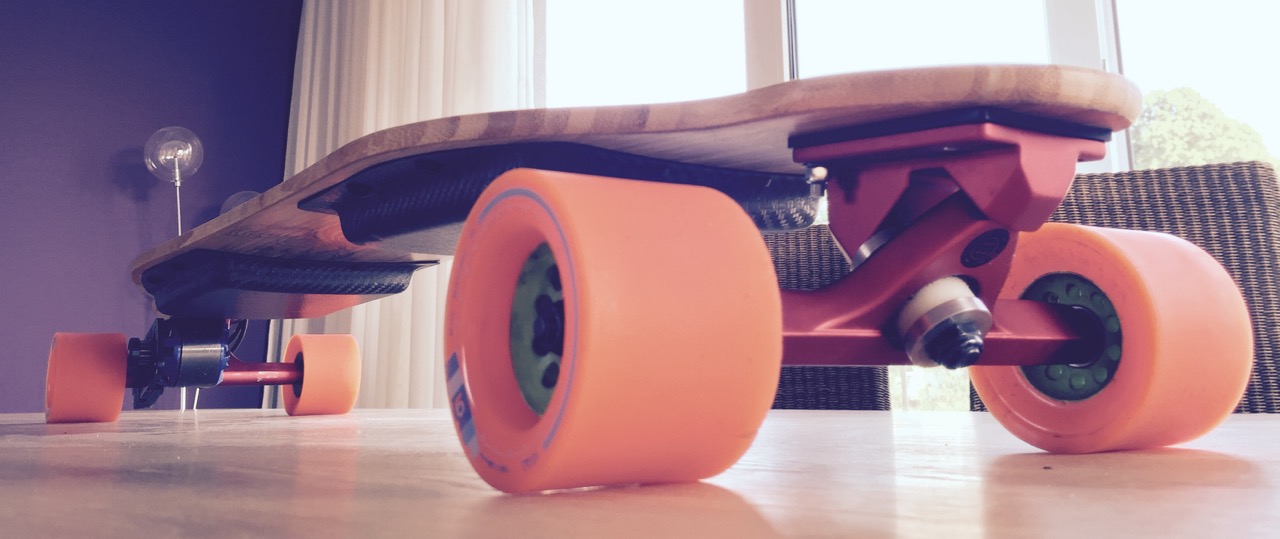
* cast ronin trucks with diy truck adapters

results:
vanguard_34.jpg


vanguard_46.jpg


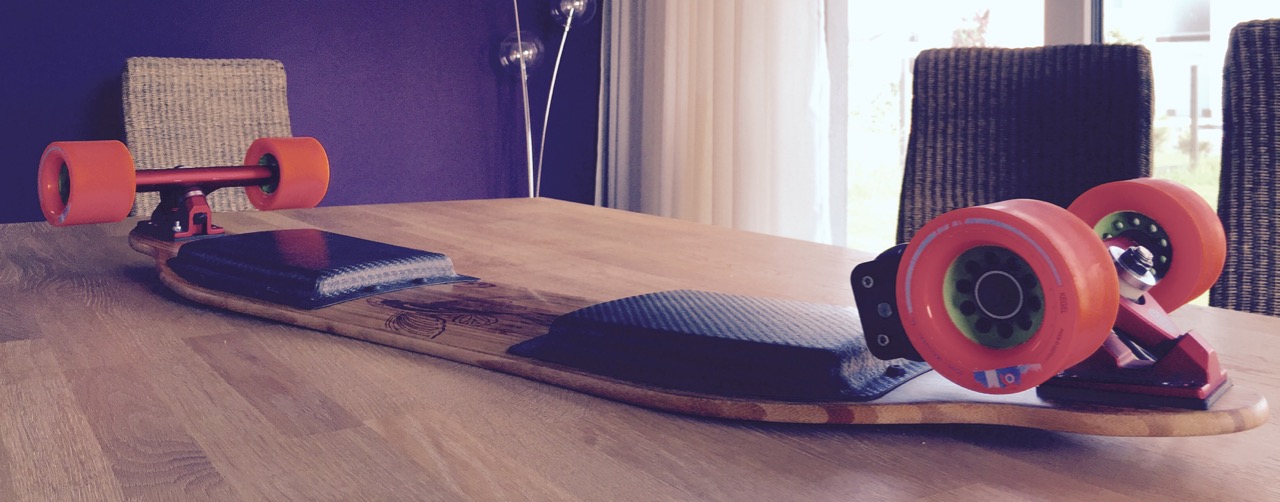
update 08/2016: switched caliber 2s for cast ronins with DIY truck adapters. never been happier with the vanguard, these ronins are insanely good <3
ronin_mount_adapter_21.jpg


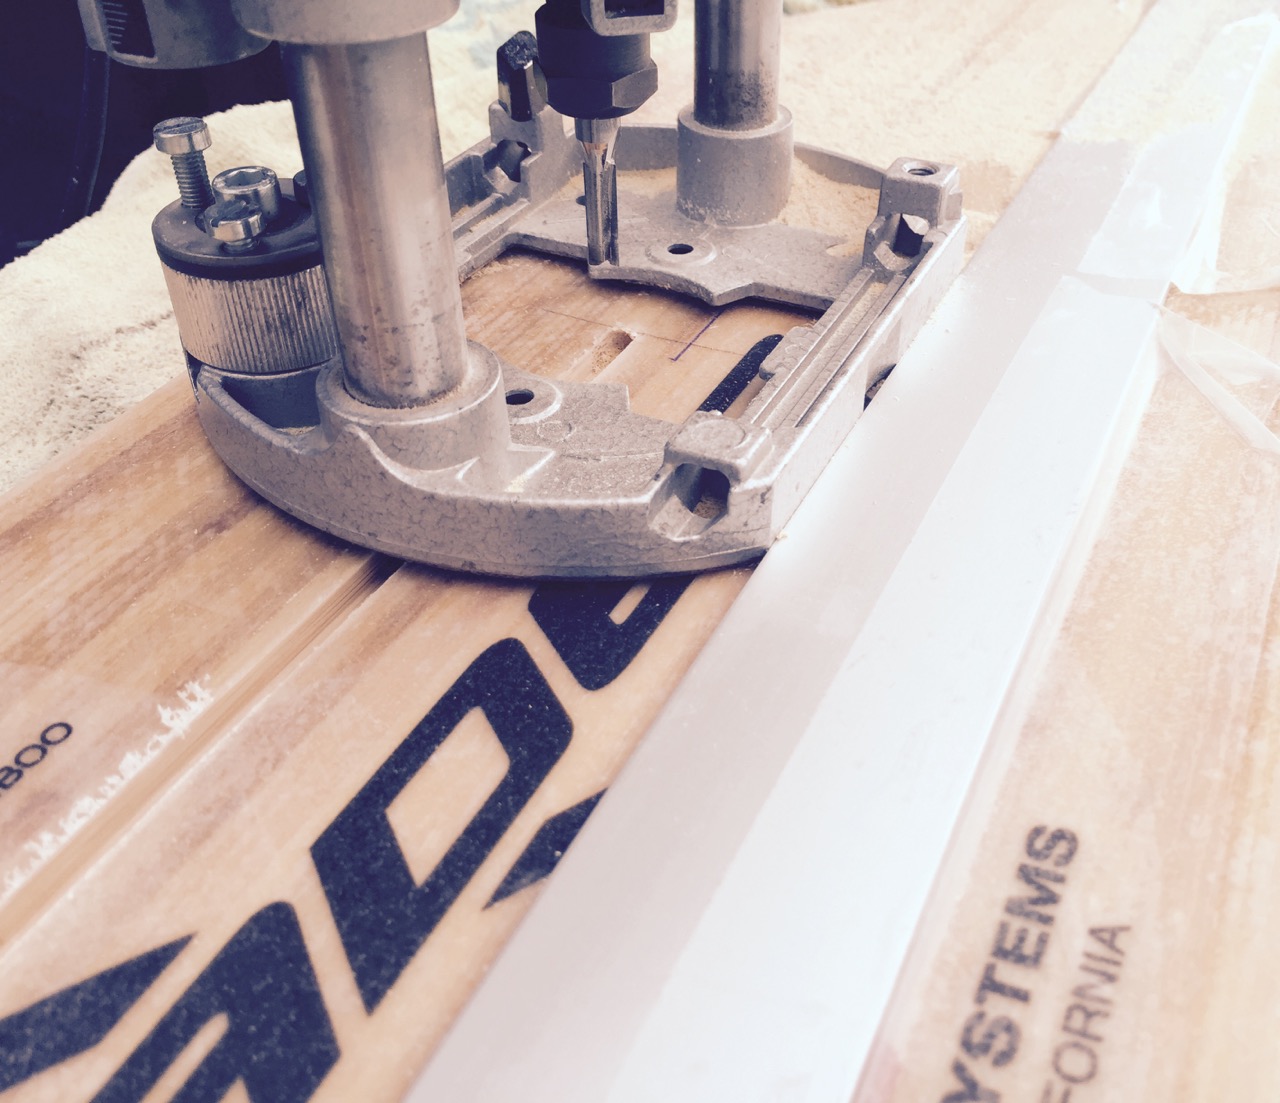
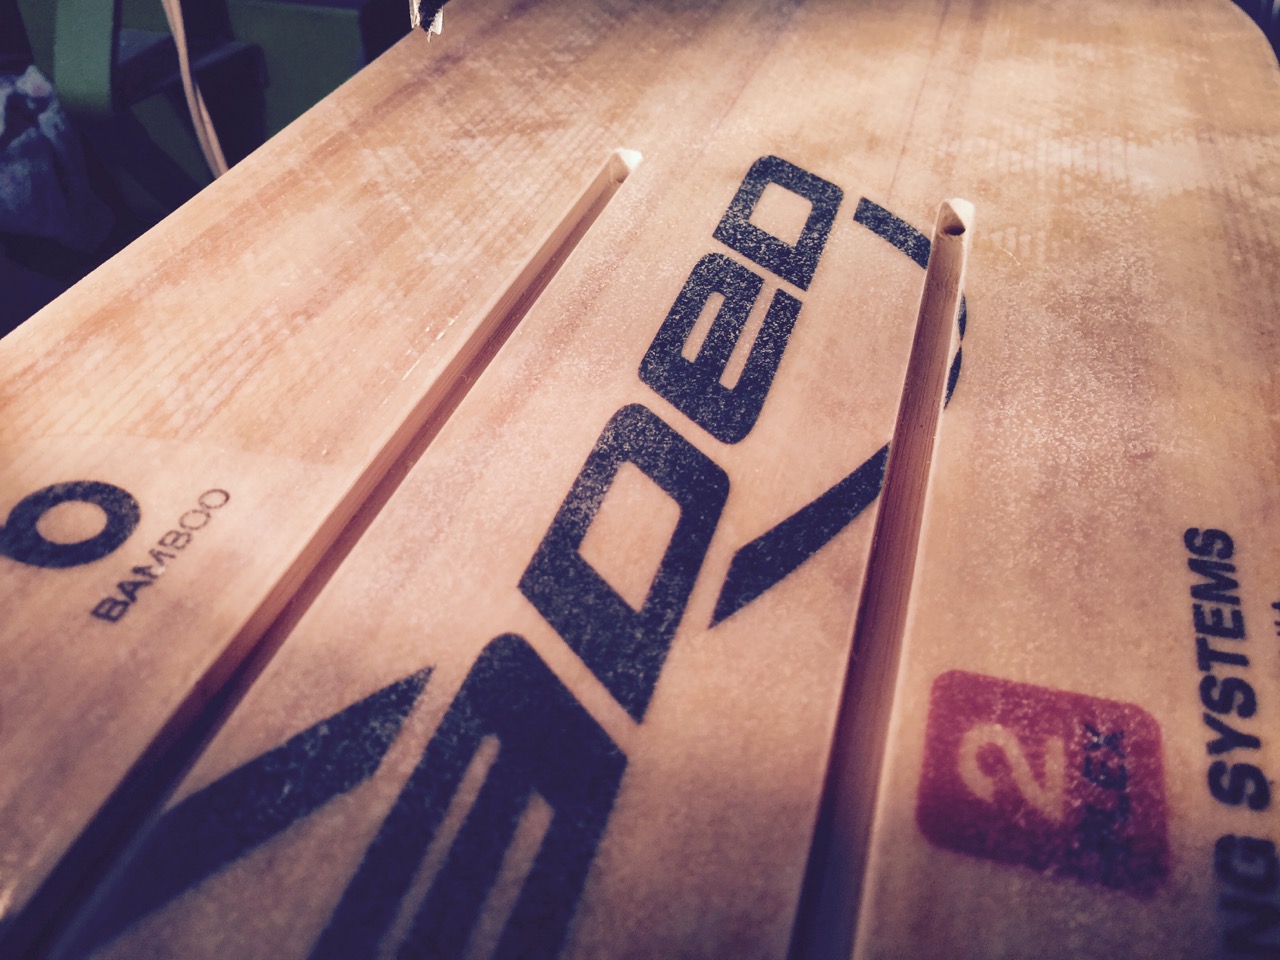
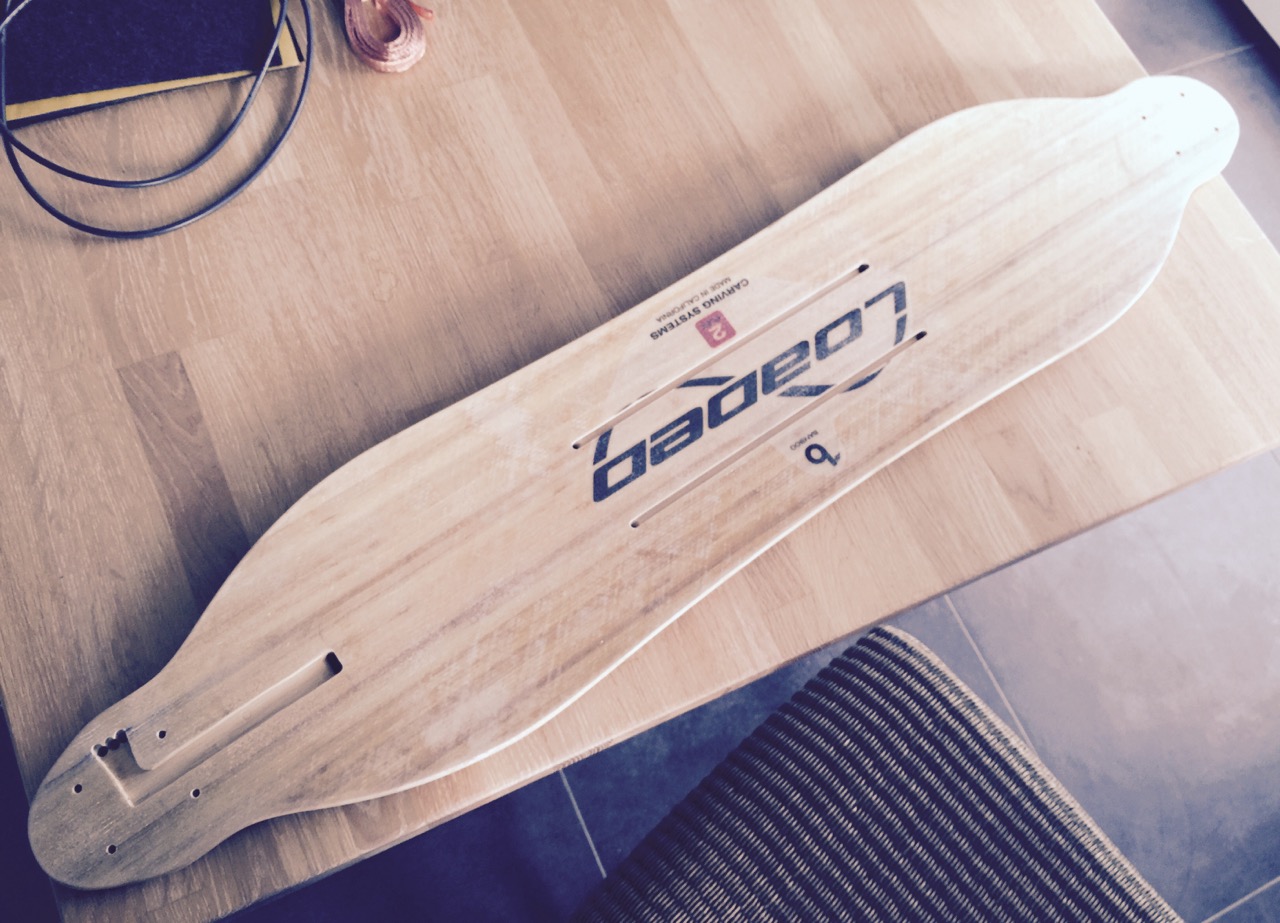
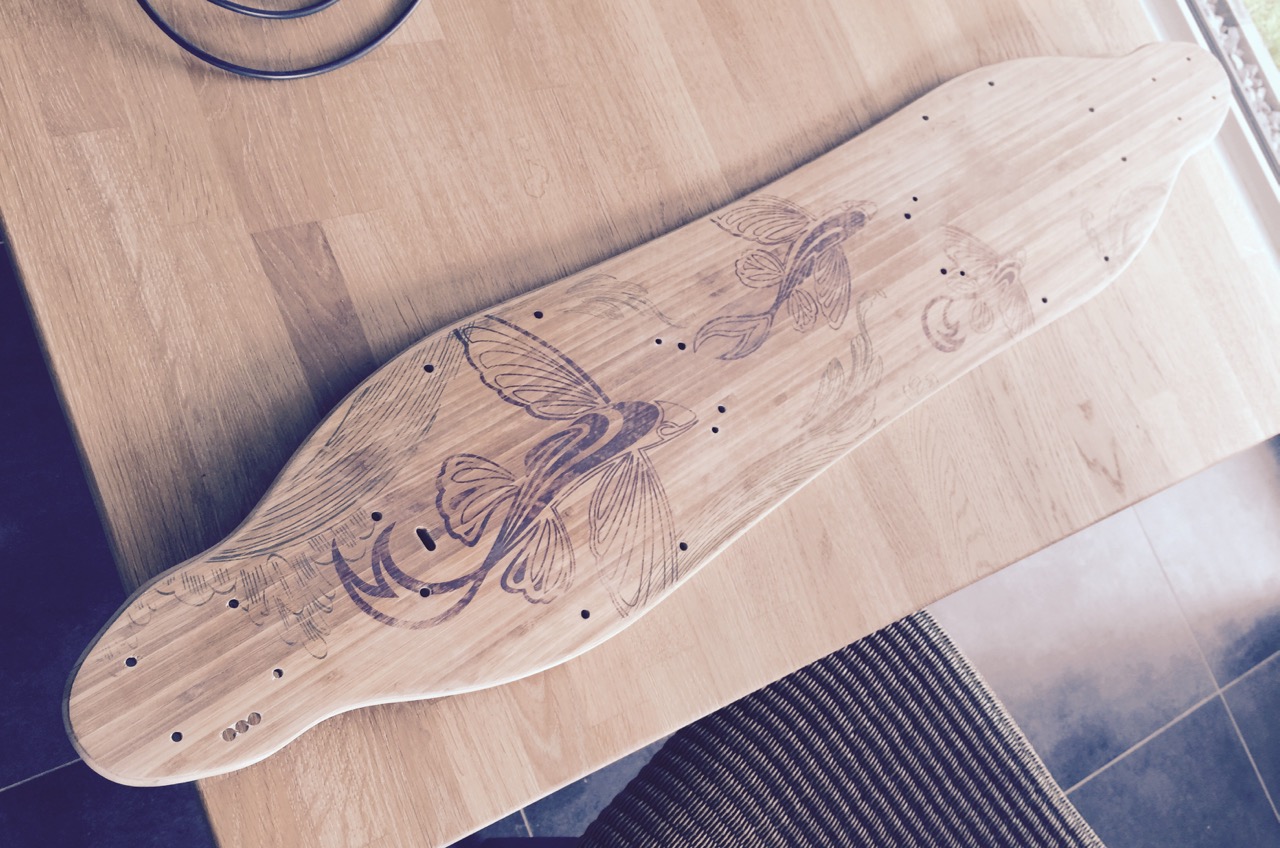
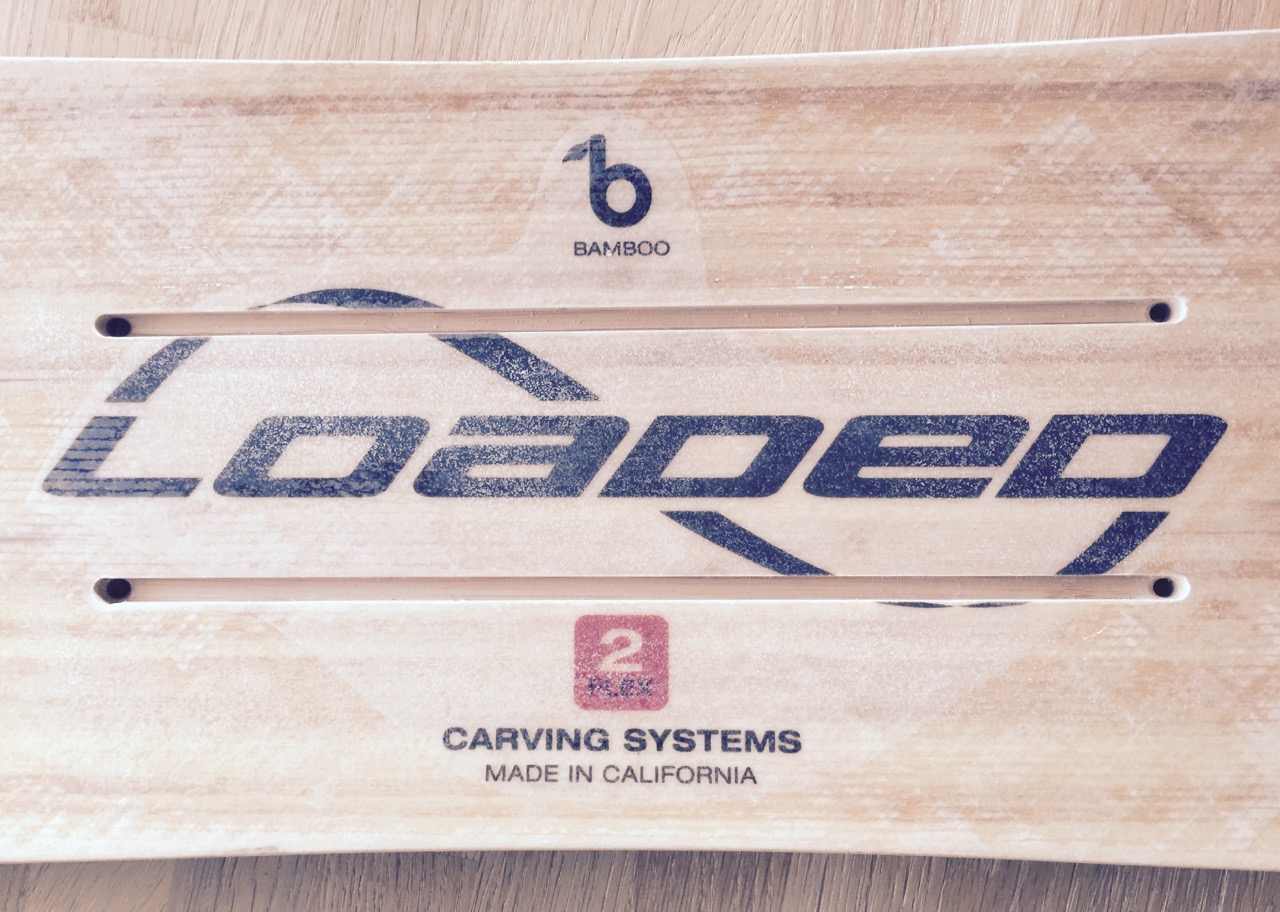
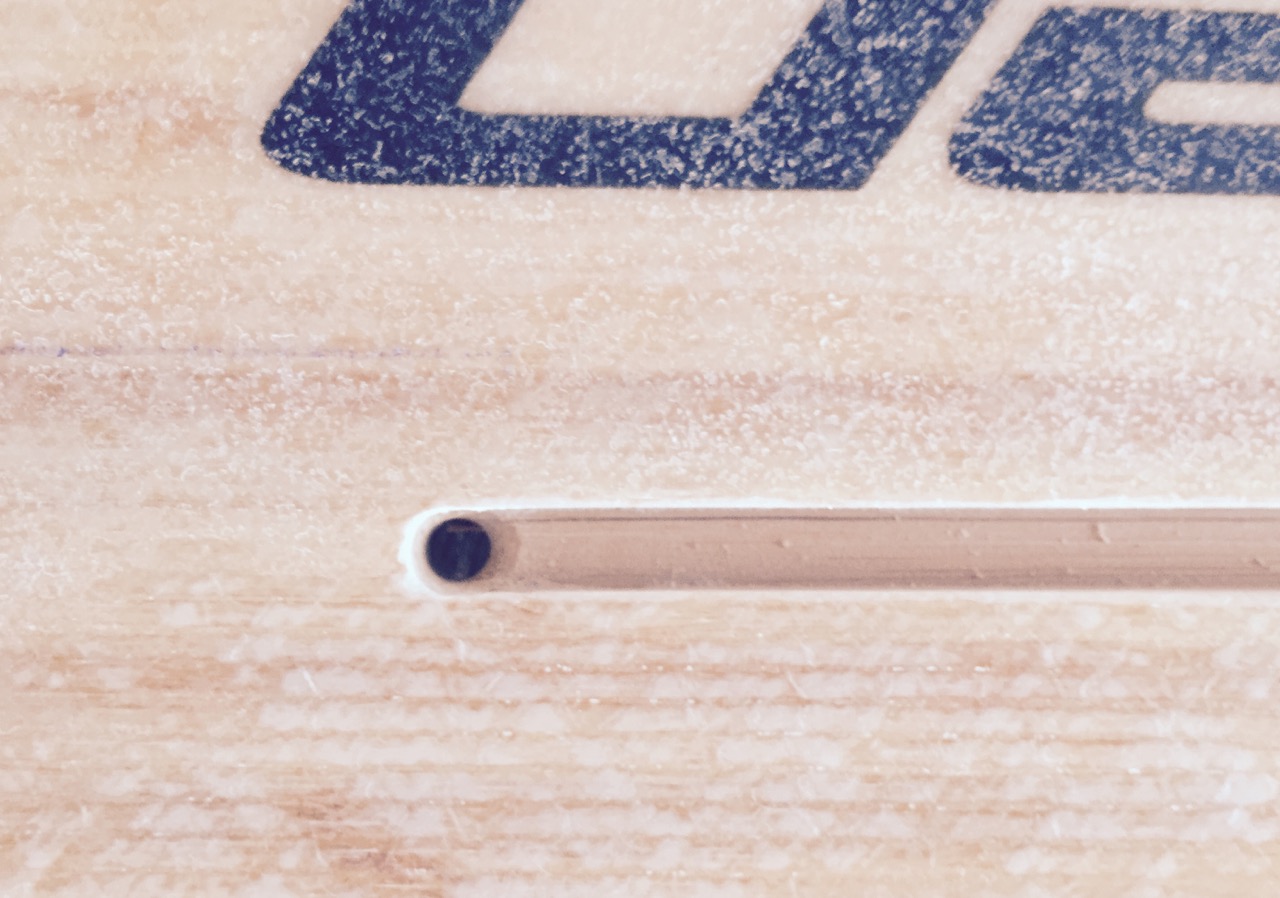
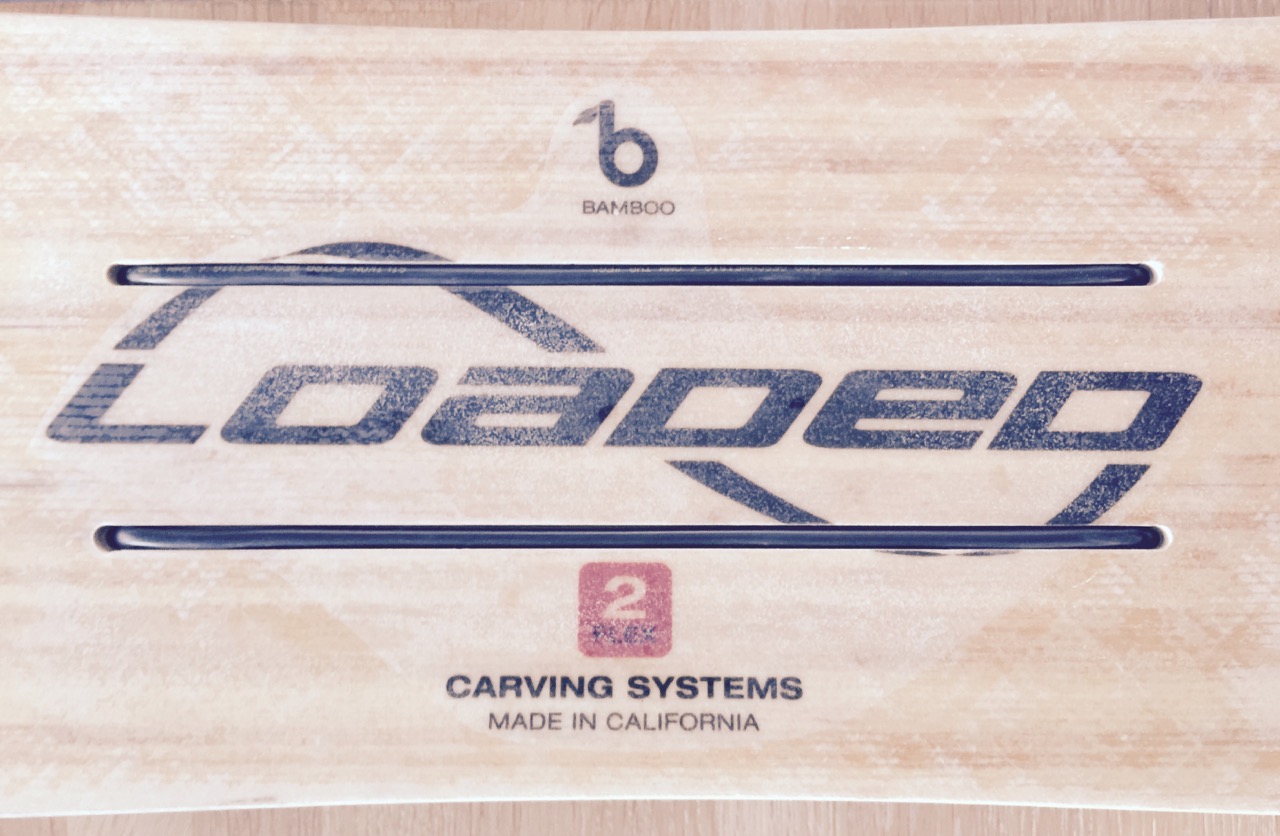
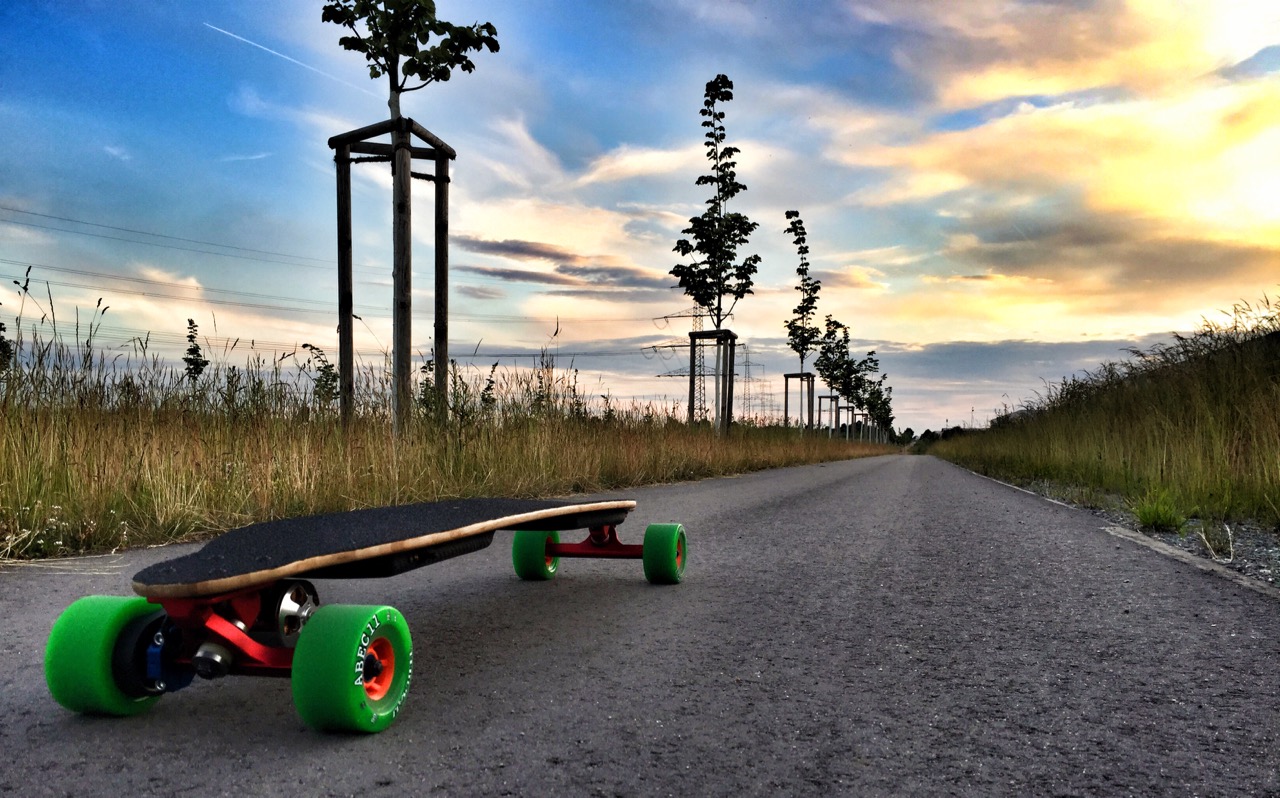
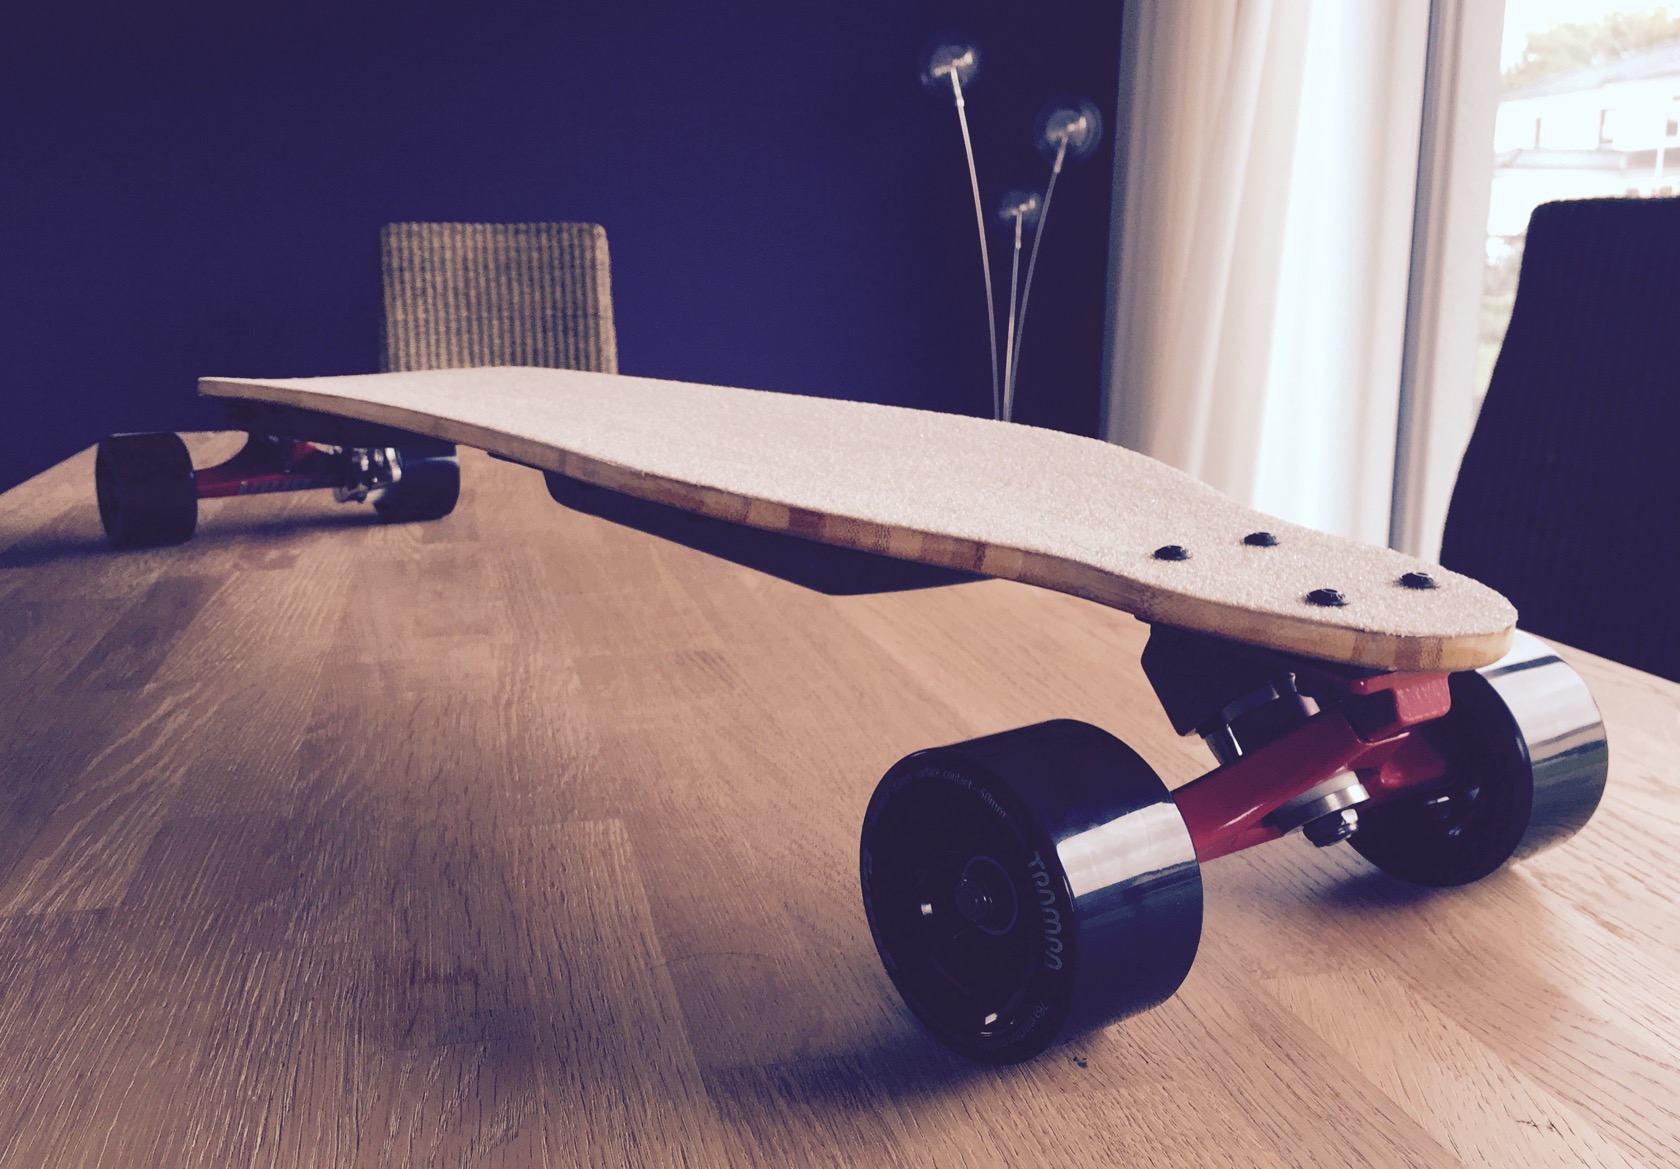
update 10/2016: added a 0.6mm bamboo veneer ontop with vicious griptape and 83mm trampa wheels
vanguard_winter_4.jpg


______________________________________________
how it started:

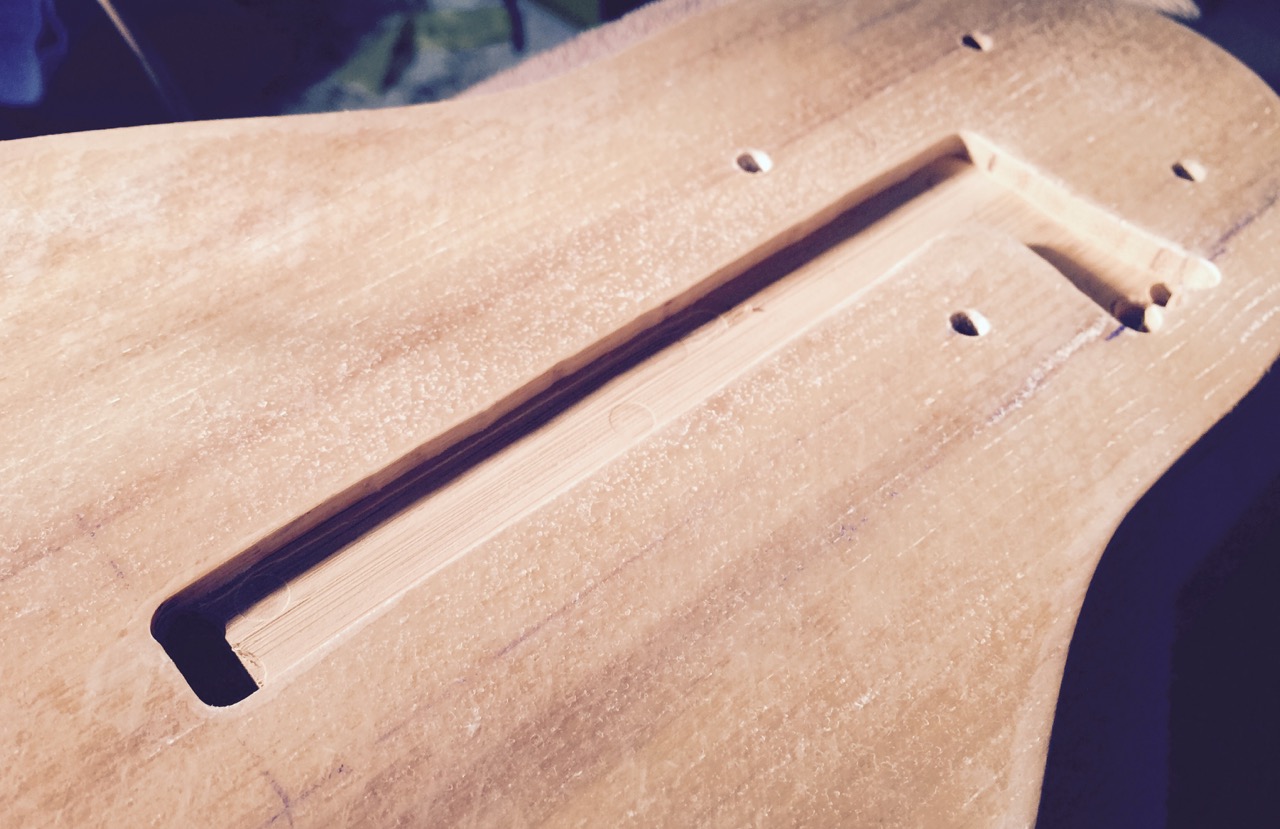
in the middle of a major rework of my landyachtz topspeed, I pretty much accidently stumbled across an extremely cheap flex2 42" vanguard - offer was so good that I couldnt say no.

since my topspeed was supposed to become the flexy cruiser next to my tesseract, I wasnt sure what to do - keep on working on topspeed or just focus on the vanguard ... well, here we are. I must say, the vanguard felt quite different from the topspeed, even more flexy, but it also felt more lively. spent a few hours on the road, pushing and pumping without a motor. :)

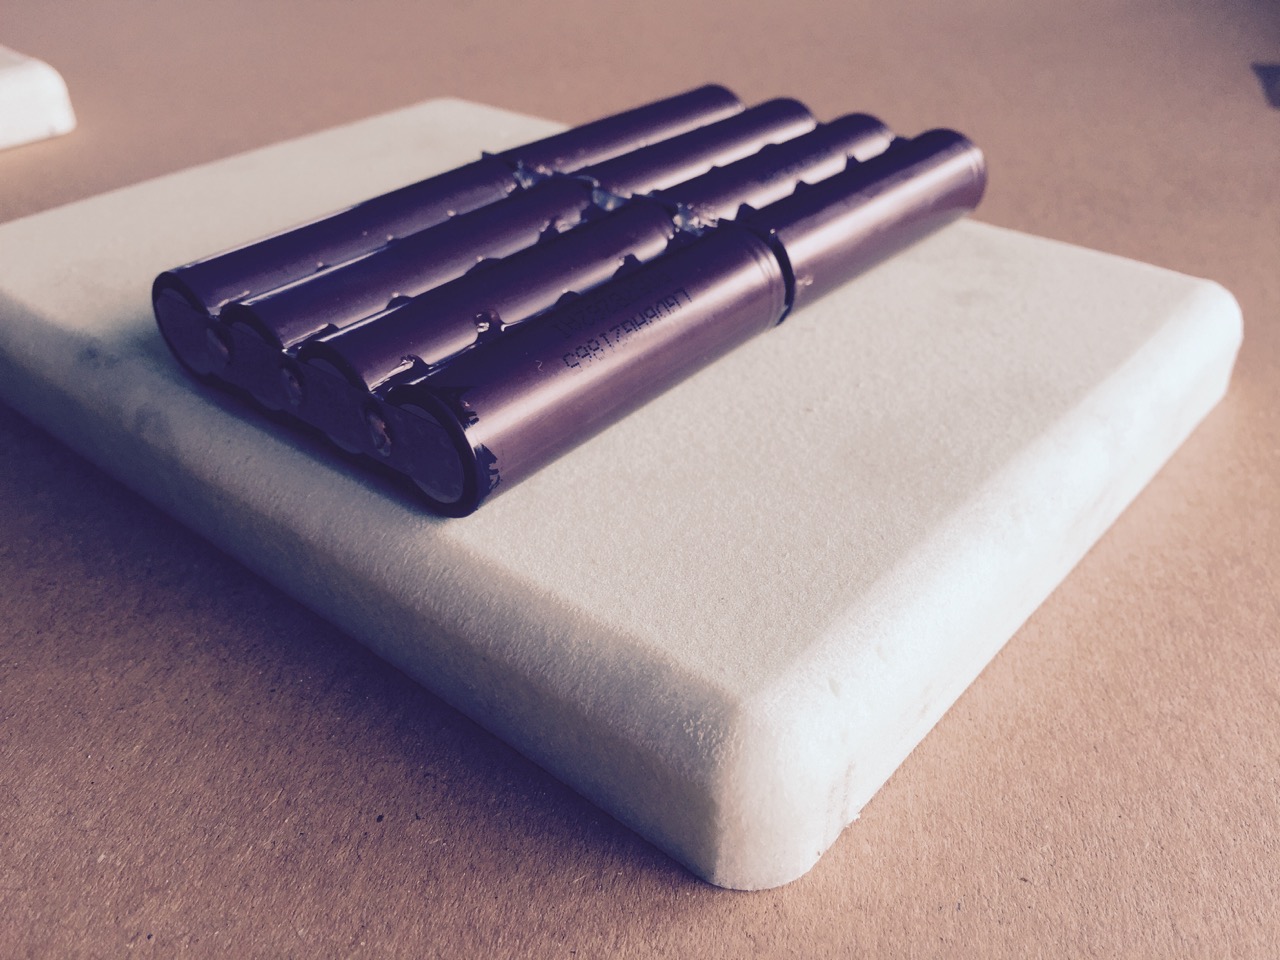
didnt want to dig into this board, so the enclosure mold needed to bend a little around the slight concave. I also wanted to preserve flex, so I went for the double enclosure setup like everyone else. since I already had the LG HG2 cells for my topspeed, even spot welded for the most part, I had to hide away my typical 10S4P setup somehow.

it was pretty straightforward, didnt feel like trying fancy crazy designs:
vanguard_3.jpg

vanguard_4.jpg


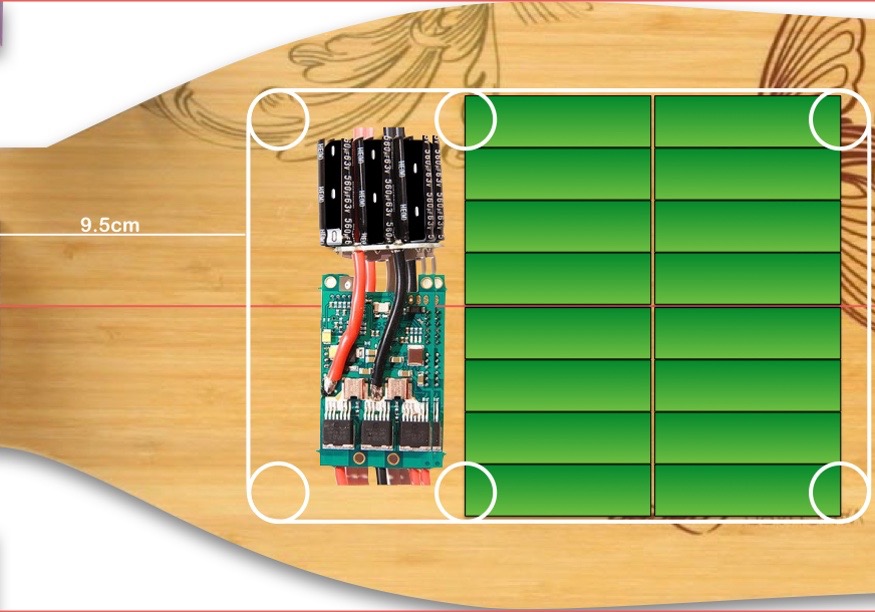
the space for the vesc can support up to 2 vescs and even 2 new vesc5.0. initially Ill go single motor though, possibly using the 168kV 6374 that I planned to use for my tesseract, which is running quite flawless though after downgearing to 15/36T.

since the mold had to bend a little, I tried hard foam again instead of wood and prayed that it wouldnt deform under pressure like last time:
vanguard_5.jpg


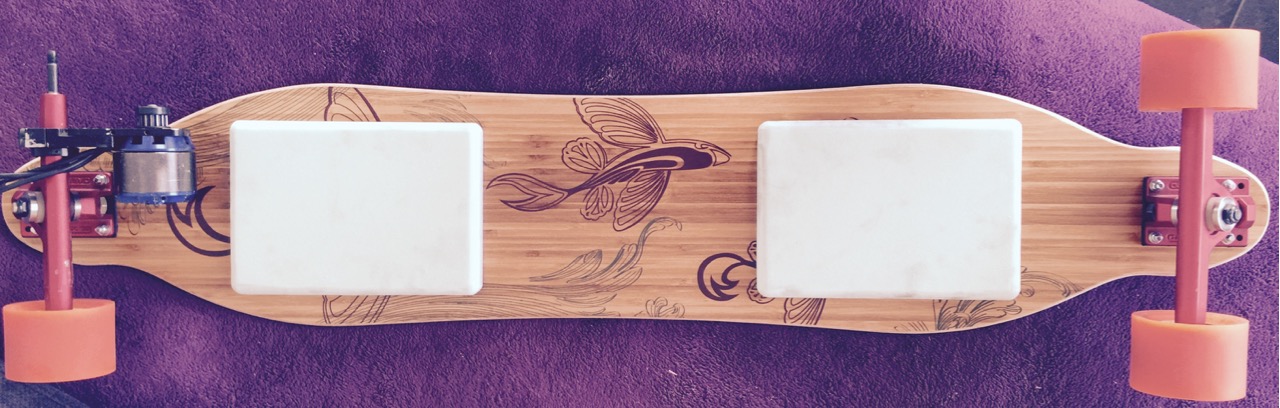
the enclosures look pretty large, but it will also be really slim compared to the other builds here - and the carbon will blend in better than the white/greenish foam. :p
vanguard_6.jpg


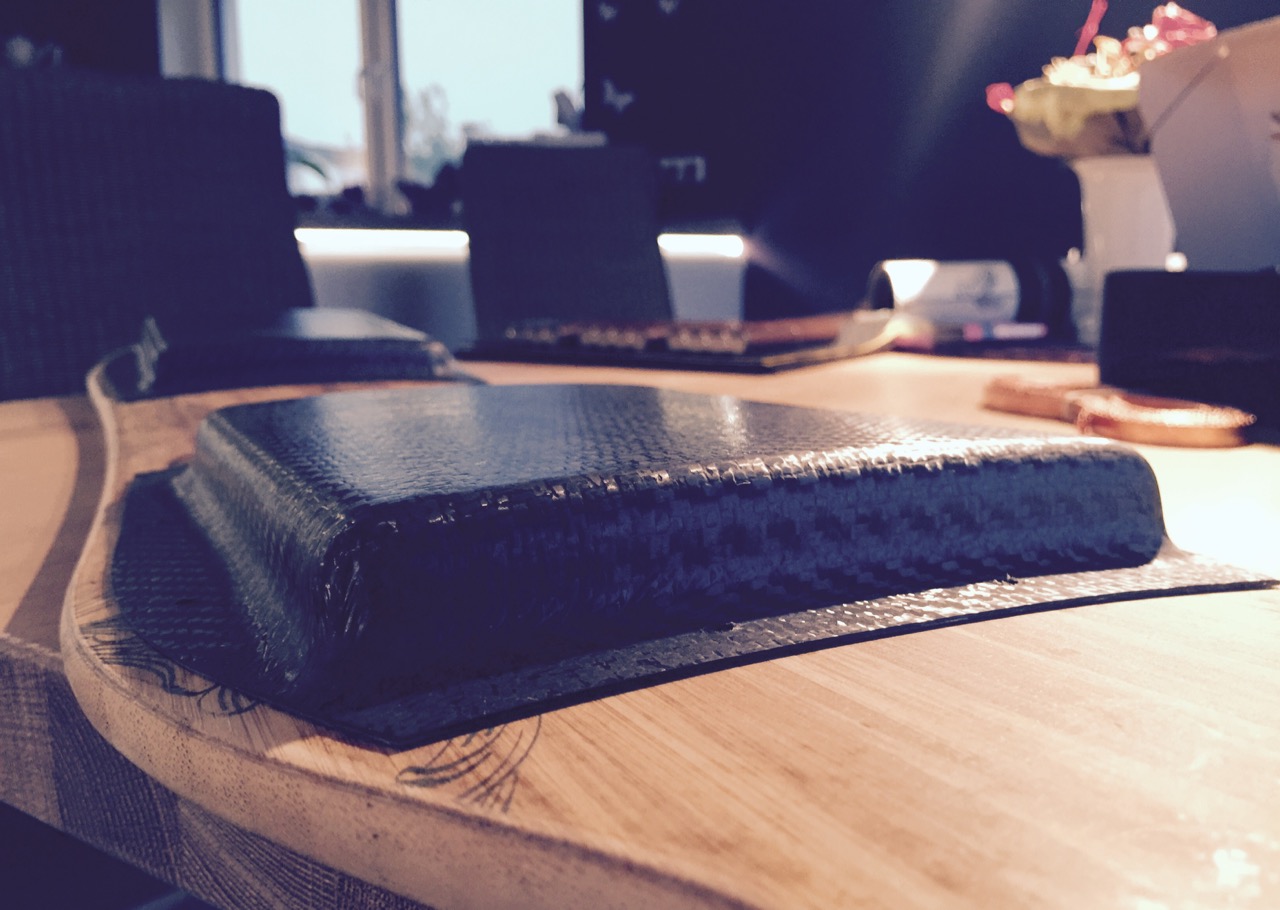
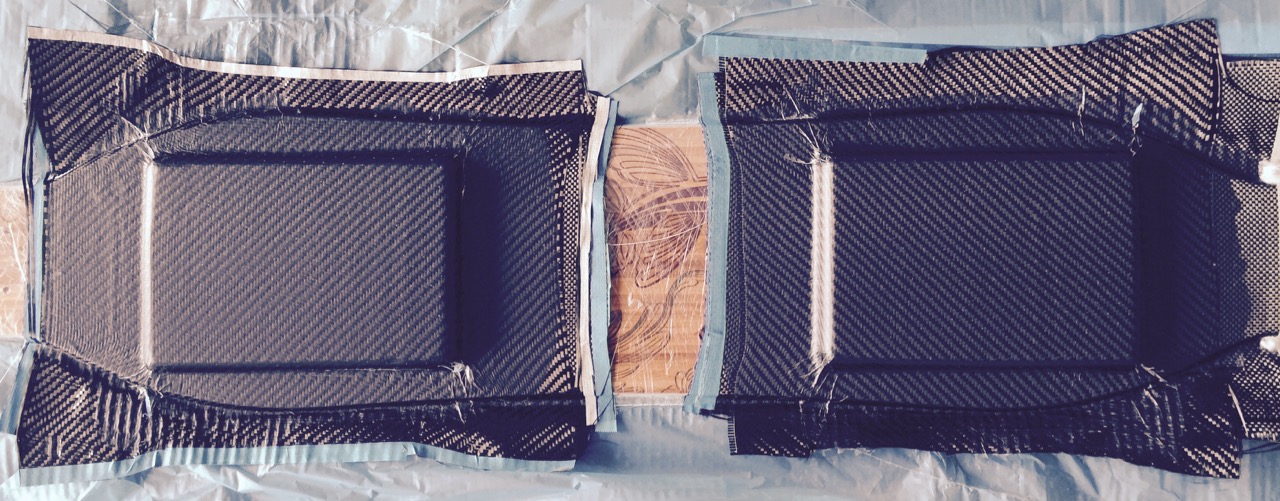
setting up triple layer carbon + 2 layers gfk, curing 24hours et voila. happy I didnt have any serious deformation, just one edge is sliiightly bend, rest is pretty good.
vanguard_7.jpg


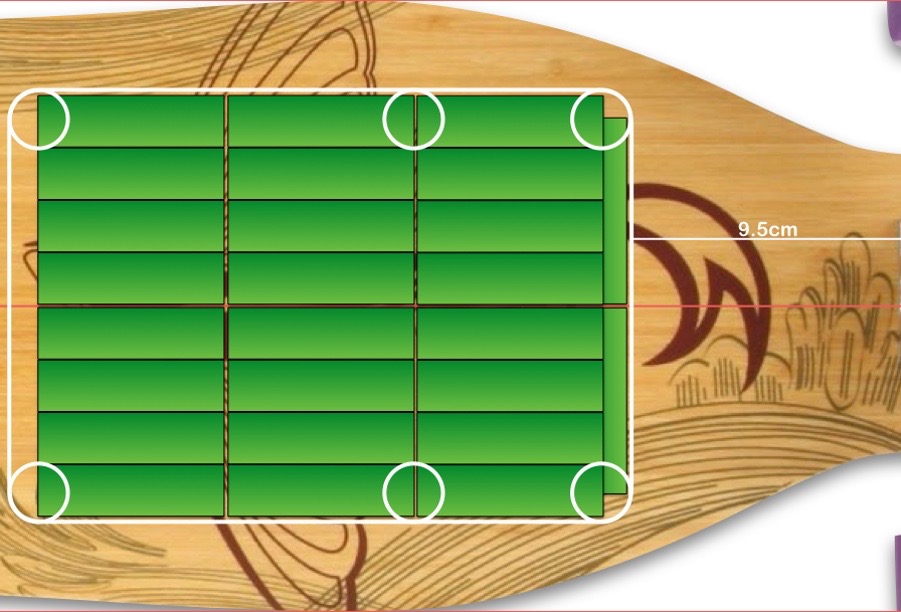
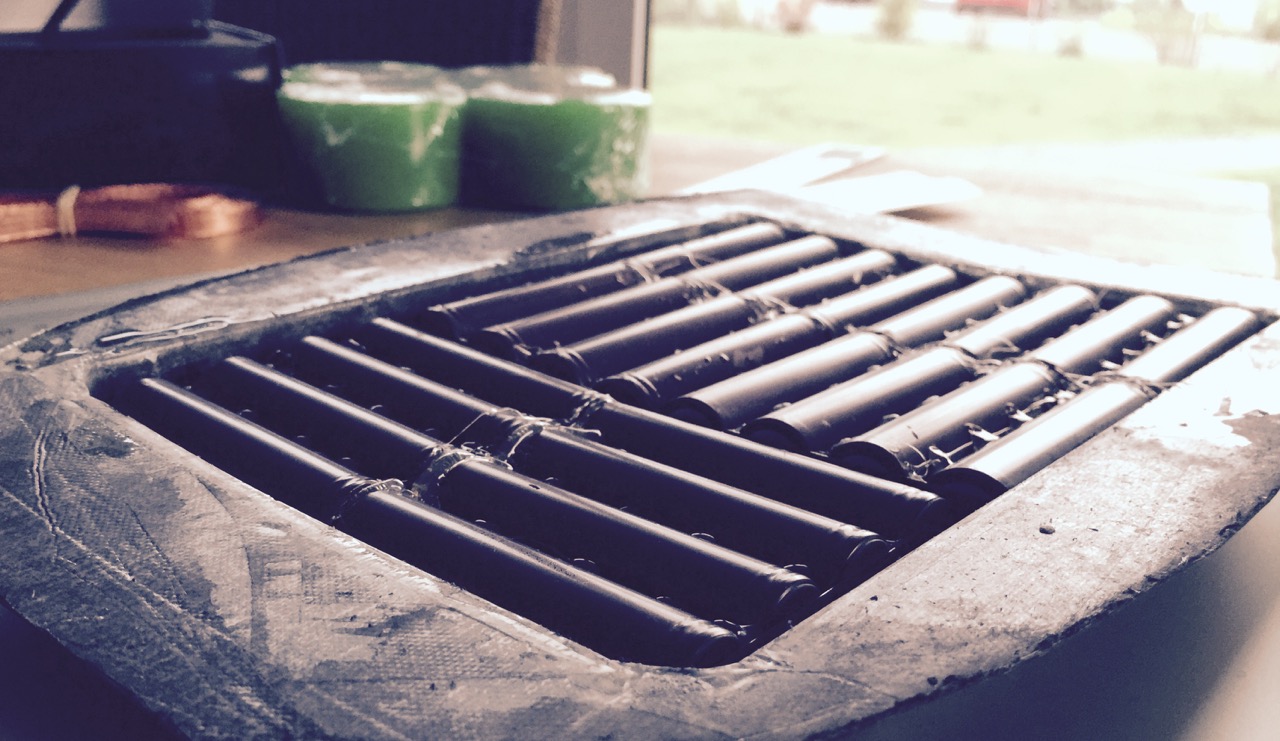
after some rough cutting and sanding, I checked the inner cavity: guess the batteries fit as planned!
vanguard_8.jpg


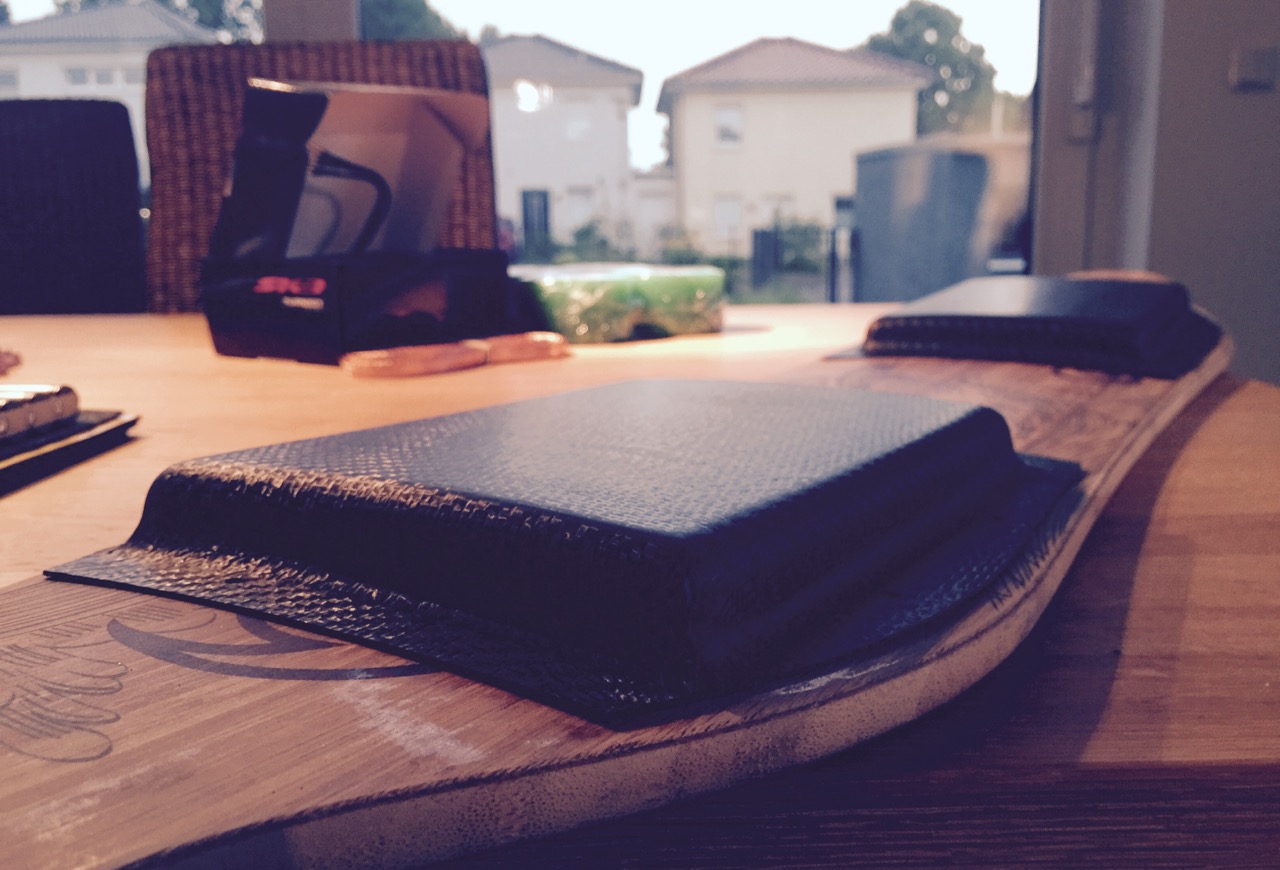
first time that I have a bent enclosure, gently following the curvature of the board. thanks brave foam, you kept up this time despite bending!! :D
vanguard_9.jpg


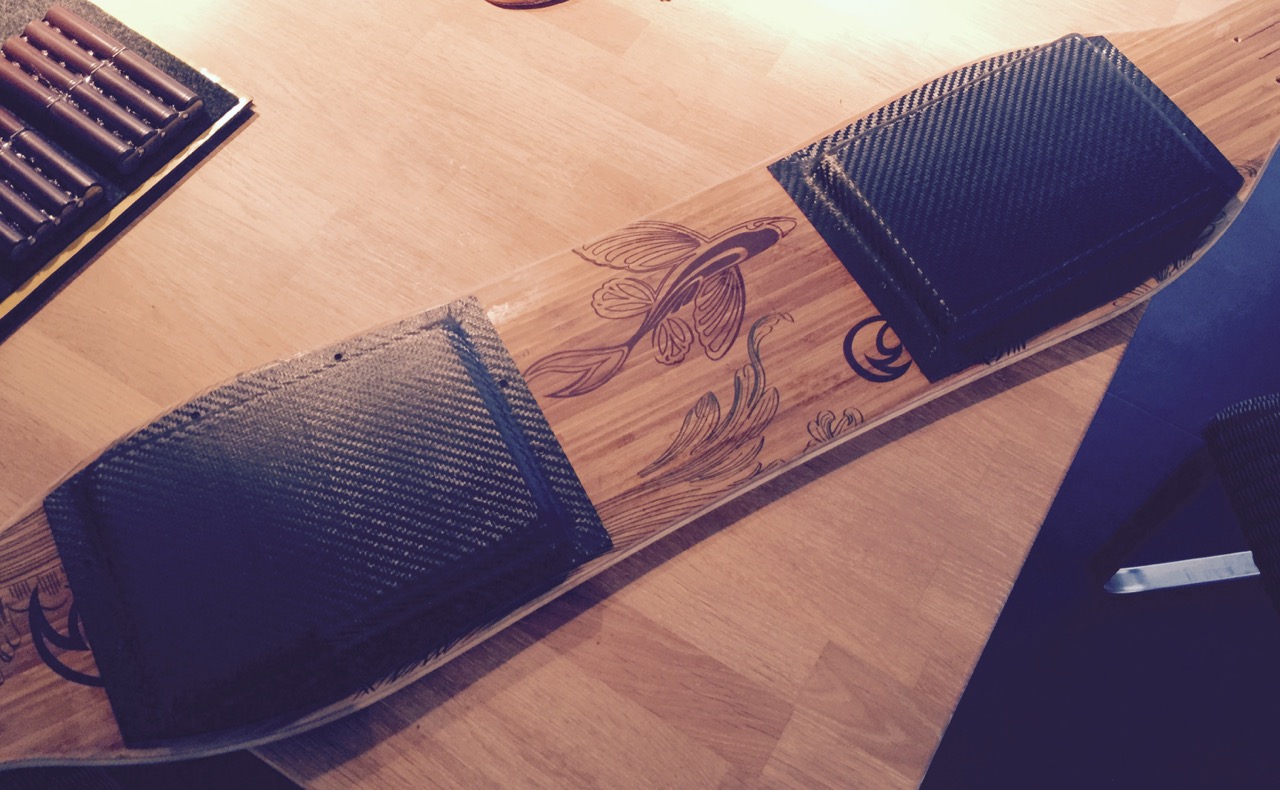
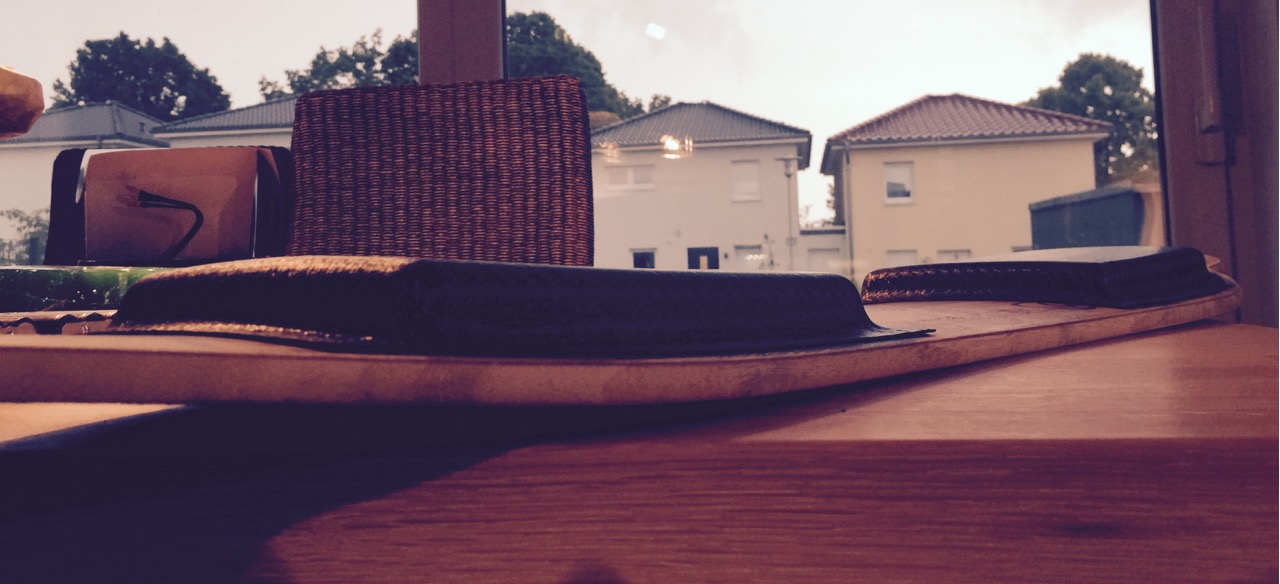
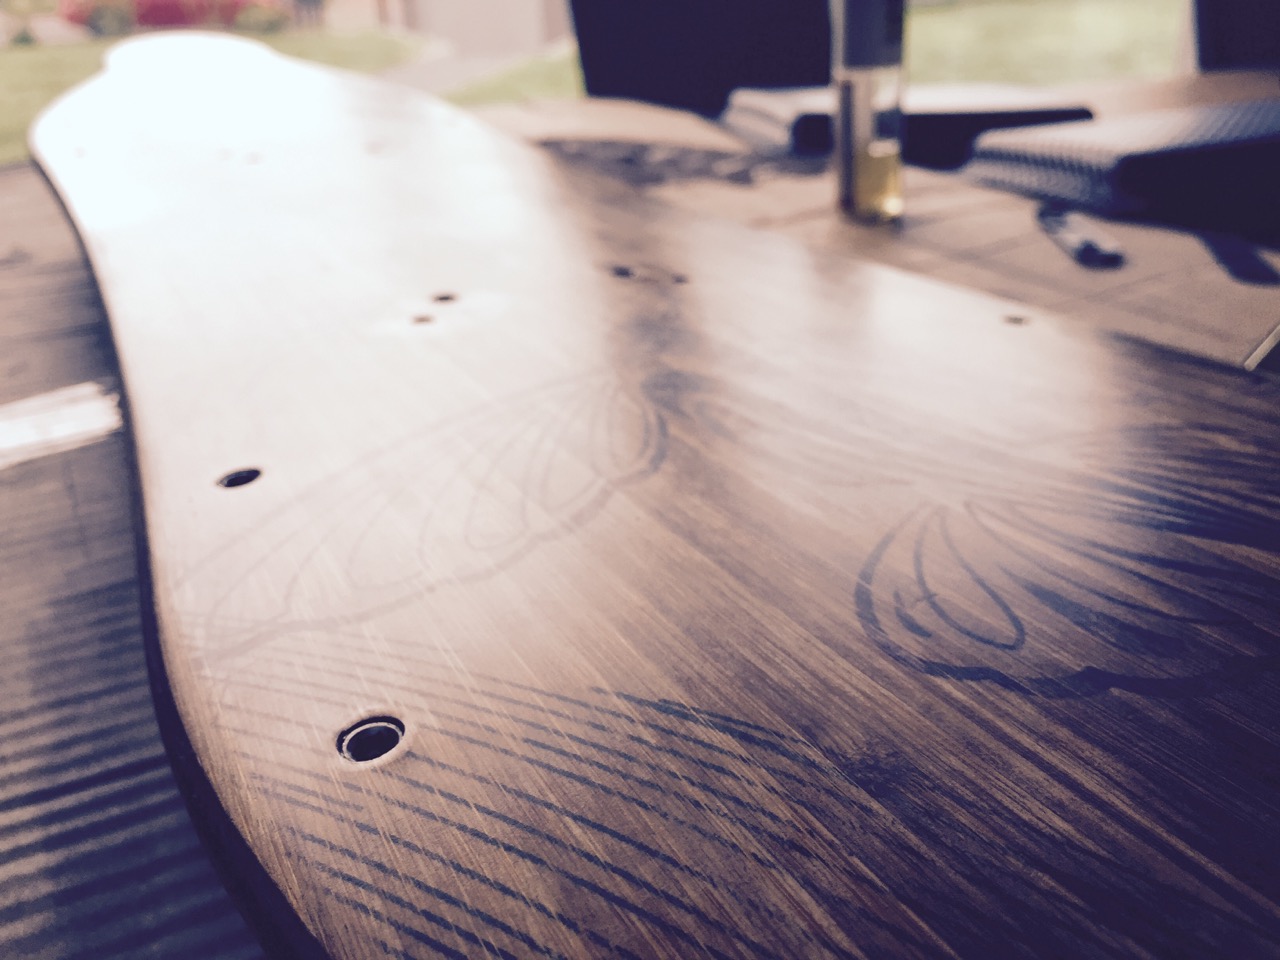
finally aligning the 2 enclosures! the sanded surface looks pretty good! :) want to cut the enclosures now following the curvature of the board with an offset. also Ill have to drill holes and I really need to take my time for that.
vanguard_10.jpg


Im mostly taking old parts for this build right now, not sure if Ill order anything new. still thinking about how to connect the 2 enclosure and the motors. I actually bought flat copper wire, so I wouldnt have to dig deep. then again, after my excessive topspeed routing, I dont feel like digging at all. :?

to be continued ..
 
Another interesting build !!

So you have tried your 6374 168 kv motor ??,...love to hear about that !
 
That looks like a fun build. Good Job, I'm impressed!

I've been considering getting a vanguard myself. That thing must be awesome to ride at medium speeds.

I've got a question though (for you or anyone already owning a Vanguard).
How wide is the middle section of the Vanguard exactly?
I got a space cell just lying around here at home and I was thinking about mounting that onto the vanguard. The enertion website says that the battery enclosure is 20.5cm/8,07" wide but the loaded website only lists the width of the board at the widest point.

Can anyone give me the exact width of the vanguard at the narrowest point in the middle? Greatly appreciated, thx!
 
in the middle it is 19.5cm (42" flex 2 version), a space cell would fit, but that thing is stiff and will REALLY suffer from the flexy vanguard, or more like: the flexy vanguard will really suffer from the stiff enclosure, cause the board will be dead if you mount the case directly. maybe it would work with rubber cylinders like my first builds. otherwise I dont think there is a way to mount a non flexible battery to the vanguard unless its close to the trucks. :?

cut and sanded the enclosures now - left a lot of meat around the screw holes so the carbon wont tear. additionally, the carbon is reinforced around the mounting lid by 4 layers of gfk in total (I learnt from my tesseract!):
vanguard_11.jpg


some impressions from the side to get an idea how slim it is - cant get slimmer with 18650 cells:
vanguard_12.jpg


love the vacuum bagging, its a super snug fit directly on the boards surface and I havent even put in any screws :)
vanguard_13.jpg


vanguard_14.jpg
 
Nice looking enclosures and fit/finish (as usual) WP!

What's your vacuum setup for this? A membrane and simple valve - leave it in vacuum for the full 24 hours or how long? I want to do this and have some of the gear, so need to practice and refine the process.

Thx!
 
sl33py said:
What's your vacuum setup for this? A membrane and simple valve - leave it in vacuum for the full 24 hours or how long? I want to do this and have some of the gear, so need to practice and refine the process.

Thx!

yea, Im running a diaphragm pump with a manometer and a valve attached (best vacuum I had was -930mbar):
A63220.jpg


-> into this:
A39906.jpg


which makes it very easy to connect to just about any sort of vacuum bag/membrane! cure time depends on heat and resin, but the resins Im using usually cures 24h at room temperature.

the vacuum bagging gear is the best stuff I bought in a long time! :)
 
Beautifull Fit and Finish of your cases !

Looking forward to seeing your other battery pack also and hearing your impressions of your 6374 168kv !
 
i kept thinking about motor and battery wires - had to connect the enclosures somehow and after sinking in my wires on my tesseract AND topspeed, I couldnt really go back to visible wires anymore. only forward, never back! :p

this time I was more careful with the routing and used some flexible aluminum profile taped to the board as router guide. my colleague will never see his router again ha haa! :lol:
vanguard_15.jpg


I managed a really pro looking 10AWG channel and drilled the exit holes:
vanguard_16.jpg


I then did the same for the motor wires, but couldnt really work that well with the aluminum profile, so the cuts are less awesome, but still nice that I wasnt ashamed to post it:
vanguard_17.jpg


whole board:
vanguard_18.jpg


and backside with all the holes for enclosures in as well. still waiting for the threaded nuts that I used in my other builds:
vanguard_19.jpg


just because its a beautiful picture :)
vanguard_20.jpg


I rounded the transition to each drilled hole so that the cable wont be stressed and easily bends around the corner:
vanguard_21.jpg


10AWG wires inserted:
vanguard_22.jpg


and the same 10AWG for the motor wires. decided to go 10AWG instead of 12, because I planned to use a 6374 with max 80A vesc settings. its probably slightly overkill though, couldve saved 3mm channel width and 1mm depth, but somehow Im not too worried about destroying the board. if it will turn out a little too flexy, Ill just add one layer of carbon on roadside.
vanguard_23.jpg


finally all exit wires! Ill glue in the exits at the motor with female gold connectors longhairedboy-style - but thats not done yet, didnt want to fixate the cables before Im sure everything is perfect. if the board is too flexy and I have to add a layer of carbon, it would suck with fixated wires sticking out at roadside! 8)
vanguard_24.jpg
 
Hi whitepony ,those 3 motor wires in the channel,.. will be covered in resin ? Or carbon fibre ?
 
still thinking about that, consulting longhairedboy how he seals the holes - last time I filled things with resin on my topspeed, a lot of it sipped out at the cable exits despite a really snug fit. that created a lot of work afterwards :p

Im also not sure if resin is the way to go there, maybe normal flexible car filler ontop, some sanding and its good to go. for longhairedboy, its part of the boards aesthetics, for me its just to give a solid, flat base for black griptape! in any way, this will be the very last step of the build - thats what I learnt from topspeed as well. cable exits on the roadside can be quite annoying when you still have a lot of work to do there. :lol:
 
today I didnt have much time, so I just added the stainless steel threaded inserts to the board - 8 in total! also I sanded the board and oiled it. why you ask? hehe, well, admittedly I screwed up a little bit when I made the enclosures - at 2 points some resin made it onto the board and covered an area of about 16-20cm^2 even though I thoroughly taped it - probably stupid capillary effect. I felt pretty down cause everything was supposed to work out perfectly for once ... but yea, of course it never does. I tried to fix my mistake by supercarefully sanding these parts and OF COURSE I went just a liiiiitle too far and scratched the glossy surface. knew it in advance, had to happen, happened! :p

in the end I gave up of the idea of an untouched perfect board and started sanding all the glossy parts down and suddenly the board started to get this really weird look, like my 20yo worn down strat. everything smelled like wood, the "made in california" was partly sanded off on the roadside print, and I felt like the board would actually look really cool oiled with aged artwork, so i actually went a little further and partially sanding off the art and really, I started to love it. came a long way from "doh :evil: " to "hey, thats actually pretty cool! :eek: "

but judge by yourselves :wink:
vanguard_25.jpg


vanguard_26.jpg
 
randyc1 said:
Threaded nuts instead of the inserts like last time ?

ah, nono, I meant threaded inserts - just like in my other builds! :p

@okp: sorry to burst your hippie-fantasies, but its just linseed oil :lol:
 
Are those thread inserts pushed in from the top or from the bottom? Also, and recommendations on how to drill those holes accurately at an angle? Cheers!
 
they are drilled from the bottom, about 1cm into the wood. Im using the old drill press of my granddad which is the only reason I have a halfway decent accuracy. this time I have been more accurate than ever, not a single hole is more than a millimeter off! one big part of the success was my new flexible steel ruler though - 10€ and one of the best items to work on 3D mold surfaces. :)
 
I got the hard stuff done and Im really proud of my results this time - the board looks great, does not rattle, no airgap even without foam/rubber between enclosure and board - just a perfect fit. I can even exchange the enclosures mounting positions, thats how accurate I have managed to do it this time (dont ask about earlier builds really). :p

I fixated trucks and enclosures, the latter with 8 screws each with a wide countersunk washer and a rubber washer below that. it adapts to the small irregularities of the carbon surface and really nails down the enclosure to the board (very slim double sided adhesive tape between board and enclosure), so it wont move and tear out screw holes when the board flexes.
vanguard_33.jpg


otherwise enjoy the impressions:
vanguard_28.jpg


vanguard_29.jpg


vanguard_30.jpg


vanguard_31.jpg


vanguard_34.jpg


vanguard_32.jpg


I gave it a quick spin by foot, no motor belt attached, and jumped around a little on the board. soo looking forward to try this with a motor and relaxed 15-20mph cruising. first july weekend Ill go to denmark again - the coastal bike and jogging roads are such perfect pavement, Ill even ride on kegels. :lol:

gave it a quick flex test as well:
[youtube]D5YKjiYAEYs[/youtube]


whats left to be done: finish the battery, work on the SK3 6374 shaft, fix up vesc with heatsinks (im still waiting for my vescs), add a nice stainless steel power switch (I still got torqueboards 12S antispark switch from my topspeed and enough room in this build to use it). finally add a layer of GFK ontop of the inserted wires, some filler, sand and apply griptape. thats really all pretty easy and the screwup-possibilities are minimal. :)
 
I'm jealous... Jealous I don't have your fabrication skills... and jealous that I'm not independently wealthy which apparently you are since you have nothing but time and money to put into board after board after board! :)

I like this build SO much, that I want one exactly like it for myself. Problem is, I do not have the time or tools to fabricate the enclosures. Everything else I have or can do. Any chance at all that I could pay you to make a set for me??

Oh, also, which flex board are you on in that video and, if I may ask, how much do you weigh? Thanks!
 
Beautifull quality build !

No problem with battery flex with a two part enclosure , is the board that much longer to allow this ?

Really flexy , looking forward to your comparisons to a stiffer board for ruising and at speed ??
 
hey, thanks for the compliments :) Im not poor, but especially this board was quite cheap, lots of reused parts from topspeed which has nothing left anymore really, the vanguard itself was "used" (it looked like new!) for just 100€. also I managed to pay quite a few things by evolve battery sales which I sometimes soldered on weekends. also I keep selling & disassembling boards - my evolve carbon sold 2 months ago, my trampa might be gone very soon too because Im a street surfer really and a colleague REALLY wants it. the topspeed donated all parts for my tesseract and the new vanguard. the only functional board I have right now is the tesseract to be honest. :wink:

timewise, I got a 10h job, but instead of kids I have 2 dogs which gives me a little more time in the evenings and weekends compared to what dads have. I dont even get much done, just taking everything step by step, 1-2hours max on free evenings.

1x evening foam mold building and enclosure vacuum bagging
1x evening sanding and cutting enclosures
1x evening drilling holes for enclosure after supercareful measuring, which really took forever
1x evening sanding clear grip and routing wire channels
1x evening inserting enclosure mounting threads & sanding & oiling the bamboo
tonight I attached trucks and enclosures, spend the rest of the night riding around by foot :p


about the enclosures: I think especially the vacuum bagging technique is extremely accessible. after okp made me jealous every build, I had really great results already on my first try - the only trial and error came from torn mounting holes due a mounting lid that was too narrow and too thin.

you can buy hospital equipment vacuum pumps for just 100$ and the rest comes fairly cheap too. sadly I cannot help you with an enclosure unless I can use your board as mold. my board is oiled now and full of drilled holes which would show in the carbon enclosure ... also I really dont want to screw up again and have resin land on my board. ;)

if I just take the material costs of the enclosures, its probably around 30€-40€ with carbon twill, some resin, a vacuum bag, bleeder and breather. its really quite cheap to be honest and once you have equipment, you can do a lot of really cool stuff. and it doesnt even take much time - I made the foam mold in 5minutes with the router of a colleague (radius cutter), attached it to the board with adhesive tape, prepared all vacuum things, used cling film to protect the board and foam, 30min later the board was in the bag and I took it out 24hours later when I returned from work again.


oh yea, about the board: its a flex 2 42" vanguard and I weight 80kg. its REALLY flexible as you can see, dont think it will hurt to add one GFK layer ontop to seal the wire channels. :?
 
Back
Top