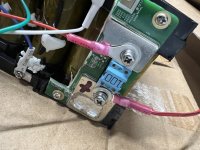
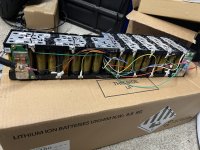
I need a bigger solder iron!
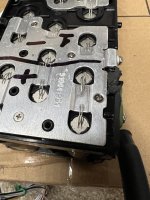
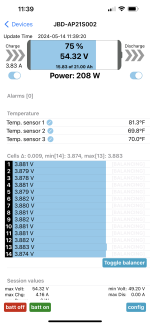
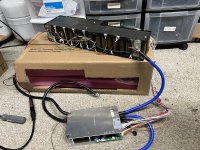
I think on my other three batteries I will just remove the BMS and install BT BMS's
later floyd
How many watts is that monster? Makes my 150 watt iron look like a toy.I had a massive iron used to build a leaded glass lamp many years ago.
I think on my other three batteries I will just remove the BMS and install BT BMS's
later floyd