I had the faint clicking problem with no detection. 777arc helped me and here's what worked in this order:
1. Disconnect everything from the VESC - motor wires, power cables, usb, everything.
2. Hook it all back together.
3. Launch BLDC_Tool.
4. Select "Connect" in the upper right corner.
5. Open the 'App Configuration' tab
a. Select "No app" but it should already default to this.
b. Select "Read Configuration" in the lower left corner.
c. Select "Write Configuration" in the lower left corner.
d. Select "Reboot" in the lower left corner.
6. Re-connect the VESC, select "Connect" in the upper right corner.
7. Open the 'Motor Configuration' tab.
8. Select "Read Configuration" (I'm not sure if this is necessary but it shouldn't make anything explode hopefully).
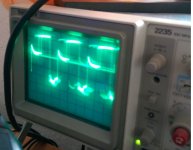
9. Select "Start Detection"
10. Have a beer if it works!