How to install a headset with a brick
I'll show fitting a threadless headset, adapt for threaded as is needed.
The old headset would be fine and plenty strong. I like to overbuild. I got a cup each of two oldschool downhill headsets so that's what I'll be installing. For shits and giggles I'll try to avoid using the proper tools.
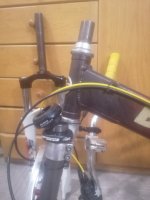
Bottom half of a FSA The Pig and top half of a Tioga Alchemy.
Notice the size difference to the old headset. Most importantly the cup flanges are longer which makes for a larger area of force transfer from fork to frame. In a bike headset, the lower cup gets all of the shock loads from riding. This can result in pitting of the lower bearing races over time. If you have a headset with ball cages, you can strengthen it a bit by using loose balls in the lower cup and putting in as many as fit. Sometimes you can extend the lifespan of an already pitted headset this way and make the steering index less noticably. The ball cage leaves regular indentations but some of the loose balls will run in-between on the not-indented part of the bearing race. Tribological concerns on using loose balls in a ball bearing do not apply here because a bike headset rarely sees a full rotation, it's more about transmitting loads to the frame.
There's a downside however:
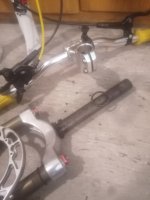
I forgot I used loose balls on the lower cup. As you can see, they are a mess to service. Keep a magnet ready.
Now we'll need to remove the old headset. This entails driving out the cup flanges from the frame. There are some possibilities:
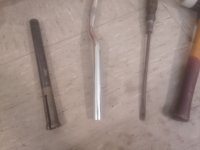
On the left is the professional option. It's called a headset cup removal tool, they come in different sizes depending on the headset diameter. You can also use any suitable pipe with a square edge, old straight alu handlebars work well enough and leave no marks on steel cups. The worst tool would be a large screwdriver. With a pipe, the force gets distributed over a wider area. The screwdriver tends to leave indentations easily.
Regardless of the tool, it's easiest to drive out the cups if you brace the frame against a suitable surface.
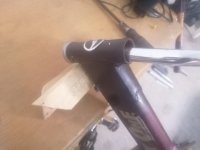
With the professional tool just a few whacks on top would be needed. Without, it takes longer. Work your way around the flange using the biggest hammer you got. Sharp precise blows. Beware if you've got a headset with thin flanges. They can get damaged using DIY tooling. On high-end headsets the flanges can be so thin that even the professional tool struggles to get purchase.
I whacked them out using the handlebar.
Now we need to install the new cups. These all can be used:
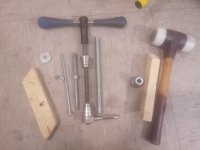
The professional tool is called a headset press. It is designed to guide and press in both cups at once. It is a fancy piece of allthread but the guiding part is the key. Without that it's easy to get the cup in crooked. Good tools have long press plungers.
What we'll now be doing is called an pressfit or interference fit. Basically the cups are held in the frame with friction. Some mechanics grease the cups before installation, some don't. Realistically speaking, greasing is irrelevant from a technical standpoint due to the comparatively low loads the cups experience. Usually I don't grease, my reasoning being "what goes in easier also comes out easier", but this time I found grease on the cup flanges and head tube so I'm not even consistent myself. Do what you prefer.
Now here's the important part that decides how cheaply you can get away with:
From a machinists perspective, bicycle tolerances are shit.
Your combination of head tube and headset might have a tight fit or a loose fit randomly. I've seen everything, from cups falling out of frames after install to cups bursting head tubes.
What that means is, ideally it will take some force to push the cups in. The amount of force needed depends on your tolerances.
To install the cups without damaging them we'll need to consider the force transfer. First of all, the bearings need to be removed since putting a large static load on the balls tends to result in pitting. Headset presses can operate somewhere in the low one-digit ton range. That's a lot of force for the small contact patch of the bearing balls.
The FSA uses a large industrial bearing. It runs smoothly but it's stuck inside the cup. I can't get it out and in this case, I don't need to. I can use either the sidewalls of the beefy cup or the outer bearing race to press it in. Only press on the sidewalls if your headset is sturdy enough.
There are two main ways to go if you don't want to buy the professional press tool. You can either press or hammer in the cups. Pressing it in is theoretically better, it's called a pressfit after all and the force gets transmitted gradually that way. In practice,
it's a bicycle not a centrifuge.
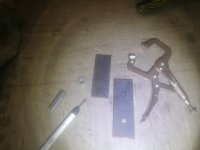
The key is to be patient and do one cup at a time. I'll start with the lower one and try the cheap 8mm allthread. For comparison, I've got a selection of allthread next to the press tool.
The 8mm one is the thinnest I've successfully used to get cups in. Smaller threads than this don't work in my experience. It is the size to try for a one-time use with aluminium cups. Steel cups take more force since they deform less. It takes less force to install cups into an aluminium head tube than a steel one.
Next is 12mm. This is a good size to get if you want to build a reasonable DIY version on the cheap. The professional tool has 16mm trapezoidal threads.
On the right is 20mm trapezoidal allthread I used for my DIY press. Total overkill but I had it laying around. That thing is in the last corner of my workshop currently so I can't be bothered to make a picture.
Large washers can get relatively expensive. Let's see if I can forego them using leftover soft wood and small washers. I do use soft wood for 1.5" cup installation in the shop. We get that size so rarely it doesn't make sense to get the proper press plungers.
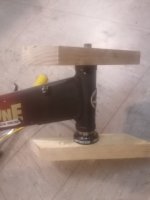
The allthread is barely long enough. I got the cup started carefully. It will want to go in crooked so be patient and go slow. Because there's no guide, you'll need to reposition the allthread as is necessary. If the cup starts to get crooked, you can use a piece of wood to tap the cup out a little. If it gets too crooked, start over.
In my case, I got a very tight fit with a long flange. The force it takes to press that in is enormous. The soft wood was... too soft. The small washers spread the forces well enough, but upon reaching a certain point the wood started to compress. I escalated to hard wood. This got the cup in a bit deeper but also ultimately started to compress the wood.
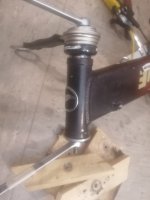
Next I tried the large washers. They will bend under the pressure, even if you use multiple.
To build a lasting DIY headset press using washers you need to make them work as a single unit. For mine, I welded four thick ones together. That did the trick.
To press on the outer bearing race I found a BBR60/BB9000 bottom bracket tool to be a fitting adapter.
The 8mm allthread was not up to the task this time. On most other head tube/cup combinations it would have worked fine for at least a single use provided the fit isn't too tight. I've no 12mm of suitable length, so I used the proper press instead.
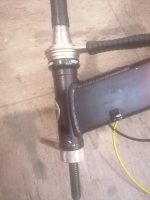
Even the professional tools have limitations. The Cyclus Tools one is too short to press both cups in simultaneously on >60cm frame head tubes for example. This time the end piece had a better suited diameter than the press plunger.
I wasn't able to get this very cup in using the cheapest 8mm allthread. 12mm would've worked.
Next up is the upper cup installation. And for that, let's try the other method of hammering it in.
Using a brick. Yup.
Now the key to this method is proper force transfer. You need your blows to be precise and on target. You also want the force to not dissipate, so prop the frame up well until it rest planely on the other end.
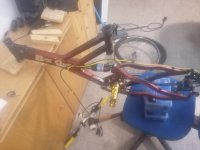
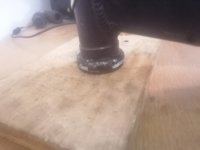
Now we need to start the cup. It is foolish to use the brick now as that would give us little control. Using something lighter, carefully start the cup with light taps until you got the cup square and deep enough.
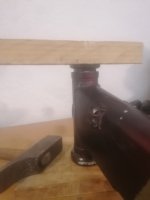
Now it's brick time. Or essentially any suitable weight such as a hammer starting with 1kg or upwards. The smaller ones do work but not as well. We need to deliver a lot of force precisely. Use both hands to deliver hard and square blows. If you got the cup started well, it won't skew and seating fully should take two to three hits.
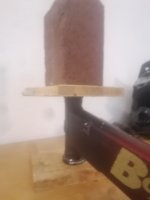
Now it's time to prepare the fork. I could skip the next step as I don't need the old crown race, but I'll show you regardless. Some forks have a screwdriver slot. This is easymode for getting off the crown race.
View attachment crown_race_slot.jpg
Let's pretend we're not so lucky and the fit is so tight we can't get even our smallest screwdriver in. What you need now is a knife with a thin blade and a sturdy enough back. It will suffer from the procedure. Make sure the blade is in the gap between crown race and fork, this is hard to feel sometimes.
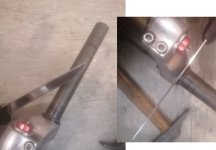
Tapping lightly with a small hammer work your way around the gap. Place the blade, give it a tap, pull off square and repeat. Do not lever, the blade will break off. Rather use it as a thin wedge to open up a slot wide enough for a small screw driver and go from there. Given enough patience, this method never failed me.
But now that we got the crown race off, we'll need to put it on the new fork. This is straightforward enough, given that the proper tool is a glorified pipe called a crown race setting tool. I have these options:
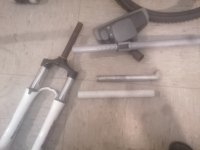
Any suitable diameter pipe with a clean cutoff will do the job. You can chamfer the inside if you need to. It needs to have a tight fit around the forks steerer to not damage the bearing surface of the crown race. Instead we'll be pressing on the inside edge of the race. For 1" steerers, an old 30.9mm seat post is a good fit. For 1 1/8" you'll need to look around. Yes, I did use the vaccuum cleaner's tube successfully to fit a crown race. I didn't expect it but it even survived with little damage.
But again, tolerances are the issue.
First of all, crown races do come in different diameters. Buy the right size suitable for your headset and you'll have little trouble. The crown race basically only needs to have the right bearing race chamfer for the given cup used and fit the fork steerer well enough. You'd be surprised with what you can get away with depending on your tolerances. I've seen crown races so loose you could turn them on the steerer by hand(!) work just fine long-term. I've seen precisely machined headsets bind on high-end frames because of mating surfaces with crap tolerances. As long as it doesn't rattle it'll probably somehow work. Just don't expect your bearings to hold up well with a badly fitting crown race.
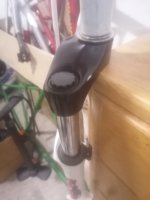
Let's first take a look at a good crown race installation setup. This entails the single step of propping up the fork crown on something suitable so that the force won't be transmitted through the dropouts. If you set the fork on the dropouts instead they can bend. I've seen it happen. On suspension forks either your hammering won't be as effective, you could damage the fork internals with that high a shock load or... you can bend the dropouts as well

Did it myself.
It's more effective to hit the setting tool with something heavy than to hammer it up and down the fork steerer regardless of how heavy your setting tool may be.
But sometimes you have no choice but to adapt the given race to an existing fork and there are a number of ways to do that if your fit is just that smidge off.
First case: crown race too tight. If it gets stuck on the top third of the slightly conical steerer seat, you'll be better off looking for a new one in my experience. Else, slowly and concentrically filing the steerer seat away starting at the base with frequent checks in-between will get you to a point where you'll be able to use the crown race setter successfully.
You can try differential heating, but only to a point. With too much heat you'll anneal the race, so red-hot is out of the question. With too little heat the seat won't expand enough. You should stop heating when the grease on the race starts smoking. Regardless, should you want to go this route be aware that the race will cool rapidly once in contact with the steerer. You have a couple of seconds to land your blows at best - bigger hammer helps - but if the race gets stuck halfway before seating it'll be a bitch to get it off again to restart.
Second case: crown race too loose. Much easier to deal with and a wider range of options. If it's only a little too loose, use a center punch to hammer a row of marks around the race seat. The punch drives up the material around it just a little. Ideally, it'll fit tight enough, whack it on with the setter and you'll be done.
If the fit is too loose for that, I've successfully used coke can shims. It's very fiddly. My technique is cutting so wide a shim that it does not overlap when wrapped around the steerer tube. It needs to be at least double the height of the crown race. Wrap the shim around the crown race seat and put the race over it. The steerer is conical at the base so it should start to seat. Now you'll need to hammer down the crown race carefully so that the shim stays in place and doesn't crumple up at the crown base. Once successful the overlap can be cut off using a sharp knife.
There is also the irreversible way... which is to epoxy that sucker on and start working on the cockpit. Been there, done that to a fork of mine as a last resort. Works brilliantly as long as the race is not worn

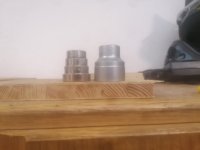
If you own a socket set, you may be tempted to use a fitting one as either a press plunger or a punch. 12mm allthread fits through a 1/2" socket just fine and the socket shape lends itself well enough... provided you don't try to use the conical shoulder. It's a bitch to get that out once it wedged itself and all it takes is a bit of inattention. Guess how I know.
Be aware that the sockets faces don't have as large an area compared to a washer or the press plunger. That translates to leaving marks more easily or indentating the cups in the worst case.
Regardless of the methods used I ended up here:
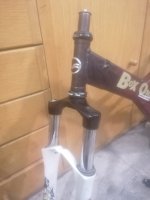
Using anything other than proper tooling on carbon parts is bad taste in my opinion.
