Aluminum extrusion subframe build- Prototyping Deck

Qwiksand

100 W
Joined
Nov 10, 2009
Messages
160
Location
Bowie, MD
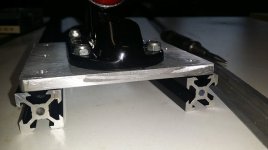
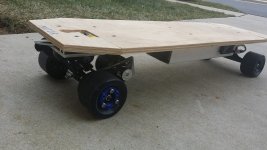
This will be my first e-skateboard build, so I wanted something modular and easily changeable as I'm sure I'll swap components and parts like on I do on my ebikes. I've been using v-slot and other hardware from http://openbuildspartstore.com/v-slot-linear-rail/ in a couple other projects I've got kicking around the garage and have found it to be incredibly handy stuff. I'll be using a 1500mm length of the 20mm v-slot chopped in two for the main under deck frame pieces. The skate trucks will attach to a couple pieces of 1/4" aluminum which will bolt (using t-nuts) to the bottom of the two rails. A couple pics of my (slow) progress...

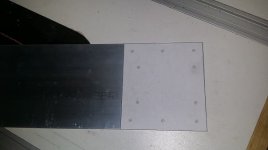
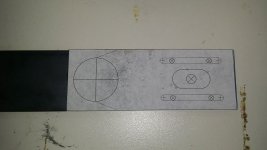
Paper template on aluminum flat stock.
20160225_125250.jpg

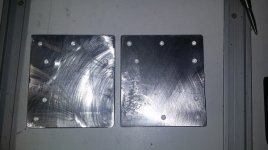
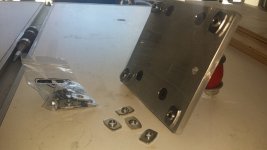
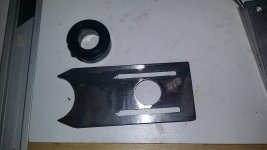
Aluminum flat stock cut and drilled.
20160225_135639.jpg

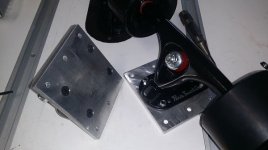
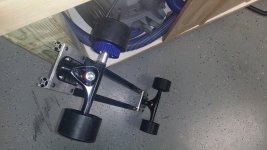
Trucks mounted to aluminum base plates.
20160225_140958.jpg

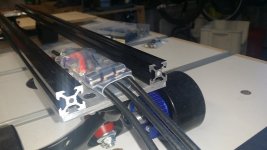
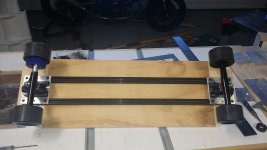
Truck base plate setting on v-slot subframe.
20160225_141053.jpg
 
This is cool, but I worry this is unsafe.

Not all extrusions are created equal. Some have a small taper to allow for preloading fasteners in high vibration applications - others are flat ... which when added to the normal deflection makes stuff wobble out. Also be sure to use the thicker, pre-install t-nuts ... not the stamped 'economy' ones which have less meat on the threads.

Lastly using 8020inc's load calculator [1] with a 30" 20mm profile, loaded with 175lbs deflects .6" when loaded from the center.... which seems excessive. It will of course stiffen up when a deck is bolted on.

Again, I think this is neat and want to see how it turns out. But I think you should put some thought into locating the plates supporting the trucks for if/when the bolts back out on you.

-----
[1] https://8020.net/deflection-calculator
 
saul said:
this should be interesting! what kind of electronics do you have planned for it?

Fairly vanilla...


Bigfoot 160, VESC, 8s- single drive to start, will go dual diagonal if I need the torque.
 
Vanarian said:
Got to love aluminum :p is your deck going to be metal too?

Hadn't thought about aluminum, probably not worth the weight/cost penalty. As it sits today, I'm using a piece of crappy 1/2" sanded pine plywood I had sitting around- beauty of this setup is you can use cheap plywood to demo different board shapes before you commit to a better material. Long term deck is likely to be made from decent baltic birch plywood, though I've been thinking a polycarbonate deck might be cool.

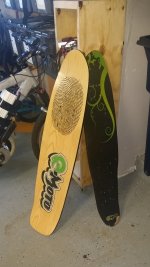
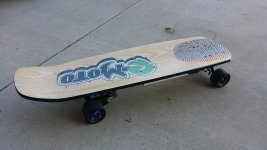
I've got a couple of these old e-moto decks I picked up from a guy last year, may cut one of these down to demo a kick tail/concave version.
20160226_124438.jpg
 
Made a little more progress today.

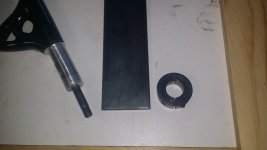
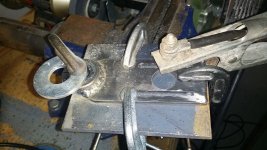
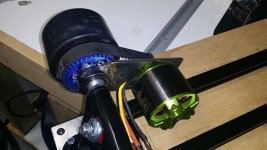
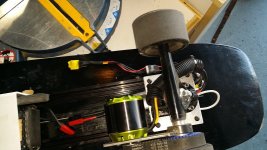
This will be my motor mount, might get some time to make sparks this weekend. Just a 18mm shaft collar I'll weld to some 3/16" hot rolled. I turned the hanger down (very rough, used a drill press) so everything should end up square'ish.
20160226_121721.jpg

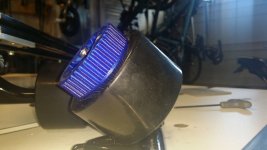
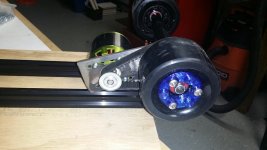
I'm using this beatifully designed pulley (Designer: brentyi, file: https://www.thingiverse.com/thing:545345) printed in blue eSun PETG. Will be 15t driver pulley, 40t driven on 83mm wheels- theoretical unloaded top speed of right at 30mph on 8s lipo. What kind of loaded vs unloaded speeds should I expect, approximately? i.e loaded speed approx what percentage of unloaded, 80%, 85%?
20160226_122042.jpg

The aluminum truck base plates mount to the v-slot with the stamped, cheap t-nuts. The two rails span an unsupported gap of approximately 22" (25" wheel base) and when I stand on it and bounce I can get it to deflect, but not as much as I thought it would (I go about 200 lbs, give or take).
20160226_113302.jpg

View attachment 9

20160226_123149.jpg

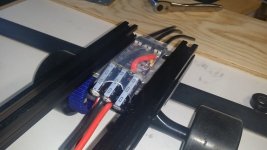
The base plate should make for a decent heat sink and the VESC will fit in this gap belwo the deck.
20160226_123344.jpg

20160226_123352.jpg

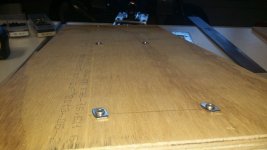
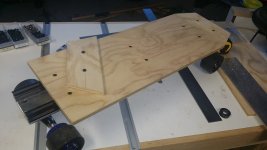
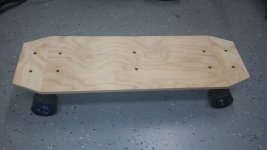
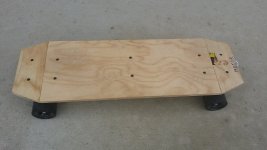
This is just a mock-up deck using some cheap plywood I had on hand, but it will work for this stage of the game. With this 1/2" plywood attached to the rails, it is very stiff- I feel very little flex ( i don't know if I want more or less flex at this stage of the game, I need to get some miles under my belt to form an opinion. The end pieces are separate mainly because my scrap piece of plywood was too small, but it should allow easy access to the controller(s) I mount under here.
20160226_132309.jpg

20160226_134541.jpg

View attachment 3

20160226_134756.jpg

20160226_134940.jpg

20160226_134715.jpg
 
Qwiksand said:
Vanarian said:
Got to love aluminum :p is your deck going to be metal too?

Hadn't thought about aluminum, probably not worth the weight/cost penalty. As it sits today, I'm using a piece of crappy 1/2" sanded pine plywood I had sitting around- beauty of this setup is you can use cheap plywood to demo different board shapes before you commit to a better material. Long term deck is likely to be made from decent baltic birch plywood, though I've been thinking a polycarbonate deck might be cool.

As a suggestion and to backup the "weight/cost penalty." Avoid using aluminum as your deck material if you can. My current setup for school uses an extruded aluminum part from a treadmill with a 3/16-inch, 6061-T6 as the deck material. What I learn from this is my whole setup weights 15.6 lbs, has no flex at all, and 6061-T6 is very hard to bend. The only good out is anodizing in the color of choice and feels like I'm riding a tank.
 
chuttney1 said:
[snip] What I learn from this is my whole setup weights 15.6 lbs...

15 odd pounds doesn't sound too heavy for a complete board. I think my contraption will be a bit over 16 pounds ( w/ 8s, 8000mah battery) and it doesn't feel too bad. I'll admit, I'm not much of a weight-weeny though :lol: What's considered light for an Esk8?
 
Got some work done last weekend and through the week, just been slow to post progress. Here we go...

Motor mount template.
20160228_104117.jpg

After some drilling and cutting.
20160228_205756.jpg

Welded-up (lots of spatter, effing flux-core- I really need to get my gas refilled).
20160228_210909.jpg

And the motor mocked up with belt- I gave myself way more adjustability than need and I could have rounded the mount a lot more, but the shaft collar clamp works tits!
20160228_222717.jpg

20160228_222734.jpg

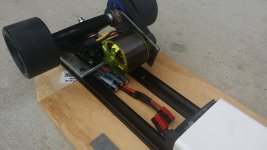
So these rails are 4" outside to outside, which leaves 2.3xx" between the rails- perfect size for some 4s turnigy hardcase packs. I don't have any of the hardcase batteries yet, so I'm using some old, saggy zippy 8000mah cells. The zippys are too wide to fit between the rails, I ripped a vinyl fence post (ID of just under 4") down just big enough to fit/protect the lipo and then mounted it to the rail with some t-nuts.
View attachment 6

DB9 connector for the balance taps, cell log velcroed in place.
View attachment 5

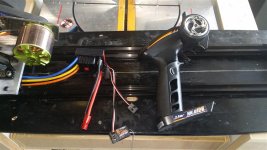
You can see the controller caps peaking out from there home here. The anderson connectors work as my on/off switch as well.
20160304_140450.jpg

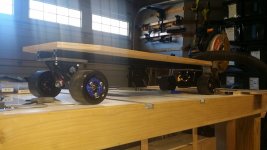
And some shots of the board as it sits today...
20160304_140504.jpg

View attachment 2

20160304_140534.jpg


It runs! It's way faster than I am brave at the moment- my nyko kama controller is not very confidence inspiring (random signal drops) and I need to get some stiffer bushings in the trucks. I think I'll order a couple more v-slot rails and try a longer wheelbase set-up too (as it sits it's 25" center-to-center)- very maneuverable, but I poop my pants any time I get close to 17 or 18mph 8)
 
10/10 for DIY ingenuity - can't fault you there.
Doing that all yourself you must have one of the cheapest E-Board builds here.
 
WeeChumlee said:
10/10 for DIY ingenuity - can't fault you there.
Doing that all yourself you must have one of the cheapest E-Board builds here.

Thanks man. If you don't count materials I had on hand, I probably have $250 invested- if I had to buy everything else, closer to $400 I'm sure. Still a pretty cheap build.

This is just a prototyping set-up, I plan to build a more traditional board once I figure out what I'm looking for.
 
I chopped down one of the e-moto boards and mounted it this weekend.
20160307_142207.jpg

The kick tail makes a huge difference in my comfort level- I was able to cruise at the 20mph mark and not feel like it was going to kill me if I had a signal drop. I'm still not ready for a top speed run, need to get a few more miles under my belt first and will likely switch to a gt2 in a badwolf case along with stiffer bushings before that happens.

The way the trucks are mounted on the bottom of the aluminum plate/rails is the same as having a 1" riser on a standard board, so not ideal for high speed stability I'm finding. As I'm very new to longboarding, I'm learning new things daily: I like the kick tail, I like a wide deck and I don't like concavity.
 
okp said:
congrats, this motor shines !!!!

You are preaching to the choir here. I think your posts (and psychotiller's builds) about these motors are the reason I ended up with 'em, thanks for that! This is my first experience with rc components as well, I'm very impressed with the power these little things can crank out.
 
I think I may have solved my nunchuck coms issue. I added a little jst-hx battery extension lead to the chuck receiver and moved the receiver well and clear of the controller and motor. Huge difference so far, I haven't even had a hint of signal drop (much less throttle hang/stick) on my test rides post-extension.
20160308_151624.jpg

This morning I had a nasty meeting with the pavement as I was trying to figure out why the throttle would hang when I would peg the thumbstick (just short dabs and the motor would keep pulling after I released the thumbstick and even delay before braking). Then I had a full on throttle stick and down I went, the board cartwheeled across a curb/grassy space rather spectacularly, but no damage sustained. That motivated me to try extending the wires on the receiver and damned if it doesn't seem to be working now. Much better, lesson learned- keep your chuck receiver far away from all sources of potential interference.
 
CSN said:
How high is the deck from the ground?

I think 5 1/4" (I'll measure it tomorrow to verify, but I think this is accurate) from ground to underside of deck, so 5 3/4 to 6" top of deck to ground- it feels tall.

**UPDATE**

Measured again, it is exactly 5 1/4" from the ground to the flat bottom portion of the deck (subtract 20mm to bottom of rail, approx 4 1/2" ground clearance to rail bottoms). Top of deck at the sides is approx 6 1/2" tall due to the concavity.
 
you covered your batteries in carbon. you think it's a good idea? I did the same but am questioning if it was safe as it will limit expansion and more likely cause a blow-out from pressure.
 
Hummina Shadeeba said:
you covered your batteries in carbon. you think it's a good idea? I did the same but am questioning if it was safe as it will limit expansion and more likely cause a blow-out from pressure.

Nothing quite that high-speed on this build I'm afraid; the black stuff you see covering the batteries is just regular old tool drawer anti-slip matting/foam- and lots of fiber-reinforced package tape.
 
I can't believe I waited so long to build one of these, this is too much fun- feels a lot like snowboarding to me!

I changed out the boardside bushings with some super-hard (feels less urethane, more delrin or nylon :lol:) ones from real crappy set of trucks I bought on ebay a long time ago and left the stock paris cones on. What a diffence! I'm way more comfortable on this thing now- actually had two consecutive days without crashes even 8) . In BLDC mode I'm able to hit 25-26 mph top speed on the flat with topped up batts (got a 27.8mph on a slight downhill segment). In FOC mode, I'm only seeing top speeds around 22-23mph on the flats. I ordered a 6s and a 4s 10,000mah multistar last night to try out 10s, should get me to 30mph on this set-up and I think that'll be plenty for the cruising I'm doing around the neighborhood. I also need to order a grab bag set of double barrel bushings in various flavors to fine tune.

I'll be playing with some different deck shapes here shortly (just using cheap plywood for the demos), but now that I've stiffened the trucks I'm in no rush to lengthen the wheelbase. I'll still build a 36-40" rail setup, but I've got some other things I'd like to do first.
 
Cross-posted on a couple other forums...

I had my VESC from OllinBoardCo up and running for about a week with no problems, but that all ended Saturday afternoon...

It died under very innocuous circumstances; I was giving short, back-and-forth rides to my 45lb kid on the sidewalk when it just stopped responding. I power cycled it (big mistake, wish I would have pulled the fault code doh!) and still nothing. I then go inside and hook it up to the computer and pull faults and get the dreaded DRV_8302. VESC still connects/reads/writes fine, but any attempt to drive the motor results in 3 red LED flashes and a DRV code.

There are no obvious shorts and it has never been wet. I kept the shrink wrap on and all leads were well connected and insulated. After this happened and I removed it from the board, I removed the shrink wrap to see if I could see any glaring anomalies (yeah right, how in the hell do you wizards solder these things?!?), but there was just a little dust.

Earlier in the day, I was playing with the motor current and absolute current settings as well as FOC. Here are the settings and results...

Vesc 4.11 hardware with c18 mod done by chaka, 4.15 firmware. Single Bigfoot 160 245kv on 8s Lipo. 15/40 gearing on 83mm wheels- top speeds between 25-26mph on the flats.

Motor Mode: BLDC
Motor Current: 70a
Batt Current: 60a
Abs Current: 130a
Results: Mostly excellent, this was the setting I used most of the week and put probably 50 miles on. I was able to induce the occasional cut-out on full power starts. When I pulled that code, I got a couple of ABS over current (just barely, like 130.3 amps). So, of course I up the absolute current- saw a post of Vedder's where he says do not go above 150 ABS amps, so on to the next setting.

Motor Mode: BLDC
Motor Current: 70a
Batt Current: 60a
Abs Current: 150a
Results: Great! No codes, but I wanted a bit more so I upped the motor amps

Motor Mode: BLDC
Motor Current: 90a
Batt Current: 60a
Abs Current: 150a
Results: Very sweet acceleration and the mid to full power range felt great and just dangerous enough to be exciting. Cool, now lets try it on FOC...

Motor Mode: FOC
Motor Current: 90a
Batt Current: 60a
Abs Current: 150a
Results: Major cut-outs on full throttle accelerations (all slow rolling starts as starting from a dead stop feels bizarre to me). I pulled the codes and got an ABS over current of well over 200 amps! (I didn't save this one, unfortunately).

So I reflashed back to the BLDC, 90amp motor, 60amp battery, 150amp absolute and was happy. It was using this exact setting that the DRV died, but under next to no load with me giving baby rides.

FOC mode on this motor was working as intended, except when I would coast at moderate speeds (maybe over 15mph) and then try to throttle back into the power very slightly, I would get a buzz-like short sound and slight braking force as it felt like the motor was trying to sync back up? The faster you go, the more braking force was encountered and it made the board difficult to control under FOC.

What do you think? Were my amps too high? Did I do damage with the FOC over current? Motor never got over 55c (infrared thermometer immediately after some hard hill pulls) and I never saw any mosfet heat related codes, but I wasn't actively monitoring during any of these rides either.

I've got an e-mail into chaka for return/repair service, so hopefully I'll be up and running again here shortly.
 
VESC was sent back to OllinBoardCo hq for repair, got a message from chaka last week that stated he found a couple pins on the DRV had a small piece of copper shorting them. He removed the copper and the DRV fault went away, but FOC was still acting funky. He said he'd replace the DRV and make sure all functions normally before return shipping, I also had him install the heat sink package he now offers. I'll report back when I receive it.

In the mean time, I picked up a little FVT 120a 6s esc and USB programmer as well as a GT2B.
new esc tx rx.jpg

At 6s, top speed is limited, but starting torque feels quite a bit higher compared with what the VESC can do. This seems to be consistent with what I'm reading/hearing about other's experiences and is related to the lack of real current limiting in these small, cheap controllers. The FVT is considerable noisier both in acceleration and braking and is no where near as refined as VESC during starts from stopped. If I'm after raw torque/power, the FVT wins hands down, but as a refined e-skate controller package, I prefer the VESC. The GT2B transmitter seems to work very well and I've not experienced any signal drops, but I'll need to print out the badwolf enclosure as this thing is huge and I miss the tiny nyko kama controller.

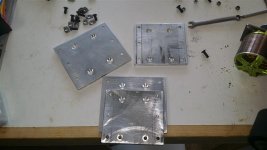
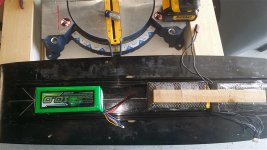
I made some new aluminum mounting plates, these move the rails out to 4.5" max width and allow most any Lipo to fit within the rails.
plates.jpg
batts between rails.jpg

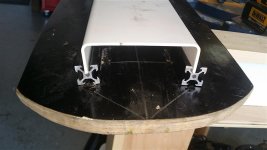
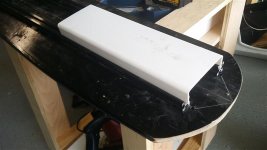
This width still allows the use of the cut-down PVC fence posts, but now they slot in to the v-rail top groove.
pvc on rails end.jpg
pvc on rails angle.jpg
 
Got my VESC back from chaka about 2 weeks ago and it is very nice to replace the FVT. The vesc lacks a little grunt on start-up compared to the FVT, but having reliable brakes, the nunchuck and FOC greatly makes up for it. I've been running 10s lipo for the last couple of days and boy does that little tacon scream near the top end (I need to check the erpm, but should be somewhere around 10k rpm)!

I found a deck shape I liked on sketchup warehouse by a guy named 97longboards: https://3dwarehouse.sketchup.com/model.html?id=722f089bb160b6f4a12149f3fbea221f&commentafterlogin=add&firstcommenttext=Love%2520this%2520shape!%2520Thanks%2520for%2520sharing.&login=true

So I downloaded it, got rid of the wheel wells (don't need 'em on this 4x4!), chopped the tail a bit and added holes for my rail system.
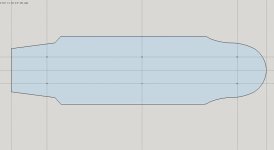
deck skp.jpg

I printed it out and did a little arts and crafts to get a full size template. I cut this out using a combination of jig saw and table saw.
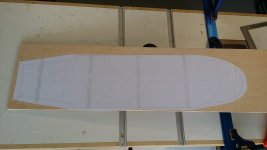
deck paper template.jpg

I've been running this raw deck for about a week, no grip on top makes it a little hairy in the corners.
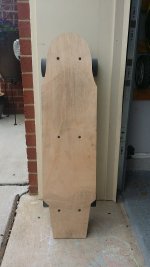
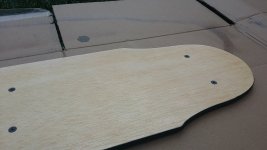
board top.jpg
View attachment 8

I decided a liked the shape enough to try adding a little grip to the top and color to the bottom. I traced the original shape onto another section of plywood and spent a little time with the sander on this version. I'm trying a DIY spray grip utilizing Behr floor finish additive (basically seems like finely crushed quartz, maybe glass) and some spray poly to stick it down. I tried this on a piece of scrap and it seems to work in small scale, time will tell if it's an adequate solution- I'll keep ya posted.
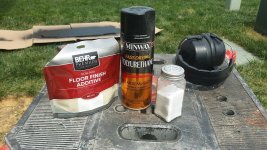
spray grip.jpg

I sprayed the bottom and sides satin black.
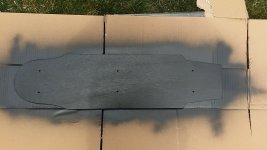
black sprayed bottom.jpg

And I think I put about 4 coats of poly with sprinkled grip.
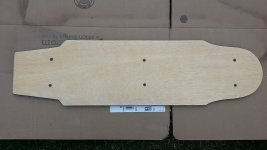
poly top wide.jpg
poly top close.jpg

You may have noticed my velcro straps on the deck bottom image above, here's the sketchup of the individual brackets.
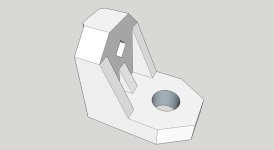
bracket skp.jpg

And a gratuitous printer pic, eSun PETG of course.
View attachment 4

There is a 2" wide velcro strap attached via 1/4"-20 bolt to two brackets. The brackets are then mounted to the rail, velcro strap crosses whatever needs strapping and loops under the opposite bracket/bolt combo (bolt threads covered with heat shrink tube) and adheres back to itself. Makes for really quick battery and electronic change outs- perfect as a prototyping deck.
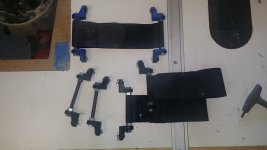
assembled brackets.jpg
 
Back
Top