
You are using an out of date browser. It may not display this or other websites correctly.
You should upgrade or use an alternative browser.
You should upgrade or use an alternative browser.
Dee Jays Giant Revive projects
- Thread starter Dee Jay
- Start date

Dee Jay
100 kW
- Joined
- Dec 11, 2007
- Messages
- 1,211
Lots interesting things going on around here! Most notable being Link's copper cooling tube project and a freebie kit! As well as Matt's modular gearbox! And other pioneering efforts too many to list. Been too lazy to post comments lately but hats-off to you gentlemen that are shakin' and bakin'. Nice pumpkins there, EMF!
I've been doing a bunch of maintenance on my SCR. Yup, Single Crystalyte Revive! I am back in action. I got the town chasing after me again, I got the lycras hating on me again, shaking their fist at me as I sail past. JK It's fun stirring sh!t up in this sleepy little town. Rattle some cages..
A list of maintenance performed:
-Drink holder was ready to fall apart. Reinforced with 2 more screws, (I used only one) Now it's solid.
-Found a better way to tighten up the wire guts under the frame
-Cleaned the packing tape adhesive gunk off the frame with an enzyme type parts cleaner, to take the frump factor down a notch. Might've dulled the glossy finish though..
-Cleaned gunky chain
-Cleaned gunky cassette
-Adjusted derailleur to accept the 8th gear (Revive's original lowest gear)
-Cleaned rust off the 408's screw holes with a tap and magnet
-Used silicone adhesive to seal 408 covers
-Loctite all hub screws
-Used heat shrink tubing to hide the ammeter shunt a little better, take the frump factor down another notch.
-After installing an analog ammeter on my CCCV power supply, I found that charging a cell was sometimes too slow due to bad connections. I had to jiggle the PS pos/neg connector pins and watched the ammeter needle shoot up where it should be, at around 3.5 - 4 amps / when starting from 3.27v charging up to 3.63v. Loose connections were showing up as low as 1 amp! A giant THANKS to "tailwind" for giving me the power characteristics of these power supplies! These PS works better than I thought! *
-The M1 pack installed inside the frame got disconnected at the last cell during a rough ride! I pulled the entire pack out of the frame. It's a good time to redo the charging harness, some of which shorted out and heated up due to my own carelessness. I'm now wondering if I should just rebuild this pack into one of my new enclosures and just keep the Journey Kit Quick Release battery enclosure for awhile longer.
-Installed the front Big Apple on the 408/alloy rim for the first time. Wow, what a big difference in comfort and efficiency. I actually save energy, electrical and physical energy, with shock absorbing tires! And with less rolling resistance, it's like drop of water rolling off a duck's back. I highly recommend Big Apples if you ride in rough pavement like Tokyo streets.
-Lost my love handles and beer gut by riding without electric power for over 3 months. Gained it back again in a matter of weeks after reinstalling the 408. It was a pleasure riding without power in cool autumn weather. But you won't catch me riding without power in Tokyo's summer heat!
-The best part of my maintenance was installing a 48v throttle. I found that the 48v Throttle yellow LED comes on at around 2.80v/cell (42 volts). All I have to do now is use that LED to activate a relay to cut the throttle at LVC. A Ghetto LVC! Killing M1 cells will be one less thing to worry about.
TO DO LIST:
-Need to fab those dreaded torque arms for some peace of mind!
-Need to fab a homemade Battery Switch, allowing to choose Schottky Diode Two Pack parallel, or Single Pack A, or Single Pack B, or OFF/Charging. I will incorporate the schottky diode and a 20 amp fuse inside this switch box. I may even find a way to stash the bulky ammeter shunt inside. APP will still be used.
-Need to fab APP contacts. I have a handful of housings but I'm fresh out of contacts. Too cheap to buy them so I thought I'd try my hand at fabbing them from sheet copper.
-*I will be using the 20 amp version of my power supply to power an electromagnet inline with the positive wire. ~Por Qua?~ you ask in your best French Canadia? *chuckle* Canadia... An electro magnet to trigger the reedswitch/relay/solenoid/rotarycharger, of course! Whilst charging one or two cells with 10 amps or less, 10 amps or more will power the electromagnet. The electromagnet will keep the reed switch normally closed thus keeping the relay open. When the amps descend to a certain point (will show 0 amps on the ammeter, the electromagnet will release the reedswitch and close the relay, powering the solenoid. ~viola~ switch jumps to the next cell! I hope. We'll see.
-Need to find Nickle Epoxy to bond charging harness to the magnets as well as electrically conduct them. I could probably whip up my own by grinding a five cents coin! Nah...
-Need to order some viagra from "Horace Hubbard", I'm fresh out. I find junk email so irresistible!
Happy Friday!
J
Aka DJ Laze (Loneozner)
Attachments


Sacman
10 kW
J,
Nice to see you're back up and riding again after your cracked hub motor troubles. You got any trimphant tunage to celebrate that you're out terrorizing the Tokyo streets again? You've been pretty quiet lately and I was beginning to wonder what happened. If I remember right you were changing the windings on the 411 motor. How did that turn out?
By some fluke bad luck, my 408 casing cracked on me too. The threaded collar where the freewheel screws onto crack for no reason I could think of other than poor Crystalyte quality control. I thought I was up shit creek when I found out my vendor wasn't going to warranty the cracked side cover. But Ypedal had some spare 408 side covers and sent me a few. I thought I was home free but those covers didn't fit and required significant modification/machining to work. <sigh> You gotta luv this Crystalyte quality control.
Dee Jay
100 kW
- Joined
- Dec 11, 2007
- Messages
- 1,211
Sacman, good to hear from too. Sorry for leaving you hanging on that PM. I meant to get back to you but kept forgetting.
Yeah, I read about your 408. That's pretty tragic... It's cool that Ypedal tried to hook you up. He's Teh Bomb, he just doesn't know it, he he! docnjoj aka "otherDoc" mentioned he had his 409 cover fixed (welded?). I just might go that route and then wind the armature into a 409. I put this winding project on-the-back-burner for now but I'm curious about a 409 rear and 408 combo so I'll do my best to make that happen ASAP. 4011 at 52 volts wasn't doing it for me.
Next mix will not be very up-tempo. In fact it will be very sedate so I can hypmotize Endless Sphere members into clucking chickens! :lol: @ Link. Lots of smooth music. It's pretty groovy for those who partake in herbal recreations. Very nice to wake up to if you set your CD alarm clock on less than medium volume and about one hour ahead of your usual waking time. It's pretty dope, I think. Oh, and I got the Akira Kurusawa's Seven Samurai movie soundtrack on there mixed with Keiko Matsui's most excellent piano skillz.
What kind of music are you into? Good luck with your 408!
J
Dee Jay
100 kW
- Joined
- Dec 11, 2007
- Messages
- 1,211
I ordered the 20A version PS. 
I was hoping to use 10A for my electomagnet that would trigger the relay/solenoid and use 10A to charge 2 paralleled cells but (using an analog ammeter) I realized that:
-my 20A-PS only peaks @ 6.5A charging two approx 3.11v paralleled cells and
-my 8A-PS only peaks @ 4.5A charging approx 3.11v single cell. I can charge 2 paralleled cells and still peak @ only 6.5A charging one 3.11v cell
I don't understand why tailwind's chart shows his 8A-PS peaks @ 9.63A charging a single 3.21v cell and is done in about 40 minutes... ? ? ? His 20A-PS peaks @ 24.06 with four paralleled cells and is done in about an hour. http://www.endless-sphere.com/forums/viewtopic.php?f=14&t=4057&p=69229&hilit=single+cell+Dee+Jay&sid=aee5c511c60d521403f7c91ad6ed6e06#p69229


My 8A-PS takes about 1 hour and 20 minutes starting @ 3.11v, and the 20A-PS takes about 2 hours with 2 paralleled cells starting @ 3.11v! EDIT: Maybe my charging harness is too long...
umm, Yo ? :?
I will try running a fan off the 20A-PS for extra load while charging 2 parallel cell, maybe then I'll draw the amps for my electromagnet.
On the plus side, I can now charge a pack twice as fast with two PS, and charge two packs paralleled with one 20A-PS
J
I was hoping to use 10A for my electomagnet that would trigger the relay/solenoid and use 10A to charge 2 paralleled cells but (using an analog ammeter) I realized that:
-my 20A-PS only peaks @ 6.5A charging two approx 3.11v paralleled cells and
-my 8A-PS only peaks @ 4.5A charging approx 3.11v single cell. I can charge 2 paralleled cells and still peak @ only 6.5A charging one 3.11v cell
I don't understand why tailwind's chart shows his 8A-PS peaks @ 9.63A charging a single 3.21v cell and is done in about 40 minutes... ? ? ? His 20A-PS peaks @ 24.06 with four paralleled cells and is done in about an hour. http://www.endless-sphere.com/forums/viewtopic.php?f=14&t=4057&p=69229&hilit=single+cell+Dee+Jay&sid=aee5c511c60d521403f7c91ad6ed6e06#p69229
My 8A-PS takes about 1 hour and 20 minutes starting @ 3.11v, and the 20A-PS takes about 2 hours with 2 paralleled cells starting @ 3.11v! EDIT: Maybe my charging harness is too long...
umm, Yo ? :?
I will try running a fan off the 20A-PS for extra load while charging 2 parallel cell, maybe then I'll draw the amps for my electromagnet.
On the plus side, I can now charge a pack twice as fast with two PS, and charge two packs paralleled with one 20A-PS
J
Dee Jay
100 kW
- Joined
- Dec 11, 2007
- Messages
- 1,211
About a few months back, I was charging a cell while I stepped out for about an hour, and the wife accidentally moved the charging leads while vacuuming the room and she shorted the leads together.  I've been meaning insulate the leads for a long time and even purchased the right sized heat shrink just a few weeks prior, but I kept forgetting to get it done
  . Anyway, I came home and the first thing she said was "your battery pack was smoking"
 I immediately cut the shorted wires from outside the pack, cut the rest,
 then slowly opened the pack while listening for shorts and looking for more smoke. I found that only two wires burned inside the pack . . .
 if the charging harness burned and shorted all at once, the whole pack may have gone up in flames and exploded!
 Fuses on each wire might be a good idea, I thought.
.
.
.
I've been meaning insulate the leads for a long time and even purchased the right sized heat shrink just a few weeks prior, but I kept forgetting to get it done I immediately cut the shorted wires from outside the pack, cut the rest, then slowly opened the pack while listening for shorts and looking for more smoke. I found that only two wires burned inside the pack . . . if the charging harness burned and shorted all at once, the whole pack may have gone up in flames and exploded! .
.
.
Dee Jay
100 kW
- Joined
- Dec 11, 2007
- Messages
- 1,211
Old news: My failed attempt at charging 30 cells with the DC9000 charger, 10 cell at a time, left me charging one cell at a time with an 8 amp power supply
~zzz~

but now that I have the 20 amp version I can charge twice as fast so that's just one z
~ z ~
But until I get my rotary switch functional, I will always risk plugging the charging leads to the wrong pin. And charging cells whilst having Jim Beam whiskey on the rocks will increase my chances of feeding -50 volts to my poor little 20A power supply
Like so:

Man, that negative lead just vaporized! *Poof*Hiccup* All this drinking and smoking has got to stop *rim shot*
Luckily my power supply survived like a trooper
The dark marks on my fingers are not burns btw. No really! :lol: it washed off
.
.
.
~zzz~
but now that I have the 20 amp version I can charge twice as fast so that's just one z
~ z ~
But until I get my rotary switch functional, I will always risk plugging the charging leads to the wrong pin. And charging cells whilst having Jim Beam whiskey on the rocks will increase my chances of feeding -50 volts to my poor little 20A power supply
Like so:
Man, that negative lead just vaporized! *Poof*Hiccup* All this drinking and smoking has got to stop *rim shot*
Luckily my power supply survived like a trooper
The dark marks on my fingers are not burns btw. No really! :lol: it washed off
.
.
.
Dee Jay
100 kW
- Joined
- Dec 11, 2007
- Messages
- 1,211
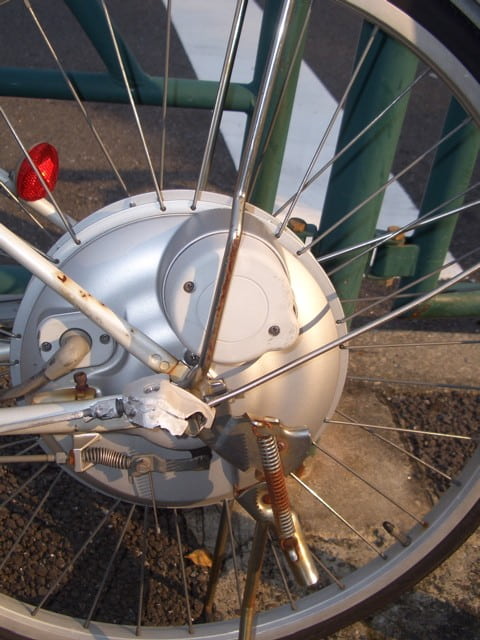
I finally stopped being lazy and attempted to install a temp sensor inside my 408 motor but the three wires' insulation were about a millimeter thick each, plus the replacement heat shrink tube was thicker than the original so it was a no-go. I will use three single strand wires on my next attempt.
I also bought a great rust removing product which worked like a charm. View attachment 2I was hoping to get enough rust off the axle to push it out and swap it with the 4011 rear axle for a front-to-rear motor conversion, but it still wouldn't budge!

I removed the bearing seal to check for rust. Some rust water seeped in from the outside. Also it seemed like it needed more grease so I packed plenty of fresh grease like one would in CV joints but I may have applied too much or used the wrong grease as it wouldn't freewheel as easily as before. I installed it as-is anyway just to see how much it would affect efficiency. So far it's fine.
I didn't achieve my goals that afternoon but I had a moment of URETHRA! To widen the motor's wire path -but not by grinding the axle- Details soon so stand-the-funk-by 8)
Happy Friday
J
I also bought a great rust removing product which worked like a charm. View attachment 2I was hoping to get enough rust off the axle to push it out and swap it with the 4011 rear axle for a front-to-rear motor conversion, but it still wouldn't budge!
I removed the bearing seal to check for rust. Some rust water seeped in from the outside. Also it seemed like it needed more grease so I packed plenty of fresh grease like one would in CV joints but I may have applied too much or used the wrong grease as it wouldn't freewheel as easily as before. I installed it as-is anyway just to see how much it would affect efficiency. So far it's fine.
I didn't achieve my goals that afternoon but I had a moment of URETHRA! To widen the motor's wire path -but not by grinding the axle- Details soon so stand-the-funk-by 8)
Happy Friday
J
Dee Jay
100 kW
- Joined
- Dec 11, 2007
- Messages
- 1,211
I rebuilt my charging harness of the pack that shorted and used yellow duct-tape of great quality! The adhesive has the same stickiness as your average duct-tape but it doesn't feel like it would gunk-up the cells when I remove the tape after a while.

I didn't feel like redoing the other pack wrapped in silver duct-tape, I'll just wait to redo it when I find other reasons to mess with it, like another short :?

I also switched from 12 pin white connector (wadayacalit?) and 6 pin black connector back to the original 16 pin white connectors, but this time with male pins instead of female. Females has a tendency to spread too wide apart causing inconsistent electrical contact. These connectors will plug to my rotary charger incased in a plexiglass enclosure that's 25 x 25 x 5 cm when (or if) I find one. If not, DIY.
.
.
.
I didn't feel like redoing the other pack wrapped in silver duct-tape, I'll just wait to redo it when I find other reasons to mess with it, like another short :?
I also switched from 12 pin white connector (wadayacalit?) and 6 pin black connector back to the original 16 pin white connectors, but this time with male pins instead of female. Females has a tendency to spread too wide apart causing inconsistent electrical contact. These connectors will plug to my rotary charger incased in a plexiglass enclosure that's 25 x 25 x 5 cm when (or if) I find one. If not, DIY.
.
.
.
Dee Jay
100 kW
- Joined
- Dec 11, 2007
- Messages
- 1,211
Wow, I can't believe how perfect my two new enclosures are for A123 M1 cells

I don't know why I haven't thought of using an M1 cell (until now) to check how well the cells fit. I think I was too hung up on the "specs" as well as not wanting to be disappointed if I find out that I won't have room for charging harness, even if I used thin ribbon wires.
Looks like I'll have room for my 18 awg(?) charging harness, home-made copper cell tabs, as well as a plastic sheets to insulate the top and bottom of the cells.
Aesthetics might be a different story. . .will they look too boxy and affect the Revive's elegance? My choice of the Bell Cocoon child seat actually added to the my bike's elegance that the bike looks naked to me without it.
The Journey Kit quick-release enclosure is a bit too tall for my liking but the bulbous tip of the pack gets the ladies hot and bothered, ooh ooh! :lol: Ok maybe not, but it does me, anyway, :lol: I decided to keep it on the frame and attach the new enclosures on each side of the swing arm for additional 4.6ah for longer trips.
J
Dee Jay
100 kW
- Joined
- Dec 11, 2007
- Messages
- 1,211
Sometime last autumn, Pack A which was hidden inside the Revive frame tube disconnected at the first cell. I pulled the pack out and I wondered if the frame tube pack idea was worth the trouble. I hadn't touched Pack A until now because I'm short on range. I thought it's time to get crackin' on my swing arm pack using my new enclosures.
The original cells tabs were weak so I decided to tear them out and solder fabbed copper tabs.

The negative tabs were welded really well and was a bit tricky to remove. I was left with sharp bits on the negative that need to be filed down. The positive tabs positive tabs pulled off effortlessly.
I found it odd that, if you remove the cell's paper insulation, that the whole cell body is positive and the negative is just a tiny island separated from the positive by just millimeters apart.
At first I couldn't decide on whether I should hold the pack together with duct tape or glue. I never liked the idea of committing the cells with glue and didn't want to wrap the whole pack with large and expensive heat shrink. What I want is to have the cells accessible (if I ever kill a cell again) and not have to tear into the pack and having to wrap it again with more expensive heat shrink. Duct tape was almost doable if kept to a minimum but it still gets sticky gunk all over the cells that gets stickier in summer heat. Well I shat me a brilliant idea so I brokedown and hopped on the hotglue bandwagon. Yep!
View attachment 6
I've never used hotglue before and always wondered what the advantage of it is over using only a tube of silicone sealant. So I buzzed down the hardware store still wondering if I should pay 23 bucks for the hot glue kit or pay 3 bucks for a tube of silicone.. me being a cheap bastard..I asked for a tube of clear silicone. The clerk searched high and low, out of hundreds of sealant, silicone, glue products and he couldn't find one that was clear. I thought it might be God's way of telling me to go for the hot glue kit. And I'm an atheist! Well I was blown away by the convenience of not having to wait forever for it to cure. Instant gratification is so King. Shoot, now I have to find other uses for it to justify owning it... hell, I'm knee deep into this hobby so fuggit...
Earlier, I checked the height of the cell and it fitted nicely in the enclosure but my dumbass didn't bother to see if two cells fit side-by-side. I found that two cells were few a millimeters too wide and the enclosure wouldn't shut flush. So I staggered them and I'm in there like hardware leaving me with just enough space on the sides of the cells for the charging harness. shweetness!
After pulling Pack A out of the frame tube, I was left with the 1 meter long heat shrink tubing that I used to loosely insulate the pack and
View attachment 3
Solid!

Fnck no! I can simply cut the tabs and viola! Slide that sucker out, and slide another one in! Tee hee hee!

~ Tra ~ la ~ la ~ I am the man.. 8)

Tuck the boys in bed. Nite-nite.
J
The original cells tabs were weak so I decided to tear them out and solder fabbed copper tabs.
The negative tabs were welded really well and was a bit tricky to remove. I was left with sharp bits on the negative that need to be filed down. The positive tabs positive tabs pulled off effortlessly.
I found it odd that, if you remove the cell's paper insulation, that the whole cell body is positive and the negative is just a tiny island separated from the positive by just millimeters apart.
At first I couldn't decide on whether I should hold the pack together with duct tape or glue. I never liked the idea of committing the cells with glue and didn't want to wrap the whole pack with large and expensive heat shrink. What I want is to have the cells accessible (if I ever kill a cell again) and not have to tear into the pack and having to wrap it again with more expensive heat shrink. Duct tape was almost doable if kept to a minimum but it still gets sticky gunk all over the cells that gets stickier in summer heat. Well I shat me a brilliant idea so I brokedown and hopped on the hotglue bandwagon. Yep!
View attachment 6
I've never used hotglue before and always wondered what the advantage of it is over using only a tube of silicone sealant. So I buzzed down the hardware store still wondering if I should pay 23 bucks for the hot glue kit or pay 3 bucks for a tube of silicone.. me being a cheap bastard..I asked for a tube of clear silicone. The clerk searched high and low, out of hundreds of sealant, silicone, glue products and he couldn't find one that was clear. I thought it might be God's way of telling me to go for the hot glue kit. And I'm an atheist! Well I was blown away by the convenience of not having to wait forever for it to cure. Instant gratification is so King. Shoot, now I have to find other uses for it to justify owning it... hell, I'm knee deep into this hobby so fuggit...
Earlier, I checked the height of the cell and it fitted nicely in the enclosure but my dumbass didn't bother to see if two cells fit side-by-side. I found that two cells were few a millimeters too wide and the enclosure wouldn't shut flush. So I staggered them and I'm in there like hardware leaving me with just enough space on the sides of the cells for the charging harness. shweetness!
View attachment 4So Dee Jay, what's this brilliant idea you've come up with this time?
After pulling Pack A out of the frame tube, I was left with the 1 meter long heat shrink tubing that I used to loosely insulate the pack and
View attachment 3
Solid!
But Dee Jay, what if you kill a cell? That means you'd have to tear the heat shrink blah blah blah...
Fnck no! I can simply cut the tabs and viola! Slide that sucker out, and slide another one in! Tee hee hee!
~ Tra ~ la ~ la ~ I am the man.. 8)
Tuck the boys in bed. Nite-nite.
J
Doctorbass
100 GW
Dee Jay said:Sometime last autumn, Pack A which was hidden inside the Revive frame tube disconnected at the first cell. I pulled the pack out and I wondered if the frame tube pack idea was worth the trouble. I hadn't touched Pack A until now because I'm short on range. I thought it's time to get crackin' on my swing arm pack using my new enclosures.
The original cells tabs were weak so I decided to tear them out and solder fabbed copper tabs.
View attachment 7
The negative tabs were welded really well and was a bit tricky to remove. I was left with sharp bits on the negative that need to be filed down. The positive tabs positive tabs pulled off effortlessly.
I found it odd that, if you remove the cell's paper insulation, that the whole cell body is positive and the negative is just a tiny island separated from the positive by just millimeters apart.
At first I couldn't decide on whether I should hold the pack together with duct tape or glue. I never liked the idea of committing the cells with glue and didn't want to wrap the whole pack with large and expensive heat shrink. What I want is to have the cells accessible (if I ever kill a cell again) and not have to tear into the pack and having to wrap it again with more expensive heat shrink. Duct tape was almost doable if kept to a minimum but it still gets sticky gunk all over the cells that gets stickier in summer heat. Well I shat me a brilliant idea so I brokedown and hopped on the hotglue bandwagon. Yep!
View attachment 6
I've never used hotglue before and always wondered what the advantage of it is over using only a tube of silicone sealant. So I buzzed down the hardware store still wondering if I should pay 23 bucks for the hot glue kit or pay 3 bucks for a tube of silicone.. me being a cheap bastard..I asked for a tube of clear silicone. The clerk searched high and low, out of hundreds of sealant, silicone, glue products and he couldn't find one that was clear. I thought it might be God's way of telling me to go for the hot glue kit. And I'm an atheist! Well I was blown away by the convenience of not having to wait forever for it to cure. Instant gratification is so King. Shoot, now I have to find other uses for it to justify owning it... hell, I'm knee deep into this hobby so fuggit...
Earlier, I checked the height of the cell and it fitted nicely in the enclosure but my dumbass didn't bother to see if two cells fit side-by-side. I found that two cells were few a millimeters too wide and the enclosure wouldn't shut flush. So I staggered them and I'm in there like hardware leaving me with just enough space on the sides of the cells for the charging harness. shweetness!View attachment 5
View attachment 4So Dee Jay, what's this brilliant idea you've come up with this time?
After pulling Pack A out of the frame tube, I was left with the 1 meter long heat shrink tubing that I used to loosely insulate the pack and
View attachment 3
Solid!
View attachment 1But Dee Jay, what if you kill a cell? That means you'd have to tear the heat shrink blah blah blah...
Fnck no! I can simply cut the tabs and viola! Slide that sucker out, and slide another one in! Tee hee hee!
View attachment 2
~ Tra ~ la ~ la ~ I am the man.. 8)
Tuck the boys in bed. Nite-nite.
J
That's a nice idea Dee Jay for the shrink tube!
now just pay attention to the cell that can have direct contact with your alluminum case!.. these cells can deliver current of 550A when shorted!.. that would garanty you that you could never be able to open up your case dur to perfect weld!!! :lol: ..
Doc
Dee Jay
100 kW
- Joined
- Dec 11, 2007
- Messages
- 1,211
Doctorbass said:That's a nice idea Dee Jay for the shrink tube!
now just pay attention to the cell that can have direct contact with your alluminum case!.. these cells can deliver current of 550A when shorted!.. that would garanty you that you could never be able to open up your case dur to perfect weld!!! :lol: ..
Doc
Hey, thanks Doctorbass!
Yeah, I'm a bit nervous about a tight metal enclosure. I'll need thin bullet proof sheets for the ends of the cells and then to ensure the cells don't shift back and forth maybe use a tight fitting blocks of wood (or something light weight) to fill the ends of the pack
J
ps: new mix is up, please enjoy!
http://www.endless-sphere.com/forums/viewtopic.php?f=1&t=2997&p=133426&sid=6a93eb61e7e86813677e0be92984885c#p133426
Doctorbass
100 GW
Dee Jay said:Doctorbass said:That's a nice idea Dee Jay for the shrink tube!
now just pay attention to the cell that can have direct contact with your alluminum case!.. these cells can deliver current of 550A when shorted!.. that would garanty you that you could never be able to open up your case dur to perfect weld!!! :lol: ..
Doc
Hey, thanks Doctorbass!
Yeah, I'm a bit nervous about a tight metal enclosure. I'll need thin bullet proof sheets for the ends of the cells and then to ensure the cells don't shift back and forth maybe use a tight fitting blocks of wood (or something light weight) to fill the ends of the pack
J
ps: new mix is up, please enjoy!
http://www.endless-sphere.com/forums/viewtopic.php?f=1&t=2997&p=133426&sid=6a93eb61e7e86813677e0be92984885c#p133426
I suggest two different way to do this:
cheap : try with bicycle tire tube that you cut in the right dimention!.. they have the just right thick and insulatr well for vibration too!
lightweight: find some PCB without the cooper on any side.. thgis fibergladd is just like bulletproof and fire retardent!
Doc
Ypedal
100 TW
Hot Glue Rulz!!!!! I buy that stuff by the 5 Lb box ! :wink:
Nice box.. !
ps: Fiberglass sheet ie: " G10 " .. Of the cheap bastard option.. Rubbermaid plastic bins for a source of plastic sheet ! In canada we got " Crazy Carpet " at the dollar store !
Nice box.. !
ps: Fiberglass sheet ie: " G10 " .. Of the cheap bastard option.. Rubbermaid plastic bins for a source of plastic sheet ! In canada we got " Crazy Carpet " at the dollar store !
Dee Jay
100 kW
- Joined
- Dec 11, 2007
- Messages
- 1,211
Doctorbass said:cheap : try with bicycle tire tube that you cut in the right dimention!.. they have the just right thick and insulatr well for vibration too!
Maybe too thick.
I was thinking a sheet of kevlar but don't know where to get it.
Fiberglass PCB is a great idea, thanks Doc!
mmm mmm mmm... you're package is lookin' mighty good, too, ooh ooh! :wink:Ypedal said:Nice box.. !
Your Battery Pack! I meant your Battery Pack!
:lol: :lol: :lol:
Would be funny as hell to see a "Cheap Bastards" shop :lol:
J
Sacman
10 kW
Hi Jay,
Good to see you're still tweaking up the Revive. Your A123 battery pack seems to be coming along really nice. But those issues you've run into charging them properly is what's keeping me from going the A123 route as well.
Good to see you're still tweaking up the Revive. Your A123 battery pack seems to be coming along really nice. But those issues you've run into charging them properly is what's keeping me from going the A123 route as well.
Dee Jay
100 kW
- Joined
- Dec 11, 2007
- Messages
- 1,211
Sacman, how are you my Journey Kit bruda!
yeah, charging A123 cells ain't no picnic. And building your own packs takes a bit of finesse.
I love these cells though, especially after my experience with 36v 9Ah NiMH.
I think charging 10 cells at a time is the way to go. Charging 15 in series x 3 (10 cells at time) was just frying my BMS!
I still have my Dewalt DC9000 charger. Maybe if I build another bike I'll go 66v.
J
Dee Jay
100 kW
- Joined
- Dec 11, 2007
- Messages
- 1,211
I'm getting ready to go parallel with my two 15 series packs, so I want to build a power switch that can select Pack A or Pack B or A+B or Off/Charge.
Here's just the general idea. The "Y" is my symbol for the Schottky Diode. The black triangle is the switch position.
Here's just the general idea. The "Y" is my symbol for the Schottky Diode. The black triangle is the switch position.
Attachments


Dee Jay said:Idea time....
That'd be a sweet bike with a low KV RC motor in there.


Dee Jay
100 kW
- Joined
- Dec 11, 2007
- Messages
- 1,211
I stopped being superlazy and did something about the charging harnesses dangling out of the battery enclosure held together with only a rubberband. Can you imagine if the harnesses got caught in the pedal or chairing? Or I accidentally kicked them yanking out the live wires ? ?  WELL, CAN YOU ? It would've been like "herding cats" ! Ok, bad analogy, I just always wanted to use this analogy but could never find the opportunity. :wink:
Anyway, it's not so much laziness that stands (or slouches) in the way of my ebike projects. It's more like indecisiveness, especially when the process calls for permanent alterations to the bike or ebike kit. In the case of my charging harnesses, I couldn't decide if drilling holes on my lovely bulbous pack (battery pack, that is :wink: ) if drilling was something I reeeealy wanted to do, or will I come up with a more clever way to secure them with out drilling, the next day or week? If this happened I would kick myself swiftly up the ass for a while.
Well, I do'd it...

Yep, I drilled two 3mm holes to secure a black plastic enclosure that will hold the charging harnesses securely whilst I ride. I figured, if I ever decided to remove this box, the 3mm holes would be very easy to seal with black rubber plugs. Also, I rearranged the wires so that power leads of both packs comes out of the rear and the charging harnesses comes out of the switch hole and the xlr hole. NICE!
I'm very happy with my decision and it looks really great, this mysterious black box. 8) I also wrapped the blue wires in black flexible conduit !

Frump factor down by ...oh...10 percent . Life is good.
8)
8)
8)
I AM DA BOMB... *nostrils flaring* <---- smug emoticon
J

Anyway, it's not so much laziness that stands (or slouches) in the way of my ebike projects. It's more like indecisiveness, especially when the process calls for permanent alterations to the bike or ebike kit. In the case of my charging harnesses, I couldn't decide if drilling holes on my lovely bulbous pack (battery pack, that is :wink: ) if drilling was something I reeeealy wanted to do, or will I come up with a more clever way to secure them with out drilling, the next day or week? If this happened I would kick myself swiftly up the ass for a while.
Well, I do'd it...
Yep, I drilled two 3mm holes to secure a black plastic enclosure that will hold the charging harnesses securely whilst I ride. I figured, if I ever decided to remove this box, the 3mm holes would be very easy to seal with black rubber plugs. Also, I rearranged the wires so that power leads of both packs comes out of the rear and the charging harnesses comes out of the switch hole and the xlr hole. NICE!
I'm very happy with my decision and it looks really great, this mysterious black box. 8) I also wrapped the blue wires in black flexible conduit !
Frump factor down by ...oh...10 percent . Life is good.
8)
8)
8)
I AM DA BOMB... *nostrils flaring* <---- smug emoticon
J
Dee Jay
100 kW
- Joined
- Dec 11, 2007
- Messages
- 1,211
I have so many ideas rattling around in me brain-bucket but not enough time nor money. Most of the projects are on hold until I run into materials and solutions that I need, until then, I'm just doing what I can with what I have at the moment and playing catch-up with more pressing issues such as:
- a safe, reliable, * Dee Jay Proof *charging regiment with my rotary charger.
I just bought 25 x 25 x 25 cm plexiglass box with a lid for 45 bucks to be used as housing for two power supplies, ammeter, voltmeter, fan & my rotary switch. Too tall though, I need to find a way to cut it neatly down to 25 x 25 x 10 cm . Gettin' there though!
- DIY battery switch with built-in schottky diode
- 4011 paint stripping & magnet epoxy removal (prepping for aluminum brazing repair & flange reinforcement)
- DIY Longtail Tandem made with two bikes, a 26" roadster and 20" folder, a project I will call Precious Cargo 2620 or PC2620.. something like that...
J
Dee Jay
100 kW
- Joined
- Dec 11, 2007
- Messages
- 1,211
Even though my ebike projects seems to have slowed down to a halt, I'm always on the look-out for ebike project parts. I've accumulated a bunch of parts beckoning <--- :lol: for me to come out and play.
I searched many toy shops all over Tokyo and nobody carried the bubble gun I was looking for. The only place I found them was on US and UK sites. But this past weekend the family went shopping for kids' stuff, and there it was!
Fun for the whole family! Though I was disappointed with the design..it shoots only in bursts (you have to pull the trigger at intervals) so it means it's not a fully automatic assault weapon, more like semi-automatic. I was hoping to at least copy this gun's design but it turned out to be complicated.
Matters not to I
After many sleepless nights, I have lucidly dreamt of a simple yet perfect design for a Fully Automatic Bubble Machine Gun ! A gun that you can pull the trigger once and produce a non-stop stream of bubbles until you release the trigger, run out of bubble fluid, or drain the battery.
It amazes me what my brain can come up with when I switch it to Auto Pilot.
Unfortunately I won't be able to share my design for phere of The Pink Internet Spies waiting to steal golden eggs and cashing in on it ! Ha!
But that's not to say I won't share other useful ebike ideas so stay chooned!
J
I searched many toy shops all over Tokyo and nobody carried the bubble gun I was looking for. The only place I found them was on US and UK sites. But this past weekend the family went shopping for kids' stuff, and there it was!
Fun for the whole family! Though I was disappointed with the design..it shoots only in bursts (you have to pull the trigger at intervals) so it means it's not a fully automatic assault weapon, more like semi-automatic. I was hoping to at least copy this gun's design but it turned out to be complicated.
After many sleepless nights, I have lucidly dreamt of a simple yet perfect design for a Fully Automatic Bubble Machine Gun ! A gun that you can pull the trigger once and produce a non-stop stream of bubbles until you release the trigger, run out of bubble fluid, or drain the battery.
It amazes me what my brain can come up with when I switch it to Auto Pilot.
Unfortunately I won't be able to share my design for phere of The Pink Internet Spies waiting to steal golden eggs and cashing in on it ! Ha!
But that's not to say I won't share other useful ebike ideas so stay chooned!
J
Similar threads
- Replies
- 6
- Views
- 650
- Replies
- 23
- Views
- 668
- Replies
- 12
- Views
- 686
- Replies
- 20
- Views
- 1,643