Direct-drive 3220 setup with a 3-Speed Hub...

Ah, okay I'm finally getting the idea about what you are talking about. This truly is a "series" configuration, but with the motor in the middle instead of the pedals, right? I'm still having a tough time visualizing how you would "attach a drive sprocket" to the case, and then screw on a FW.

I'm not so sure going to a larger diameter is the right answer. That will limit the installation options. You can get more torque just by making these longer. If you don't need the extra torque, they will run cool as a cucumber. We also aren't really maxing out the potential performance of the 3210/3220s, due to the 50V RC limit. If you double the voltage you can get the same power at half the current, which really cuts down the heat generated. Heat losses go up as square function of the current.

-- Gary
 
GGoodrum said:
If you double the voltage you can get the same power at half the current, which really cuts down the heat generated. Heat losses go up as square function of the current.

-- Gary


Watch out Gary! Miles will pounce when you talk like that! If efficiency of a motor doesn't change, all that matters is the amount of power you input to determine the heat in the motor. If you make your 1kw from 10v and 100amps, or 10amps and 100v, if both motors are 90% efficient, they both will make 100w of heat. In the fantasy world of motor performance spec sheets, it all works out... :p :) :p :roll: :twisted: :mrgreen:
 
BTW- I'm totally drooling on those composite sprockets! Quiet, light, and ultra sexy :)

I'm thinking the motor drive sprocket is going to need to be made of steel though (maybe that is what you were planning?). The strain per tooth on the little sprocket is going to be about 10 times higher, and it will have a chain roller seat in it and unseat 10 times faster and 10 times as many cycles as well.
 
Miles said:
LOL I resisted........

You're a man of strong will Miles. :)

Any progress on the CADoodling?
 
the composite sprockets are just dreamy, so light and cool looking, not a single sign of wear on mine yet.
once we get the splined freewheel sorted im really looking forward to getting a 100t on the back wheel, will look very nice, even better i only paid £4.99 for my 80t, it don't get much cheaper than that!!
wheres gary? what's taking so long to get the deal? :lol:

D
 
deecanio said:
the composite sprockets are just dreamy, so light and cool looking, not a single sign of wear on mine yet.
once we get the splined freewheel sorted im really looking forward to getting a 100t on the back wheel
92t is the biggest they do, at the moment......
 
92T it is then :)
lovely drawing by the way Miles, fingers crossed we will get Mr White to make it, can't be Mr blue, he's on another job :lol:

D
 
GGoodrum said:
Ah, okay I'm finally getting the idea about what you are talking about. This truly is a "series" configuration, but with the motor in the middle instead of the pedals, right? I'm still having a tough time visualizing how you would "attach a drive sprocket" to the case, and then screw on a FW.

If using an intact geared hub, you attach the drive sprocket to the right side motor cover. The freewheel simply screws on to the existing freewheel threads for hub motor use. I'm not sure if you'd call it series or not, because the freewheel inside allows the exterior housing to spin without turning the motor. With the exterior freewheel or cassette driven by the crank chain, you could pedal assist, or pedal only without motor drag, or motor only, and no special components to buy. For higher than rated power, simply ventilate the geared hub motor by drilling holes in the aluminum covers and shell.

I want to try to minimize the size and push the upper limits of the motor itself by removing the housing completely to directly ventilate the windings and rotor. I started a separate thread.

John
 
Is there a good source for low tooth count drive sprockets for either #35 or #219 chain ?
#35 chain is stronger than #219 chain, right ? ( but #219 chain is finer pitched, so can stand a smaller drive sprocket ? )
 
http://www.gokartgalaxy.com/engine_sprockets1.htm

#219 and #35 are the same strength but, as you say, #219 pitch is smaller, see:
http://www.azusaeng.com/chain/krtchn.html

For those outside the US:
#219 chain pitch: 7.772mm
#35 chain pitch: 9.525mm
 
They may list #219 as being the same strength as #35, but I can assure you that $219 is available in all sorts of wildly strong alloys, and with special lubrication and pin/end plate clearances designed for high speed operation and racing shock loads.

#35 chain is more like a low speed industrial application chain, generally made with economical alloys and lubricants.

#219 is a chain that was specifically created and designed for running in high RPM high load applications to connect a very tiny drive sprocket on the end of a 15,000-20,000rpm kart racing engine to a large diameter drive sprocket. That is very similar to our needs as well.
 
Hi,

Luke said:
#35 chain is more like a low speed industrial application chain, generally made with economical alloys and lubricants.
I agree that #219 is a better option but it looks like high quality #35 chain is available.
Miles said:
Yes, there are lots of variations: http://www.targetdistributing.net/ek_kart_chain.php :p

Quoted from the url provided by Miles:
Developed in 1978 as the first extended bushing or "space chain", EK Chain combines the qualities of high tensile strength, low wear, impact resistance, anti-kinking performance and fatigue toughness to produce the best racing kart chain available...

Available in #35 & #219 chain, in standard, "Silver Pro" or "HT" high tensile, the strongest #35 racing chain available (#35 chain only!)
 
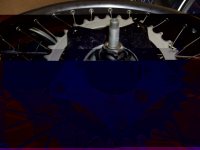
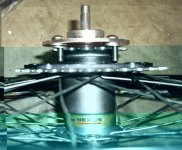
I am trying out a similar setup to the original posted in this thread, but having issues with the Sturmey. It looks like there is about 5mm between the circlip securing the 22t sprocket and, um, the next piece of metal. The Sturmey 22t that comes with the wheel is 3mm thick. Normally the dust shield takes up the remaining 2mm.

Rather than trying to somehow jam another sprocket into this tight space, I used the stock 22t sprocket as a mounting point for an adapter to my #219 sprocket. This was not only easy, but my sprocket and adapter are aluminum, and I think an aluminum adapter to the Sturmey sprocket shape might have sheared off under load (there's just 3 little bumps on the inside of the sprocket). Currently the bike is electric only. I am trying to find another Sturmey sprocket locally which I will mount to the adapter using some spacers. I don't care about freewheeling right now.

I also never tried the 22t sprocket on its own before all the machining started (oops), so I have no idea how well this gearing suits a folder. I am used to hitting some pretty decent pedaling speed on it, so maybe I should look for something smaller? The bike was originally a 7 speed. If top gear is 0.75*22t = 16.5, sounds like I should look for an 16 or 18t Sturmey sprocket.

The Shimano sprockets fit on this hub too?
 
Hi,

fitek said:
The Shimano sprockets fit on this hub too?

http://www.sheldonbrown.com/harris/sturmey-archer-parts.html#sprockets
Scroll down to Sprockets...:
In addition to the genuine Sturmey-Archer sprockets, which are for 1/8" (wide) chain only, we also can supply most sizes in Shimano versions that will work with either 1/8" or 3/32" chains.

All sprockets listed here are compatible with Sturmey-Archer, Sachs and Shimano multi-speed hubs (except for the Sachs 12 speed and Sturmey-Archer 8-speed.) Shimano Nexus hubs don't accept sprockets smaller than 16 teeth because the chain will rub on the shift linkage.

15 and smaller sprockets are flat. 16 and larger sizes are "dished" permitting chainline adjustment by flipping the sprocket over.
 
First of all, yes, the Shimano cogs do fit. You should look for a 16T, like this one. It has a bolt circle diameter that is similar to a number sprockets/adapters. The trick is not to try and use the 16T cog directly, but sandwich it in between two other sprockets, and or another freewheel. The 16T, which is hardened steel, serves as the mount to the hub.

Because of the offset, you can easily fit two sprockets in the available space, but one ends up inward from the end of the hub. Your sprocket, or sprocket adapter needs to have a bore of 2-1/8", so that it will fit over the end of the hub. What I have on mine is a 94T #35 sprocket that already comes with a 2-1/8" bore and four holes that match up with the teeth on the 16T cog. You can also use something like the Dimension "Big Cheese" BMX 110 mm BCD adapter that can be made to work by using a 2-1/8" hole saw, and then drilling four holes that match the 16T cog.

FW Adapter Kit-04.jpg
View attachment 4

On my original setup, I used a 22T 74mm BCD "granny gear" MTB sprocket for the pedal chain. This required a freewheel in the crank. For the setup in this thread, I used one of the new freewheel adapters I had made, which replaces the 22T granny gear. Instead I'm using a 17T BMX freewheel.

FW Adapter Kit-07.jpg
View attachment 1
View attachment ePort Runner-16.jpg

-- Gary
 

Attachments

  • eMariner-40.jpg
    eMariner-40.jpg
    115.8 KB · Views: 1,341
Gary,
on the port runner I see you are using a metal large sprocket with a 7 tooth motor sprocket. May I ask what size is it, is it heavy, and what material? It is not extron correct? Have you thought about getting it lightened?

On another note, I thought your adapter was going to slip onto the three prong mount on the hub directly and be more stout than the stock 16 tooth cog, but now I see. I just question the power handling capabilties of those small teeth to handle much power. But if you are running a 3220 through it in this manner with no slipping or wear I suppose I will order up an adapter this week. Thanks for this pics, maybe they are somewhere else, but this is the first I have seen. They let you on the metrolink with those bikes? I want to ride the Santa Ana river trail into Huntington beach and then ride th train back home one day, I just don't know how to get my bike back home. :|
 
I'm going to buy the sic bikes eno freewheel, and a regular freewheel, and the dual-drive hub, and make the freewheels fit on the splines by hand with a file. I will make a jig using sprockets clamped to the freewheel's inner portion, and carefully work it with a file until they slide on the splines.

3-spd motor drive, 3-spd pedal drive, no derailer BS, no needle sprauge clutch BS, and completely independant drive isolation.
 
And if it doesn't seem like there is adquate room for both to fit onto the short splines of the dual-drive (likely), then I will shave down material from the freewheels until they are thin enough to both fit. If they still don't both fit, I will take the dual drive hub spined portion off, and figure out what it will involve to get the required length spline portion mounted. Likely would involve machining some custom shift rod pieces at the very least, but I'm game for a few challenges.
 
LFP;

I hope you document your experiences with pictures for those of us who are visual imaginatively challenged.

Greg
 
My congratulations ...

Randy must have found enough room


liveforphysics said:
And if it doesn't seem like there is adquate room for both to fit onto the short splines of the dual-drive (likely), then I will shave down material from the freewheels until they are thin enough to both fit. If they still don't both fit, I will take the dual drive hub spined portion off, and figure out what it will involve to get the required length spline portion mounted. Likely would involve machining some custom shift rod pieces at the very least, but I'm game for a few challenges.
 
Back
Top