light WATT METER screen

dnmun said:
Back Light is self explanatory but if someone can put a handle on the other stuff it may be useful for the arduino hackers. like RS and RW

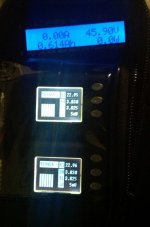
dnmun a google for ""1602 lcd display arduino"" will give heaps of info on the web, including pinouts. Sounds like it's a regular 16 character by 2 line display.
Start here http://arduino.cc/en/Tutorial/LiquidCrystal
 
For anyone with a Big Lots nearby, some of them have these little LED reading lights (size of a ballpoint pen in two halves, bendable in the middle) that are only $2.50 on clearance. I think htey use 3x LR44 batteries inside (included). Not terribly bright, but good enough to light up your screen from the outside of the meter for nighttime.
 
well finally got around to starting the conversion , but need some advice ..

there are 15 pins in a row that i have to desolder, i have got most solder of by useing desolder ribbon ,, but i can not get all pins heated to remove the l,c,d panel,

any one got any ideas for this ?? i only have a very fine pointed tip soldering iron, i can adjust the temp, and have tried it on the highest heat, but
 
Because they are through hole plated, solder wick wont work that well.

I usually use my Hakko desoldering gun, but a cheat is to actually use too much solder (so its bridging across all of the terminals) and get it all molten, then pull off the LCD module. You can clean it up later to reuse it (or get some very small transistor nippers, and cut each of the header pins, then hold them with a pair of needle-nose pliars and pull them out (you can replace them easily enough when you remove the solder from the main board.

Edit - looking at the main picture - cut them off and replace them - far easier. The black plastic that holds the header pins apart just prises off them, and you just remove it pin-by-pin and clean up with solder wick and replace the whole header when you put the new LCD on.
 
i have two bad hobby king turnigy wattmeters. display gone on one and main board blown on the other so i wondered about cutting each of the pins cleanly and putting a long cable on it to remote the display and leave the control board on the battery by using the good board from each one connected through the ribbon cable.

i got another turnigy and i don't think it is better than the $17 special. at least that one had the trimpots. only thing better about the turnigy is just the back light, which is like 30-40mA extra drain on the battery.

but i agree with him. cut them and then you can take the pins out one by one since you have the new display with pins.
 
You could also try a desoldering bulb or desoldering pump. The bulb is $6 at Radio Shack. Maybe cheaper some where else. The tips eventually melt, but they are good for a while if you don't bump them into the soldering iron.

http://www.radioshack.com/product/index.jsp?productId=2062742
 
thanks for the help folks, unfortionally i dont have a new set of pins ,,
i will look on ebay for some but i dont think i will have much luck finding them but we will see ,, failing that i might replace the pins with wires ,,

i don't really even know if the new boards will work, as some people have tried this conversion with other replacement boards with out success ,

would it be possible to connect 2 boards in parallel ? just to see if the new boards are compatible ?? ie leave the original one in, and connect the new one to the pins with wires ?? im wondering because then if the new boards dont work, then i dont have to mess around refitting the old one
 
If you are in the UK - then get some from Farnell eg.

http://au.element14.com/wurth-elektronik/61301011121/header-2-54mm-pin-10way/dp/1841229

Use that part number on the UK farnell website, surely there are some local electronics places that would have them as well

I don't know how you would go with putting two displays in parallel, never tried it. In theory it should work...
 
dnmun said:
if one board is sacrificed you could even heat that board with a torch and melt them all off at once, hehe.

Just be sure to do that over a large piece of cardboard or something so you can keep the lead solder from going everywhere.
 
Is there anything special about this watt meter?
I use this one and it has built in backlit LCD screen.
http://www.ebay.com.au/sch/i.html?_odkw=130a+power&_osacat=0&_from=R40&_trksid=p2045573.m570.l1313.TR0.TRC0&_nkw=130a+watt+power&_sacat=0
I have clocked it up to 1600watts of power with out it having any probs, had it permanently hooked to my lipo pack for months now.

I saw Hyena post he blew his and said that the Turnigy one from Hobbyking is better and its cheaper.
https://hobbyking.com/hobbyking/store/uh_viewItem.asp?idProduct=10080
 

Attachments

  • shrink.jpg
    shrink.jpg
    130.5 KB · Views: 1,406
TheBeastie said:
Is there anything special about this watt meter?.......

Maybe, I think the wire gauge going through the shunt side of the meter on the OP is about 11awg or 12awg. What is the wire gauge on your suggested meters?

Also, the OP meter can balance up to 6s on the battery backs. Is there a balancing feature on your suggested meters?

:D
 
e-beach said:
TheBeastie said:
Is there anything special about this watt meter?.......

Maybe, I think the wire gauge going through the shunt side of the meter on the OP is about 11awg or 12awg. What is the wire gauge on your suggested meters?

Also, the OP meter can balance up to 6s on the battery backs. Is there a balancing feature on your suggested meters?

:D
Nar no balancing option, I save that for when I charge my pack. The wire is quite thick I would have to check the exact gauge but I am thinking 12awg or 11, actually maybe even 10.
If you do the maths it can take about 7800watts because 130A x 60v is 7800w.
The specs on Hobbyking say "0~6554W, resolution 0.1W" so I guess its rated to allow up to 6500watts to run through it.

What would be great is if it had a voltage cut off feature, would love to force my self to be cut off at say 42v so I don't over drain my packs to the default controller voltage of 37.5, the KU123 controller I got can only be adjusted via a PCB resistor mod if I want that voltage from what I have read.
 
ok just an update

the blue with white text board that i bought off of ebay works fine, i have also found where it can be connected onto the bottom board to get the led light to work. it is on pin 16 on the top board, but not pin 16 on the bottom board,
i will get my camera in the next few days and take pictures to show where to connect it up. [camera is round my mothers] its very near to pin 16

i cant believe that its took me a month to get around to doing it lol
 
ok bit of help needed here folks ,

the place that i thought was going to get the led light working is around 5v .. but thinking about it, i think i read some where that the led is 3v???

the 5v comes from the main power input from the battery [black] negative ..

so i need some plain english advice,

what is the voltage of the led ?

what value resister should i use or is this not needed on the neg power side to the led ???
 
Most of these boards are designed for 5V, and the LED is as well. They usually have the appropriate series resistors for the LED's on board.

One problem you may run into is that the LED draws more current than the voltage reg can comfortably provide. In which case, if you know what current the unit itself draws (a resistor and multimeter will tell you this) then you can actually run the LED in series with the supply line (preferably after the resitive divider IF you can get to it so your Vf doesn't affect the voltage) If the current is small (say 10-20mA) then the LED will help drop the voltage as a free pre-reg. - Its how it is done on the CA.
 
ok. the blue screen with white letters worked great.
but i have messed the board up with to much heat [that will teach me not to check the heat of the solder gun before using it,]

i will see if i can repair the tracks that i burnt out whilst soldering,
 

Attachments

  • 20130418164107.bmp
    174.8 KB · Views: 571
justlooking said:
ok. the blue screen with white letters worked great.
but i have messed the board up with to much heat [that will teach me not to check the heat of the solder gun before using it,]

i will see if i can repair the tracks that i burnt out whilst soldering,

So where did you ground the 16th pin to get the 5 volts?
 
e-beach said:
justlooking said:
ok. the blue screen with white letters worked great.
but i have messed the board up with to much heat [that will teach me not to check the heat of the solder gun before using it,]

i will see if i can repair the tracks that i burnt out whilst soldering,

So where did you ground the 16th pin to get the 5 volts?

to the negative from the battery, to pin 16 on the top board with the led on ..
 
what voltage are you getting via pins 15 and 16? (The BL+ / BL- Pins)

:D
 
e-beach said:
what voltage are you getting via pins 15 and 16? (The BL+ / BL- Pins)

:D
i cant remember off hand, im away from home till next week, but will check as soon as i get home, but i dont think i got a reading on pins 15 and 16, thats why i had to find another ground ,
 
justlooking said:
e-beach said:
what voltage are you getting via pins 15 and 16? (The BL+ / BL- Pins)

:D
i cant remember off hand, im away from home till next week, but will check as soon as i get home, but i dont think i got a reading on pins 15 and 16, thats why i had to find another ground ,

No worries. I just checked mine hooked up to a 12v SLA and got a constant 4.91v on pin 15 with my meter's negative probe attached to the ground input.

It is what I needed to know for ordering a lcd with back-light.

:D
 
Back
Top