LightningRods mid drive kit

I was working on Walter's big block this afternoon and thought you might enjoy a comparison between the GNG motor and the big block.

The GNG armature weighs 655 grams

magnetSM.jpg


The big block armature weighs 1.25 kg

magnetLG.jpg


If it looks like the big block is two small blocks side by side, that's because that's pretty much what it is. If you look at the weights the biggun' is almost exactly twice the weight of the GNG.

I got the thermistor installed into Walter's motor. It's a great accessory, and I know that a lot of you want them, but it's a time consuming proposition. Not really hard to do, but just a lot of steps. I haven't figured out how we're going to work this out yet.
 
any chance you could post a youtube on installing a thermistor?
 
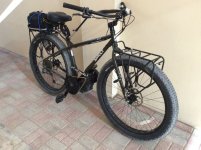
BRK Surly ECR Update...HAPPY THANKSGIVING 2014!
Photo Nov 27, 3 07 56 PM.jpg
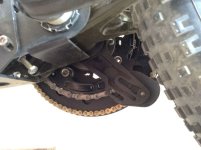
After many months of tinkering, I had a totally satisfying ride today with no issues. My most recent problem was chain jumps on the front sprocket. I had removed my front derailleur because of clearance and that's when the trouble started. I finally saw where another builder, jdevo2004, had used a MRP chain guide and that's what I have done while at the same time upgrading to a 38-tooth RaceFace thick-thin sprocket and Connex chain. I wasn't able to get the one jdevo2004 used because of shipping problems, but the MRP Lopes is similar in principal. No more chain jumps for me.
Photo Nov 27, 3 10 19 PM.jpg
Photo Nov 27, 3 11 01 PM.jpg
Photo Nov 27, 3 09 01 PM.jpg
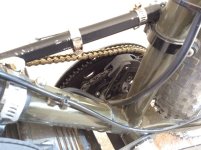
My other ongoing problem was the torque issue. My abandoned front derailleur mount presented itself with a good anchor point but the hardware was problem. Since I am in Oman and everything I order takes about 2-3 weeks (hardware here is severely limited), my efforts have resulted in a crude, embarrassing, unattractive kluge that finally works!
Photo Nov 27, 3 08 13 PM.jpg
It's hard to see, but the kickstand tube rest on a boss on the derailleur mount and also wedges in on the upper sheets. Next step will be too drop the derailleur bracket down more to more parallel with the top run of the kart chain, which is the true direction of the force.

Here are a couple of other views of the bike. Note the Surly Rear Rack on the front.. Why? coz I think it looks bad ass, that's why.
Photo Nov 27, 3 15 55 PM.jpg
 
L-R are you planning on offering torque braces as well?
 
A simple torque brace is all that's needed to stop the upper sheets from twisting. That's why I added a lug to attach one to the new 10 gauge sheets. If we were only dealing with one bike design I'd make a tube brace and include it with the kit.

People have been writing and asking about the weight of the new upper sheets. The overall weight without the additional front torque plate is 2 ounces more than the earlier design. The side plates are considerably heavier but redundant hardware and spacers that I was able to eliminate brought the total difference back down to 2 oz. The optional 10 ga front torque plate weighs 7.5 oz for the small block and 9 oz for the big block.

Happy Thanksgiving to everyone who celebrates this holiday.
 
i really don't get people who are worried about weight on e-bikes in general, maybe it's something i'm missing but you guys are loading a motor, a battery pack on a bike which are already not exactly "slim" in the first place, and are doing it for something that would actually help you peddle, and you are worried about couple oz more or less?


i foresee an "aftermarket" boutique market for these torque braces ;) "we're the only store that stocks braces for the famous L-R kit , suited for ah... canondale lefty.."
 
emaayan said:
i foresee an "aftermarket" boutique market for these torque braces ;) "we're the only store that stocks braces for the famous L-R kit , suited for ah... canondale lefty.."

Here is a potential torque brace that looks promising. My turnbuckle that did not stand up was 6mm and this one is 8mm.
 
BRK said:
Here is a potential torque brace that looks promising. My turnbuckle that did not stand up was 6mm and this one is 8mm.

That does look promising. Especially if it's not at full extension. I'll have some sort of seat post mount made if it turns out to be necessary.
 
What's jackshaft size?
I mean from left to right.
Did you decrease jackshaft size, especially on drive side?
Thanks
 

Attachments

  • IMG_20141126_143502.jpg
    IMG_20141126_143502.jpg
    379.7 KB · Views: 4,217
dusan said:
What's jackshaft size? I mean from left to right. Did you decrease jackshaft size, especially on drive side?

My small block jackshafts are 5" long. The center housing has a BSA thread and can be adjusted side to side for offset.

The problem in your photo is that you have a standard BB and crankset on your bike. All kits of this type require a wider BB axle, preferably 148 mm. With the wider axle your chainring will be offset correctly for the driver sprocket on the jackshaft.
 
Here is another part that continues to evolve. The chain guard or pants ring for the 219 driven sprocket. This one is for Walter's big block with a 75T 219 driven and 44T bicycle driver.

75Tchainguard.jpg


My first design for the pants ring was made of 12 ga steel and mounted to the sprocket attaching bolts. I liked the idea of using existing holes so that users could change sizes of sprockets or replace worn sprocket with a standard item. Unfortunately the additional depth of the pants ring caused even counersunk bolts to hit the right crank arm. This guard is far lighter being smaller and made of .100" aluminum. It completely clears the crank arm with no spacer. I just have to drill the sprocket for the attaching bolts. More work for me but a better part for you.
 
LightningRods said:
Here is another part that continues to evolve. The chain guard or pants ring for the 219 driven sprocket. This one is for Walter's big block with a 75T 219 driven and 44T bicycle driver.

My first design for the pants ring was made of 12 ga steel and mounted to the sprocket attaching bolts. I liked the idea of using existing holes so that users could change sizes of sprockets or replace worn sprocket with a standard item. Unfortunately the additional depth of the pants ring caused even counersunk bolts to hit the right crank arm. This guard is far lighter being smaller and made of .100" aluminum. It completely clears the crank arm with no spacer. I just have to drill the sprocket for the attaching bolts. More work for me but a better part for you.

Sweet Mike. Just today, I was just testing the Motobecane FB4 bike that my big block is going on and the chain ring kept trying to rip my pants off! This guard will definitely come in handy when riding in the snow with even bulkier snow pants! Super stoked and can't wait.

BTW, the Motobecane FB4 is a cool bike but my initial reaction is a weird feeling in steering. This may not be a geometry issue of the bike and maybe more of a fat bike thing. It also wants to steer right a little. I'll have to research how to fix that. I'll keep you guys posted on the result when I get Mike's big block attached. Also, it is worth noting that this bike DOES have the BSA bottom bracket threads that Mike has indicated as step 1 in determining a suitable bike for his kits.

Happy Holidays all!
 
Jason, or Mammalian04, is going to do something really fun. He's going to build a big block fat bike using my front mount kit on a new Motobecane and he's also going to build a mid mounted big block using Eric's custom mid mount fat bike frame. This will be a great platform to show the various advantages and disadvantages of front mount through the BB vs mid mount with the BB and motor joining at a second jackshaft. I'm really excited about both kits and I think that Jason will end up with two really cool (and fast) bikes. Jason's spot in the production queue was coming up so this is all legit with no line jumping. The front mount bike will be finished first since those kits are shipping now and the mid bike mount is still in development.
 
are there any updates in better belt pulley department?
 
Here's the first big block kit, ready to ship out to Walter. It's properly fortified with the new 10 gauge upper sheets with bolt-in front torque plate and heavy duty 10 gauge rear hanger.

bigblock1.jpg


Here's a shot of the front torque plate and also the rear lug for the optional torque brace turnbuckle/bar. You can also see in this shot how the upper adjuster plate is now trapped by the side plates. This allows the right side adjuster to be used as a belt tracking adjuster. I didn't realize until I actually assembled a few of these that only the left side adjuster needs to pull up on the belt. The right side adjuster actually needs to push down on the jackshaft. Now it can.

bigblock2.jpg


The lower adjuster now has two adjuster bolts on all BB widths. I also added a 12 gauge steel plate with two countersunk holes for the bolts to press into. Several users broker the molded urethane blocks by pressing hard on them with the adjuster. The steel plate epoxied on top will stop that.

bigblock3.jpg


My next order will be to Stephen in Switzerland which is FIVE small block kits plus tools and extra parts. That order is also nearly ready to ship. Now that I'm past the US Thanksgiving holiday it's pedal to the metal to ship kits as fast as possible between now and Christmas. Santa will be bringing a lot of you mid drive kits this year!
 
Wow,im glad im glad i wasnt the only one who broke the uthrane and browwoed to the motors housings:)
Will you be sending the better plastic pulley as well?
 
Mike, I don't recall everything that comes with the kit. Do I need the "tools" you mention? Also, do I need to order anot her bottom bracket for the Motobecane with different specs?

Just trying to get a head start so I have everything needed with the kit arrives.
 
Mammalian04 said:
Mike, I don't recall everything that comes with the kit. Do I need the "tools" you mention? Also, do I need to order anot her bottom bracket for the Motobecane with different specs?

Just trying to get a head start so I have everything needed with the kit arrives.

You will need another bottom bracket but I provide that as part of the kit. The orange-gold Gigapipe shown in the photos of the big block is the 100mm BB that I use.

You don't need all of the extra tools that Stephen asked me to pick up for him. He asked for things like specialized JST connector pliers and gear pullers. It sounds like he's in a group planning on building e-bikes. You shouldn't need the extra tools.

Most of the extras you need will come from Edward Lyen, Grin Technologies or your battery supplier. I think we're going with a larger than stock chainwheel on your bike. You'll need a longer final drive chain.
 
Mammalian04 said:
Mike, I don't recall everything that comes with the kit. Do I need the "tools" you mention? Also, do I need to order anot her bottom bracket for the Motobecane with different specs?

Just trying to get a head start so I have everything needed with the kit arrives.

don't forget to ask for the chain breaker mike supplies.
 
Back
Top