Moonshine's Vector/MXUS/MaxE Build

litespeed said:
I have a 7 speed on my MXUS and it fits perfect but I had to move the clamping dropout to the outside. Neither my brake nor cluster would work due to the screws on the clamping dropout connection.

Tom


Oh man! I didn't know those clamping dropouts could be switched! Dammit! Thanks litespeed!
 
ImageUploadedByTapatalk1431391570.610579.jpg

ImageUploadedByTapatalk1431391583.727246.jpg

ImageUploadedByTapatalk1431391871.195974.jpg

ImageUploadedByTapatalk1431391893.289318.jpg

ImageUploadedByTapatalk1431391906.461426.jpg

ImageUploadedByTapatalk1431391922.887707.jpg

ImageUploadedByTapatalk1431391932.941748.jpg

ImageUploadedByTapatalk1431391943.348149.jpg

Perfect chain line!!!! Success!
 
Looks like plenty of room now! Keep the updates coming, I'm slowing working on mine and need inspiration to keep going :lol:.
 
Here is the Phasor you were considering and it is in NJ?

http://endless-sphere.com/forums/viewtopic.php?f=9&t=69300
 
I know! I still don't like the bottom bracket height and I'm sure it'll be worse with 19" rims. But definitely something I would've considered if I didn't get a vector
 
Its looking awesome,nice brooks to boot.you can always get shorter pedal arms.i went from 165-155 and got used to it in about 2 days,plus i think it helped my bad knee out some.
 
Oh I meant I didn't like the bottom bracket height for the phasor. That's why I didn't get it.

I love the bracket height on the vector. But I don't like the custom bottomed bracket itself.
 
ImageUploadedByTapatalk1431831413.953111.jpg

9.5" with offset bushings. Looks great!!!! I just need to get the battery (currently on the way from germany). Then I'll have to start wiring everything. But the controller is definitely staying inside the frame.


offset bushings for the 9.5" shock.

ImageUploadedByTapatalk1431831507.515433.jpg

ImageUploadedByTapatalk1431831515.821236.jpg


ImageUploadedByTapatalk1431831527.474645.jpg

With the 8.75" shock. Pretty low. No issues with bottom bracket height. But def not ideal. I'd have to mess with the shock settings but I bottomed out pretty easily.
 
ImageUploadedByTapatalk1432181409.758628.jpg
ImageUploadedByTapatalk1432181419.162036.jpg
ImageUploadedByTapatalk1432181428.834480.jpg
ImageUploadedByTapatalk1432181438.963012.jpg

Batteries are here!!! Well still waiting on 1/4 packs (they were sent separately) they're so tiny! I feel like I could double the amount I got!

ImageUploadedByTapatalk1432181508.341228.jpg
ImageUploadedByTapatalk1432181516.644882.jpg
ImageUploadedByTapatalk1432181524.483973.jpg
 
Thanks! That's a great question...I'm still waiting for the 4th battery pack for my full 20s. I also have to get blade fuses for the built in fuse holders on the pack (couldn't figure out last night why nothing was turning on!)

I'm getting all the hardware mounted and stuff. I really want to put the controller on the inside on the top portion of the frame, but I'm having a hard time figuring out how to mount it. I think i'm gonna have issues with the domino throttle and the bms.

I'm not sure how to plug the BMS correctly. My packs are paralleled then put into series as you can see in the pics. Do i connect the packs in series then plug in the pigtails? or do i plug in each paralleled pack into the BMS then plug the packs together in series?

For my throttle...the domino has three standard wires then 2 green wires for a microswitch. Apparently once the throttle is at zero, the switch turns on and initiates the regen/brake. My plan is to connect the green switches to a push button so that I can control when the microswitch engages. That way i can coast if i want to or use regen when needed. I know it would be easier just to wire the button, but i kind of like a setting where i just need to disengage the throttle for the regen to come on instead of pushing a button.

Thoughts?
 
I used push button regen and it was just another thing i had to think about,when i tied in regen to throttle i could just roll the throttle down 3/4 turn and coast,mind you i was using 48v so it will be different on your machine.
 
If you turn down the throttle, you should ideally coast until you slow down enough to start picking up speed. For me i like the idea of let go of the throttle to brake/coast. I want it to feel like a regular motorcycle throttle. I'll see how it goes both ways...
 
ImageUploadedByTapatalk1432272089.626840.jpg
View attachment 1
ImageUploadedByTapatalk1432272118.554291.jpg
ImageUploadedByTapatalk1432272127.094606.jpg
ImageUploadedByTapatalk1432272140.581206.jpg
View attachment 5
View attachment 6

It's aliveeeeee! Holy shit it's fast! I cranked up some settings. I did 75a batt/150a phase and that took me up to 35mph easily! Boost mode at 150/300 was too intense/scary. My front end is too light. I didn't really mess with any other settings. Did some throttle tweaking but I didn't really know what I was doing. Just going off of what I remembered from the owners thread. Changes the pwr1 to 1.4 or something. Heard increases torque. Also changed ovs to 2.

There is some bad news. I def don't know wtf to do about the BMS. My packs were wired a little weird. They're 4 individual 5s8p packs put into series. Each pack has some connector (not jst-xh) for balance leads. The guy who made it schwisbi made a custom harness with jst. The issue is once I plugged the harness in and the packs in series (paralleled already) it blew the second bms socket.

I plugged in the balance lead on the pack with the main negative lead for the entire pack into the BMS slot closest to the wire. Then the second one I plugged in started smoking the BMS and showed a red-light. I immediately unplugged it. Looks like the 015 resistor is discolored. I don't have a pic right now but will get one. What's the deal? How do I do this bms thing???!!!
 
That is a crazy amount of unused real estate in your battery compartment. I used Konions so I had to use a bunch, 360 to be exact in a 24s15p ( 100.8 volts and 22.5 amps ) scenario and space is limited but still some left. Yours looks nicer with all that extra space though! I'll go to 21s14p of some 3 amp cells when I get an Adaptto Max-E so I don't have to use the side spacers and to shed a few pounds.
 

Attachments

  • image.jpg
    image.jpg
    82.6 KB · Views: 1,645
Yea I'm pretty surprised as too how small these samsung 25Rs are. I have a 20s8p pack (84V/20ah). I could easily go 20s16p for 40ah!!! that would be outrageous!!!! :twisted: I don't have a scale, but the bike is pretty light. I would say definitely under 100lbs...maybe 80? Regardless, the 20s8p pack was pretty pricey...so no new packs anytime soon.

The controller was easily mounted inside and hopefully wont get too hot. I just didn't want to waterproof it or have the wires on the outside of the frame. If it gets hot i'll put some fans it there.

Still working on the BMS issues....i'm not sure if the custom balancing lead harness i got was wired correctly for the MaxE bms.
 
Forget the last post - I didn't realise the thread was 4 pages and was answering to a very early post.

Loving the build - any tips for me starting to build my own? I just have the frame at the moment.
 
I'm sure you've seen this, but this what you need to do.

index.php


You need to take a DVOM and measure from your negative battery terminal into each balance connector pin of your custom harness. You should see the voltage go up by 4V or so (whatever your cells are charged to) for each pin. Do this for all balance connections, keeping the DVOM at negative battery and stepping the positive in the connectors. If any do not step up incrementally by that much, DO NOT plug it in!!
 
I've seen that diagram but I didn't think of doing that! That makes a lot of sense.

So the lowest voltage (first cell) goes in the slot closest to the BMS wires?
 
moonshine. the bms wiring is actually very simple, but it needs careful thought cause adaptto have flipped the plugs around, making it rather confusing at first.

as you have discovered, the boards blow easily when things arnt correct. i have blown a board by dissconnecting the serial sub-pack connections without unplugging the bms plugs first(which were bridging the serial connection)

general rule to be safe is- when unplugging stuff,whatever you do to the pack , ALWAYS UNPLUG ALL BMS JST PLUGS FIRST, and NUMBER ALL PLUGS.

as the components on the boards cant take any more voltage than they are spect for.

its good having the spare ones so you can reconfigure and use them.

try setting to ovs 5, 150A batt,350A phase :twisted:

for me, this is where the bike started to feel like a responsive moto.

you can also soften the start current with ls start/hs start feature, thatway full power will not kick in until the set speed, say eg. 30kph, is acheived.

if you havnt already done so, try running autodetect several times. it improves the smoothness and efficiency again each time, givving more power accelleration and cooler temps.

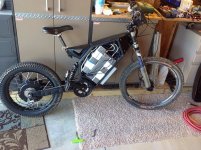
also, cant recommend the atached wuxing thumb throttle enough.
really comfortable to use, good qual, cheap.
works right out of the box with the max-e, and means you rerely need to touch the discs :D
 

Attachments

  • wuxing throttle.jpg
    wuxing throttle.jpg
    1.6 KB · Views: 1,602
moonshine said:
I've seen that diagram but I didn't think of doing that! That makes a lot of sense.

So the lowest voltage (first cell) goes in the slot closest to the BMS wires?

Right. Right on everything RTL said also. I don't know why they flipped the connector, it was a poor design/decision. The BMS boards are in order though, just like the diagram I posted. The first board (closest to BMS wiring) is for cells 1-4, which should read from ground, 4V, 8V, 12V, 16V. The next BMS board is for cells 5-8, they should measure from ground, 20V, 24V, 28V, 32V...blah blah blah and so on.

I numbered the BMS boards and all the parallel connections so there was no guess work when I went to plug them in. Board 1 = cells 1-4, board 2 = cells 5-8, board 3 = cells 9-12, board 4 = cells 13-16, board 5 = cells 17-20. Cell count being in series of course.


I'm getting mine close to running later this weekend!
 
So if I started seeing smoke after plugging in the second plug is it safe to assume it's dead? Is it OK to just skip that board and resume plugging in the rest of the packs on the third board?
 
Back
Top