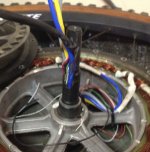
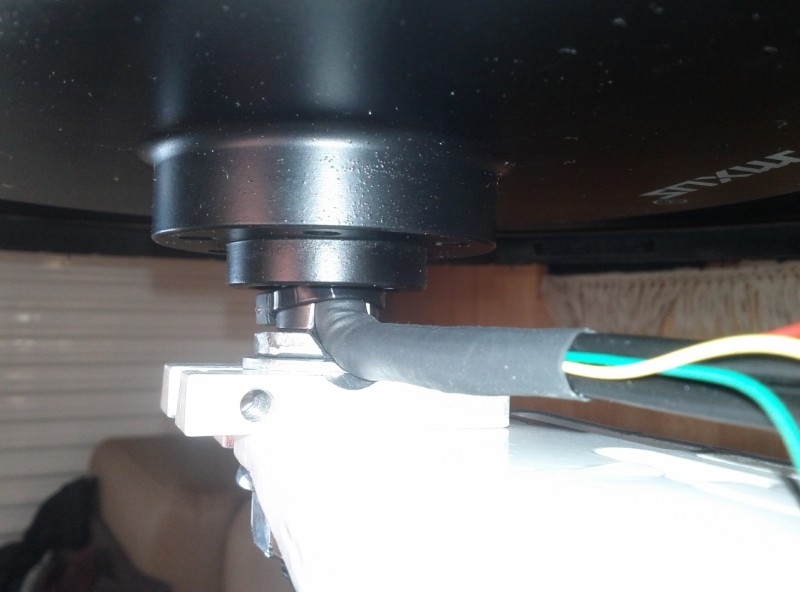
MXUS 3000 Hub Motor - V1 V2 V3

here one extremely interesting test about the effect of magnet strength:

https://endless-sphere.com/forums/viewtopic.php?p=1114205#p1113753

summary: it is all about trade offs.

copper losses square with the torque
eddy losses square with RPM
bearing losses and iron hysteresis losses should be linear with RPM

so basically, stronger magnets are better if one needs high torque most of the time (large wheel, low rpm, climbing steep hills)
weaker magnets will be better if one rather drives fast on a flat road (small wheel, high rpm)

I will definitely try out the V3 rotor on my V2 (so nothing else changed, no other influences).
the OVERALL performance i expect to be better, but i would not be surprised, if it becomes much hotter than before when rinding past 70-80kmh (it is 3T in 17x2,75" wheel)
 
Offroader said:
Made a quick video of the Low pitch hum noise I am talking about. Make sure your speaker volume is turned up and sub on if you have one. I just pointed my bikes rear dash cam down at the wheel and also removed the bikes chain.

EDIT: I just watch the video on my cell phone and you can not hear the low pitch hum, it is very loud on my computer speakers with subwoofer. So you really need to watch the video with something where you can hear low-frequency noises. Maybe computer headphones will work that can play low sounds. You won't hear the noise on a cell phone, so don't even watch it.

EDIT2: You can hear the low noise on a good set of headphones, but you will lose the annoying effect of it vibrating through your body like a sub woofer would do or the actual motor will do.

Please let me know what yout think.

[youtube]3Pmdr1OokQU[/youtube]


Yeah this is basically how my motor sounds. Did you try it with a different type of controller? But this sound is still there when I just spin up the wheel fast by hand WITHOUT controller connected. Ride on! :D
Cant here the sound of the motor on samd video because of the noise around and he does not spin it fast enough.
 
Allex, you also hear a low frequency sound at around 5 MPH?

Yes mine will make the same sound if spun by hand and controller disconnected.
 
madin88 said:
here one extremely interesting test about the effect of magnet strength:

https://endless-sphere.com/forums/viewtopic.php?p=1114205#p1113753

summary: it is all about trade offs.

copper losses square with the torque
eddy losses square with RPM
bearing losses and iron hysteresis losses should be linear with RPM

so basically, stronger magnets are better if one needs high torque most of the time (large wheel, low rpm, climbing steep hills)
weaker magnets will be better if one rather drives fast on a flat road (small wheel, high rpm)

I will definitely try out the V3 rotor on my V2 (so nothing else changed, no other influences).
the OVERALL performance i expect to be better, but i would not be surprised, if it becomes much hotter than before when rinding past 70-80kmh (it is 3T in 17x2,75" wheel)

So the V3 puts out more thrust than the V2 with comparable winds at the cost lf slightly more eddy resistance? If I am understanding this correctly, does anyone know how much more thrust the MXUS V3 4T has over the V2 4T?
 
A few percent due to stator gap decrease.

Sorry about the tv noise in my vid. But no bearing noise i assure you. Just hard to spin with one hand.


Sent from my iPhone using Tapatalk
 
Samd said:
A few percent due to stator gap decrease.

the stator gap should be similar because the magnets are bended.
i measured the thickness to be about 6-7% more on the V3, and from what i know, the V2 has N35 grade.
when putting those values into the simulator from link below (simple to use), the increase in pull force is about 15%!!! (N35 grade of V2 vs N38 of V3 also included)

http://www.kjmagnetics.com/calculator.asp

If that means it needs 15% less current to get the same torque output, is out of my knowledge..
 
this sound is "normal"
since a camera cant catch the "real audience of this try" iam 100% sure.

all my motors had this a: in different speeds b: installed IN a frame.

this resonance sounds comes from your swingarm. its a "play" from all together.

this is also why in this video from sam (looks like a frontfork) had no "vibrating/resonance" sounds.


with manual tuning the adaptto you can shift this sound a bit.
the mxus v3 from my girls bike had this exact in his uglyest sound/way on 25kph....so the legal speed in europe.
she doesnt notice that. but iam too sensible to stuff like that and i hate it too.
even when she rides with the bike in front of me, behind me or beside me.
i also can hear another buddy with his 10Khz sabvoton behind me. and i hate it. thats why i buyed a 16khz version always.

i wished i were not that sensible to this stuff because i saved hundreds of hours of trying to prevent "noises"

my last raptor swingarm was filled with rubber "fluid" that dry out on air. its used in hifi studios and stuff like that... helped me about 30% preventing grunting noisy sounds.

last year i wrote an email to qulbix to make a new dropout design...a bit of a FLX Beta frame dropout with a rubber core. it would be very helpfull for the axle stress + less vibrations to the frame.
but never got an answer.
Cars had this design since 10 years on the steerin bearings. some newer has liquid cores.

ah, and this "resonance frequency" works also without controller connected. so pushing by hand works also to "show" this sounds.
 
Just did an 8 mile ride with the new settings. Without a doubt they make a big difference and the motor doesn't heat up nearly as fast. I'm still surprised that lowering those two settings -13 to -4 and 430 to 64, made such a huge difference in how fast the motor heats up. The spikes are also way less and don't go nearly as high. It is a must to manully tune these motors. I wonder now if my cromotor was running hotter than it should have because I never manually calibrated it.

That being said without any cooling the MXUS does get fully heated in about 6-7 miles, compared to my cromotor I think took about 8-9 miles. At this fully heated stage any full throttle up hills will quickly overheat it. Doesn't make any sense to ride off-road anymore at that point.

What still doesn't make sense is that the outside motor case doesn't get hot like the cromotor case. After riding around at 100 C for a while the motor case was cold to the touch. After my ride I took temp readings of the case. After about 10-15 minutes the outside case reached a maximum of 40C. The Cromotor I remember that it would peak at about 70C. The Cromotor would also be very hot after maybe 30-60 seconds after sitting when riding.

The MXUS motor case just doesn't get hot which really doesn't make sense because I am running the same wattage through the motor, using 60 watt hours / mile average. Waiting a long time to get max temps, and also keeping the windings at around 100C. 70C vs 40C is a huge difference in heat. It must obviously be the windings thermal transfer to the stator, or stator to case is somehow different, because the winding temps of both motors are getting as hot. But why? This makes having FF fluid in MXUS much more important, because the thermal transfer just sucks.

I believe the weight savings in the rear makes a big difference with the violent rear suspension of the bike. I notice it is much smoother when riding down stairs and seems to not be as violent when hitting things in the rear fast. It doesn't throw the whole rear up as much as the heavier cromotor would. I would need to put the cromotor back on to do a better comparison. But the weight savings in the rear I believe is important if you off-road the bike.

I am liking the MXUS turbo more and more, I am going to have to modify it for cooling, just have to make a final decision on hubsinks or forced air cooling.
 
Glad you like the MXUS Offroader. I love my V2. Its the perfect combo of power with minimal weight penalty. I have my cases vented, still gets hot just as fast as before, however, it cools quicker.
 
Offroader said:
Just did an 8 mile ride with the new settings. Without a doubt they make a big difference and the motor doesn't heat up nearly as fast. I'm still surprised that lowering those two settings -13 to -4 and 430 to 64, made such a huge difference in how fast the motor heats up. The spikes are also way less and don't go nearly as high. It is a must to manully tune these motors. I wonder now if my cromotor was running hotter than it should have because I never manually calibrated it.
When i did manual tuning on my Cromotor, i only could do it a tiny bit better as autotuning did. It seems like adaptto was built for Cromotor :lol:
the manual tuning i do as follows:
- first set angle corr so that motor spins most silent with lowest current consumption at very low RPM
- calculate no-load speed of your motor (you need: kV, actual battery voltage, wheel size) and multiply the result with 0,93 (sine wave controllers have about 7% less rpm)
now adjust IND timing so that you get the calculated no-load speed
Of course, OVS should be set to 0 for the whole set up!
That being said without any cooling the MXUS does get fully heated in about 6-7 miles, compared to my cromotor I think took about 8-9 miles. At this fully heated stage any full throttle up hills will quickly overheat it. Doesn't make any sense to ride off-road anymore at that point.
similar to my experience.
i would say it is almost only because of the lower motor mass. what do you think?
What still doesn't make sense is that the outside motor case doesn't get hot like the cromotor case. After riding around at 100 C for a while the motor case was cold to the touch. After my ride I took temp readings of the case. After about 10-15 minutes the outside case reached a maximum of 40C. The Cromotor I remember that it would peak at about 70C. The Cromotor would also be very hot after maybe 30-60 seconds after sitting when riding.

The MXUS motor case just doesn't get hot which really doesn't make sense because I am running the same wattage through the motor, using 60 watt hours / mile average. Waiting a long time to get max temps, and also keeping the windings at around 100C. 70C vs 40C is a huge difference in heat. It must obviously be the windings thermal transfer to the stator, or stator to case is somehow different, because the winding temps of both motors are getting as hot. But why? This makes having FF fluid in MXUS much more important, because the thermal transfer just sucks.


1) Where is the temp sensor placed in your Cromotor? Mxus normally has it directly on the windings..
2) cromotor has, iirc a dark blue purplish painted stator. this means the stator will emit more heat.
3) if the surface area of the magnets and sidecovers is darker compared to the parts of the mxus, it would also explain the hotter motor case.
don't underestimate the effect of heat radiation.
 
Thanks

Heat shrink crossed my mind countless times, but I just have the Hobby King stuff which probably would do...but

If the regular 2:1 for $1.50 wont cut it there is dual wall 3:1 from LG for $4, hopefully its not too thick.

Which is better to use for slipping the cover over, soap or WD40, I do have some grease I was going to use for my geared motor that should be best, what do you guys think?
 
If you damaged the wires that badly I'm not sure if lubrication will be good enough. Are you sure you are not doing something wrong? I never dealt with this motor. I do know the wires can get damaged like this with the cromotor if you are not careful and make sure the wires are squeezed together in the most efficient space eliminating way possible. I would also remove the tubing they put the halls in to make some extra space at the exit.

I would also put something thin over the wires while you put the cover on this way it is likely to slide that and damage that than dig into the wires and rip the insulation.


People have stripped 10 gauge wire and then used regular heatsink to make the wire as thin as possible where they exit the hub. The hobby king stuff would be fine.
 
OK Well I used my dremel rotary tool with ball end tip which helped a bit but the tip wore down too fast, then I used a barrel drill bit then good ole fashioned drill bits and a cordless drill.

Using the dremel I didnt see any significant progress but I felt it through the dremel and bit, with the drill I didnt feel much but I could see the shavings with both methods. I saw more shavings using the dremel.


Oh baby the wires went in so smooth. No effort on the last phase wire. 1st wire installed was a phase, 2nd was the ribbon cable making sure it came out of the axle on the bottom thread side, 3rd wire (second phase wire ) went in smoothly while the 4th wire (third 'yellow' phase wire) only required mininal pushing with pliers once it exited the axle I hooked it and pulled it out.

frock I should bored the axle hole to begin with.

Its all a jungle now though. 1st method was slicing off a bit of the insulation then using heat shrink. 2nd method I started and quickly scraped, slicing off larger length of insulation then using heat shrink. You can see the yellow wire. Might work for a last ditch effort. I think my ribbon cable took up much less space and helped the process for the final fix.

I dont know why its so hard for me to find PTFE wire, everything I find is in huge rolls. The batch I got I bought from a guy in Los Angeles California. Very stiff wire with slippery insulation.


-------------------------------------------------------------------------

Thin walled PTFE Teflon wire
https://endless-sphere.com/forums/viewtopic.php?f=2&t=25138&p=368939&hilit=Mil+M22759#p368939

Element 14 has 16awg for cheap which I will be buying. Their 10AWG and 8AWG are in $P00L$

Reason to go PTFE
https://endless-sphere.com/forums/viewtopic.php?f=2&t=25064&p=362067&hilit=Mil+M22759#p362213

"PTFE Teflon" 5 pages worth in ES Search = Not too bad
https://endless-sphere.com/forums/search.php?keywords=PTFE+Teflon

"PTFE" is 16 pages
https://endless-sphere.com/forums/search.php?keywords=PTFE+Teflon

"Teflon" is 46 pages
https://endless-sphere.com/forums/search.php?keywords=Teflon

"ETFE" is 1 page
https://endless-sphere.com/forums/search.php?keywords=ETFE


https://endless-sphere.com/forums/viewtopic.php?f=2&t=25138&p=363111&hilit=ETFE#p363111
Still go with PTFE

New Term ETFE from Interstate
ETFE

Our range of ETFE (ethylene tetrafluoroethylene copolymer) insulated wires and cables display excellent material toughness, electrical properties and good resistance to heat, flame, chemical and radiation. In terms of heat resistance the ETFE wire can go up to 150°C while the wires display good flexibility and resistance to abrasion.

The ETFE wires we have available come in single insulation and dual insulation options. The dual layer options offer layers with contrasting colors to provide users with a clear visual indication of abrasion or mechanical damage during service or installation. The ETFE insulation helps to resist high ph cleaning fluids, fuels and other chemicals and also in withstanding extreme temperatures from -65°c to 300°c for period of 7 hours.
Applications

Aerospace (using thin wall ETFE extruded wall insulation as found in MIL-W-22759 (16, 18 or 19)
Electronic Applications
High-energy radiation environments
 
markz said:
OK Well I used my dremel rotary tool with ball end tip which helped a bit but the tip wore down too fast, then I used a barrel drill bit then good ole fashioned drill bits and a cordless drill.

Using the dremel I didnt see any significant progress but I felt it through the dremel and bit, with the drill I didnt feel much but I could see the shavings with both methods. I saw more shavings using the dremel.


Oh baby the wires went in so smooth. No effort on the last phase wire. 1st wire installed was a phase, 2nd was the ribbon cable making sure it came out of the axle on the bottom thread side, 3rd wire (second phase wire ) went in smoothly while the 4th wire (third 'yellow' phase wire) only required mininal pushing with pliers once it exited the axle I hooked it and pulled it out.

frock I should bored the axle hole to begin with.

Its all a jungle now though. 1st method was slicing off a bit of the insulation then using heat shrink. 2nd method I started and quickly scraped, slicing off larger length of insulation then using heat shrink. You can see the yellow wire. Might work for a last ditch effort. I think my ribbon cable took up much less space and helped the process for the final fix.

I dont know why its so hard for me to find PTFE wire, everything I find is in huge rolls. The batch I got I bought from a guy in Los Angeles California. Very stiff wire with slippery insulation.

[at

El


ETFE

Our range of ETFE (ethylene tetrafluoroethylene copolymer) insulated wires and cables display excellent material toughness, electrical properties and good resistance to heat, flame, chemical and radiation. In terms of heat resistance the ETFE wire can go up to 150°C while the wires display good flexibility and resistance to abrasion.

The ETFE wires we have available come in single insulation and dual insulation options. The dual layer options offer layers with contrasting colors to provide users with a clear visual indication of abrasion or mechanical damage during service or installation. The ETFE insulation helps to resist high ph cleaning fluids, fuels and other chemicals and also in withstanding extreme temperatures from -65°c to 300°c for period of 7 hours.
Applications

Aerospace (using thin wall ETFE extruded wall insulation as found in MIL-W-22759 (16, 18 or 19)
Electronic Applications
High-energy radiation environments
[/quote]

I found PTFE wire on the net, but damn is it expensive. Just polishing the wire channel on the axle helped that much? well shit, I should have done that myself. Next time I will.
 
Just polishing the wire channel on the axle helped that much?
It was more then polishing, it shaved material off, then, of course, gotta smooth out everything afterwards so there are no sharp edges. But yes doing that helped tremendously.

The best bit to get, is a decent one of these

I blew through that ball tipped one pretty quick, it was more sand papery like then the file like bit.
 
for me it wasn't a big deal installing 4mm² ptfe phase wires, but i don't know what wires you exactly have (regarding diameter). the wires i was using had exactly 3,3mm OD.
it may help, if you place the 3 phase wires in triangle shape, and than placing on each side two sensor wires.
this way, the overall outer diameter will be as small as possible.
i did some little grinding on the sharp edges where the wire is coming out so that the insulation doesn't get damaged. no more.

see here:
https://endless-sphere.com/forums/viewtopic.php?f=2&t=66625#p1001972

9x7ziN.jpg
 
Rix said:
markz said:
OK Well I used my dremel rotary tool with ball end tip which helped a bit but the tip wore down too fast, then I used a barrel drill bit then good ole fashioned drill bits and a cordless drill.

Using the dremel I didnt see any significant progress but I felt it through the dremel and bit, with the drill I didnt feel much but I could see the shavings with both methods. I saw more shavings using the dremel.


Oh baby the wires went in so smooth. No effort on the last phase wire. 1st wire installed was a phase, 2nd was the ribbon cable making sure it came out of the axle on the bottom thread side, 3rd wire (second phase wire ) went in smoothly while the 4th wire (third 'yellow' phase wire) only required mininal pushing with pliers once it exited the axle I hooked it and pulled it out.

frock I should bored the axle hole to begin with.

Its all a jungle now though. 1st method was slicing off a bit of the insulation then using heat shrink. 2nd method I started and quickly scraped, slicing off larger length of insulation then using heat shrink. You can see the yellow wire. Might work for a last ditch effort. I think my ribbon cable took up much less space and helped the process for the final fix.

I dont know why its so hard for me to find PTFE wire, everything I find is in huge rolls. The batch I got I bought from a guy in Los Angeles California. Very stiff wire with slippery insulation.

[at

El


ETFE

Our range of ETFE (ethylene tetrafluoroethylene copolymer) insulated wires and cables display excellent material toughness, electrical properties and good resistance to heat, flame, chemical and radiation. In terms of heat resistance the ETFE wire can go up to 150°C while the wires display good flexibility and resistance to abrasion.

The ETFE wires we have available come in single insulation and dual insulation options. The dual layer options offer layers with contrasting colors to provide users with a clear visual indication of abrasion or mechanical damage during service or installation. The ETFE insulation helps to resist high ph cleaning fluids, fuels and other chemicals and also in withstanding extreme temperatures from -65°c to 300°c for period of 7 hours.
Applications

Aerospace (using thin wall ETFE extruded wall insulation as found in MIL-W-22759 (16, 18 or 19)
Electronic Applications
High-energy radiation environments

I found PTFE wire on the net, but damn is it expensive. Just polishing the wire channel on the axle helped that much? well shit, I should have done that myself. Next time I will.[/quote]


Yes, PTFE is stupidly expensive. I just went ahead and bought rolls of it since I'm wiring things up on a regular basis. I feel your pain. I stripped the insulation of one of the phase wires the first time I tried to stuff larger gauge wire through a MXUS3k as well. The inside of that thing must be sharper than the HS motors I have done in the past. You got rid of that C-ring, right? I think it is nothing but trouble. My setup now looks almost exactly like madin88's now with the ground out washer and notched area for the wires.
 
Just polishing the wire channel on the axle helped that much? well shit, I should have done that myself. Next time I will.
Yes it really helped that much!
Its more then polishing though, its grinding the hole out then polishing/sanding down the imagined/real sharp edges. Then grinding down the entry and exit points where the sharp edges are. But you know this, its for the others reading this.

One person used a spring where the wires exit, In their case I dont think any of the spring got inside the axle at all. But its a cheap fast way of protecting the wires exiting the axle.

Im going to either find this flexible stuff or this to have it look nice. Or just heat shrink the frock out of it with good quality heat shrink with a thick wall. I see some "Under Ground" heat shrink in 3:1 ratio. Fabric heat shrink sold by the foot I may try the under ground and fabric. Either way there are many very good prospects that will look nice.
 
markz said:
What should I do to fix this?
Oil would have helped that never crossed my mind.
I did try to squeeze the wires closer together with a C clap.


View attachment 1

May be late to mention, but I just take the cover of without the bearing. You can slide some slim metallic object in between cover and axle and hit around on the bearing inner ring while lifting the cover. When Installing thicker wires, just slide the bearing on first, and yes smoothing all corners and drilling the hole wider is a good start. :) Sorry if my comment is based on misunderstanding the issue.
 
parabellum said:
You can slide some slim metallic object in between cover and axle and hit around on the bearing inner ring while lifting the cover.
Keep in mind that doing this can damage the bearing, if enough force has to be used to do this.
 
I would like to give an update about the hubmotor noise. When I remove the axle nuts the noise goes away. When I tighten the axle nuts back on the noise returns. I still have the motor inside the dropouts.

Any ideas on why this would happen? Is this like what Merlin said about motor resonating through the swing arm?

Just odd how it would not do this still with the motor still in the dropouts, I would think it would still resonate as it is still making decent contact with just the axle nuts loosened. But the noise really does go away once loosened.

Any way to fix this?
 
Offroader said:
I would like to give an update about the hubmotor noise. When I remove the axle nuts the noise goes away. When I tighten the axle nuts back on the noise returns. I still have the motor inside the dropouts.

Any ideas on why this would happen? Is this like what Merlin said about motor resonating through the swing arm?

Just odd how it would not do this still with the motor still in the dropouts, I would think it would still resonate as it is still making decent contact with just the axle nuts loosened. But the noise really does go away once loosened.

Any way to fix this?

That is a 24C solid gold riddle.
 
Back
Top