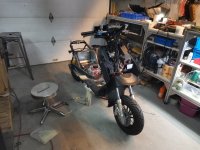
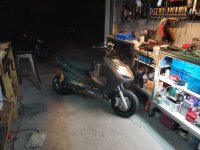
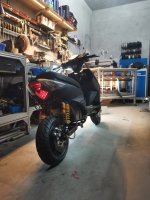
My Chinese E-Scooter

evo1087 said:
What diameter is your hub motor on your scooter/moped? Mine is 8” on 10” wheel. I can only run 7kw for 15 minutes before the phase wires are heat to 60 celcius. Im thinking of some 0w oil in there or maybe glue on some ugly heat sinks as a last resort. I can achieve 80kph @67v with flux weakening. Im thinking of trying 80+v and less amps. The acceleration will suffer probably, but maybe I can generate less heat and more top speed? Do you know any chinese controller with variable regen? All I know is the ASI Bac controller line designed in Canada and (from what i’ve heard) made in China and sold for $1600 with control of tune and $1000 with a fixed tune setting. I think the controllers in China for 15kw are $500? Correct me if i am wrong.

Diameter is same as yours I guess, it's what QC calls a 10 inch motor.
60Celsius isn't a lot, those motors can take 90degree C reliably, some people are less cautious than I am and even push them up to 100 degree or more.

Go for a higher voltage is always a good solution as long as you can find a powerful controller in your price range. It should indeed lower the current a bit, thus lowering the temperature.

I know some chinese controllers with variable regen, but I do not know any I could recommend. Some are really good products but with a horrific customer service, some other are simply bad products. I find variable regen to be a bit of a gadget personnally. I'd say dont focus too much on that and take this option as a bonus, I'd rather focus on reliability, performance and quality of the throttle feeling. To be honest right now there is no controller I could really recommend anymore.
 
Thanks for advice. Where do you measure temperture from? I hear people say measure at the axle if your controller does not have a temp probe inside of it. I measure mine on the phase wire where the motor connects to the controller. Probably too far from the motor to get an accurate reading of any kind but provides a scalable idea of temp increase. What do you think of the 12kw (constant) 13" hub motor from QS? This guy on YouTube runs a it and says he needs 4 torque plates on the swingarm which is also heavy duty. https://www.qsmotor.com/product/13-inch-12kw-motor/ I was quoted a few years ago $600 not including shipping. It is a good price. My only concern is weight. The bike would need to reinforced.
 
evo1087 said:
Thanks for advice. Where do you measure temperture from? I hear people say measure at the axle if your controller does not have a temp probe inside of it. I measure mine on the phase wire where the motor connects to the controller. Probably too far from the motor to get an accurate reading of any kind but provides a scalable idea of temp increase.

Ah ok, I'm talking about internal temperatures, using the heat sensor installed in the motor.
Measuring temperature from outside means nothing unfortunately, you can't get any reliable idea of what kind of temperature the motors internals are reaching.

evo1087 said:
What do you think of the 12kw (constant) 13" hub motor from QS? This guy on YouTube runs a it and says he needs 4 torque plates on the swingarm which is also heavy duty. https://www.qsmotor.com/product/13-inch-12kw-motor/ I was quoted a few years ago $600 not including shipping. It is a good price. My only concern is weight. The bike would need to reinforced.

That would be an insane beast for sure. My main concern would be to have a powerful enough controller/battery combo to supply it enough current. weight isn't such a big deal if you get a good suspension, sure it isn't ideal but they use these motors for circuit races here and it doesn't seem to impact that much their lap times...
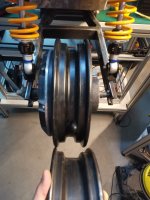
 
Hi everyone,
It's been a while since I haven't used my scooter. After taking too much abuse, the battery finally died and I've left it rotting outside for about two years.
But now, it is time to give it a new life again.

The plan is to make it better: new battery, improved frame, entirely new wiring harness, replacing some broken parts, fixing the brakes and probably changing the suspension. For now I think I'll keep the motor as well as the controller, but I might just change my mind later. I don't need it to be super powerful since it had plenty of power already, but I want it to be well built, all weather proof and very reliable.
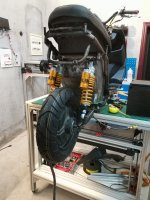
So right now I've stripped everything out of the frame and started working on a battery box to fit the A123 24S 1P battery (yeah I'm a big fan of thoses batteries :lol: )

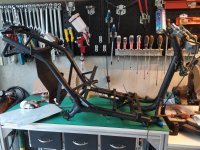
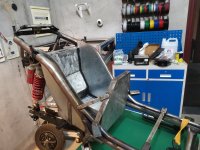
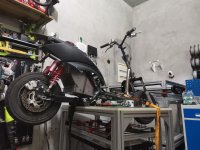
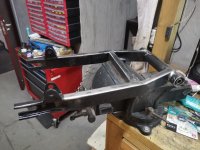
So first, cutting out the old battery box and removing every unecessary stuff from the frame:
IMG_20210804_182157.jpg

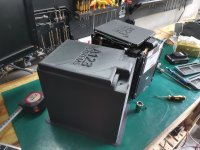
Next, I 3D printed a mockup of my A123 battery. This helped tremendously while making the battery box, because it is very lighweight and the dimensions are very accurate. So I was able to better design the box around it and make sure it was possible to slide the battery in. I 3D printed it with my giant printer, it took about 10 hours:
IMG_20210813_084225.jpg

Removing the paint was more difficult than expected. I tried using some paint remover but it didn't work well, the paint turned into some kind of goo which was even harder to remove. So I ended up burning all the paint with a blowtorch, which took a while but worked very well

IMG_20210814_205817.jpg

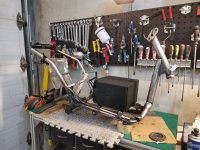
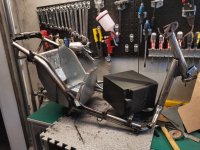
Next thing was to cut some metal sheet and weld it together. I had a hard time welding it since it was rather thin sheet and I'm really not a good welder, but it turned ok eventually:
IMG_20210815_210813.jpg

Finally, some silicone sealant to help waterproofing it:

IMG_20210818_201335.jpg

I had to get myself a longer swingarm since the motor was touching the new battery box:
IMG_20210817_231040.jpg

Now I just have to build some kind of enclosure for the controller at the rear of the frame, then it'll be time to prep for painting!
 
Great to see you build up your scooter again!
Are you going for even more power and a more colorful paint job this time? I'll follow your progress again as your projects are always beautifully executed :thumb:
 
SlowCo said:
Great to see you build up your scooter again!
Are you going for even more power and a more colorful paint job this time? I'll follow your progress again as your projects are always beautifully executed :thumb:

Thanks SlowCo!
Actually right now the plan is to keep the current controller and motor, so it will be almost the same power (a little bit more than before actually because this battery is a bit more powerful than the one it replaces)

The main reason for that is that I need this scooter to be finished soon, cuz I'll need it to go to work. My black motorbike's battery has a defective cell which has already lost 2/3 of its capacity, so I need to send it back to the manufacturer so he can replace this cell. It has been like that for more than a year already, but its getting worse so now I have to hurry.

As for the color scheme I still don't know what I'm going to do... I'd like more colors but also this vehicle isn't exactly legal and is intended to be my daily driver for a little while, so mate black helps to keep it off the radar... I might go for a more colorful frame but I'll probably keep the fairings black at least for a few months.

Anyway, made some progress this weekend:
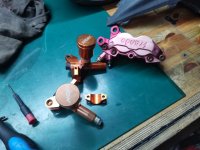
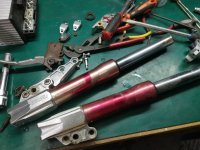
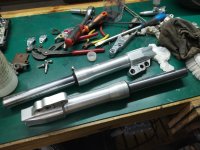
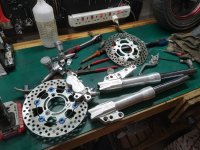
First, I tried to give a new life to the old hardware: brake calipers, brake pumps and front shocks. The anodizing was completely faded and they looked like crap as you can see:
IMG_20210821_184040.jpg

IMG_20210821_192001.jpg

A little bath in Sodium hydroxyde (NaOH) and less than 5 minutes later they looked almost brand new, tadaaaaa:

IMG_20210821_194416.jpg
IMG_20210821_200941.jpg

Also replaced the steering column bearings as well as the front wheel bearings.
IMG_20210821_224955.jpg

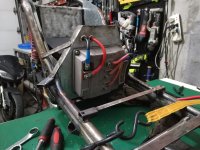
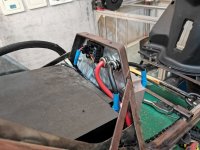
Next, I found out that instead of installing the controller at the rear and make a complicated enclosure, I could simply bolt it there, right at the front of the battery box. Saves space, lowers the center of gravity, makes for a much cleaner wiring . Only drawback is that it is harder to maintain in case of problem, because I have to remove all the rear fairings. But it's okay, it isn't that much time consuming to do on this scooter.
IMG_20210822_001613.jpg

Last thing was to work on the rear brake. I had to modify the braket in order to fit a 220mm disk (wasn't really necessary but I had one laying around doing nothing, would be a shame not to use it). Then I rebuilt the caliper: new pistons, new seals, new pads, stripped the ugly purple color and installed it back on.

IMG_20210822_003418.jpg

Most of the big mechanical work is now done, it'll be time to start working on the wiring 8)
 
G'day Dui.
Nice work, as always from you.
Can I ask you, what bike is the new swing arm from?
Looks like it might fit my EVT 4000e.

AussieRider
 
AussieRider said:
G'day Dui.
Nice work, as always from you.
Can I ask you, what bike is the new swing arm from?
Looks like it might fit my EVT 4000e.

AussieRider

Thanks mate!
I'm not really sure which model it comes from, I just tried to find a swingarm that had approaching dimensions. I had to remove a bit of material to get it to fit, but no biggie.
Anyway, here is the link I bought it from, hopefully you can access it from australia? Not sure if Taobao is still available outside of China
Let me know if you need any help, I could probably buy one and ship it to you if the shipping process isn't too complicated.
https://item.taobao.com/item.htm?spm=a1z09.2.0.0.168d2e8d50cyz1&id=599982462263&_u=p23vfsu3cf1
 
Dui said:
Let me know if you need any help, I could probably buy one and ship it to you if the shipping process isn't too complicated.
https://item.taobao.com/item.htm?spm=a1z09.2.0.0.168d2e8d50cyz1&id=599982462263&_u=p23vfsu3cf1

WOW can you read Chinese?
Then maybe you can explain what they mean by showing pictures with 17 and 14 mm wrenches, and describing them as 12 and 10 mm... ? :lol:
 
Elektrosherpa said:
Dui said:
Let me know if you need any help, I could probably buy one and ship it to you if the shipping process isn't too complicated.
https://item.taobao.com/item.htm?spm=a1z09.2.0.0.168d2e8d50cyz1&id=599982462263&_u=p23vfsu3cf1

WOW can you read Chinese?
Then maybe you can explain what they mean by showing pictures with 17 and 14 mm wrenches, and describing them as 12 and 10 mm... ? :lol:

I can't read it well, I can only speak it. Too lazy to learn it I guess... :wink:
I think the meaning of that picture is that the axis bolt is 12 mm diameter, so it has to be tightened with a 17mm wrench. As opposed to the 10mm axis which would need a 14mm wrench.
 
Some Progress on the build:

I worked on the wiring, starting with the main power wires:
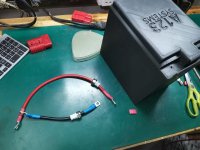
These power lines could hardly be any shorter. They'll be bolted to the battery on one side, on the controller on the other side. They can be removed relatively easily if I need to remove the battery.
IMG_20210824_230714.jpg

IMG_20210824_231246.jpg

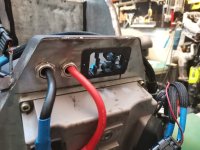
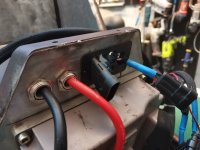
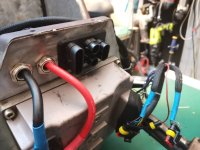
Then I designed and 3D printed a system which serves as a pass through for the automotive plugs I've chosen to use. It was not easy to design because I wanted to find a way to have it securing the plugs in place while being a little bit watertight (at least from spalshing), but also leave the possibility to remove a plug without having to pull the plug entirely apart and remove the wires one by one.
So this thing allows me to quick disconnect all the main wiring of the controller (hall sensors, throttle, ignition and brake signal, I won't wire the other stuff cuz I don't care about the gadgets like 3 speeds and whatnot).

IMG_20210825_221333.jpg
IMG_20210825_221550.jpg

IMG_20210825_221923.jpg
IMG_20210825_222230.jpg

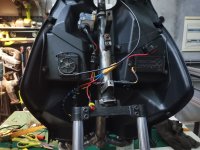
Also started wiring on the front power loom, now the 72V part of the harness is finished. The accelerator, ignition, charge port and 12V converter are all installed and wired. The scooter could theoretically move under its own power at this point.
IMG_20210827_003238.jpg

I still have to make all the 12V part of the wiring, which is the most cumbersome to do with all the light, switches, etc. Hopefully that won't take more than a few days.

Once this'll be done I'll take everything apart again, finish the frame work, paint it and it should be good to go. But we're still a long way from that, there's still many things to be done.
IMG_20210827_003256.jpg
 
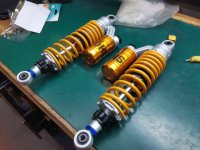
I received my rear suspension and it was a good surprize. I paid only 35 bucks for the pair so I was expecting some very low quality, but as it turns out they are really nice!
Copy of ohlins, of course, the real ones are probably 100 times that price.
IMG_20210828_122343.jpg

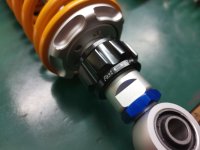
They are still adjustable though, I tried different settings and it definitely makes a difference. Seems like I can adjust damping, spring compression and overal suspension stiffness through a potentiometer on the gas cartridge.

IMG_20210828_122356.jpg

The manufacturing quality is pretty decent, it looks much more expensive than it is.

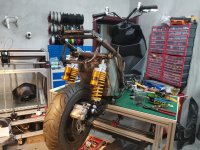
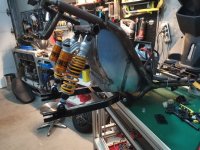
Anyway, I've installed them on the scooter, no problem. They are a little bit longer than the original ones, because I had to compensate for the longer swingarm.

IMG_20210828_123409.jpg

Also, the basic wiring is done and the motor made its first wheel spins. I still have all the 12V wiring harness to do (for the lights, the horn and whatnot), but at least it's a roller now. Next is to make the brake lines, because having a running motor is great, but I need to be able to stop it from times to times.
 
These "Öhlins" look realy nice, any info where to buy them.
 
dominik h said:
These "Öhlins" look realy nice, any info where to buy them.

Here's the link, but I doubt it will be of any use to you unless you live in China, in fact I'm not even sure it is accessible from outside of the country:
https://item.taobao.com/item.htm?spm=a1z09.2.0.0.63e82e8dgGXwia&id=45283349518&_u=223vfsub413
 
Dui said:
Here's the link, but I doubt it will be of any use to you unless you live in China, in fact I'm not even sure it is accessible from outside of the country:
https://item.taobao.com/item.htm?spm=a1z09.2.0.0.63e82e8dgGXwia&id=45283349518&_u=223vfsub413

I can confirm that it is ACCESSABLE from France.
(but not READABLE for me, since I dont know chinese... :lol: )
 
I can't read it too.
But I am working with people which can read it. :wink:

They have also pictures of the version I need. :D

On the pictures they look nicer as my original Öhlins dampers I had in my car and they can't be worse than the dampers in my scooter.
 
I can't read chinese either, I just right click and then click on "translate". Translation isn't perfect but it's good enough :wink:
I'm pretty sure you can't order on taobao from abroad though. But let me know if I can help, I could probably buy them and then send to you if it's not too complicated.

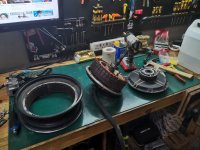
Anyway, Not so much progress these days. I just found out that my motor has an issue: it wobbles quite a bit. I narrowed it down to something being wrong with the right bearing, so I had to take it apart.
IMG_20210902_225349.jpg

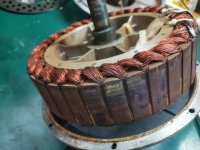
This is the first time I'm opening this motor, it seems to be in relatively decent shape for a 6 or seven years old motor that spent the last two years rotting outside. A bit of corrosion, for sure, but aside from that no sign of excessive heat and nothing to really worry about.
IMG_20210902_225022.jpg
IMG_20210902_225322.jpg

Unfortunately, the bearing issue is a bit complicated to repair since the bearing itself is not the issue, but it appears that the side cover is a bit worn and the bearing is floating inside with lots of play. So I have to either find a new cover or to somehow make the bearing hole tighter.
But the good thing is that a friend gave me a similar motor a while ago, telling me his motor had busted hall sensors. So the idea was to put the stator of my old motor into the rotor of this other motor... But I though that before that I should just try and spend 10 minutes to install this motor and see just how defective were the hall sensors.... Well it did worth the effort since after tuning the controller it seems to appear that there is nothing wrong with this motor!

So the plan now is to just drop this second motor directly in the scooter, and then repair and upgrade the old one later with some mods.
This other motor is slightly different from the one I had installed previously. Mine was a WP20030X, this one is a WP20040X. So I've been told that this one is the "high speed version".

Also, I've smoothed out the rear swingarm, cutting all the unnecessary crap and getting it a bit smoother:
IMG_20210901_190047.jpg
IMG_20210901_190921.jpg

This weekend I should receive some nice new hardware: new brake lines, and new front wheel. I should be able to get the brakes working, which should be one of the last important steps before final preparation of the frame for painting. I think I'll paint the frame in white this time, but not sure yet.
 
It's been a busy weekend...
First, I received my new stuff:
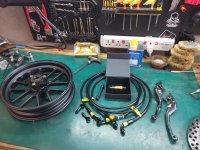
IMG_20210904_165914.jpg

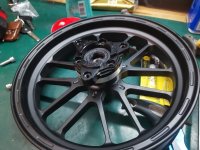
Brake lines, brake levers, a new front wheel, a quick brake line disconnect (I just want to see if this thing works, would be aewsome to be able to take out the caliper without having to bleed everytime) and last but not least: new tires. The old ones were still ok, but I thought it would be a shame not to replace them now that everything has been taken apart. This time I went for a much wider tire at the back (120mm instead of 90mm).

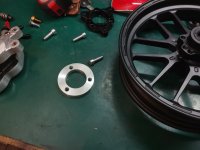
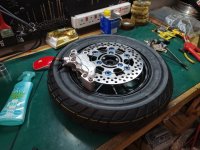
First thing I wanted to do was to check wether the front wheel I bought could fit. After trying to install it, I noticed that the brake caliper just couldn't fit and was hitting the wheel. So I had to make a spacer.
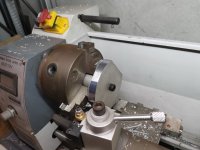
First I designed one and printed it, just to see what would be the ideal dimension. After making sure it was fitting properly, I took a block of aluminum and warmed up the lathe.
IMG_20210904_194911.jpg

A few hours later, the spacer was done:
IMG_20210904_225010.jpg

IMG_20210904_225141.jpg

I then mounted the front tire....twice. Cuz I didn't pay attention to the direction arrow and I only noticed it was the wrong way after I put the tire. Rookie mistake... Anyway, second time was the charm. The tire is a Maxxis in 3.5*10 inches size. I like those tires, they work great on the scooter.
IMG_20210904_234930.jpg

After this, I tried to install the rear tire on the motor... and it was at that point I found out that this motor had a narrow rim. Crap. :cry:
IMG_20210903_222156.jpg


Well, I still tried to mount the tire, but it ended up being severely deformed, weird looking and overall not satisfying at all. Maybe it's not too visible on the pictures but in real life it was very obvious
IMG_20210905_004745.jpg

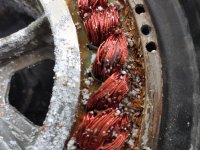
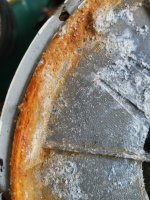
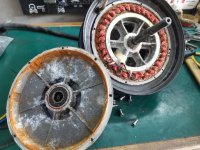
So I decided to go for plan B, which I wanted to avoid until now given that it was a lot of work, but there was just no way around it anymore: plan was to use the original motor, but change the defective side cover and take the one from the second motor instead. So that meant first to open the second motor.... which turned out to be full of surprizes. Not the good kind:
IMG_20210905_125528.jpg
IMG_20210905_130028.jpg
IMG_20210905_130010.jpg

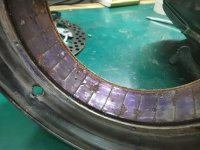
The insides are completely rotten. Not sure what happened here, but I did notice that this motor was using much weaker/thinner seals at the axis so it might have ingested lots of water from there, I don't know. Anyway, it was a good thing that the tire didn't fit, otherwise there was a good chance that this motor wouldn't have last very long if I started riding. I'll rebuild it later, already ordered a new cover for it.

Anyway, I took the motor cover, cleaned it well, changed the bearing and re assembled the original motor with its wide rim. Went smoothly, no problem. Finally I fit the tire on it, installed it on the scooter, plugged it to the computer, made the motor calibration and made sure it was still working just fine:
IMG_20210905_181424.jpg
IMG_20210906_002202.jpg

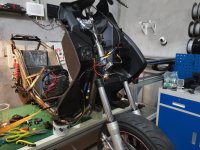
So now I should be done with the hard work (except frame prep and frame paint), it's time to work on plenty of little stuff. I have to make some kind of protection at the rear to avoid water entering the battery compartment, I have to make all of the 12V wiring harness, Wiring the BMS to the dashboard, bleed the brakes, etc. But now the scooter powertrain is completely done so that's great.
 
JimVonBaden said:
Looking good! I like your swingarm!

Thanks bro!

I finally finished all the wiring, yay!
Now everything's working, only thing remaining is to connect the BMS to the dashboard's screen, but I'm missing a connector so I have to wait for it to arrive.
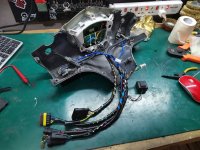
Anyway, I worked on the 12V harness, this part was the most complicated:
IMG_20210908_000408.jpg

Then installed all of this in the scooter:
IMG_20210908_001348.jpg

I then removed the scooter from the table it was sitting on and installed the battery in its compartment:
IMG_20210908_230132.jpg

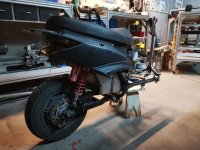
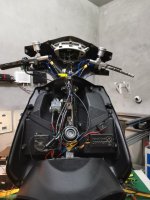
Finally put some of the fairings in order to test the lights, turns signals and whatnot:
IMG_20210908_233014.jpg
IMG_20210908_233435.jpg

Everything worked fine, so I decided to test the powertrain and go out for a small ride.
Since I had not installed the brakes yet (I prefer to finish the frame first), I enabled the slide regen on the controller and didn't go too crazy on the throttle, but I couldn't resist to test it briefly.

And well, I forgot how much of a blast this thing is to ride, it's so fun! It has plenty of power, it makes an awesome spaceship noise, it can change direction in a heartbeat... It used to be a nice ride before, but now it is lighter by about 20 kilos, with a more powerful battery and a much lower center of gravity! Freaking awesome.

Also it seems to be really comfortable, the rear suspension seems to be much better than the one I had installed previously.
Only small issue I found is that the rear brake disc seems to be very warped, or maybe wrongly installed, I''ll have to check. But that's no biggie, those things aren't expensive or hard to find.
Anyway, I'm impatient to finish this thing and get it back on the road!
 
j bjork said:
Nice to see you back, it has been a little quiet after your accident :wink:

Thanks guys!

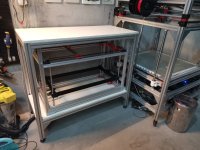
Yeah but that's not really because of the accident, it was because I was building another big 3D printer.
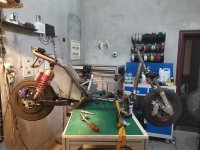
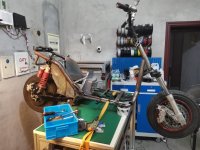
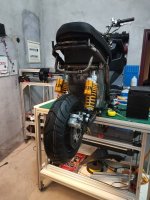
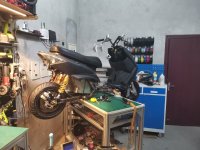
If you look closely at the pictures of the scooter, you can see that it actually sits on top of the printer, since the printer is integrated into the table :lol:
IMG_20210712_001151.jpg

So I guess it is the first 3D printer that can also serve as a motorcycle table :roll:

It's not finished yet because I had to work on the scooter quickly, but it is already moving on all its axis and I just have to finish the print head wiring.
This printer will be both crazy fast and also able to print in greater details than the other one I have. Here's a short video showing the kind of speeds it is already capable to reach :
[youtube]CrezX3w9s-0[/youtube]

,
 
Great little hot-rod you've built for yourself. Do you have details on the cable-operated throttle? After much searching I found an off-the-shelf adapter, but the one supplier I found for something like this has disappeared (with my $40 I may add). Was yours custom or off-the-shelf? If purchased, do you have a link?
 
Jordan325ic said:
Great little hot-rod you've built for yourself. Do you have details on the cable-operated throttle? After much searching I found an off-the-shelf adapter, but the one supplier I found for something like this has disappeared (with my $40 I may add). Was yours custom or off-the-shelf? If purchased, do you have a link?

I'm sorry I can't really help you to find a supplier wherever you live, but I bought this one: https://item.taobao.com/item.htm?spm=a1z09.2.0.0.4c0e2e8dwRkdhQ&id=573495086738&_u=a23vfsude37

I suppose this should also exist on aliexpress
Those cable throttles are really great, the feeling is just the same as what a gas bike would be, plus they are always hidden from the rain so no weird stuff happening, they are very reliable. I've got one installed on every bike I own.
 
Back
Top