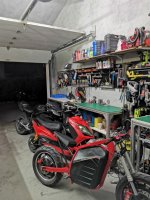
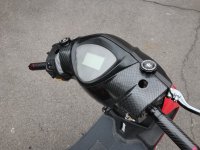
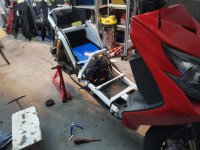
My Chinese E-Scooter

Good news everyone: I've finished everything except for painting.

The BMS is now connected and fully functional:
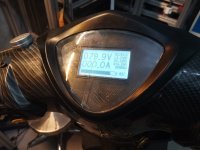
IMG_20210913_003620.jpg

I cracked the transparent cover while installing it, but it doesn't matter I already ordered an new one, this thing costs peanuts.
Also installed some small switches to control the BMS functions. I chose to install one on each side, so I can easily control the BMS while riding. It is very useful because the screen can display many informations so I can swith easily from one screen to another depending on what I need to know (speed, amps draw, temperatures, individual cell voltages, etc.
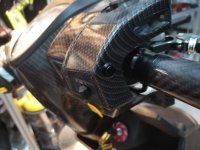
IMG_20210913_003608.jpg

The wiring is now completely finished:
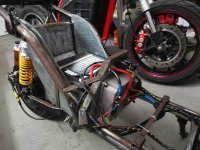
IMG_20210913_003714.jpg

I also took this opportunity to open and clean all the light switches, they really needed it:
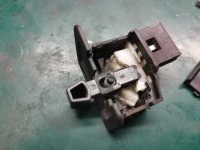
IMG_20210912_230939.jpg

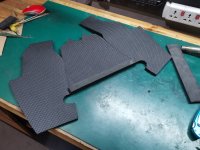
I needed to add a bit of protection from the rain, so I decided to follow my friend's advice and used EVA foam.
I fist made a mockup with cardboard:
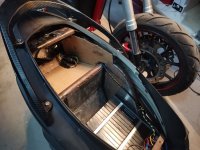
IMG_20210914_190856.jpg

Then cut the foam:

IMG_20210914_194207.jpg

Then I used some electric wire and kinda sew it together:
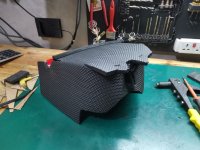
IMG_20210914_195759.jpg

It fits nicely and it should protect the battery from water entering through the wheel arch.
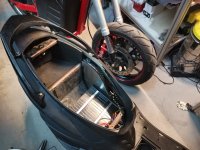
IMG_20210914_200932.jpg

I gave the plastics a full sanding in order to prep for painting. First with 360 grit sand paper, I'll have to do another pass with 600 grit and then a good coat of primer:
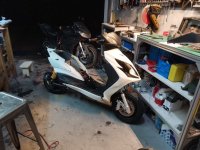
IMG_20210915_191714.jpg

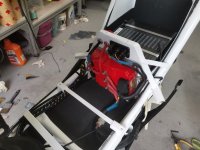
Finally I took the whole thing apart entirely and started working on preparing the frame and swingarm for painting. There will be a huge amount of work getting the whole thing a bit smoother (point is not only to make it look better, but also having a smoother frame before painting will help reducing bad paint coverage and future dirt/water settling, thus reducing future corrosion).
I gave the frame a first sanding to remove the surface rust:
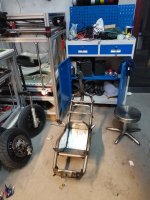
IMG_20210917_001730.jpg

Did the same with the swingarm, and started filling holes with bondo:
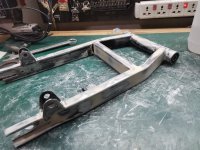
IMG_20210917_001751.jpg

Also, I might change the scooter's color. I'm not sure yet. I did like the mate black, but I think other colors look really cool as well.
What do you guys think? Which color would you choose?

asd.jpg

There's still a lot of very exhausting work to be done, essentially sanding. But once sanding will be done then things will progress very fast. Hopefully the scooter will be finished very soon! I still need to decide on the final color though...
 
Thanks for your suggestions guys!
So, actually I decided to change all the plastics and get new ones instead. The reason is that a few of them are cracked. I could fix them, but I had a look at the price for new ones and since I can get the whole kit for like 30 bucks it really doesn't worth the hassle.

So my new plan is to
- 1) purchase new fairings
- 2) get them painted mate black because I know it's easy to paint for the supplier and I'll get a predictible result (meaning I'm sure it's look decent).
- 3) Use the old fairings to experiment with other colors
- 4) Once I'll find a color I like, repaint the new fairings properly with it.
So at first, the scooter will be mate black, like it used to be.

Anyway, I started with painting the frame.
First a bit of sanding, then a good coat of primer:
IMG_20210920_205200.jpg

I decided to paint the frame white. The reason for that is to see if it helps later in maintaining the scooter in good condition. White should make everything a bit more visible when working on the scooter, so the idea is to improve ease of maintenance and giving it a cleaner look. The frame will mostly be invisible after all the plastics will be installed so its color doesn't matter too much. And I can repaint it black later if this ends up looking weird.
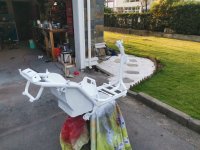
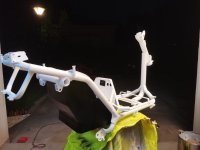
Anyway, a good coat of white paint:

IMG_20210921_170548.jpg

Followed by a coat of black paint on the battery box (the battery box is visible once the fairings are installed, so I'm trying to make it less visible by painting it black).

IMG_20210921_190452.jpg

And finally two thick layers of clear coat to protect it. I'll add a third and last layer this evening for good measure, I want the frame to remain rust free for as long as possible.
I haven't made a really great job at painting, it's not really my prettiest work, but since it won't be visible and I need the scooter to work asap I figured I won't spend too much time getting eveything perfect.

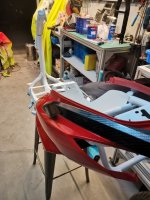
Last but not least, I had some leftovers of red paint from my other bike so I thought I'd use the old fairings to do some Ferrari red color tests.
My phone sucks at capturing true colors, especially red, so it might not look that good on the pictures, but in real life it looks really good.

IMG_20210922_001257.jpg

Next step is to finish the clear coat on the frame, the swingarm and the steering brackets. I'll need to wait a few days for it to fully cure, and after that I shall be able to reinstall all the wiring, hopefully for good this time!
 
Some progress yesterday:

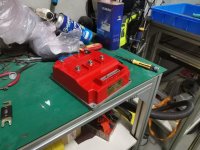
The controller looked like crap so I gave if a fresh coat of paint since I had some paint leftover from painting the other stuff:
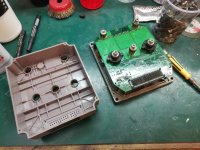
First disassembling it:
IMG_20210923_184815.jpg

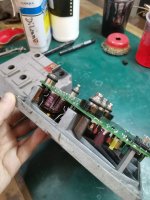
Here is the internal layout of the controller in case anyone's interested:
IMG_20210923_184922.jpg

I found out one diode was poorly soldered an wasn't making proper contact, so I took the opportunity to re solder it.
Anyway, here's how the controller looks like now:
IMG_20210923_215717.jpg

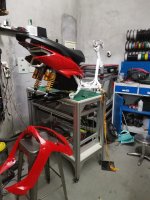
Also painted all the other plastics:
IMG_20210923_220349.jpg

I chose to paint these red because I have this color in stock, but the new fairings I'll receive will be mate black. I'll see if I like the red better and I'll try some other colors later.

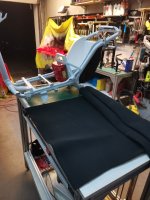
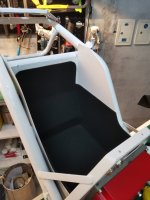
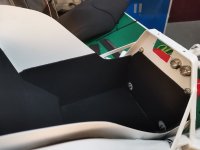
Anyway, I installed the controller back in the frame and started working on padding the inside of the battery box with some really nice automotive grade foam. The goal of this is to reduce vibration noises, secure the battery and protect it from vibrations too.It also serves to lift it sligtly in case there were some water finding its way in, there is also a small hole at the bottom of the box to help drain it in case of such event.

IMG_20210923_223124.jpg

I used some nice 3M spray glue to stick the foam to the box, worked really well:


IMG_20210923_232841.jpg
IMG_20210923_232913.jpg

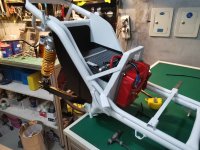
Next I installed the battery and I was very relieved to see that it fits just perfectly. I was a bit afraid I haven't left enough room for the insulation but it turned out to be spot on!


IMG_20210924_000032.jpg

Now I'll have to wait a few days for the paint to fully cure, but it's almost entirely done, last thing I'll have to work on will be the dashboard, it's mostly done but I still have a few things to do to make it look nice and also to make it reliable. Aside from that I believe this should be a finished project. Can't wait to ride it again!

IMG_20210924_001057.jpg
 
Thanks SlowCo!

I almost entirely finished the scooter, I've been using it to go to work for the three past days already and have made a bit more than 100 kilometers with it. But before that, I had to finish assembling it.

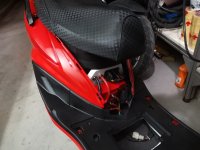
First I installed the wiring:
IMG_20210925_172503.jpg

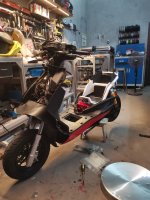
Then most of the fairings:
IMG_20210925_014548.jpg

At that point I realized I forgot to remove the scooter from the table and it was too heavy for me to put it back on the ground, so I had to take it apart one more time... what a dummy :roll:
Anyway, put it back on the ground, then installed the motor:
IMG_20210925_180342.jpg

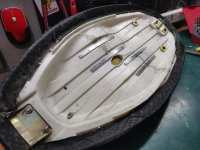
The saddle has been cracked for a very long time already. I couldn't find a good replacement for it, I really like the fabric this one has so I had to save it. I already tried to "weld" it, hence the nasty scars, which worked for a few days and then cracked again. So this time I took some aluminum bars, drilled then and used pop rivets to reinforce the whole thing. Hopefully that shoould last, I hope:
IMG_20210926_210053.jpg

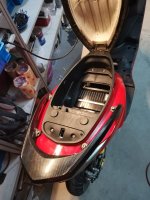
One great thing with this scooter is that I'm having plenty of storage space:
IMG_20210925_230305.jpg

And done, almost:
IMG_20210925_221757.jpg


I'm just waiting for a few plastics to come, but nothing important at all.
IMG_20210926_004359.jpg

IMG_20210926_004918.jpg
IMG_20210926_001528.jpg

Next I'll have to finish a few little details, especially the dashboard. But it's some quick and easy stuff.

So, as I said earlier, I have made around 100kilometers with it already and this thing's just perfect. The ride quality is awesome, I absolutely love the rear suspension and the way the rear swingarm works, I can't feel any play whatsoever, even rinding on potholes is kind of pleasant.

The scooter is about 20 kilos lighter than it used to be, and has even a little bit more power because this battery's voltage is a tad higher, but more importantly this battery can supply way more current than the previous one. So I guess what I'm trying to say is that the acceleration is awesome! Top speed is a little low, I measured it at bout 85km/h, but I'm not sure I've enabled flux weakening yet. I don't really need more top speed anyway, the fun of this machine comes from accelerating from 0 to 70 km/h, it's just way too fun!!

The only thing that surpasses the acceleration is the brakes. The front brake is just insane and the Maxxis tires are gripping like hell. I managed to stop in distances so short I didn't think it was even possible. Only thing that worries me is that I can feel the frame flexing a lot under hard braking. I planned to make a carbon reinforcement bar going from the front to the back, but I didn't have enought time. I hope I'll be able to make it someday, it would really be a useful addition.

One other nice thing is that the scooter is a little bit higher on it's wheels so that means I can lean much more into corners without having stuff rubbing on the floor. It can take some really serious angles, that was quite impressive. I don't think I've found its limit just yet, probably missing a bit of skill :lol:

Also, I tried using the quick brake disconnector and this thing seems to work just fine. I disconnected it, then connected it back again and I could use the brake just fine, didn't need to bleed again of anything. Pretty cool stuff, I'll use it on my other bikes from now on, should make maintenance much easier.

Anyway, I'm totally happy with this scooter, it's awesome, totally worth the time and effort.
 
Great work! Nice to see you have it running. I have some of the same batteries for a standby power setup. The good cells are very good but there were a few bad cells. They should last for many years.

You should be able to surprise people with the acceleration, especially since it's so quiet. :twisted:
 
fechter said:
Great work! Nice to see you have it running. I have some of the same batteries for a standby power setup. The good cells are very good but there were a few bad cells. They should last for many years.

You should be able to surprise people with the acceleration, especially since it's so quiet. :twisted:

Thanks Fetcher!
Yeah, I use these batteries for all my builds, they are awesome. Plus I can get them at incredibly low prices here, the battery for this one (24S1P, 20Ah), including the 300A bluetooth BMS just cost me 280 USD, impossible to get a better deal. :wink:
The one I'm using on my black motorbike has a defective cell, but it's been like that more than a year of daily driving and it still holds strong. I'll send it to get repaired in the next few weeks, that's the whole reason why I re-built this scooter actually.

It does indeed surprize people at red lights, it can smoke pretty much anything until it reaches its top speed. 8)
 
The last finishing touches before I start working on fixing the black motorbike:

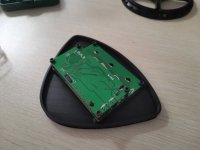
Finishing the dash, first I 3D printed a support bracket:
IMG_20210928_170843.jpg

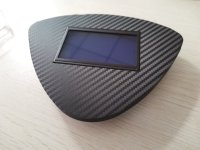
Then covered it in carbon vinyl:
IMG_20210928_170834.jpg

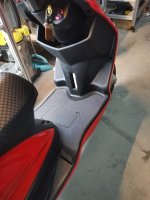
The last touch was to cover the foot deck. For that, I had the idea of using some regular skateboard grip tape. It was pretty easy to lay out, hopefully that should last a while. It was dirt cheap and I think it looks pretty clean:

IMG_20211007_191802.jpg

So now the scooter is all done, I might change the color later, though I actually quite like the red, but right now there are more pressing things to do: it is time to remove the battery from the black motorbike and send it to repair.

I've made about 400 kilometers with the scooter so far and it is really perfect: well balanced, comfortable, fast, powerful, plenty of grip and insane braking power. That's my favorite bike to ride overall, great daily driver.
Welcome back to the family !
IMG_20211004_171838.jpg
 
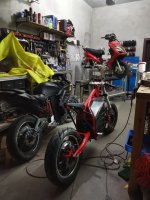
So, these past days I've been working on my black motorcycle.
I have to send its battery back to the seller, because one cell is almost dead. So I thought it was a big waste to have the motorbike controller sitting here doing nothing, while it could power up the scooter instead... :wink:
So I just took a few hours of my time and removed it from the motorcycle, made some slight modification to the wiring, drilled a couple holes, made some new power cables, and it was ready:
IMG_20211025_195011.jpg

After that I had to re program the controller, which was fairly easy. Only things I did were to do the motor self learning procedure and slightly modify the throttle voltages.
Aside from that I kept the exact same settings I was using on the black motorcycle, so that's 210Amps continuous current from the battery and 510Amps max per phase.

Made a few test rides with it and oh boy it is snappy, the throttle response is instantaneous, the thing litterally jumps forward. :shock:
Popping power wheelies is no problem anymore, despite the very low center of gravity and myself weighting more than 90 kilos.
It's super fun, I love it!
 
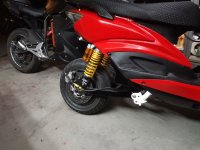
Probably one of the last mods for the scooter which I now consider as a 100% completed projet: The front suspension.
I was still using the old one, it looked a bit sad and crappy. That was supposed to be temporary so it was time to upgrade!

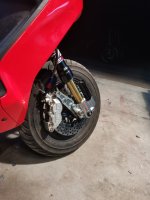
So this time I went with inverted forks: tadaaaaa
IMG_20211229_172505.jpg

Installed it on the scooter:
IMG_20211229_233635.jpg

And now it's finally finished!
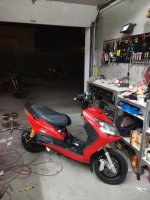
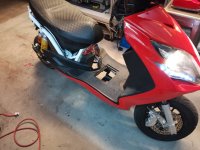
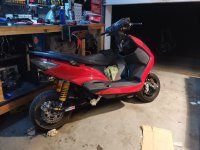
Some pictures of the completed project:
IMG_20211229_233645.jpg
IMG_20220101_163342.jpg
IMG_20220101_163435.jpg
IMG_20220101_163445.jpg

I love this scooter, it's pretty much perfect! Great power, very nice handling, crazy brakes, relatively comfortable, good grip... I wouldn't change anything except maybe put some more powerful front light, the current ones aren't all that bright. Now let's wish it a happy, long life and hope it will remain in good shape for a while!

Thanks to everyone who followed the build! :bigthumb:
 
Great upgrade with the front forks :thumb:
And thank you for documenting the build here for us to follow!
Enjoy the scooter and stay safe riding out there.
 
Looking great. Very stealthy. I bet you can surprise a few drivers out there with the acceleration.
 
Hello Everyone,

It's been a while I haven't updated this thread.
The scooter is still in great shape, actually better than ever. I just fitted a new controller a few weeks ago.
I was able to test the Votol EM-150 Controller.

In theory, if you just look at the specs, it looks like a huge downgrade from the sabvoton 200A unlocked. The official specs for the votol are a reather unimpressive 150A battery and 470A phase, while I was running about 250A battery and 600A phase on the sabvoton.
Anyway, I installed it on the scooter:

IMG_20240224_223844.jpg

Well, as it turns out, there is a huge difference between theory and real life!
This things pulls like nothing else, it's crazy. Actual power draw from the battery was 300A at the BMS screen. Keep in mind that this is achieved with the good old 2000W motor, that's almost 11 times its rated power!!!

Startup acceleration got greatly improved, obviously, but the most impressive gain in performance comes once past 70km/h: with the sabvoton there was a noticeable loss in torque once that speed was reached, then it was slowly getting up to around 90km/h ( my new tires lowered top speed from 100 to 90, for some reason).
Now with the votol the scooter keeps pulling until it reaches around 120km/h! And I think that the votol might be able to go even faster with a bit more flux weakening, I haven't played much with the settings just yet.

Very, very impressive, this scooter is now the best performing of all my bikes. Power wheelies aren't an issue at all now. Only downside is that the power consumption exploded, I can drain the battery in less than 10-15km if I ride fast.
 
Last edited:
Great result with the Votol!
Is it easy to configure/set-up for a more novice person? Or not recommended for reasonably inexperienced builders?
For you the next step is to build a larger battery pack ;)
 
Interesting how the Votol is giving you better acceleration. I also have the 200 amp Sabvoton Unlocked version, same story with me. There’s hardly any torque when near the top speed.

I think we would all be interested to see some acceleration times with The new Votol controller.
0-30mph?
0-60mph?
Oh, I don’t know the conversion to km/h in my head 😄
 
Is it easy to configure/set-up for a more novice person?
Yes and no: the calibration is done with a wire, same way it was on the old no name controllers. You connect both wires together, the motor/controller will get calibrated and you'll be able to get the wheel spinning.
That part is easy, but then fine tuning in the desktop app is the difficult part.

The app itself is very poorly translated and the documentation that comes with it doesn't help at all.
Luckily there's a long thread on this controller here on the forum, so I found most of my answers there

Some things are very confusing, for instance I've got no idea how much amps per phase my motor is getting, there's just no information available about it in the software.
Also, I put 280A as the maximum battery current, yet I've seen it pull 307A from the battery IRL. For some reason the controller seem to do whatever he wants. The controller identifies as EM-100 in the app, for some reason.
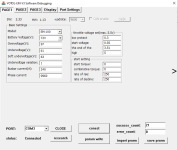
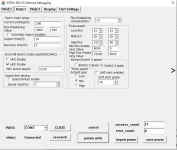
It's pretty much the worst programing interface I tried so far, nothing works the way it seems and nothing that's written even means what's written. "Flux weakening" sometimes can mean "PID settings". Just look at the following screenshots closely and see it for yourself, I think it's a bit of a masterpiece of its kind:

1.png
2.png

Or not recommended for reasonably inexperienced builders?
Here also I'm not sure
On one hand it's easy to set up, but it's also difficult to tune...

For a beginner the wire procedure to calibrate the motor makes it very easy, also connecting to the controller though the app works well, the connection is stable and it isn't buggy. You can set up the controller and save parameters without having to restart it unlike some other brands.

For a more experienced builder it has some nice features like being able to set PID control, a very effective flux weakening, all the usual stuff like 3 speed, boost, and other gadgets. There is also a remote control feature which allows you to run the motor remotely within the app, which is nice sometimes and can be useful to someone having a dyno I guess.

The problem is that it also has features that no user would ever want, like the apparent impossibility for the user to monitor phase current, the fact that it doesn't seem to monitor very seriously battery current limits, its weird and confusing, almost unusable software and its useless documentation.
But well, I guess it still worth it once it works because the power is most definitely there. Question now is for how long.

I can't really recommend it to anyone yet, but it's really not an expensive controller and it's super powerful so... 🤔

For you the next step is to build a larger battery pack ;)
Yeah indeed, 15km isn't enough, my daily trip is 20km.😕
That's a bit of an issue
The controller also has an interesting feature, which is that it can limit its power once your battery goes under a certain voltage. That helps preserving a bit of autonomy, it's a useful gadget to have.

I think we would all be interested to see some acceleration times with The new Votol controller.
Haha yeah I'd be interested as well.
I'll need to find some kind of way to measure that
 
The cheapest things to measure are Gnss rc GPS.
Like the Skye rc gsm020 for example.

Not as comfortable and precise like the racelogic performance box I had before, but small and cheap.

Or just use a GPS Smartphone App.
With one to two Hz GPS they are not really fast , but the phone has probably an acceleration measurement integrated, so you will get smoother curves, as with the 10Hz sky rc GPS which I use.
 
Last edited:
Yes and no: the calibration is done with a wire, same way it was on the old no name controllers. You connect both wires together, the motor/controller will get calibrated and you'll be able to get the wheel spinning.
That part is easy, but then fine tuning in the desktop app is the difficult part.

The app itself is very poorly translated and the documentation that comes with it doesn't help at all.
Luckily there's a long thread on this controller here on the forum, so I found most of my answers there

Some things are very confusing, for instance I've got no idea how much amps per phase my motor is getting, there's just no information available about it in the software.
Also, I put 280A as the maximum battery current, yet I've seen it pull 307A from the battery IRL. For some reason the controller seem to do whatever he wants. The controller identifies as EM-100 in the app, for some reason.
It's pretty much the worst programing interface I tried so far, nothing works the way it seems and nothing that's written even means what's written. "Flux weakening" sometimes can mean "PID settings". Just look at the following screenshots closely and see it for yourself, I think it's a bit of a masterpiece of its kind:

View attachment 348127
View attachment 348128


Here also I'm not sure
On one hand it's easy to set up, but it's also difficult to tune...

For a beginner the wire procedure to calibrate the motor makes it very easy, also connecting to the controller though the app works well, the connection is stable and it isn't buggy. You can set up the controller and save parameters without having to restart it unlike some other brands.

For a more experienced builder it has some nice features like being able to set PID control, a very effective flux weakening, all the usual stuff like 3 speed, boost, and other gadgets. There is also a remote control feature which allows you to run the motor remotely within the app, which is nice sometimes and can be useful to someone having a dyno I guess.

The problem is that it also has features that no user would ever want, like the apparent impossibility for the user to monitor phase current, the fact that it doesn't seem to monitor very seriously battery current limits, its weird and confusing, almost unusable software and its useless documentation.
But well, I guess it still worth it once it works because the power is most definitely there. Question now is for how long.

I can't really recommend it to anyone yet, but it's really not an expensive controller and it's super powerful so... 🤔


Yeah indeed, 15km isn't enough, my daily trip is 20km.😕
That's a bit of an issue
The controller also has an interesting feature, which is that it can limit its power once your battery goes under a certain voltage. That helps preserving a bit of autonomy, it's a useful gadget to have.


Haha yeah I'd be interested as well.
I'll need to find some kind of way to measure that

Download this app, it works good!
It’s called “GPS race timer”
 

Attachments

  • C56E756A-3F84-486B-993D-BAC65EA64421.jpeg
    C56E756A-3F84-486B-993D-BAC65EA64421.jpeg
    675.8 KB · Views: 2
The cheapest things to measure are Gnss rc GPS.
Like the Skye rc gsm020 for example.
Seems very nice, but a bit too expensive for me. At least for now. But I'll keep it in mind, thanks!
Also I'm not sure wether this thing needs a SIM card or not. Getting a SIM card in China is a bit of a pain since you need to go to the store and go through a registration process.
Or just use a GPS Smartphone App.
Download this app, it works good!
It’s called “GPS race timer”
It is not as straightforward here for me because I'm using a Huawei phone and I live in China.
Since the US ban on Huawei it's not possible to access the Google playstore, and unfortunately these apps aren't available on the huawei app store.
The only way for me to install things is to get an apk file, but they aren't super easy to find and it doesn't always work. For some reason I cannot understand the apk files aren't available to download from the playstore on computer.
Wouldn't it be nice if our glorious world leaders stopped their useless, endless disputes...
 
I would offer info on how you can get access to the store, but this could literally cost you a lot of social score if caught. But since you are on the forums you have more access, and if you want the data pop open an onion and hit a search, the info is all over the place.

I am not an engineer (I know, I say that a lot but got in the habit) however I have seen a very long video about accelleration curves with electric motors, the information of 45 minutes came down to my take-away at least of "The initial acceleration is a no drag spin up to full power, the high-end curve cuts off abruptly when you are close to or at the maximum rotation event that is pre-set on motor install" Ok, bugger that reads complex to me. Your motor spends at a specified RPM. you cross connect from that motor to the ground through a series of things that changes the rpm. Eventually you will hit a point where you are as fast as your ground speed can get based on the mechanics and the initial input.

Ok, that reads complex. Can someone who understands this better than me try to splain this? or did all that babble make sense?
 
It is not as straightforward here for me because I'm using a Huawei phone and I live in China.
Since the US ban on Huawei it's not possible to access the Google playstore, and unfortunately these apps aren't available on the huawei app store.
The only way for me to install things is to get an apk file, but they aren't super easy to find and it doesn't always work. For some reason I cannot understand the apk files aren't available to download from the playstore on computer.
Wouldn't it be nice if our glorious world leaders stopped their useless, endless disputes...

hypothetically, if you had an iPhone and you used a VPN, would you not be able to download from the regular Apple Store?
Or Android through play store with VPN?
 
I would offer info on how you can get access to the store, but this could literally cost you a lot of social score if caught.

Lol, there's no such thing as social score. That's a bit of an urban legend we often hear from our friends abroad.

However there is what you'd call credit score in the US, but that kind of stuff exists everywhere now. Don't pay your bills in time and you'll be in trouble, pretty much like everywhere else on earth.


hypothetically, if you had an iPhone and you used a VPN, would you not be able to download from the regular Apple Store?
Or Android through play store with VPN?
Yeah Iphone works. It's possible to download stuff from the regular apple store. It's really only targeted towards Huawei. Pretty unfair competition. Unfortunately for me I don't have an iphone.

It won't work on Android no matter if using a VPN or not, because some of the Google files necessary to run the app aren't installed in the OS itself. I forgot what is the issue exactly, but with those files missing the playstore app will just crash on opening or simply never connect.
I did manage to install to the play store after a long and painstaking process a few years ago, got it working for a few days, but it got all deleted at the next system update. And now that they switched from android to harmony OS I guess it's even more unlikely to work now.

And yeah, every foreigner living here use VPNs, it's pretty much the only way to access Google, Youtube and so on. Technically it's legal to use one, but not to sell one. We were using VPNs way before NordVPN and other VPN companies started spamming every single youtube video, lol.

Anyway, I'll try to find something.
 
Back
Top