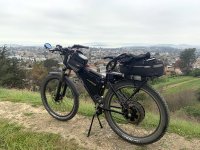
My econo-e-bike

99t4 said:
Are you going to need washers for the hub (spoke holes drilled for 12ga) with your new 14ga spokes?

Not sure. The hub end is 13 gauge so 2.3mm vs 2.6mm.

"Like it says, this spoke is very strong. The Strong is developed for specific and heavy usage such as tandem, e-bikes or heavy load use. In case of large hub holes, the Strong is the recommended choice."


EDIT: I ran numbers through 6 different spoke calculators. Half matched, 3 used slightly different ways of calculating, and once I made some tweaks, they all matched within a couple tenths of a mm. Once the rim arrives and I can measure the actual ERD, I should be set.

Freewheel arrived today, but times two. Something screwed up during ordering, so I've got the second packed and ready to drop off at UPS.

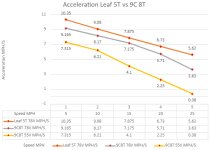
EDIT: Playing with the simulator, comparing a 9C 8T, which seems to model very closely to my 1000W MXUS, with the Leaf 5T in a 24" wheel.
https://ebikes.ca/tools/simulator.html?motor=Leaf%205T&batt=cust_80_0.05_24&cont=cust_70_200_0.03_V&hp=0&axis=mph&frame=mountain&autothrot=false&throt=100&grade=0&wheel=24i&cont_b=cust_70_200_0.03_V&motor_b=M2808&batt_b=cust_80_0.05_24&wheel_b=26i&hp_b=0&bopen=true

I wanted to see what the difference I'll see in acceleration, between the Leaf, and my motor run on both 72V and 52V. I used 78V and 55V for the comparison, since I'm usually above those voltages when out for a short ride (15miles or so). It looks like around a 10% advantage to around 23 mph, then the Leaf keeps going, when the 9C's torque falls off. At 52V, the torque starts falling off after 10mph.
Leaf vs 9C.jpg

and compared to where the bike started out:
https://ebikes.ca/tools/simulator.html?motor=Leaf%205T&batt=cust_80_0.05_24&cont=cust_70_200_0.03_V&hp=0&axis=mph&frame=mountain&autothrot=false&throt=100&grade=0&wheel=24i&cont_b=cust_70_200_0.03_V&motor_b=M2808&batt_b=cust_55_0.05_24&wheel_b=26i&hp_b=0&bopen=true

I think the interesting zone for torque starts at around 80NM, and just gets more fun above that. That's for my bike and it's laden weight. The midrange acceleration is fun to play with.

EDIT: 12-01-21 Grin shipping is expensive, but super fast. Statorade, torque arm and switches arrived yesterday, and so did the gear puller that I probably won't need. The thermistor will arrive tomorrow, so I'll definitely be able to get to opening the motor and adding both the Statorade and thermistor by the weekend. I ordered 2 thermistors, so adding the other to my existing motor will be a future project.
 
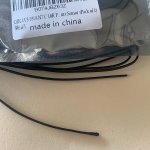
My thermistors arrived, but just checking to see if this is what I should have expected. They are super small, like half the size of a grain of rice. 10k, 3950

Thoughts?
therm.jpg

I'll test with my CA before installing it in the motor.
 
E-HP

These specs are close to what I have:
https://cdn.shopify.com/s/files/1/2867/7354/files/BatteryClerk-AJC-Battery-D12S.pdf?8876048441346863915
 
Yes, they are small. Next time you do a Grin order have them throw in a thermistor for $3. I ordered one the first time it's on a wire then later one to solider to the existing wire.
 
Tyro65 said:
E-HP

These specs are close to what I have:
https://cdn.shopify.com/s/files/1/2867/7354/files/BatteryClerk-AJC-Battery-D12S.pdf?8876048441346863915

ZeroEm said:
Yes, they are small. Next time you do a Grin order have them throw in a thermistor for $3. I ordered one the first time it's on a wire then later one to solider to the existing wire.

Thanks for confirming! I'll test them today and maybe open the motor up this weekend.
I hate clicking the submit button on Grin orders because there's always something I think of afterwards that I forgot, that only makes sense to get with other stuff due to shipping.

Even though the 24" rim is arriving soon, I'm rethinking whether to change it out now, or try the 26" for a while; after doing some comparisons on the simulator on torque and acceleration between the two. I'm also beginning some research on some type of ghetto heat sinking options, so may spend some time getting some baseline measurements, then add heat sinks and testing again. The available hub sinks are too conspicuous for my bike, so I want to test other solutions that don't stand out as much. I never liked thermodynamics in school, but having a real world application should make it more interesting. :lol:

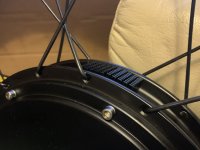
EDIT: Here's what I ordered for my heat sink experiment. The height of the heat sinks is 10mm, so barely above the lip on the hub motor where the spokes are anchored. That way, from the side, they won't be noticeable. They may not have the same cooling ability of hubsinks, but they look like they will increase the surface area by about four times or more, so still should help a bit. Testing will prove whether that's true or not.
https://www.amazon.com/dp/B07PDPL371?psc=1&smid=ADV3ON8ONZPPL&ref_=chk_typ_imgToDp

I'll attach them with thermal glue (not epoxy), so I can remove them if I need to change a spoke, etc. I also order some thermal tape, which I will use some of around the perimeter, to keep the heat sinks in place, since the glue takes 24 hours to cure.

EDIT:
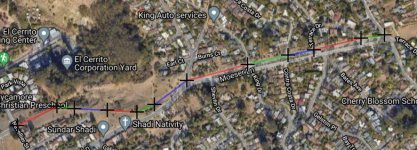
Here's are loop around the neighborhood that sometimes use when I'm just going for a short ride. It's only 5.5 miles. Nice in the evening because of the sunset. I go clockwise on the loop, or left to right on the graph. I'll use this for testing the temps of the Leaf motor, initially doing the loop in the same direction, but later in reverse, since then, the initial climb will be a decent sustained workout for the motor. Then later, repeat with the heat sinks.
test loop.jpg
test loop2.jpg

EDIT 12-04-21
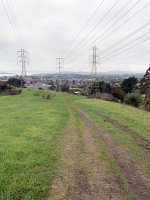
Every time I take my bike offroad, I remember how fun it is. I guess I don't do it enough. I charged it up this morning and did a quick 10 mile ride on the dirt trails, but couldn't help thinking about whether the Leaf motor will perform as well on these hills. I rode over to the hill from my test loop approaching from the bottom (reverse direction), but taking a dirt paths that parallel the road. It's only 15% average, but several 20%+ sections along the way. I pedaled hard to keep the watts at around 3kW, but did hit 4.8kW a couple of times; but with that, the motor stayed luke warm. Playing with the simulator, it looks like the Leaf will perform equally as well or maybe slightly more efficient under the same conditions, so hoping to not be disappointed. :shock:

These trails are fun to climb and descend. Some parts are steep even on foot, but the motor has plenty of grunt when it gets enough amps.
Moeser 1.jpg

This part of the dirt trail starts at 200ft up to about 500ft, then I take the road for the last 300ft climb.
Moeser 2.jpg

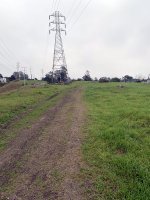
The road is off to the right of the transmission tower, but crosses between the two parallel towers at the top.
Moeser 3.jpg

Looks like a steady slope, but there's actually several flat and steep sections. I ride up this trail in 5th gear, so 46T chainring and 15T cog out back, so with the motor I can keep up a decent pace while climbing.
Moeser 4.jpg
Moeser.jpg

Even though all the parts are in now and waiting, but it's hard to work on the upgrade while the weather is still nice enough to ride in. :lol:

EDIT 12-9-21: The rim arrived and ERD is measuring 488mm. Online specs vary between 485mm and 488mm, so seems right. I'm getting 140mm to 140.5mm spoke length, depending on which online calculator I use. Grin calculator calculates the shortest. Seems like 140.5mm should work.
The rim looks good, so now I'm back to finalizing a tire decision. The decision has gone from whether to switch to the 24" rim, but when. :wink:

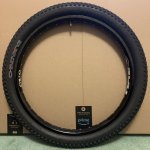
EDIT: 12/19/21 Well the 24x3 tire came in yesterday along with the rim tap. I have everything here now, so nothing but laziness is in between now and having the wheel laced and mounted. I mounted the tire in the rim to try to motivate me. On this rim, inflated, it measures 25.125" in diameter. I was worried a little about clearance if it came closer to 26", but no problem now. Looks decently beefy, and has a good rounded profile, so probably predictable cornering.
3 inch.jpg
 
Finally got the motor laced in the new rim! Should be ready to test this weekend if I hardwire the phase wires, since I don't have any spare Andersons, and the new XT150 connectors that I'll be switching over to, haven't arrived yet. I'll probably need to ride it around for 50 miles or so and recheck the spoke tension, but for a first try, it feels good to get it done and decently trued.

The tire OD is 25-3/8", so a little less than 26". My front 26x2.4 is around 27" in diameter, so I'll see how much the slightly slacker steering angle will affect my riding, but I'm still thinking of re-lacing my front with the same rim anyway.

Here's how it came out. I just have to turn the tire around, since I didn't pay attention to the direction arrow until I got it mounted, LOL.
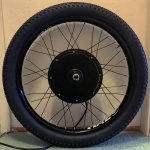
Leaf motor, Statorade added, new thermistor installed, laced and trued:
https://endless-sphere.com/forums/viewtopic.php?f=3&t=66489&start=2250#p1693988
Leaf Laced Tired.jpg

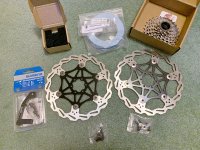
A few more parts to install. I'm hoping I have clearance for the rear 203 disc, but seem to recall checking a while back.
More Parts.jpg
The experimental hub sinks won't go on until I get some baseline runs up the hill and record the temps. I want them to be low profile and not attract any additional attention. Even though they are small, they increase the surface area several fold over that portion of the motor housing and should provide some cooling or help with cool down. Something fun to tinker with now that I can capture that stream of temperature data.
Sinks.jpg
If they end up being detrimental, they'll be removeable.
 
Better to be lower in the back then the front with 1" you wont feel much but handling you may notice if your maxing out technicalities, ride that way for a few 100 miles to settle the issue, the halo sas rims look nice no personal experience with them. What mapping gps gadgets your using?
 
calab said:
the halo sas rims look nice no personal experience with them.

Pound for pound, there's probably no better heavy duty bicycle rim anywhere than Halo SAS. (Alex Supra RX was even better, but it's ancient history.) It's awesome. And it's double eyeleted, so no losing nipples in there when you lace it up.
 
E-HP said:
The tire OD is 25-3/8", so a little less than 26". My front 26x2.4 is around 27" in diameter, so I'll see how much the slightly slacker steering angle will affect my riding, but I'm still thinking of re-lacing my front with the same rim anyway.
Just curious but what is the actual measured side to side width of the inflated tire ?
 
LewTwo said:
E-HP said:
The tire OD is 25-3/8", so a little less than 26". My front 26x2.4 is around 27" in diameter, so I'll see how much the slightly slacker steering angle will affect my riding, but I'm still thinking of re-lacing my front with the same rim anyway.
Just curious but what is the actual measured side to side width of the inflated tire ?

Right at 2.8" on my calipers.

EDIT 01-08-22: Cut the Andersons off my old motor and grafted them to my new motor's phase wires for testing. Put the wheel into my frame. Yup, Leaf axles are pretty short, but barely enough to mount the wheel securely. Did mount the disc, since I just want to make sure it would run. On my partially charged battery, running a little over 76V, the no load speed was 59mph, so fully charged to 84V should be around 65 mph. My novice wheel truing shortcomings really showed up when spinning the wheel that fast, I'll be doing a lot more work later after some riding around.

I could resist trying it out, even without the rear brake, so moved the motor harness to the side enough to keep it from getting tangled, and started up the driveway. It started the wheelie so I backed off the throttle, and turned to go up the street. I will need to adjust the throttle ramping on my CM for this motor, since it's acting like my other motor when running on the bypass (direct) throttle setting, instead of with ramping.

I need to get the rear disc mounted to do any kind of real testing.

EDIT post test ride: I got the rear disc mounted, so took a short ride (5 miles). I stopped a couple of times to adjust the CA settings. First the set the speedo, and then to set the throttle ramp all the way down to 1V/sec. That gets rid of most of the unintentional wheelies from a standing start, but seems to affect the mid range roll on too much. I think I'll need to bypass the CA even if it makes the bike into a bucking bronco, just so I can see what kind of mid range punch the motor actually has. As it is now, it feels like my old motor has noticeably more mid range.

Not making any real comparisons yet until I fully charge the battery.

EDIT post charging test ride: Uh, OK, forget what I said about the midrange. I kept the throttle ramp down at 1V/sec, which is manageable. I'll need to get used to it or just ride in low speed. But even riding up 10% at 15 mph or so, your throttle twist still has to be controlled, and the bike keep accelerating hard. It's sort of scary, but just something I'll need to get used to. I'm not sure if it's because of the throttle ramping change, but I'm getting surging when accelerating hard, so there's still a bunch of tuning ahead. I'll wire the temp sensor tomorrow. I also bought 6 speed freewheel that should get here tomorrow. The 7 speed takes more washers to clear the frame (rubbing now) than the narrower motor. Unfortunately my smallest cog will be 14, so I may end up keeping the 7 speed and dealing with another washer.
 
Nice wheel, do want! I use the 7 speed DNP with the 11 tooth and an extra washer on all 3 of my bikes. I know Chalo doesn't like them for their reliability, but my legs haven't broken one yet.
 
thundercamel said:
Nice wheel, do want! I use the 7 speed DNP with the 11 tooth and an extra washer on all 3 of my bikes. I know Chalo doesn't like them for their reliability, but my legs haven't broken one yet.

Ya, I think that's what I'll end up doing. My DNP on the old hub is on it's last leg, and not due to the cogs, but the pawls. They're definitely not Shimano quality, but not many choices out there. Adding the washer will make the short axle issue worse though. :shock: I think I have a thinner washer that might work to provide the minimum amount of clearance.

I think my truing job may not be so bad after all, but I need to remount my tire. I don't think the bead is seated correctly.
 
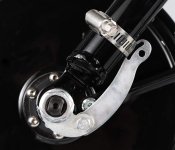
Well the short Leaf motor axles are creating some compromises. I added an extra washer to the freewheel side so that it clears the frame, but that doesn't leave enough room for my second torque arm. Since I do most my riding on the 13T cog, moving to a 6 speed freewheel with 14T as the smallest cog won't be optimal, but would allow me to get the second torque arm installed. I think I'll monitor for while, since the one Grin torque arm on the other side is pretty solid. I also have regen set pretty low.

With the washer in place, I was able to get some real testing done, so I went on a short ride. I found a short stretch to test the speed and hit 45mph before running out of room, and without field weakening, which is very consistent with the simulator, when inputting the voltage I was at during the test and an accurate wheel diameter. I don't ride over 30mph often, but the acceleration to 30mph is pretty crazy quick.

Tweaking the CA helped a lot. I set my economy mode to limit power to 4kW and current to 45A, and throttle ramp to 1.8V/sec, which really tamed the standing start and lower speed performance, enough to keep the front wheel planted unless I contribute by pedaling. Offroad mode eliminates the current and power limit, but keeps the throttle ramp to make things somewhat usable. Unlimited mode removes the throttle ramping, and that mode is pretty unusable for regular riding but good for testing.

I rode around on the hills on the way home; on 10%-15% grades, and the bike just sailed up those hills pulling hard. The motor was lukewarm when I pulled into the driveway. Time to get the temp sensor connected to the CA to start gathering that data.
 
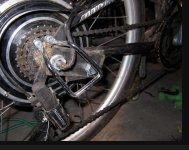
Did you specify when you ordered the motor from leaf that you wanted a longer axle I cant remember who was chit chatting about that in this or another thread somewhere. You could find a new design of torque arm that wont lose axle length from a forks tubing. Find a thinner axle bolt or grind one down. The picture shows a fork with the tube out a bit so flat bar tas wont work. The 2nd pic would lose 3-5mm of axle purchase from the rear chain stay tube depending on how the flat bar fits but do the same as the top and you lose 5-8mm with nothing you can do about it except have the ta swing away and up. ta.jpg ta1.jpg
 
calab said:
Find a thinner axle bolt or grind one down.
Joking, right?


The 6 speed freewheel arrived. Cheap Shimano Tourney, but still feels better made than the DNP. Lower line Shimano will be heavier, but usually pretty durable. I think I'll switch it out and try it for a couple of weeks to see if I can live with 14T.

The 203mm disc provides a lot more stopping power, so I'll need to get used to it to keep from locking up the rear.
 
Nope its exactly what I did to fit tas
thin axle nut.jpg
wide lipped nut.jpg


E-HP said:
calab said:
Find a thinner axle bolt or grind one down.
Joking, right?


The 6 speed freewheel arrived. Cheap Shimano Tourney, but still feels better made than the DNP. Lower line Shimano will be heavier, but usually pretty durable. I think I'll switch it out and try it for a couple of weeks to see if I can live with 14T.

The 203mm disc provides a lot more stopping power, so I'll need to get used to it to keep from locking up the rear.
 
calab said:
Nope its exactly what I did to fit tas
thin axle nut.jpg
wide lipped nut.jpg


E-HP said:
calab said:
Find a thinner axle bolt or grind one down.
Joking, right?


The 6 speed freewheel arrived. Cheap Shimano Tourney, but still feels better made than the DNP. Lower line Shimano will be heavier, but usually pretty durable. I think I'll switch it out and try it for a couple of weeks to see if I can live with 14T.

The 203mm disc provides a lot more stopping power, so I'll need to get used to it to keep from locking up the rear.

LOL, you're not joking. Think about it.
 
He said bolt but meant nut.
 
E-HP said:
Chalo said:
He said bolt but meant nut.

Understood, except how does grinding down a nut creates more axle threads?

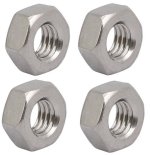
It doesn't, but it could give you more room for a torque arm to fit on while not taking away as many threads as that extra width. The first one to two threads on each side of a machine nut are cut away by the chamfer, whereas a homemade or modified nut can have full threads all the way to the edge.
 
Chalo said:
E-HP said:
Chalo said:
He said bolt but meant nut.

Understood, except how does grinding down a nut creates more axle threads?

It doesn't, but it could give you more room for a torque arm to fit on while not taking away as many threads as that extra width. The first one to two threads on each side of a machine nut are cut away by the chamfer, whereas a homemade or modified nut can have full threads all the way to the edge.

I looked at mine and if I shave off the serrated lip, I'd get a little less than 1/2 a thread. Now, without the Grin torque arm, I barely have engagement on all threads. Before adding the extra washer (3 total), with the torque arm, I had about 1 thread of the nut exposed. It seems like the axle is cut so using a 2 washers and 1/4" thick torque arm will allow the nut to fully engage. But the width of the motor takes away from the available space on the freewheel side.

Here's a question for you; Can a freewheel be modified to eliminate the smallest cog? If I need to go to a 6 speed width freewheel anyway, I'd rather have a 13T than the 14T, so willing to hack up this DNP and make it a 6 speed. I barely use the 11T.
 
That is what I meant thanks chalo I had a very large wide regular flanged nut that took up to much real estate on the short axle length and took an angle grinder to make the metric nut narrower it worked good for 3-4y it is hard to find a metric narrow nut and I made sure I had plenty of threads to bite the axle threads this makes extra room on the axle to fit the torque arm as chalo clarified. I recently wanted new nuts and found a store that had black nuts but I did not know the pitch and ended up getting the wrong pitch those specialized stores have a minimum purchase of 10$ so I have a few extra rolls of duct tape.

Chalo said:
E-HP said:
Chalo said:
He said bolt but meant nut.

Understood, except how does grinding down a nut creates more axle threads?

It doesn't, but it could give you more room for a torque arm to fit on while not taking away as many threads as that extra width. The first one to two threads on each side of a machine nut are cut away by the chamfer, whereas a homemade or modified nut can have full threads all the way to the edge.
 
calab said:
That is what I meant thanks chalo I had a very large wide regular flanged nut that took up to much real estate on the short axle length and took an angle grinder to make the metric nut narrower it worked good for 3-4y it is hard to find a metric narrow nut and I made sure I had plenty of threads to bite the axle threads this makes extra room on the axle to fit the torque arm as chalo clarified. I recently wanted new nuts and found a store that had black nuts but I did not know the pitch and ended up getting the wrong pitch those specialized stores have a minimum purchase of 10$ so I have a few extra rolls of duct tape.

Chalo said:
E-HP said:
Chalo said:
He said bolt but meant nut.

Understood, except how does grinding down a nut creates more axle threads?

It doesn't, but it could give you more room for a torque arm to fit on while not taking away as many threads as that extra width. The first one to two threads on each side of a machine nut are cut away by the chamfer, whereas a homemade or modified nut can have full threads all the way to the edge.

It's really a Mech E question, but I believe the general rule is thread engagement should be equal to or greater than bolt diameter. So, 14mm in this case. The nuts are 12.7mm deep so less than optimal already, but the issue is the exposed threads, not the nuts. With the Grin torque arm, and the required washers, there's less than 12mm on the freewheel side of the hub.

Back on topic. The 6 speed freewheel is 1.26" deep, so I'll be able to take away 2 of the washers. With the old motor, I had one extra washer, over what's required, which was tolerable. My frame can take more abuse than I could ever subject it to, but I still don't like abusing is needlessly. I'm guessing it responds differently than how it was designed to, when the frame members start off under stress.
 
E-HP said:
Here's a question for you; Can a freewheel be modified to eliminate the smallest cog? If I need to go to a 6 speed width freewheel anyway, I'd rather have a 13T than the 14T, so willing to hack up this DNP and make it a 6 speed. I barely use the 11T.
BANDSAW IS READY!

bonesaw-is.gif
 
Don't remember now, thought the 6 speed was the same width as a 7 speed? Talking about a cassette not a freewheel.

It's been years now, did get both of Grin's TQ arms on. Do remember filing down washers. Even grooved the washer where the cable comes out of the axel to gain a mm. Did not touch the nuts, could take off a bit but makes it harder to start on the threads.
 
Back
Top