• Hello ES! We could use some help to get us past the finish line on building the new knowledgebase for the forum.
    Can you donate? Please see our fundraising page. Thank you!

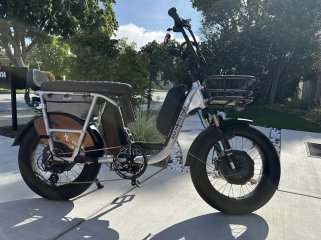
RadRunner Plus Rebuild

Now that I've got the nuts-and-bolts figured out on logging the PR/CA/GPS data down, I need to get it mounted.

First, I've updated my wiring chart to include the rpi; a new 5v dcdc that can be shared between the pi, dashcam, and potentially other things down the line, I suppose.

I also need to upgrade the rear electronics storage area; the aliexpress dime-a-dozen controller bag was simply out of room for stuffing in wires and components, and tbh, I wasn't super happy with how haphazard it was.
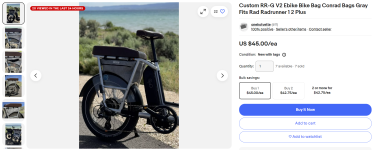
2024-10-24 22_11_26-Custom RR-G V2 Ebike Bike Bag Conrad Bags Gray Fits Rad Radrunner 1 2 Plus...png

So I picked up one of these custom made RadRunner bags specifically to fit that whole gap in the rear of the bike. This should give me a lot more room -- and it sure as heck does.

After modeling every hard component that needs to go in the back, I took some internal measures of the bag, mocked that out, and have now modeled up a two-part electronics holder that I can mount everything into and sandwich into the bag. And to top it all off, there will still even be room in the bag for my repair kit (spare tire, inflator, tools, zips & snips, etc).
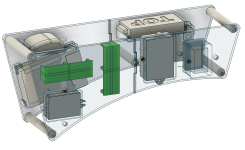
2024-10-24 22_12_59-in bag device bracket v21_ (J M) - Autodesk Fusion.png
It'll probably be another day or two of print-test-refine loop, but nothing really new is being added to the system, just got to get it all to fit better, and less jumbled, than before.

Finally, I'm going to take this opportunity to swap out to some thinner wire for signals/power going from the bag to the front -- 16awg was insanely overkill, especially now that I've measured all the power draw devices and found that not a single thing pulls more than 1A at whatever voltage it runs. Plus, most of the wires are signal wires.
 
I got it all mounted and stuffed in the bag. Still can fit an air pump, spare tire, tools, and even some handlebar jack stands.

I did find, however, that putting the GPS for the rPi inside that bag with all the other electronics was...unwise. It's odd; the LTE/GPS tracker I have has no issues getting signal and doing it's thing, but the rPi took >20m to get a GPS fix while the bike was outside in a very unobstructed location.

Doing a bit more research, it seems GPS's can be disrupted by being too near other electronics around -- so stuffed into a bag with a computer, another gps, a few DCDC converters and a bunch of signal wires was...perhaps not the best environment. Sadly, I couldn't just pull it out because I'd shortened the USB cable. Oops.

But, that did lead me down the route of researching and learning about all the myriad number of ublox GPS receivers that are on the market and that I had the most basic possible, a generation-or-two-ago version. Totally usable for what a lot of people do with them (turn them into time servers), but there's better out there.

I ended up with BN-808 which is a more recent ublox 8 series chip (so it can get coords from multiple satellite systems concurrently). Additionally, this particular one has some flash memory and, critically, a built in battery for some RTC handling. I also learned how to turn on ublox's Assist Autonomous. (My layman's understanding: most GPS data is considered only valid for about 30 minutes or so; the 8 series chips can use previous data for something like 30 hours? It extends it a lot). This feature apparently will help get a lock much faster if I've been out for a ride and, say, stop for lunch.

Most importantly, though, I remodeled the rear lightbar carrier on the bike to accommodate a camera mount (to clean that up) and to also hold the GPS unit externally from the bike away from the RF noise part I was hosting in the bag.

2024-11-02 21_21_41-Window.png
This mid-line section analysis shows where the GPS nestles in, it's a screw-cap holding it down, and that the container (as well as the camera mount) both just "slot it" to the light bar carrier. Bolt the light bar on top and it locks everything down. Let's me take the camera/gps off if I need to work on them are replace them with a different "module".

2024-11-02 21_22_17-Window.png2024-11-02 21_24_56-Window.png


And booooooy howdy does it work well. Even inside my apartment, it can grab a lock within 30 seconds or so.

---

The last mystery to work out is that, sometimes, the OLED display can get...offset? Like, all the characters will be shifted down-and-right 15 pixels, but then the ones that would be offscreen wrap around to the top/left side. I'm not really sure what's causing that, and I don't have quite enough electronics experience to make educated guesses. So far it's usually gone away in a few minutes, and it hasn't affected the log file recording, so I'm not gonna get too hung up on that.
 
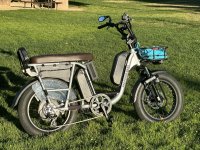
Got some photos of the finished setup today:

IMG_1720.jpg


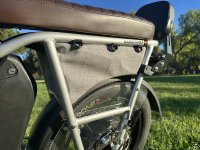
Along with the camera/gps mount; and here's the other side of the bag.

IMG_1733.jpgIMG_1731.jpg

It's worth noting that I installed by bag in a ... unique way. Firstly, I could not figure out the "triple d-rings" for the life of me. I understand double d-rings; but these straps had three? Regardless, I wanted something a bit more stout. As such, inside the bag, there is a 3d printed plate with some re-inforcing ally tubes all zip tied together to create a solid top-plate. That top plate is then zip tied onto the rear-rack, under the extended seat. Makes for a super stable setup, and really snugs the whole thing up.

2024-11-04 17_23_38-bag top brace v2_ (J M) - Autodesk Fusion.png

The four corners on each plate zip the ally tubes in place, the plates were CA glued together, and the other holes are spaces to allow for zips to hit the structural bars on the rear rack of the bike. It's pretty much rock solid.

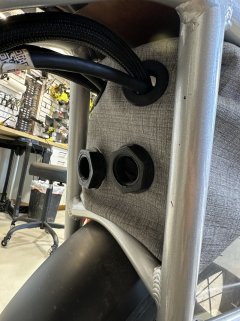
You can see them, but I also 3D printed some grommets for passing all the wires through, since the bag has no openings other than the zipper.
 
This bike is now offline :'(

Started exhibiting an odd behavior where, while pedaling, the motor would get bursts of power on and off in a cycle. If I was watching the RPM meter on the CycleAnalyst (CA) it would cut in and out bouncing between 0rpm and the actual RPM. Throttle still worked just fine, but pedaling was a herky-jerky experience.

I thought that maybe it was the...complex set of extra electronics I had installed. Well, I had been considering getting rid of the RaspberryPi data logger as I wasn't getting much use out of it, so I took all the electronics out. I did this prior to any of the troubleshooting so that the only things in the mix are the bare necessities (PR, CA, PAS, key switch, and pas dial on the CA).

Replaced the cadence sensor thinking maybe it went bad, but that was not the case. Maybe a bad CA? I happened to have a spare CA I hooked up and copied all the relevant config over to and...still see the same thing.

Oddly, in both cases, I also found that while the wheel was spinning and the PhaseRunner (PR) suite was properly report motor rpm, the CA would not show mph until about 2-3mph. Getting pedal rpm's also wouldn't kick in till about 4-5mph either.

I have a spare PR (pending a rebuild for another bike) but it's a bit of a hassle to pull it from that one and put it on here, so I haven't tried that yet.

I've opened a ticket with Grin to see if they have any ideas.
 
The PR itself has a circuit inside that combines all the speed sensors (external, hall, etc) so that if you normally run off the hall sensors for speed, but have a wheel speed sensor, and have optimized it for reaction time to the hall sensor that has many pulses per revolution, then if it can't read the hall that's on that speed sensor circuit it falls back to the wheel speed sensor instead. (or vice versa).

This can cause problems with the CA reading wheel speed correctly (since the number of poles for each of those types is different, and the CA won't change pole counts automaticlaly to compensate (I don't iknow if or how the PR would deal with that, especially if the wheel sensor pole coutn was never defined for the one that's actually there vs the default if different).

An intermittent sensor wire problem (or magnet distance/etc issue) can cause wierd PR / CA behavior because of this--there's a thread around here somwhere with examples, where this issue was orginally discovered.
 
I feel like I've personally run into that with a geared hub motor, actually. This is a max45 dd, though. While it does have a separate wire for speed sensing, I've often found that's just split off of one the primary halls (no sense in putting in a whole separate magnet assembly and setup to read one ping per full rotation).

I'm pretty sure I have the PR and CA both set to see 24 pole pairs for speed sensing. There's no other speed sensing going on. If I recall, the quirky behavior was that speed would report still, but be wildly off -- in my case, there's just zero speed readings. Though, I guess if it's expecting 23 pulses per rotation and getting, like, 1 that would be maybe rounded down enough to be "nothing"?
 
Though, I guess if it's expecting 23 pulses per rotation and getting, like, 1 that would be maybe rounded down enough to be "nothing"?
It would only be 1/24th of the number of signals expected, so it would only get a signal 1/24th as often as expected, and it might detect a speed sometimes, if the wheel was spinning fast enough, and other times not even register a signal at all if the wheel was too slow.

But if it is only getting one pulse per rev, even if it was set for only 1 pole, then it's pretty normal for it to not register pseed below a few mph.

but i don'tkonw that this is whats causing your issue, just that it feels related to that.

that's why I put 3 magnets on my front wheel spokes for my ca's speed sensor, so it would better register really low speeds for various tests I wanted to do

(and since then i just always do that, just because...and I never use motor halls for speed sensing in the ca (for non-pr controllers primarily) because if there is ever a cable failure that lets battery or phase power short to a hall it will kill the ca too (ask me how i know :roll: ) in the pr that's buffered so it would just kill that part of the pr....but i stil just always use a separate wheel speed sensor even when it's on a hubmotor, just cuz.
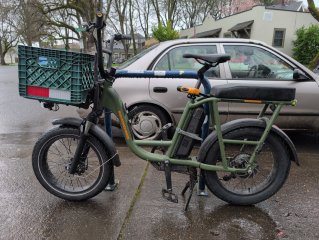
 
Well, through the magic of removing a few bits of electronics, trying every possible combination of things, putting it in timeout for two weeks, and then just putting it back together it's all better now!

Ugh.

I'm sure whatever this was will likely come back because I didn't really fix anything, but maybe I'm lucky and it was a loose connection somewhere that all this re-doing fixed. 🤷‍♂️
 
Hey, I'm doing something very similar!

~3 years ago I bought a used RadRunner, the oldest most basic one. Been riding it hard ever since. $250 grocery runs, trips with my partner on the back, all through rainy seasons, etc. I'm using a "normal" (not moped-style) pedaling position. The bike has done fine, but a few weeks ago I decided to rebuild it.

The first changes were for comfort. I eBayed a RadRunner Plus suspension fork and a 4.0" CST Big Boat rear tire (still have a 3.0" in front). With 24 PSI in the rear and the fork preload all the way up, it's quite comfy for both of us on the bike, ~400 pounds total vehicle weight. We've done several 2-up trips and the frame seems okay, it's overbuilt.

IMG_20260311_150844_765.jpg

Next is a big battery and the full Grin treatment.

I ordered the 72V 20Ah pack (with Samsung 50G cells) from Electric Bike Laboratory / affordableebikes.ca. They fit 80 cells in a Reention DP7 case, which I hoped would fit in the stock battery location. It barely does!

IMG_20260312_160658_633.jpg

Installing the battery requires temporarily removing the fender, and the mounting plate only engages two of the three original bolt locations (the top one is too high). The plate can slide down so the battery also rests atop the chainstays. I'll put a bit of high-density foam underneath the battery to spread out the pressure there, and also put a couple of Voile straps around the battery and seat tube to help prevent any wiggles. Yes, it would be nice to use a Grin Triple Bob, but there isn't room for it with the fender in its usual location (and I do need the fender).

My Grin shipment is on the way, a Max45 motor pre-laced to a 20" wheel. I opted for a Superharness kit because the connectors are all waterproof and it can power the motor's torque sensor when connected to a 72V nominal battery. The Cycle Analyst cannot do that on 72 volts without an additional 12V power supply spliced into the torque sensor harness -- and I wanted a simple, well-sealed wiring/electronics setup for riding around rainy Portland. I may still add a Cycle Analyst for a more accurate battery capacity indicator, but still use the Superharness to control the bike.

I'm pretty sure my dropouts are 170 mm apart, not 175 mm as chuyskywalker found on the RadRunner Plus. We'll find out in a few days.

chuyskywalker, sorry to hear about the mild ordeal getting your motor sorted. Is it still working out for you? Your build looks very clean given the features you've added!
 
This setup has always had a trouble getting up some of the hilly-hills in my area. Second motor time!

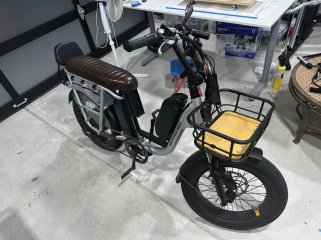
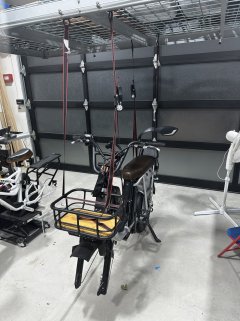
Before surgery:

IMG_5641.HEIC_compressed.JPEG

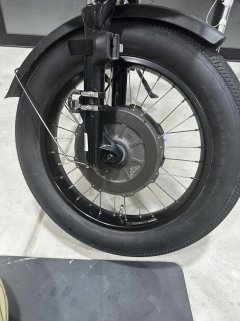
And after:

IMG_5665.HEIC_compressed.JPEG

Some WIP progress shots:

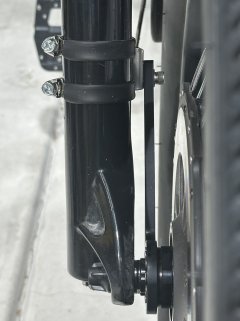
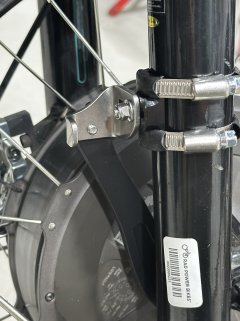
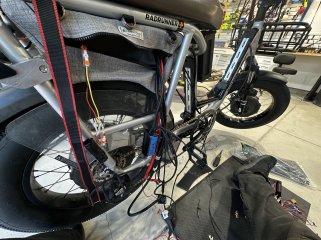
IMG_5644.HEIC_compressed.JPEGIMG_5646.HEIC_compressed.JPEGIMG_5650.HEIC_compressed.JPEGIMG_5654.HEIC_compressed.JPEGIMG_5655.HEIC_compressed.JPEGIMG_5656.HEIC_compressed.JPEGIMG_5663.HEIC_compressed.JPEG

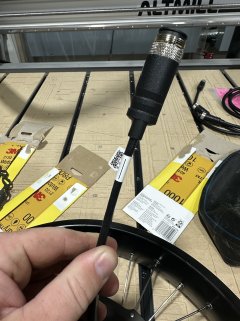
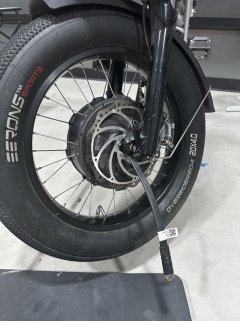
The latest batch of these motors are now shipping with a, clearly, custom-made flat cable. So, so much better than the previous setup which was being stripped and heatshrinked flat manually. Other than that, not much has externally changed between this one and the "All Axle Fat Bike" (early production model) version of the motor. The axle modularity is such a cool innovation for this product.

The bike is just shy of crossing into the 1000mi mark at this point. Which, tbh, I'd kinda been noticing that the batteries aren't quite holding up like they used to. Range loss and voltage drop are starting to show.

On the first big ride this thing conquered the biggest hill at 3x speed (5->15mph) and did pretty well on the rest. However, there are a few problem areas; but all have a solution:
  1. Steering/Handling Changes
    Gonna just have to get used to the fact that it feels a bit different to steer

  2. Front Motor Spin Out
    I setup the two phaserunners to be a 50/50 split. I knew better, but wanted to start there as a baseline. I'll go back in and split the power more 60/40 R/F. (I'll flip that for regen.)

  3. Overheating Controllers
    For aesthetics, I put the controllers in the under-seat bag. They ended up thermal throttling after a particularly long and aggressive hill climb (down to about 50% power). I knew this could show up, just wasn't sure how big a problem it would be. For normal, day-to-day riding (which doesn't include these hills) I don't think it would really be a problem. Mounting these outside of the bag -- it's a bit of dilemma. There are few spots where two controllers can be placed that'll have good air flow, and even those few spots would likely make wire management a bit of a mess I suspect. I'm going to roll with it in bag for now and keep an eye on it; need to continue to mull over placement options.

  4. Battery Limited Performance
    There are 2 x 20s3p batteries on the bike, each with a 40A bms and the Samsung 35E cells, rated for 8amp draw. So, between the two motors I can only push 48A battery amps max; per motor I currently have them set to 22A each. This is a far cry from the 90A peak the phaserunner's support (not that I could do that very long, see #3). Regardless, it's an annoying limitation of the setup -- the bike could certainly conquer some of these hills even more effectively with more power. Heck, even at the the hardest climb, the motors only hit about 40C (ambient about 22) -- they have so much more headroom. Jumping to current gen tabless cells that can push 40A continuous, 90 peak, could give these controllers and motors all the power they'd want.
Overall, I'm pretty darn happy about the extra motor.
 
Awesome work! I did sort of a similar thing with an old Juiced HyperScorpion chassis and two 177mm axle 40H Chinese special motors. Ended up setting the controllers to start activating the front only when the rear exceeded 60Nm, and then only allowing the front motor up to 50Nm to avoid the spinout you mentioned. No thermal throttling with PRs up say Ralston or Alameda de las Pulgas, but the rear PR does get close to 70ºC even with a heatsink slogging up Hwy 9 or Mt. Diablo.
 
How in the world did you set that up?
Illustrative numbers, but fed them both with the same throttle signal from a CA, but the rear PR responds over the full 1.0~3.5V range, while the front PR is set for say 2.5~3.5V, so the front doesn't kick in until the rear is already working at a high torque.
 
I pulled the front motor down to 60 phase amps and pushed it's start point up the voltage range to give the front motor a little less oompf and a delayed start. Definitely helped, but I also felt the loss of power once I was moving and tried going up some of the steeper roads. I think I'll try turning the phase amps back up, and push the motor's start voltage further up, see if I like that better.

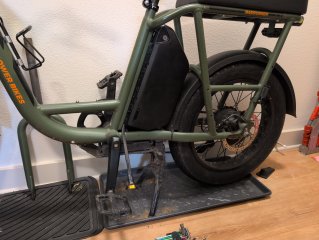
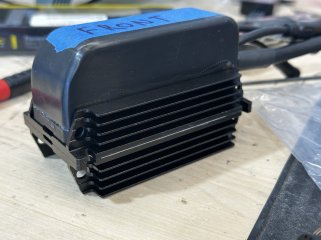
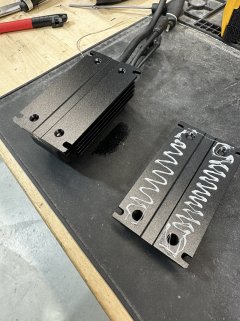
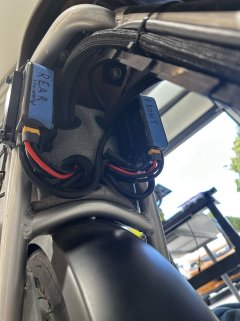
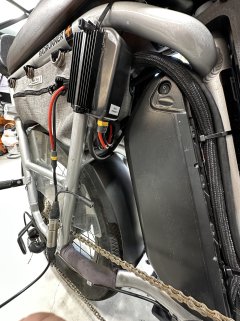
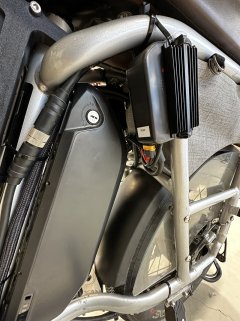
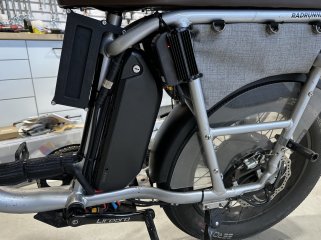
As for the controller cooling, the heatsinks from Grin came in, so I made some grommets in the bag, applied some thermal paste between the mating surfaces, rerouted the wires, and got them mounted on the outside. They don't interfere with the battery, and also stay just out of "runs into legs" range.

Plus, they don't even get remotely warm to the touch now.

IMG_5791.HEIC_compressed.JPEGIMG_5792.HEIC_compressed.JPEGIMG_5793.HEIC_compressed.JPEGIMG_5794.HEIC_compressed.JPEGIMG_5795.HEIC_compressed.JPEGIMG_5796.HEIC_compressed.JPEGIMG_5797.HEIC_compressed.JPEGIMG_5798.HEIC_compressed.JPEGIMG_5799.HEIC_compressed.JPEG

At this point, it really just leaves the batteries as the weak point, but the bike is performing well enough now that I don't think it's worth the time/effort/cost to rebuild the packs till they fade more.
 
Back
Top