
cmart
New here
Cross-posted and mildly adapted from my blog for the benefit of folks on Endless Sphere.
Three years ago I bought the oldest, most basic model RadRunner from Craigslist. The frame is stout and very capable for its length. It will carry a whole adult passenger on the back plus a load in the front, but it's a normal-size bicycle for maneuvering and storage purposes. It still works perfectly after a lot of hard use, but I decided to upgrade/ruin it with these goals.

Did I take that photo before or after putting $3k of parts on an $800 used e-bike? Exactly. Did I do a terrible locking job? Certainly.

Component Selection
Build Notes: Motor
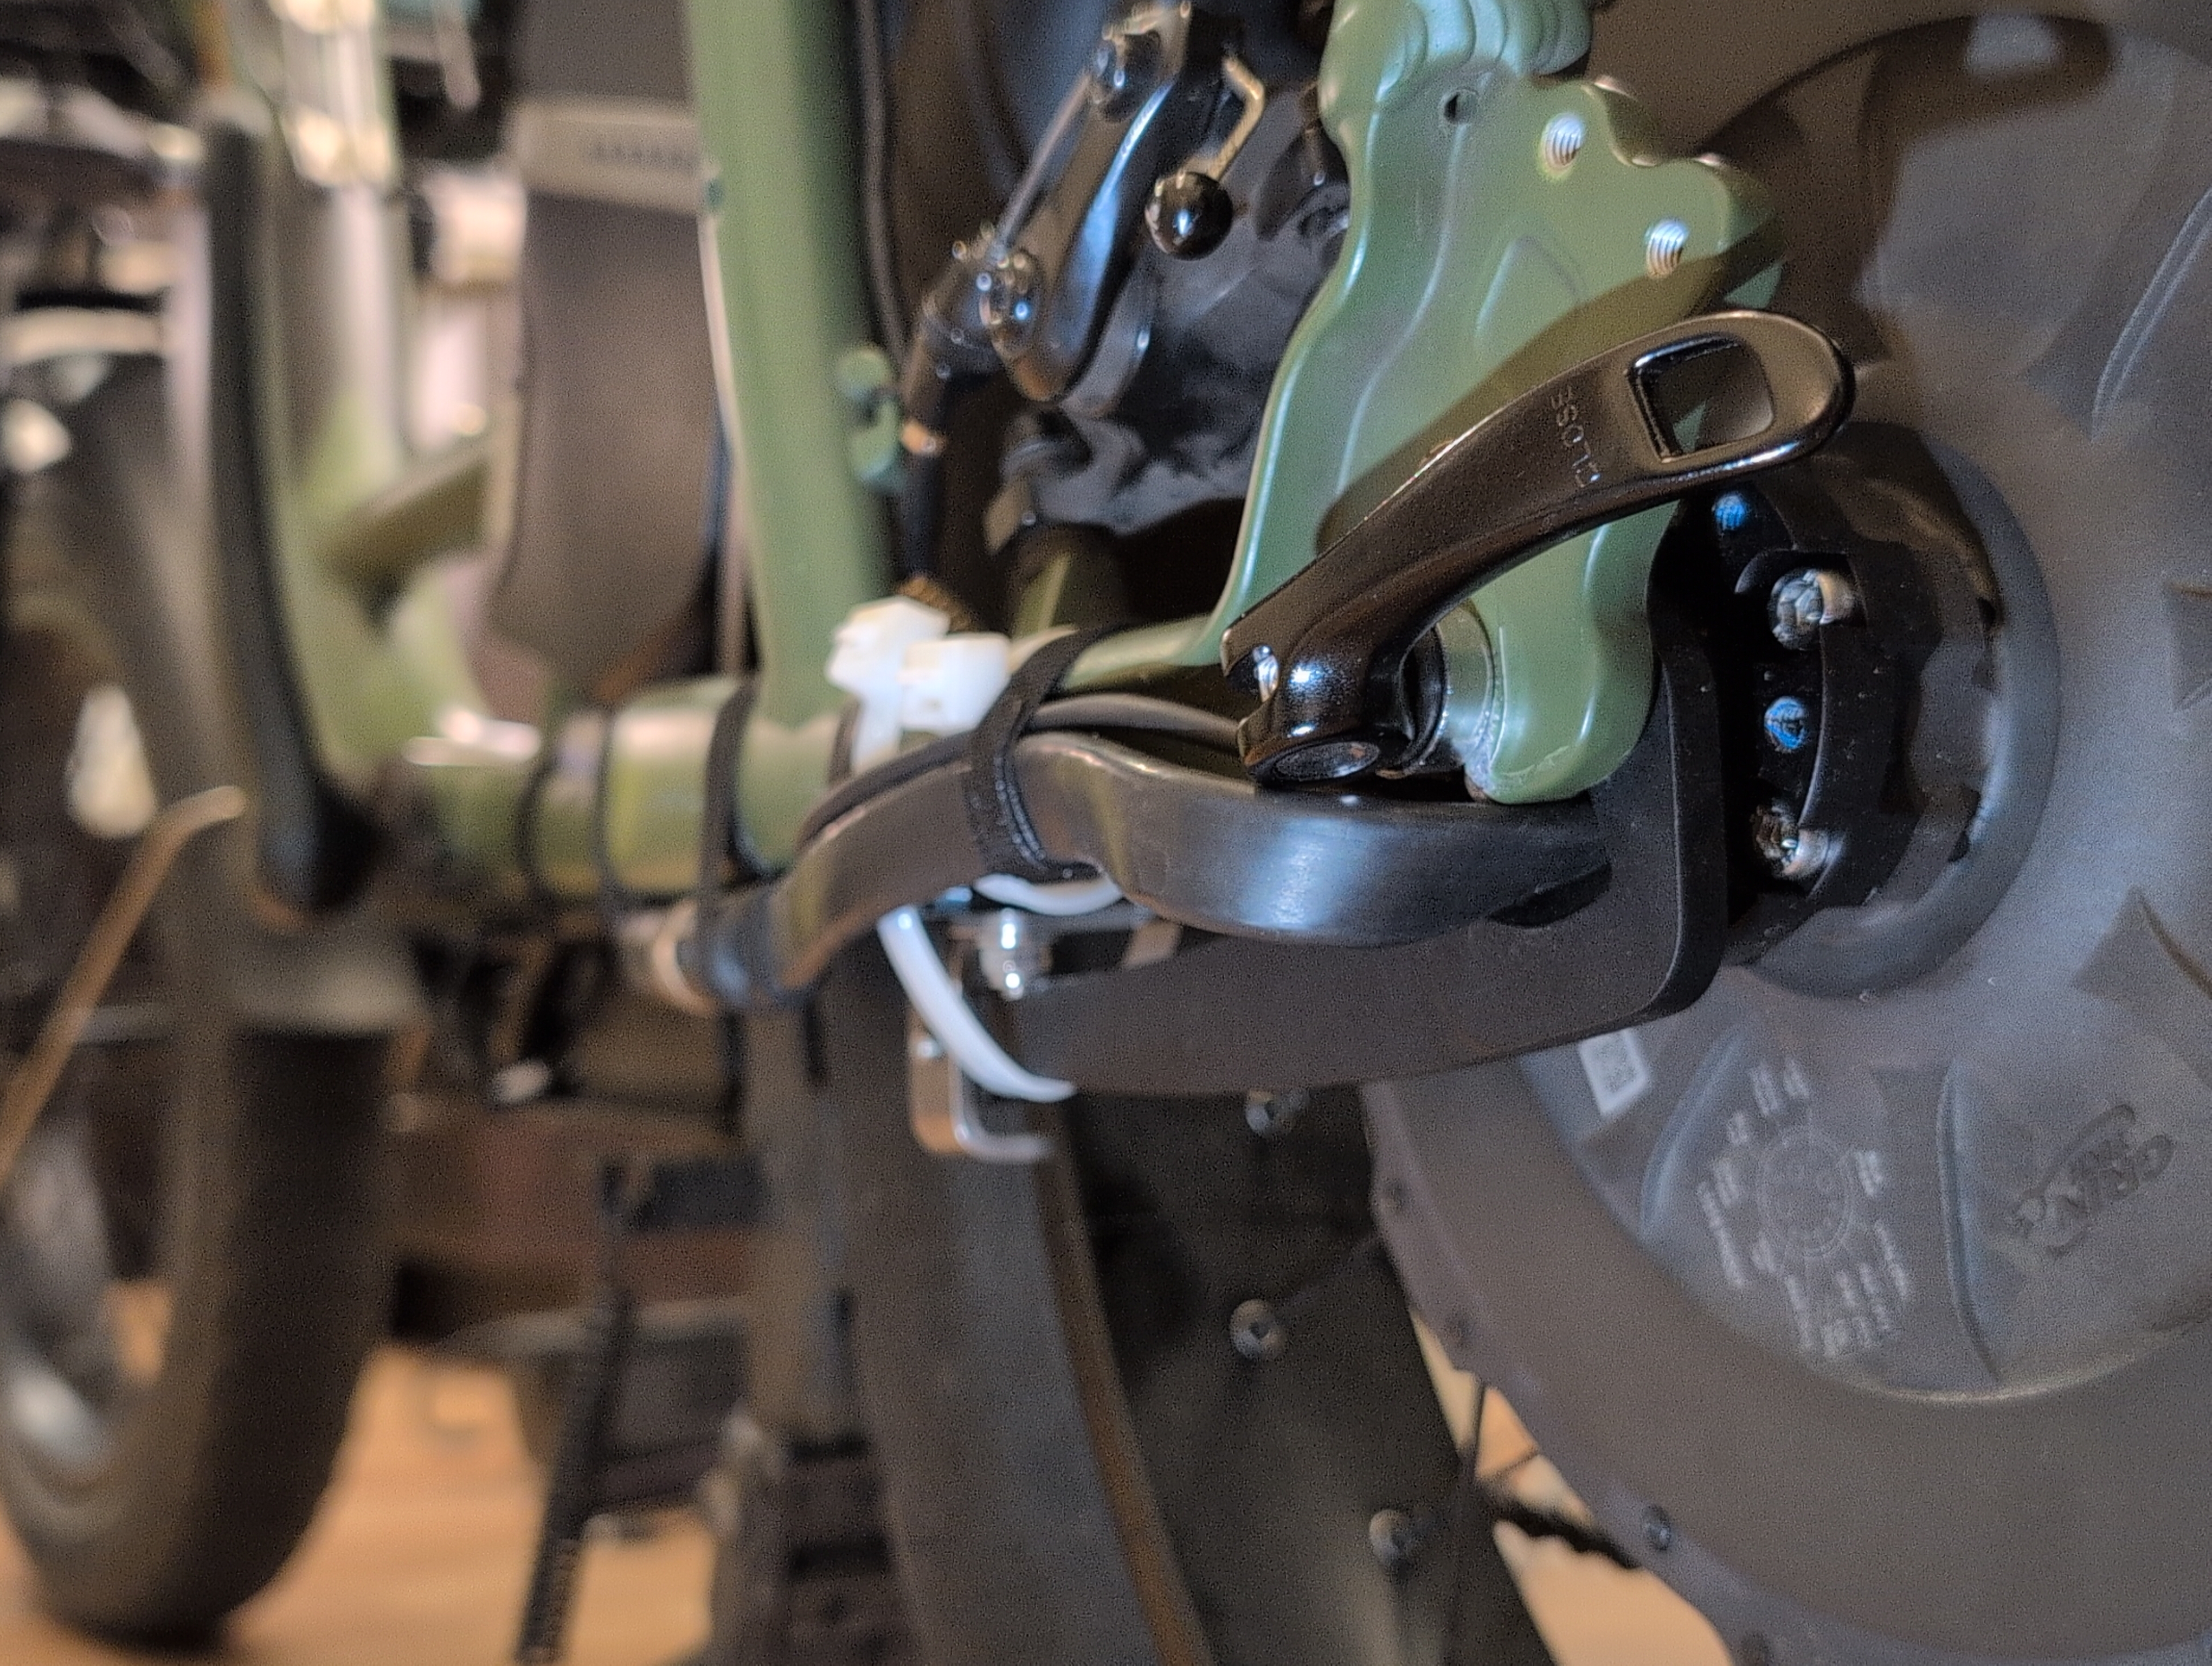
For all the adjustability Grin built into their torque arm frame clamp, this weird frame does not want you to use it. A 'seat stay' meets the chain stay right where the frame clamp wants to rest, and the bead of weld around it blocks the path of any hose clamps.

So, I put the frame clamp on backwards. Working around the brake caliper post mount, I got one hose clamp fully on the frame clamp, and one extra heavy zip tie (175 lb. tensile strength, more flexible than hose clamp) halfway onto the other end of the frame clamp. As a backstop, I put another XL zip tie around the torque arm and chainstay. This is not a good long-term solution as UV and fatigue breaks down the plastic in zip ties, but for the moment it is a solid mount, and avoids the forbidden lateral forces on the torque arm.
chuyskywalker here found their RadRunner Plus has a 175 mm dropout width, and machined some custom Max45 axle adapters for this instead of flexing the frame. I would have just flexed my frame as a 2.5 mm deflection at each dropout seems minor. But my non-Plus RadRunner has only 170 mm between the dropouts, so that wasn't necessary. The 170 mm slotted dropout axle adapters fit the frame perfectly.
I installed a Shimano disc rotor that appeared to barely clear the motor cable, or perhaps touched it only slightly. Unfortunately "only slightly" was still too much. In the course of testing the bike (spinning the wheel in the air and riding it around the block), the innermost part of the brake disc wore a groove in the outer sheath of the motor cable, exposing a bit of insulation from the wires inside. Oopsie!

Fortunately I see no exposed conductor, so I don't think it's worth the trouble to replace the motor cable. Grin sells discs that are supposed to clear the cable, but I ended up removing the rotor entirely, and riding for a week with only regenerative braking on the rear wheel. It was still enough to skid the wheel on wet pavement.
Eventually I hand-filed away some material from the rotor and re-installed it on the bike. I also happened to have some Shimano rotor bolts with a ~1 mm smaller diameter head than the Grin-provided bolts. (It seems, from the wear pattern on the motor cable, that those bolt heads also slightly interfered?)

The problem appears solved now.
Build Notes: Battery

The DP7 battery pack fits on the frame only after temporarily removing the rear wheel and loosening the fender. Unfortunately the slots on the mounting tray only meet two of the frame's three battery mounting holes. The new tray wants 64 mm-spaced bottle cage mounts, but the RadRunner's holes are about 110 mm apart, and there is no room for a Triple Bob without further reducing fender/tire clearance. Fortunately, the pack can slide down to rest on the chainstays, providing two more points of stability. I put a piece of high-density foam under the battery to alleviate pressure points on the ABS plastic case. I also put a couple of Voile straps tightly around the pack and seat tube. It's quite solid and doesn't wiggle at all. Shame there's no room for a daisy print canvas bag around it.
The battery has a Bluetooth-enabled BMS. The JBD BMS Android app connects up to the battery, and I can see some limited information but not configure anything. EBL's video shows that the app should offer to "bind" to the battery, and should show full configuration options (like temperature protection, over-current protection, and cell balancing settings). But, I don't get prompted to bind the battery, and I don't see most of the config options shown in the video. The JBD app appears to have an account-based permissions system, and it's behaving as though someone else already 'owns' this battery.
EBL confirmed that they received a batch of JBD BMSes in "monitor only" mode, and one of them ended up in my battery. They said the workaround is to configure the BMS via UART (which I think means opening up the pack and cutting into the sealing tape), and there is some other wireless workaround that's more difficult. They also offered to exchange my battery for one with an ANT BMS, which I appreciate, though that would put us both through the trouble of shipping and waiting. I don't need to change the configuration now in order to use the pack and ride the bike, but the ability to do so will be valuable for future maintenance and troubleshooting purposes.
Separately, the permissions system means that the JBD BMS app insists on phoning home to its developer every time it opens (and you must log in with an account) before you can see information about the battery. It's unfortunately common for apps to be built this way these days, but it does not respect the user's privacy or autonomy. I don't hold that against EBL, as they didn't design the BMS app -- it's a choice JBD made.
All that aside, for now I can still use the battery as a battery. Amps go in, amps come out, bike goes brrr. I'm jazzed to have so much capacity onboard.
The charge port is a DC barrel connector but has multiple points of contact to the jack, it's not just a single piece of bent steel. The area gets only mildly warm when taking 5 amps from the Cycle Satiator. Most of the time I'm charging only to 80 volts (4.0 volts per cell, ~85% capacity) to prolong cycle life.
I'm resisting the urge to open the pack for a look inside. You can watch EBL build this one, and Myles said that since that video they started putting weatherproof sealing tape around the whole pack. I might put some tape around the seam in the housing where the two halves meet, for even more water intrusion protection.
EBL includes a basic charger with this battery. It's not configurable (to e.g. stop at a partial charge for better cycle life), but it's good to have as a backup.
Build Notes: Motor Controller and Cabling
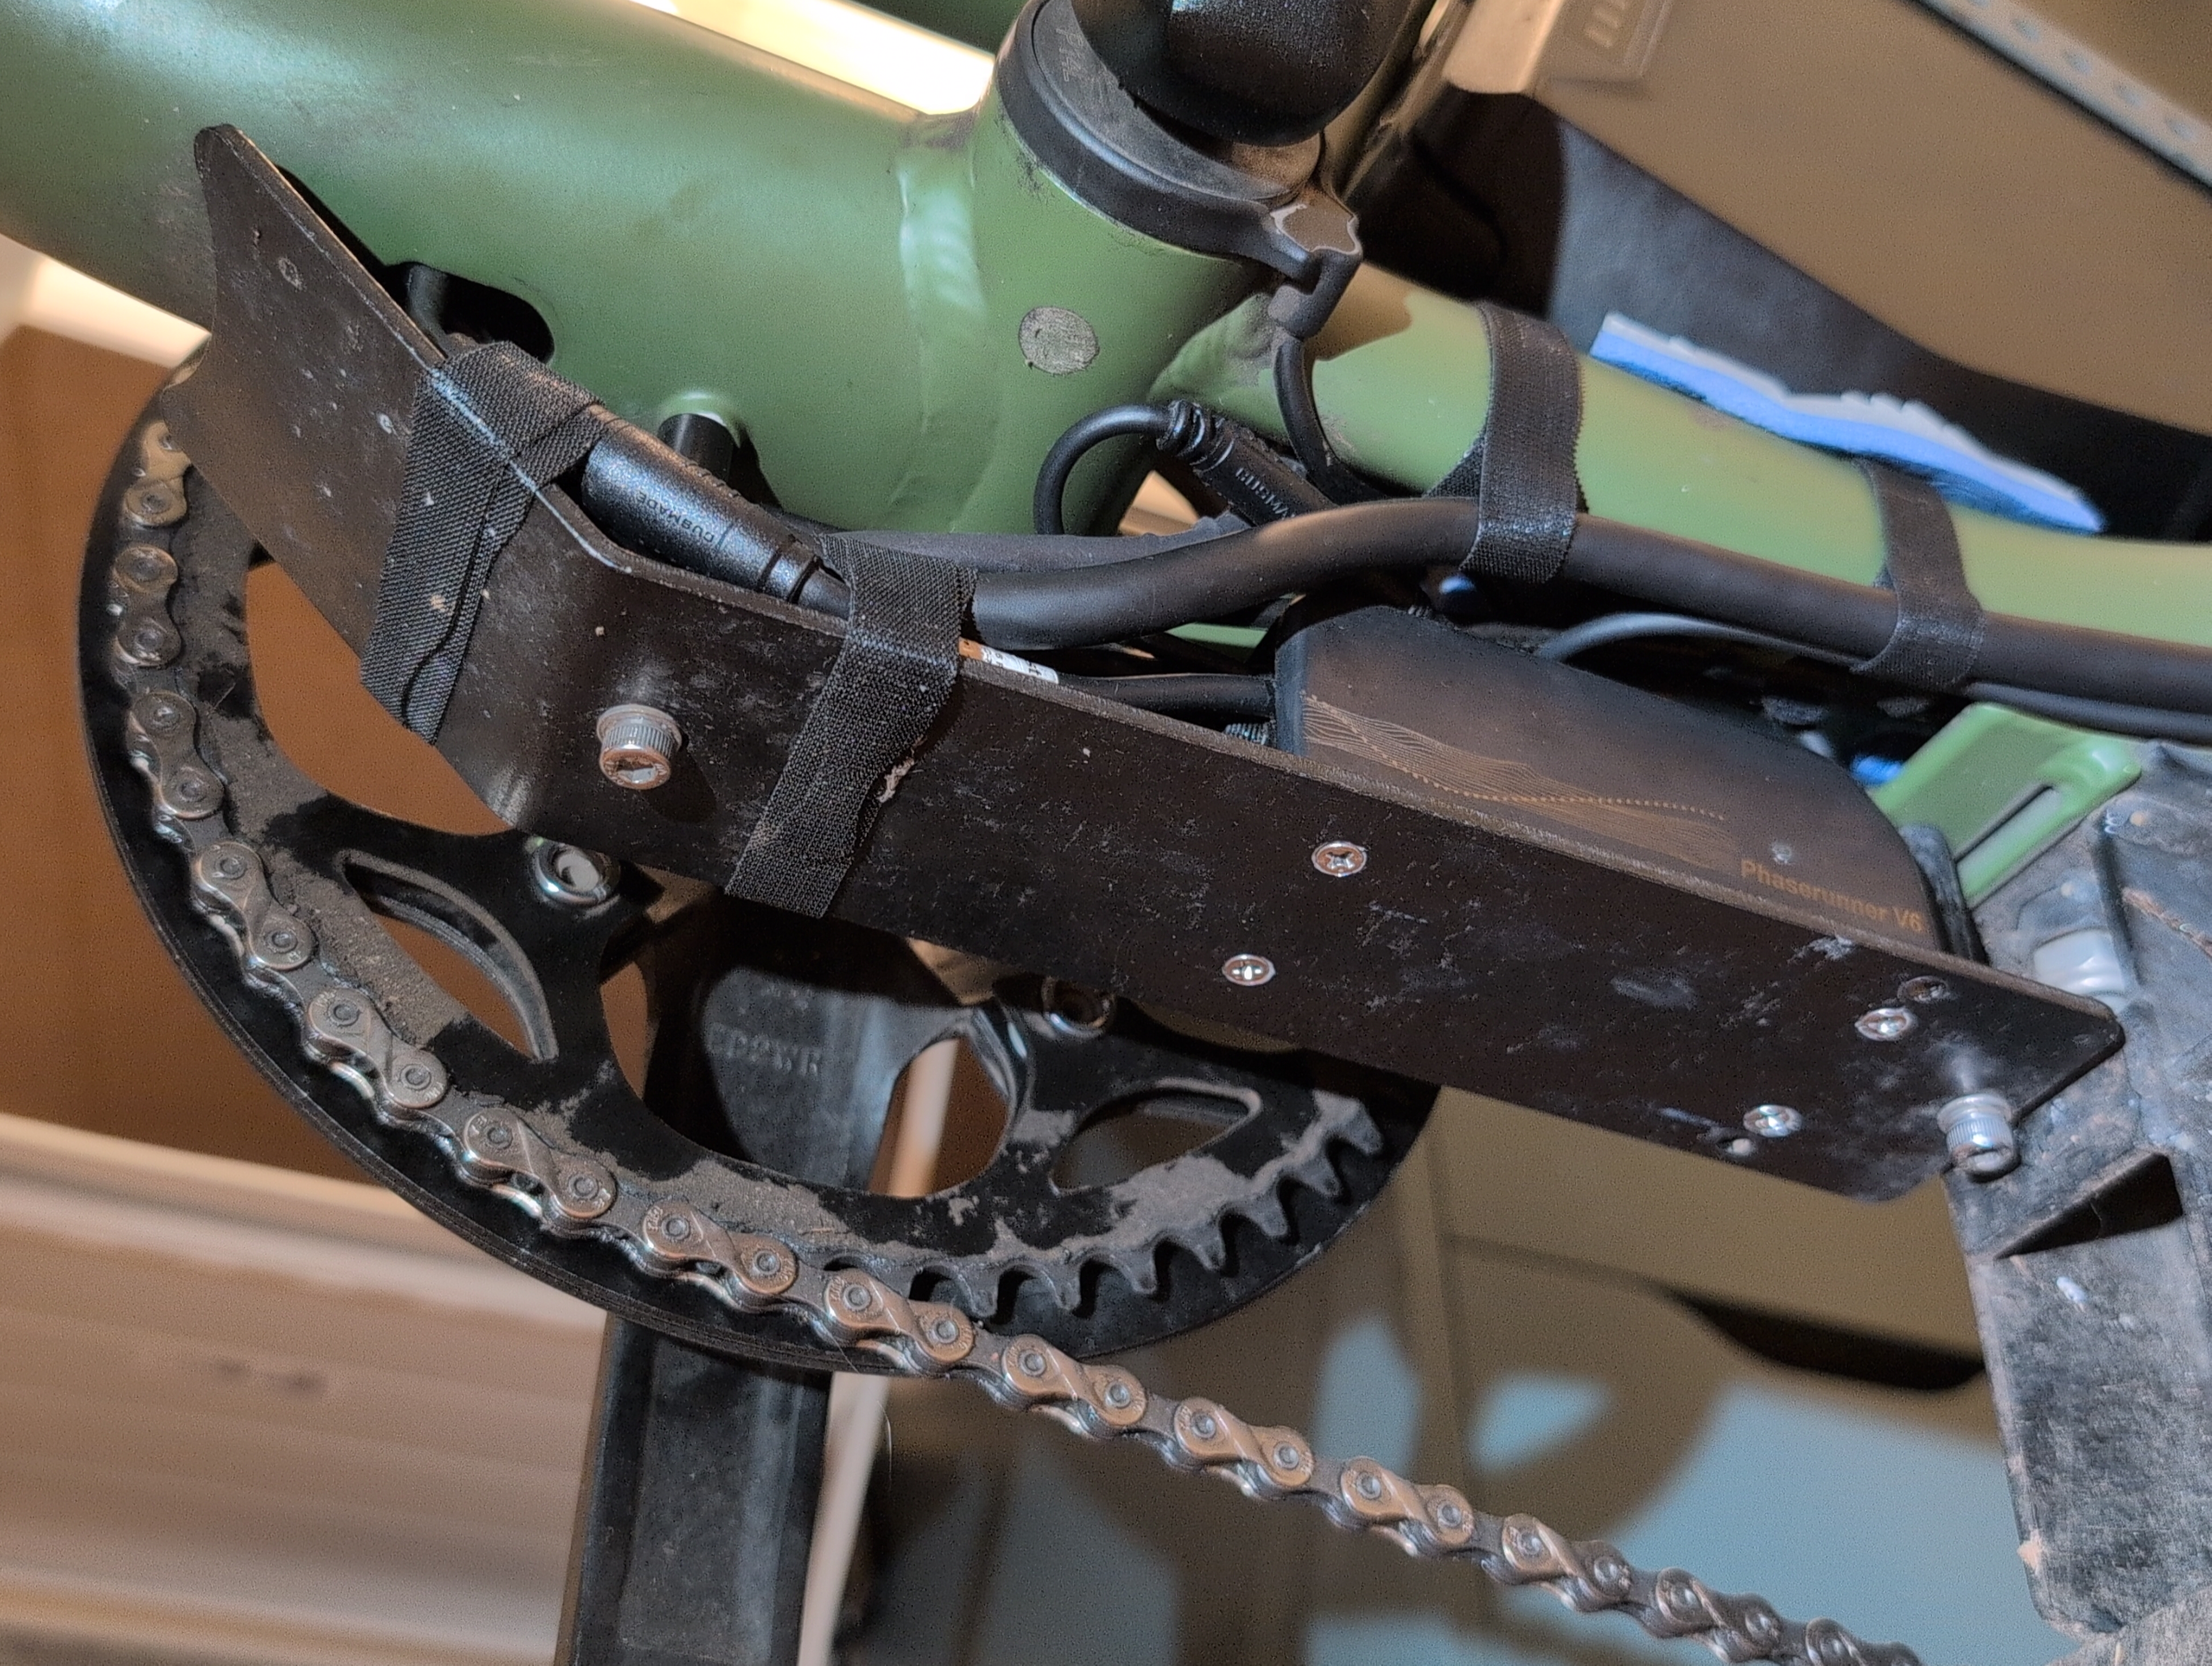
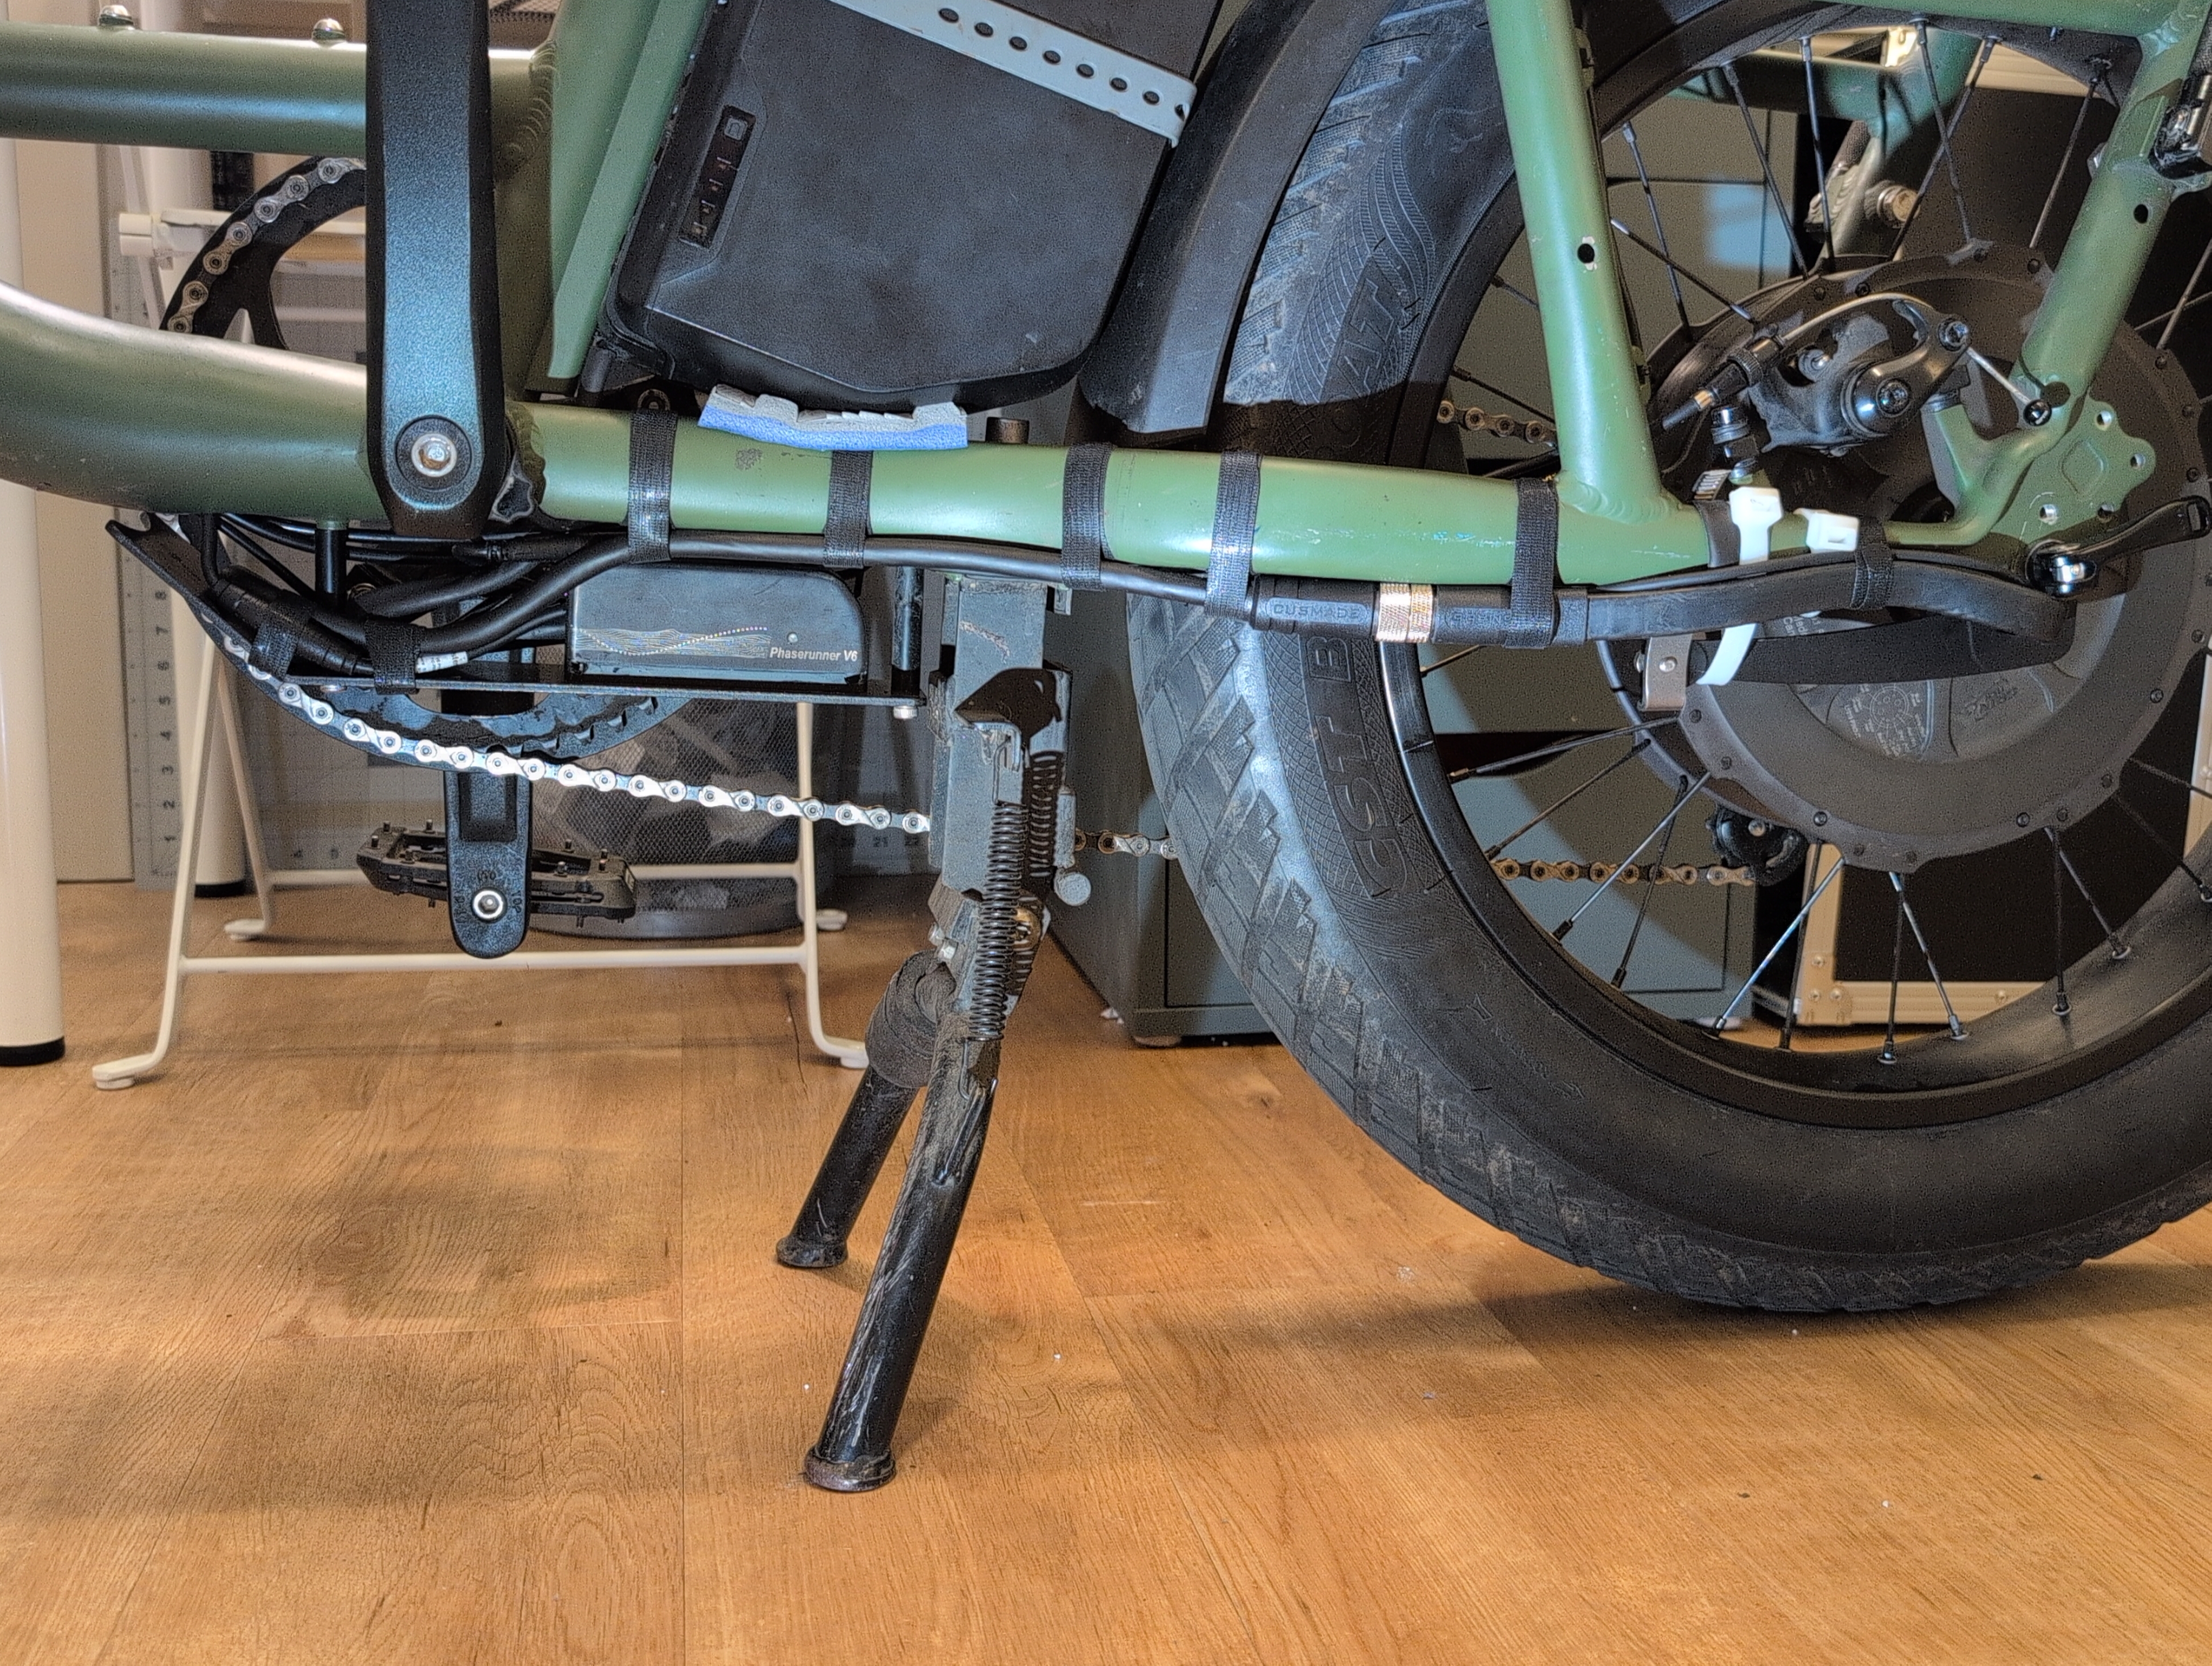
The RadRunner's original motor controller is mounted to an aluminum "skid plate" underneath the bottom bracket, and this seems like a fine place for the Phaserunner controller. I bought the Phaserunner heat sink kit, but used the heat sink only as a template for drilling new holes in the RR's skid plate. With some countersinking in these holes, the screws included in the kit work perfectly to secure the controller to the plate. The skid plate is the heat sink now.
I don't particularly expect to be pushing controller output at the thermal limits, but I do like my electronics to stay cool.

The battery pack has a 10-inch cable terminated with a female XT60 connector. This plugs right into the Phaserunner and it could have been even shorter. Only once did I accidentally plug it in with the battery switched on, and hear the "pop" of an arc from inrush current. Oops!
For managing excess cables, the area between the battery, chain stays, and skid plate is well-protected and easy to access. I secured the motor and torque sensor cables under the chainstay with velcro cable ties. I don't see these on other e-bike builds, but they are great for cables that you'll need to remove and re-install when (e.g.) fixing a flat tire.

I considered routing the motor and torque sensor cable inboard of the chainstay, but there isn't enough clearance between the fat tire and the fat L1019 connector, and the brake rotor might also interfere (if I install one again). I might figure out a guard for area where the cable exits the motor and bends around, as it could snag on something at a public bike rack. But it's fine for now.

The frame has internal routing for every cable going to the front of the bike. While removing the original controller, I used its harness cable as a fish wire to thread a shifter cable through the frame. Then I flossed that shifter cable back and forth to pull the Superharness and tail light cable through the frame as well. It was only mildly annoying. I tore some flimsy rubber grommets where cables enter and leave the frame, but it doesn't seem like a problem as the holes in the frame don't have sharp edges.

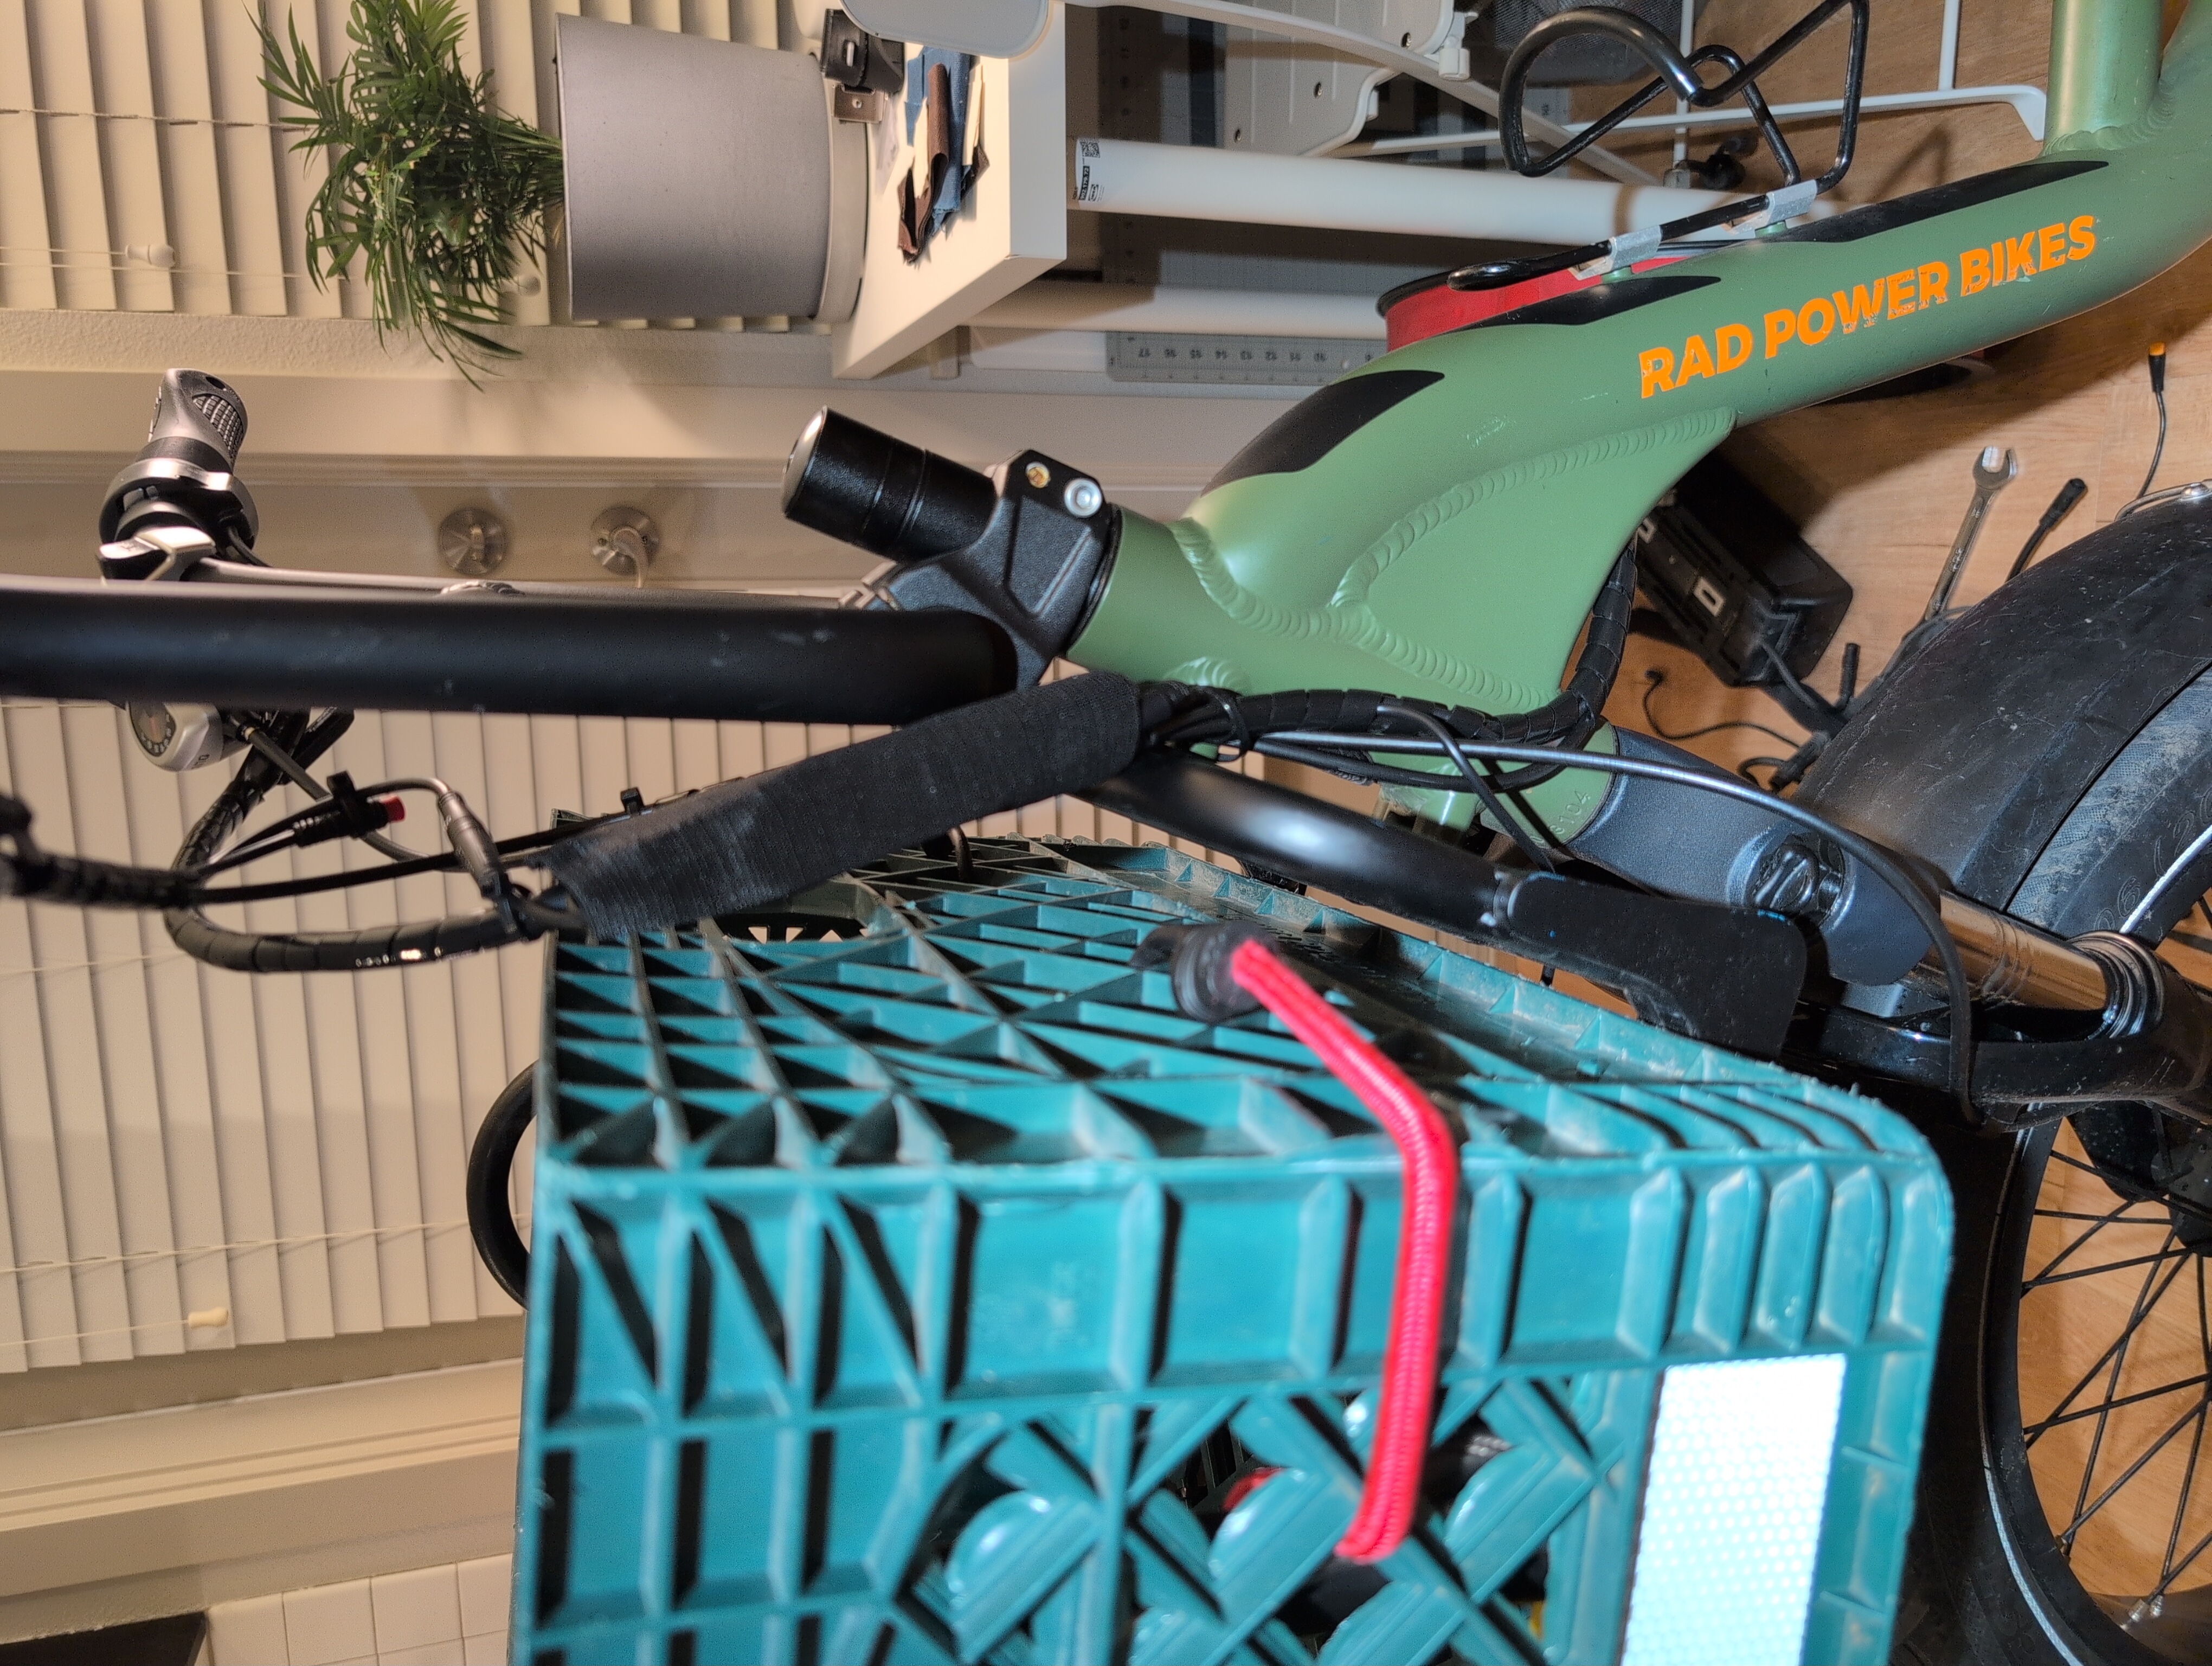
Up in the cockpit the cables are only mildly goofy. It was my first time using spiral wrap to manage wiring, and it's much nicer to work with than corrugated split cable sheath or zip ties.

A stretchy velcro wrap covers excess loops of cable and the Superharness, so it's easy to access the diagnostic LEDs, but more tidy and concealed most of the time. Grin gives you a bracket to mount the Superharness with your stem spacers. I tried this and it worked, but it looked like an octopus sitting on the handlebar stem.
There is no place on the Superharness to attach the original front brake lever's motor cutoff input, but I'm not worried about it.
I may shorten the 180 cm extension cable to the front light, presently it is folded many times and zip-tied underneath the front rack. But skipping that, I was able to finish this build with no wire stripping, crimping, or soldering whatsoever!
Build Notes: Acoustic Drivetrain

Given the Grin motor's HG freehub body, I also decided to convert the bike from single-speed to a 7-speed cassette. I chose 7-speed mostly to match the RadRunner Plus configuration, hoping for an easy installation. This includes the SL-FT55-7R, a uniquely dorky shifter whose touch points don't interfere with the additional diameter that a twist throttle adds to the handlebar. I didn't expect to be shifting a lot with this kind of bike, so 9+ gears seemed silly when I previously had only one.
The motor kit came with a 1 mm cassette spacer but I needed a ~5.5mm taller stack to fill out the width of a 9+ speed freehub body. The LBS was happy to furnish more spacers and then the cassette snugged right up. The derailleur mounted up in place of the original RadRunner chain tensioner. At this point I could make a chain (using 128 links, 12 more than a standard chain) and index the derailleur.
I opted for a Microshift short-cage derailleur, thinking it would keep the chain further from the ground. It's tidy and enough for the 11-32 tooth cassette, But the tension is weak and the long chain bounces hilariously easily, so I may swap in a clutch derailleur.
With the chainring in its original location on the cranks, the outside of the chain rubs on the inside of the "seat stay" when the chain is in the highest 2-3 gears on the 7-speed cassette. I expect to use these gears more than any others, so I needed to move the chainring and/or cassette further inboard. The chainring has chain guards on both sides (and bolts/spacers for a triple), so it was easy to swap the position of guards and spacers to move the chainring to the very innermost position.


This lost me use of the inner chain guard (which may lead to the chain falling off more easily), but preserves the outer one that keeps your pants clean. Now I can use up to 6th of 7 gears with no rubbing on the frame. To access the tallest 7th gear, I could buy a bottom bracket with 10 mm less spindle, though that would worsen the chainline. It's almost like I need to move the cassette inboard, but the smallest cog has splines that terminate at half-depth and prevent it from going fully onto the freehub body, so I can't move some of the spacers from the other side of the cassette (to go between the cassette and lockring).
Also, after moving the chainring inward the chain rubs against the fender in the lowest 2-3 gears. I eventually cut a little notch in the plastic fender to make space.
In any case, 7-speed was wise because a 9-speed cassette would be 5 mm wider, making the chain clearance issue even worse. I now suspect chain clearance is the reason chuyskywalker found 5 mm more space between the dropouts on his RadRunner Plus. It might also be why Rad Power Bikes didn't use anything physically wider than a 7-speed cassette on their whole lineup of this era.
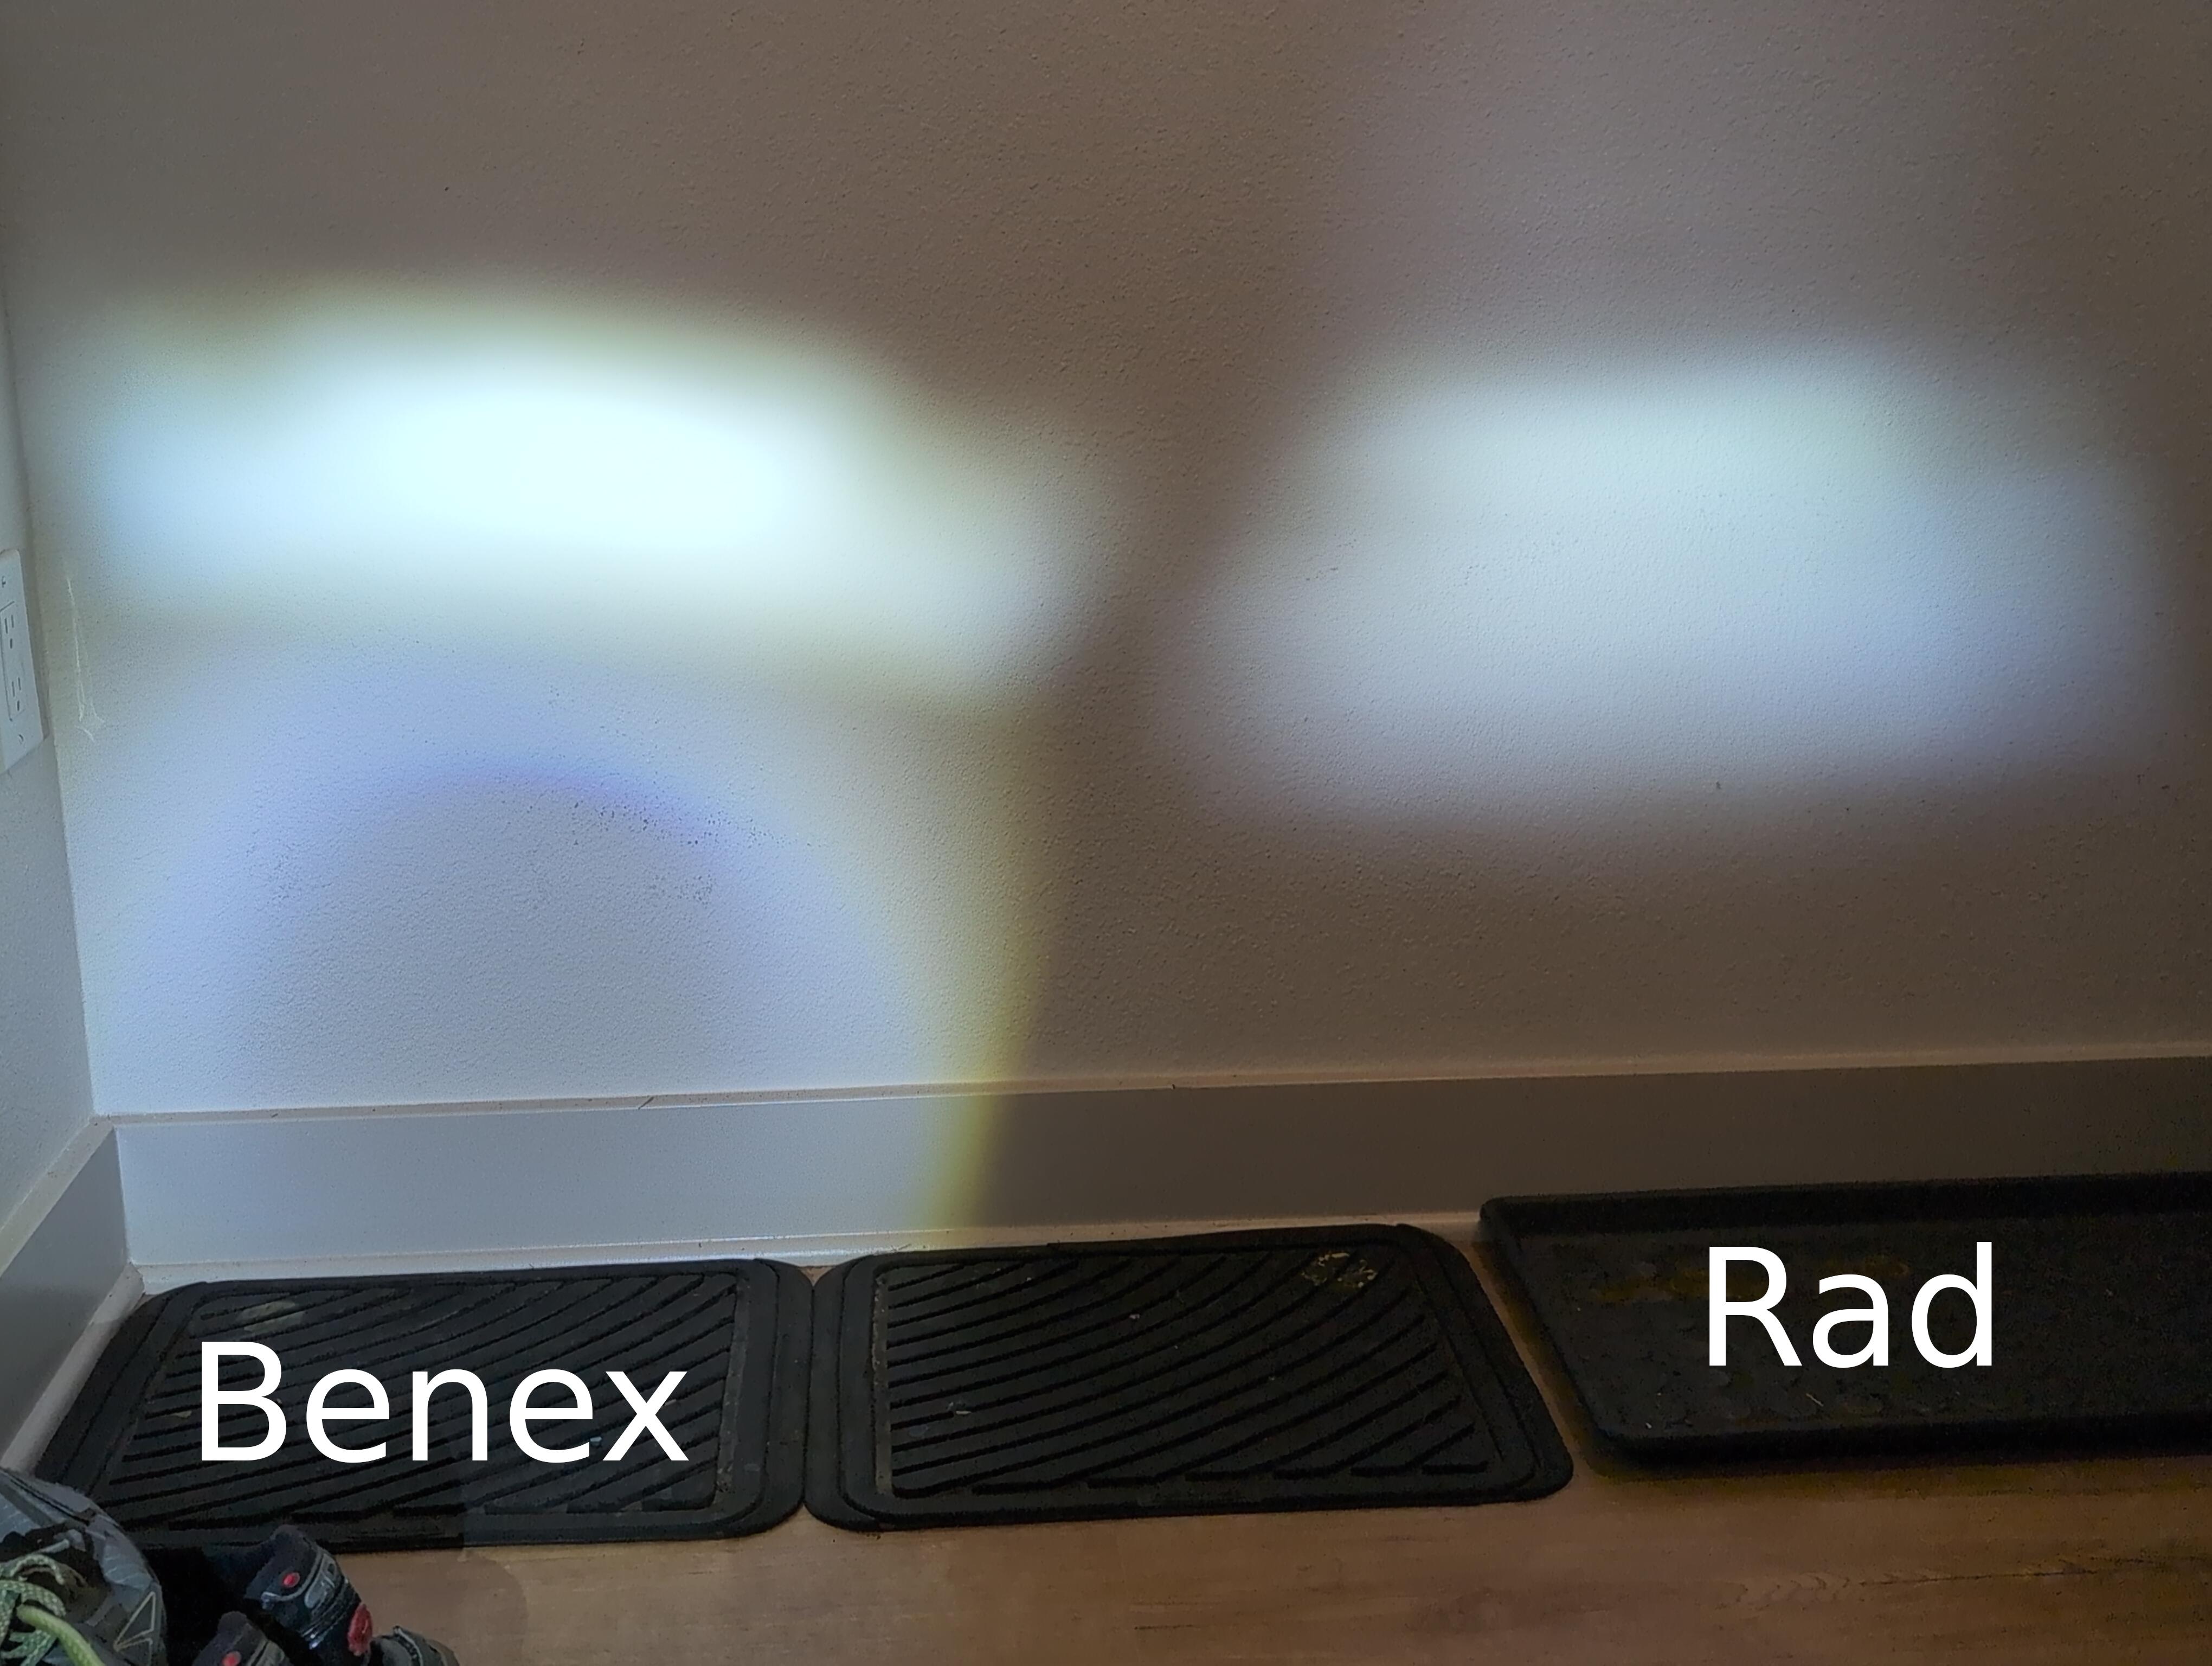
Build Notes: Lighting
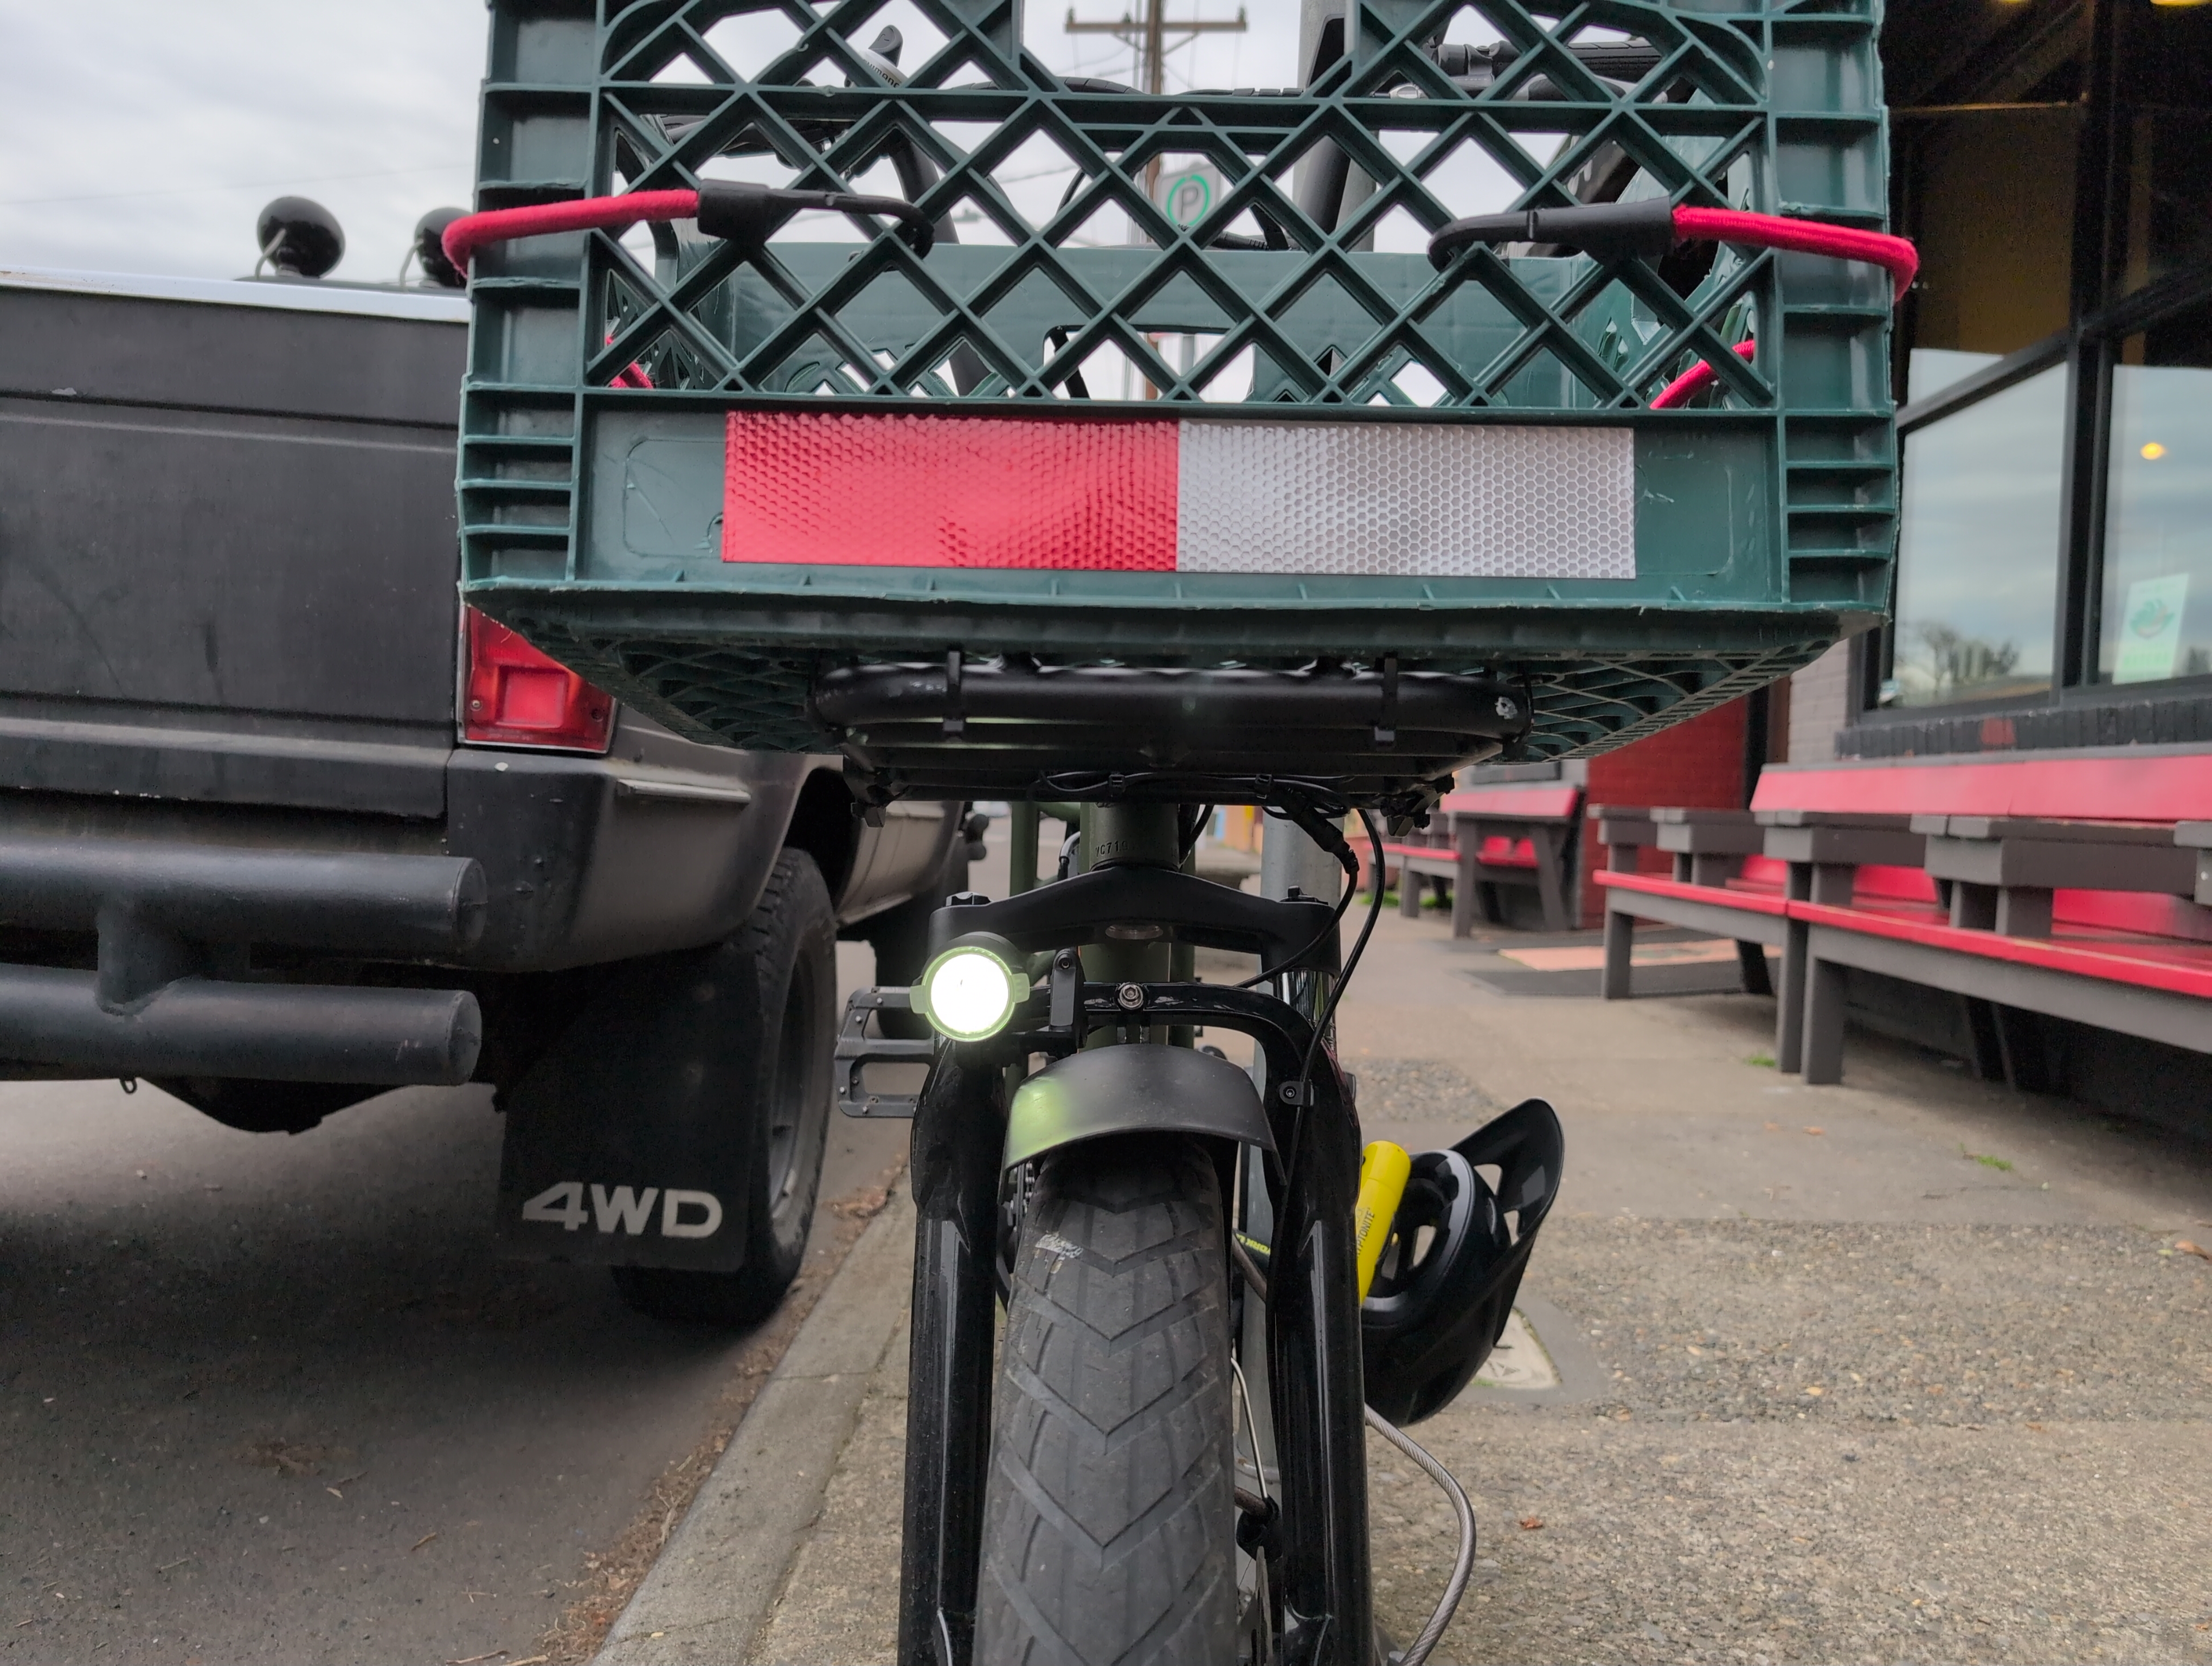
The Benex light output is a big upgrade from the stock RadRunner headlight. The upper cutoff is sharper, the beam center is much brighter, and there is much more downward spill to the road immediately in front of you.

My only nitpick with both lights is there isn't much sideways spill. This is fine with mounting locations that track with the bike's steering, but the original RadRunner bracket was on the underside of the headtube-mounted rack, which doesn't point through corners when you're taking a turn. I resolved this by moving the light to the fork arch, held on with the included handlebar mount.

The Rokim rear light is good too! Not the brightest I've seen on a bicycle, but much brighter than the stock RadRunner tail light.

The Superharness' default rear light behavior (blinking when on, steady during braking input) is fine. I'd slightly prefer blinking all the time (for bicycle rather than moto/car vibes) but this doesn't seem to be one of the supported rear port control modes.
Riding Notes
The direct-drive Grin motor is extremely quiet compared to the whiny original geared Bafang motor. It happily pulled me up the steepest grades I could find. This won't be any surprise to the ES crowd, but subjectively, power delivery has three regimes:
1. You get moving without hesitation, though in the first few MPH there is a subtle, transient judder. It's like a milder form of the judder when you get stickshift car moving in second gear instead of first. I don't find it bothersome, and it's still a more assertive launch than the bike's original setup -- especially because Rad's controller had a hilariously slow torque ramping period when you apply throttle.
2. Starting at maybe 6-8 MPH with this setup, power delivery is buttery smooth and very strong when requested. You reach "class 3" speed quickly, and shoot way past unless the Phaserunner is configured for that regulatory envelope.
3. Acceleration seems to slow only when you're a couple MPH short of the top speed given the load, back-EMF, and voltage conditions.
"So cmart, how fast does it go?"
When, uh, configured for a closed off-highway course? My GPS watch shows 37-38 MPH on flat ground. Grin's motor simulator was spot-on predicting this. It feels happy to cruise at 35, even up a moderate grade.
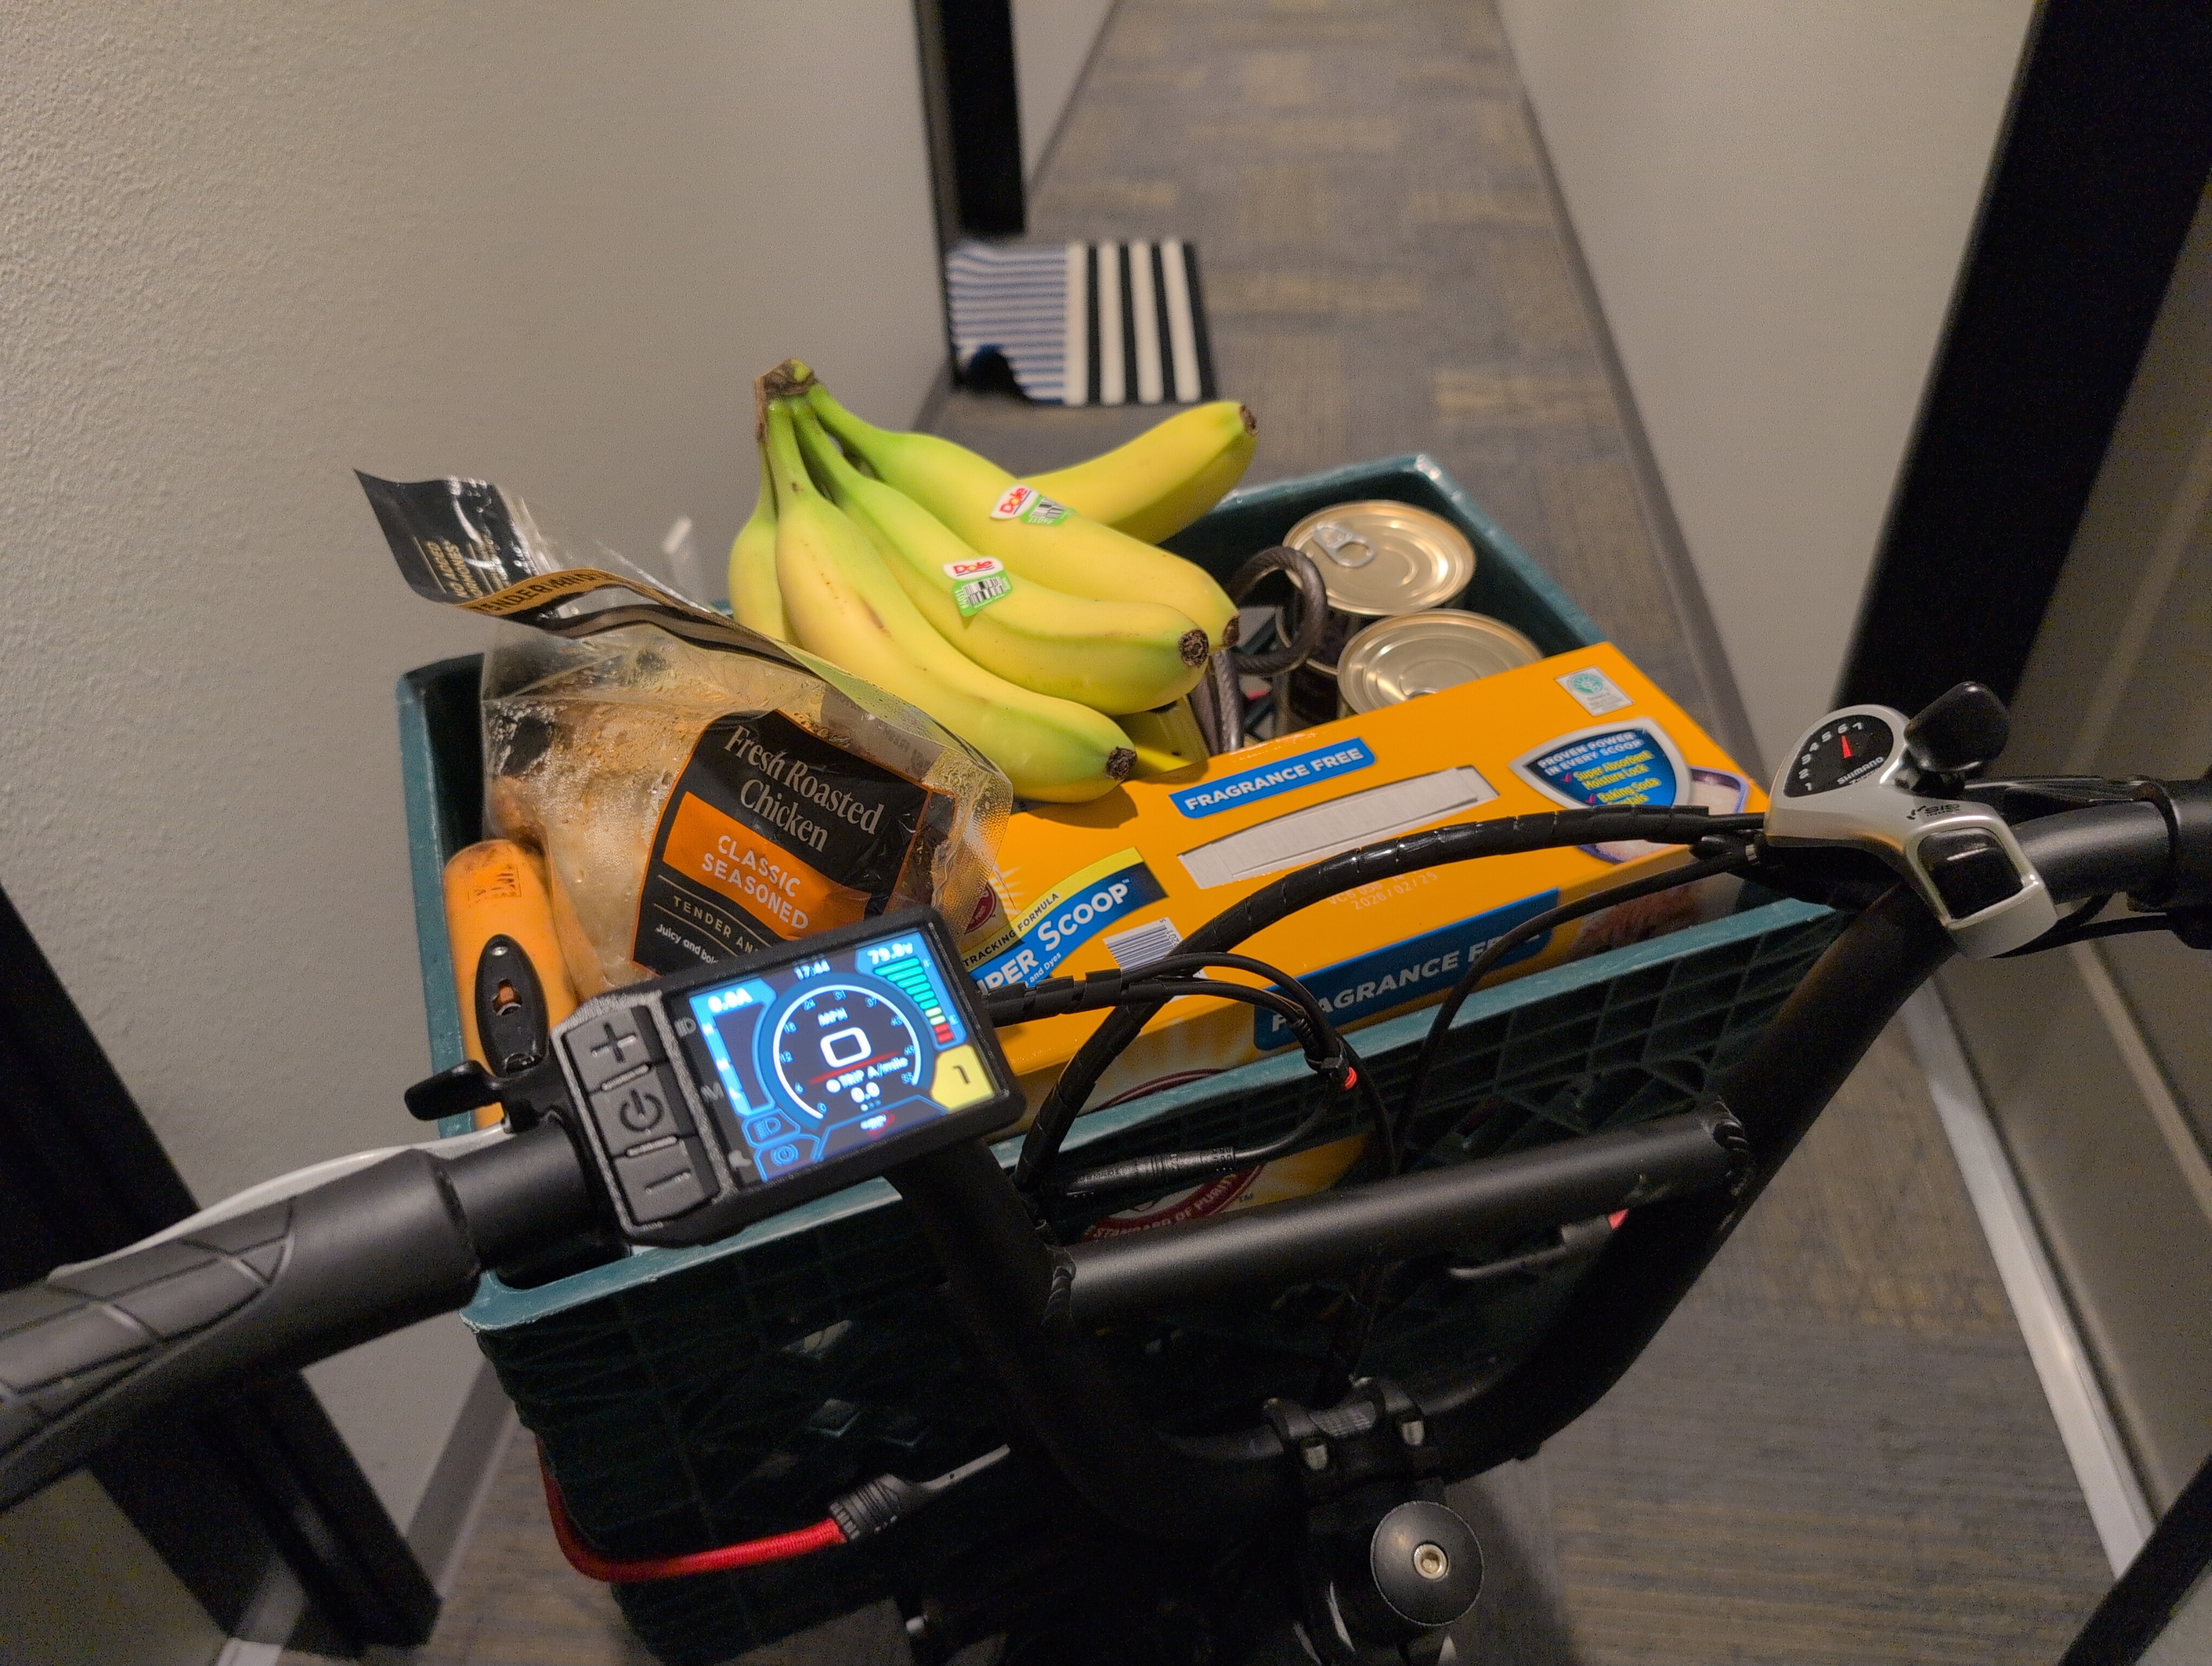
This bike has a fork wobble at certain speeds, only when you take one hand off the bars. Removing the XL milk crate from the headtube-mounted rack might fix this, but the milk crate is the most important part of the whole bike.

Regarding battery current: depending which data sheet you look at, the Samsung 50G cells support 2C "continuous" and 3C "not for continuous" discharge, or 3C continuous up to 30°C and 2C continuous up to 60°C, with the caveat that "Max. discharge current condition does not guarantee the cycle life". I'm presently allowing the Phaserunner to pull up to 3C (58.2 amps) from the battery. In real use it only pulls heavy current for a few seconds (if accelerating hard), then cruises way below 2C. The exception is very steep hills, in which case I'll need to watch the amps readout on the display to keep it under 40? Though I imagine thermal rollback happening due to motor temp before the battery gets hot? It's hard to find a steep enough hill to test this.
I have not tried enabling field weakening because at 37 MPH it's already pushing 2 kilowatts of air out of the way, and it seems stupid to go any faster on a bicycle. It's mildly stupid to go faster than 28 MPH (class 3) so I'll try to avoid even that routinely.
But I will say this setup begs you, begs you to think motorcycle thoughts. It tugs at your root chakra whispering "we could pass that car" and "why are you still pedaling" and "we don't need to use the bike lane". The instant torque tries to melt away whatever you promised yourself about being responsible. Long ago I rode a friend's Zero DSR a couple of times, including a few four-second 0-60 pulls. This bike doesn't go that fast, but at urban speeds it's the closest feeling I've had before.
Regen works really well. It's enough to do all of my "normal" braking. It will skid the rear wheel on wet pavement (as I discovered mid-turn, whee). Grin's analog e-brake lever is easy to modulate. You can regen at your desired intensity all the way to a stop, even going down a hill. Thoughtfully, it sends its minimum voltage about halfway through the lever travel, and it can pull a mechanical brake cable in addition to sending a regen signal. So, you can set up the disc caliper to start grabbing around the point of maximum regen, and have enough lever travel to also modulate the friction brake on top (and probably skid at that point).
The bi-directional throttle is a great idea, but this bi-directional throttle from Grin feels too sensitive, especially in the regen direction. It goes from 0.97 to 0.04 volts in just a few millimeters. You can twist it further mechanically, but the voltage doesn't decrease further, so I don't think you can fix this sensitivity by adjusting the Throttle + Brake Parameters in the Phaserunner Suite. The most you could probably do is play with ramp time or limit the maximum amount of regen available. Since the analog e-brake lever doesn't have this sensitivity problem, I think I'll switch back a uni-directional half-twist throttle. I briefly connected the original RadRunner throttle but the Superharness didn't seem to recognize its signal. Maybe I need to get out the soldering gear and change the pins around.
Electronic freewheeling works a treat. I adjusted it until the wheel spins down nice and gently when off the ground.
Torque Sensing Notes
The default Pedalec Motoring Torque Ramp was set to 500 ms in the positive direction, and 50 ms in the negative direction. I assume the intention behind this is immediate motor cutoff when you stop pedaling, but most people's pedaling force is not uniform throughout the crank rotation -- a bit stompy instead of pure spinny, and in my experience a 50 ms negative ramp makes the motor cut out too eagerly. You get a surge of assist when you step on the cranks from a stop (in a tall gear), but when pedaling gently at cruising speed with low-torque periods at the top and bottom of each stroke, the motor feels stubborn about coming on at all, even at high assist multipliers, unless you push unnaturally hard through the top and bottom of crank rotation.
I've been trying different values of torque ramp parameters, and the most natural feeling so far is 1000 ms in both the positive and negative directions. At a worst case, if pedaling at a very slow (<60 RPM) cadence, your legs have a >500 ms periodicity of torque output, and the motor torque feels a bit wavy. With an 'actual cycling' cadence (like 80+ RPM) the assist feels very smooth across the pedal rotation, and still responds quickly to your intention. It feels as good as everyone says a mid-drive setup is. When I stop pedaling, I do not notice the sub-second overhang of motor torque.
Separately, the torque seen by the freehub body varies with the gear that you're in, so for a given pedaling effort and assist setting, the assist feels stronger in shorter gears than in taller ones. You can compensate by changing assist levels on the display when you shift across the cassette, but I have an idea to improve this UX.
The motor output could scale according to the rider's transmitted power (watts) instead of torque (newton-meters). The controller knows the cassette/motor RPM and force on the sensor, and that's all you need to derive power at the cranks. Scaling motor power from the rider's power (instead of motor torque from cassette torque) may result in a more consistent assist feeling across the whole range of gear ratios, similar to what I would expect a bottom bracket torque sensor to feel like. No idea if the controller firmware could be programmed to do this, but it doesn't seem to be an option right now.
Finally, my torque sensor sends 0.74 volts at no load, so I reduced the offset from the default 0.8 volts -- no idea how much this matters.
Final Thoughts
The motor upgrade added five pounds to the rear wheel, and the new battery weighs eight pounds more than the original. Now the bike weighs 92 pounds (39 pounds on the front wheel and 53 on the rear). I don't notice this while riding, only when lifting the back of the bike to maneuver it indoors.
I'm trying not to write a love letter here, but Grin's engineering and component integration is excellent, as is their ecosystem of videos, documentation, software, and support. Very DIY-friendly company to work with, and after 20 years they're still iterating and developing new products.
I also appreciate Electric Bike Laboratory's transparency to show the complete "how it's made" video for their battery pack, and open-sourcing their cell placement jig. It's reassuring to see the care and attention that goes into building this black box full of angry pixies.
If you have one of these bikes and want to do this project, yes, go for it. So far, I would choose all the same components again (except not the bi-directional throttle). Just make certain that your disc rotor does not touch the motor cable at all, not even slightly. File it down if you need to.
Three years ago I bought the oldest, most basic model RadRunner from Craigslist. The frame is stout and very capable for its length. It will carry a whole adult passenger on the back plus a load in the front, but it's a normal-size bicycle for maneuvering and storage purposes. It still works perfectly after a lot of hard use, but I decided to upgrade/ruin it with these goals.
- More capable drive system, configurable to
plaid modeUSA Class 3. - Highest-capacity battery that will fit in the original mounting location.
- More comfy (rigid fork with a 20" wheel is harsh).
- Remain unobtrusive, look like a 'regular' RadRunner.
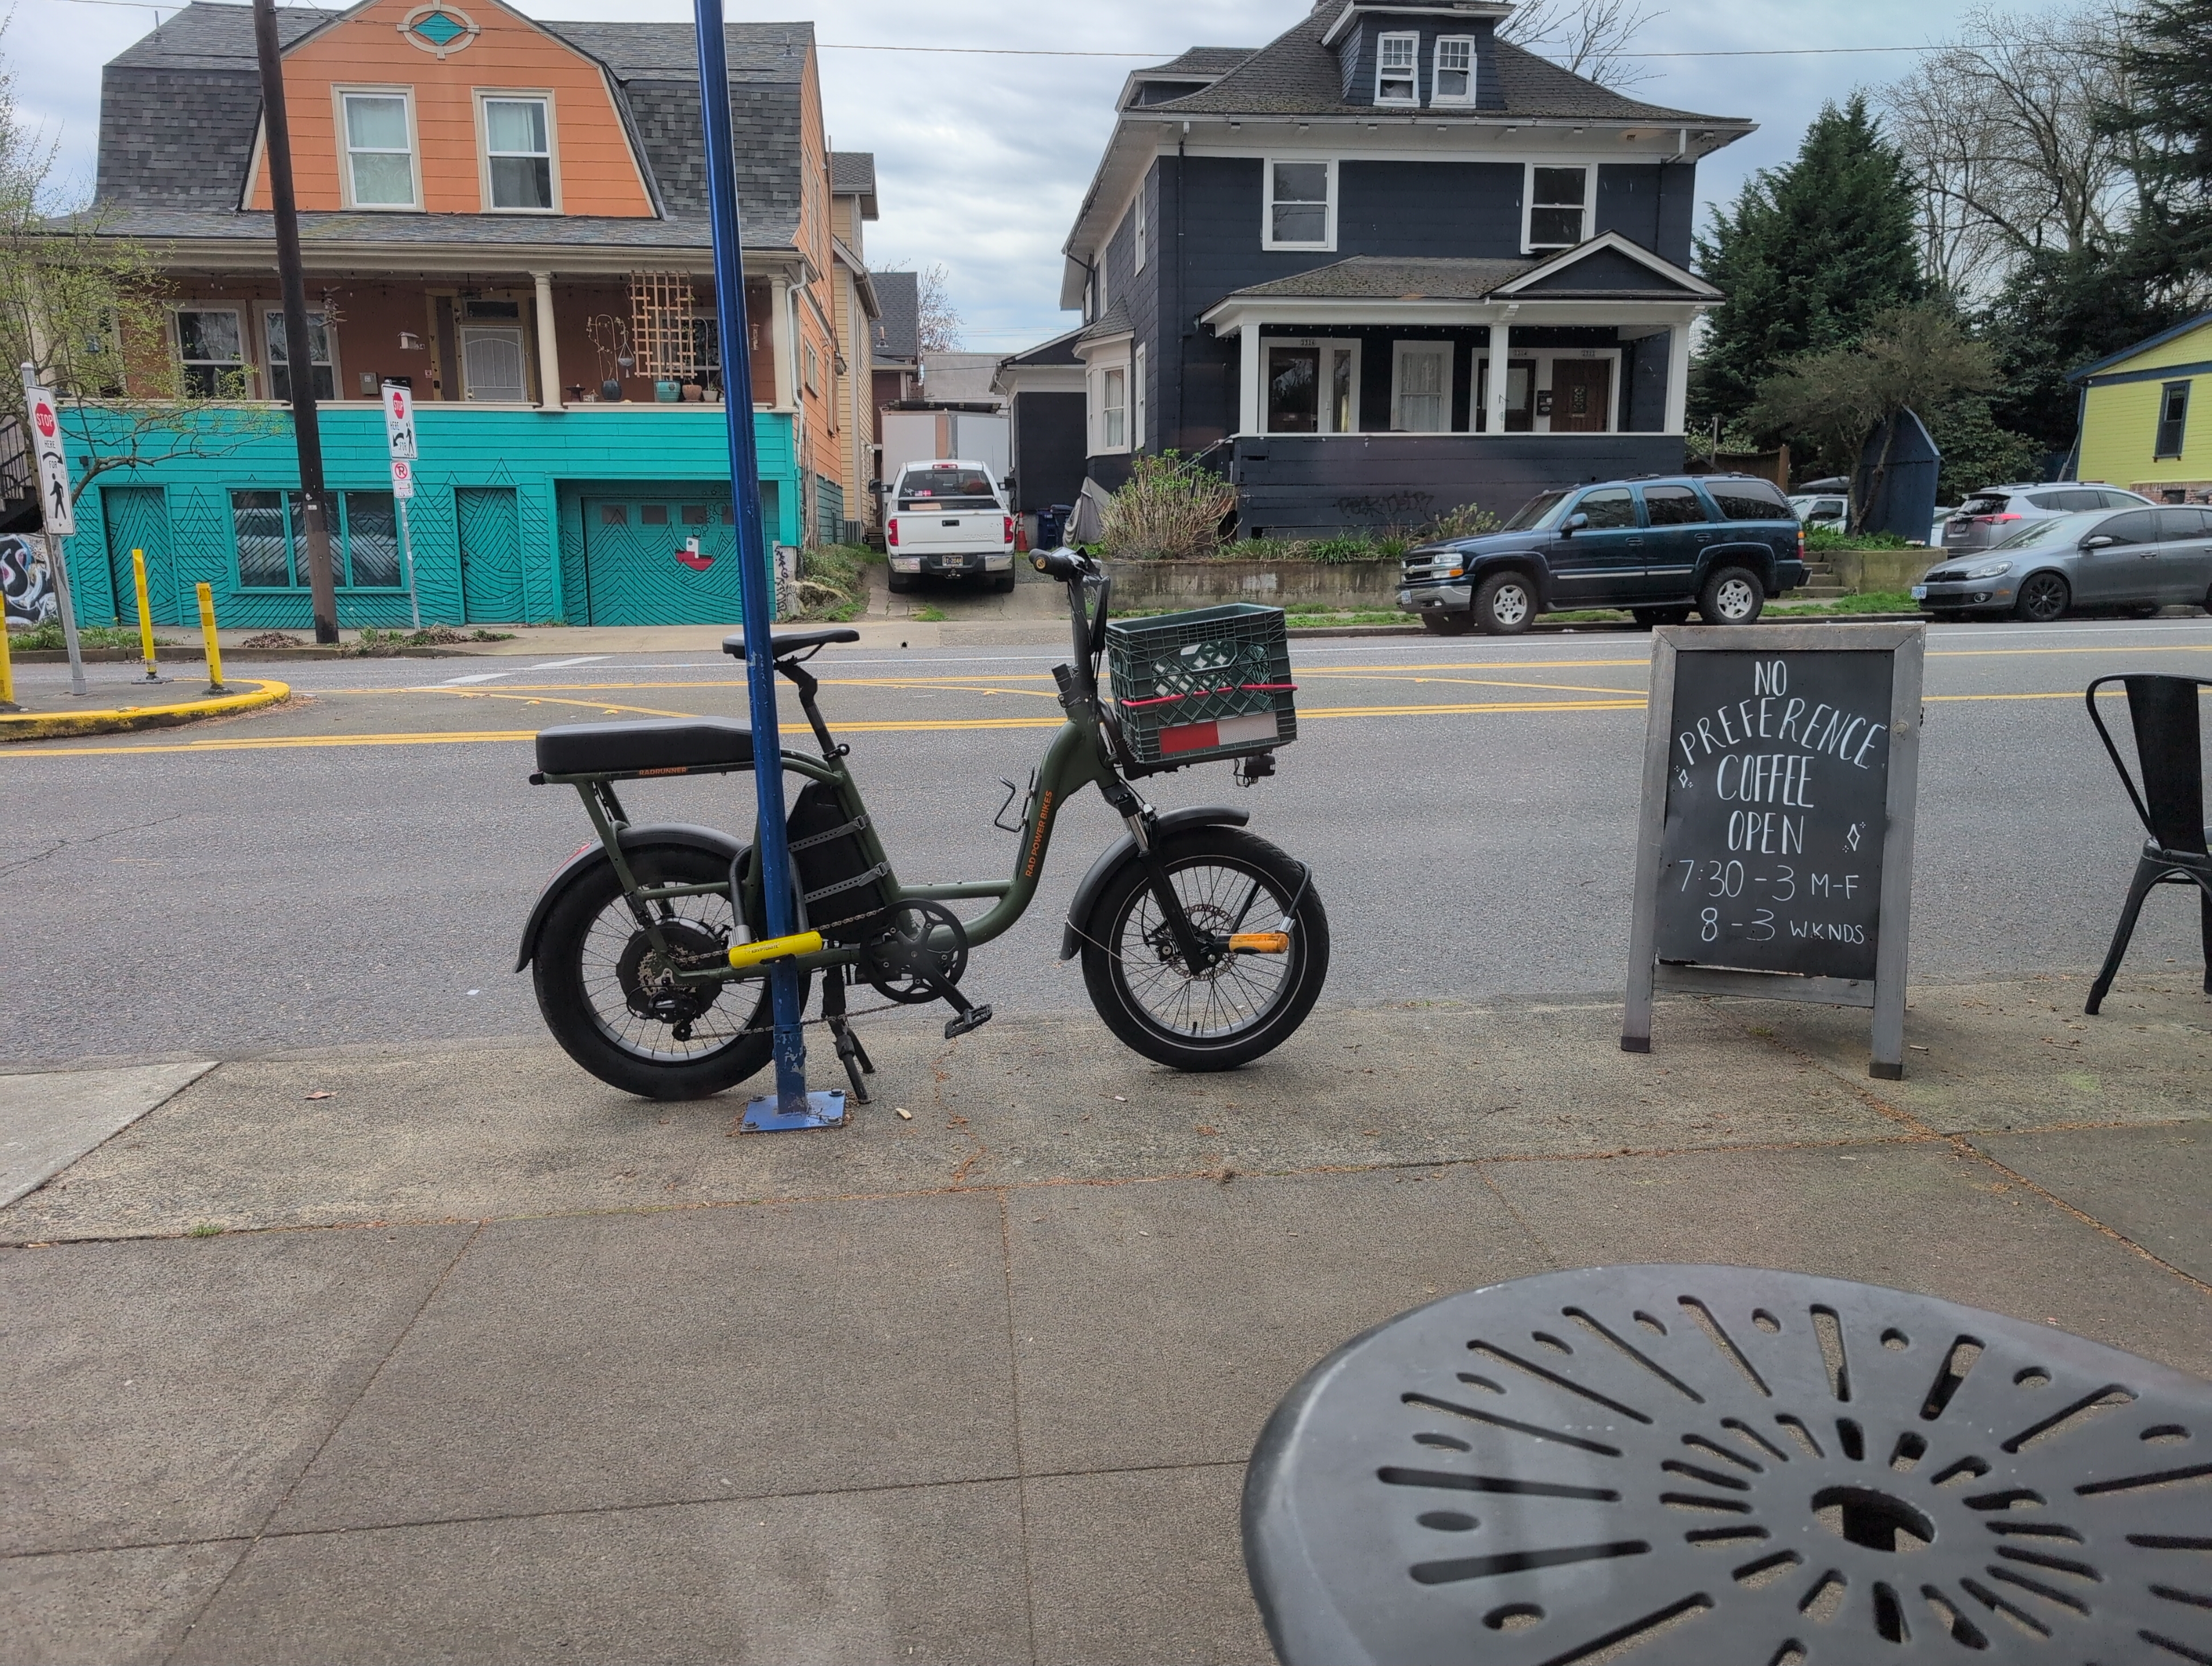
Did I take that photo before or after putting $3k of parts on an $800 used e-bike? Exactly. Did I do a terrible locking job? Certainly.

Component Selection
- Grin Max45 Rear motor, standard winding with Statorade, HG torque sensing freehub, 170 mm QR axle adapter. This frame shape wants a hub motor, and the Max45 looked like the best that money can buy.
- Grin Phaserunner V6 controller.
- Grin Superharness kit with the APT 600C display. I'm using a Superharness instead of the Cycle Analyst because the connectors are all waterproof and it can power the motor's torque sensor when connected to a 72 volt nominal battery. The Cycle Analyst cannot do that without an additional 12 volt power supply spliced into the torque sensor cable, and I wanted a simple, well-sealed wiring and electronics setup for riding around rainy Portland.
- Reention DP7 battery pack built by Electric Bike Laboratory a.k.a. affordableebikes.ca. This is the largest case that will barely fit in the RR's stock battery mounting location. Reention makes this case with holders spaced for 70 cells, but the EBL folks throw away the holders and fit 80 cells in there! This pack has Samsung 50G cells wired in 20S 4P for 72 nominal volts and about 20 Ah.
- Benex headlight and Roxim tail light, both of which can handle a 72 nominal volt battery pack.
- 7-speed cassette drivetrain, upgrading from original single-speed.
- Suspension fork from a RadRunner Plus. Coil sprung, no adjustable damping, but it's fine if your goal is just "comfy".
- 4.0" CST Big Boat rear tire, upgrading from a 3.0" that I've had on there for years. 24 PSI rear feels about right for two people on the bike, and you could run much lessw solo if you want all the squish. A 4.0" front tire would make the bike too tall to rest completely on its center stand. Fortunately, the suspension fork works well enough that 3.0" feels like plenty of volume in the front. The Big Boat has a pretty shallow tread depth and supple casing, so despite lasting for thousands of miles with the RadRunner's original drive system, it may not last long with a stronger motor. The CST Scout seems like the obvious next step as its tread blocks are deeper, but I'm trying not to just build a motorcycle.
Build Notes: Motor
For all the adjustability Grin built into their torque arm frame clamp, this weird frame does not want you to use it. A 'seat stay' meets the chain stay right where the frame clamp wants to rest, and the bead of weld around it blocks the path of any hose clamps.
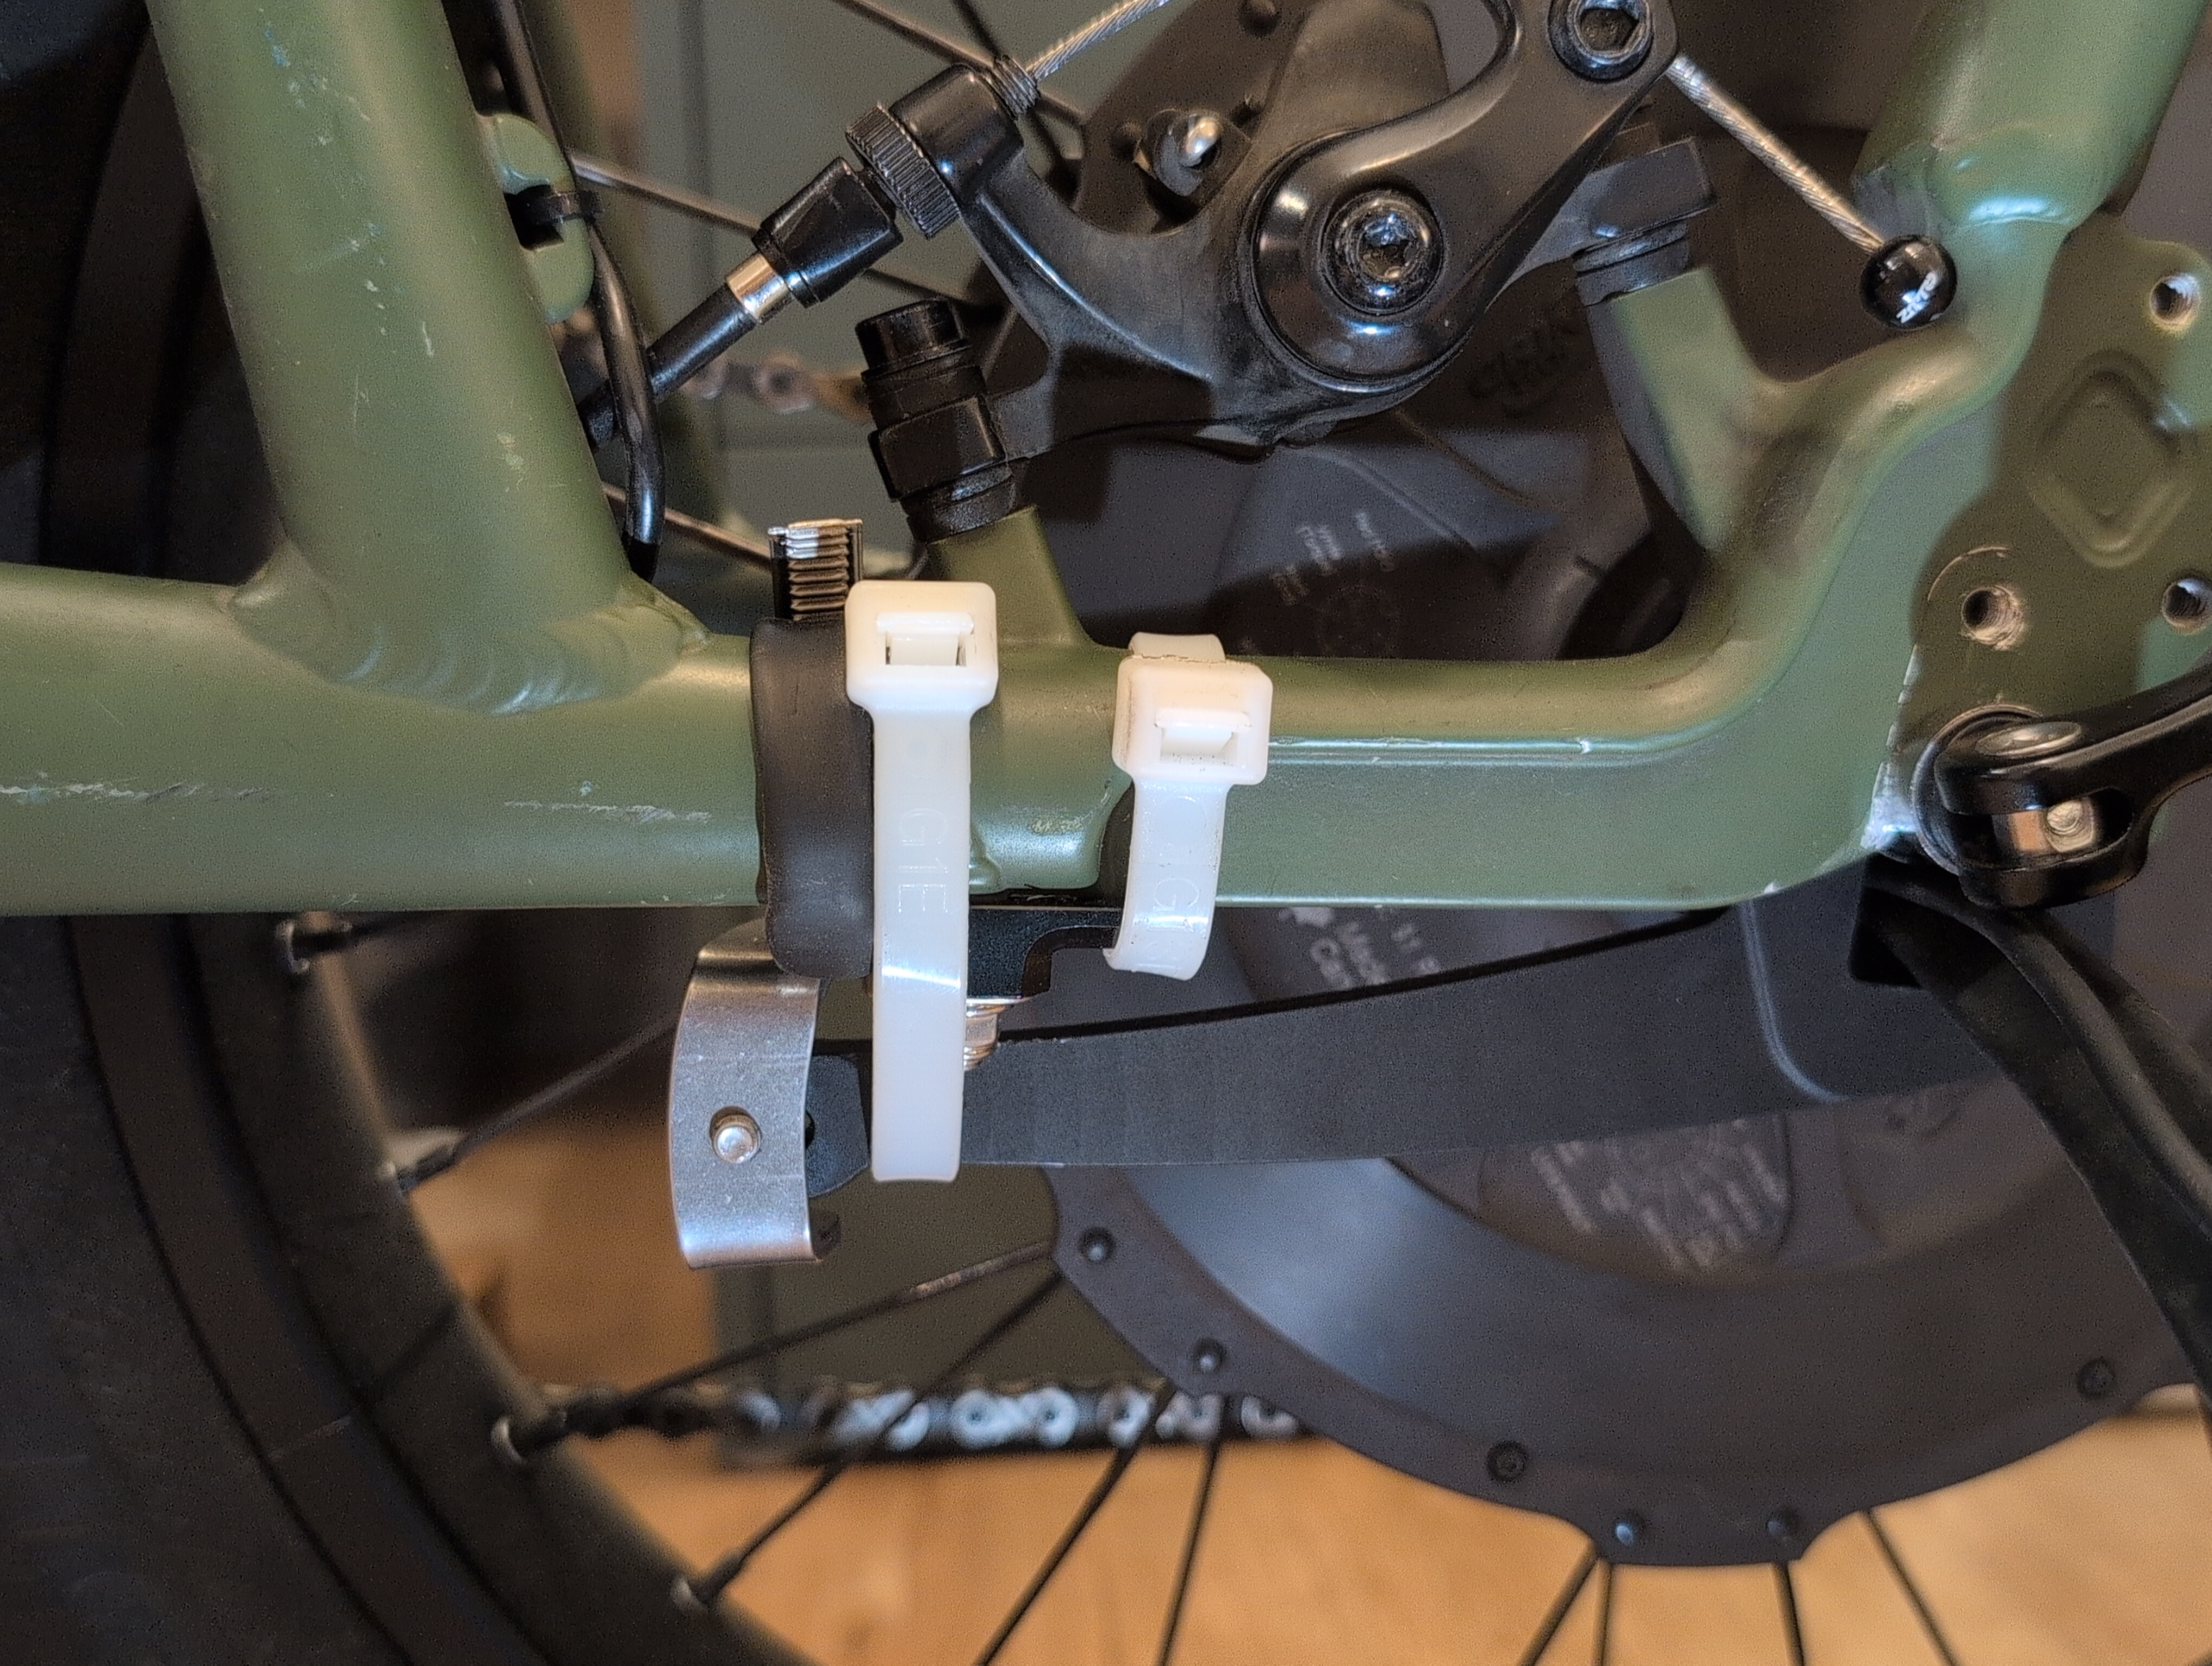
So, I put the frame clamp on backwards. Working around the brake caliper post mount, I got one hose clamp fully on the frame clamp, and one extra heavy zip tie (175 lb. tensile strength, more flexible than hose clamp) halfway onto the other end of the frame clamp. As a backstop, I put another XL zip tie around the torque arm and chainstay. This is not a good long-term solution as UV and fatigue breaks down the plastic in zip ties, but for the moment it is a solid mount, and avoids the forbidden lateral forces on the torque arm.
chuyskywalker here found their RadRunner Plus has a 175 mm dropout width, and machined some custom Max45 axle adapters for this instead of flexing the frame. I would have just flexed my frame as a 2.5 mm deflection at each dropout seems minor. But my non-Plus RadRunner has only 170 mm between the dropouts, so that wasn't necessary. The 170 mm slotted dropout axle adapters fit the frame perfectly.
I installed a Shimano disc rotor that appeared to barely clear the motor cable, or perhaps touched it only slightly. Unfortunately "only slightly" was still too much. In the course of testing the bike (spinning the wheel in the air and riding it around the block), the innermost part of the brake disc wore a groove in the outer sheath of the motor cable, exposing a bit of insulation from the wires inside. Oopsie!
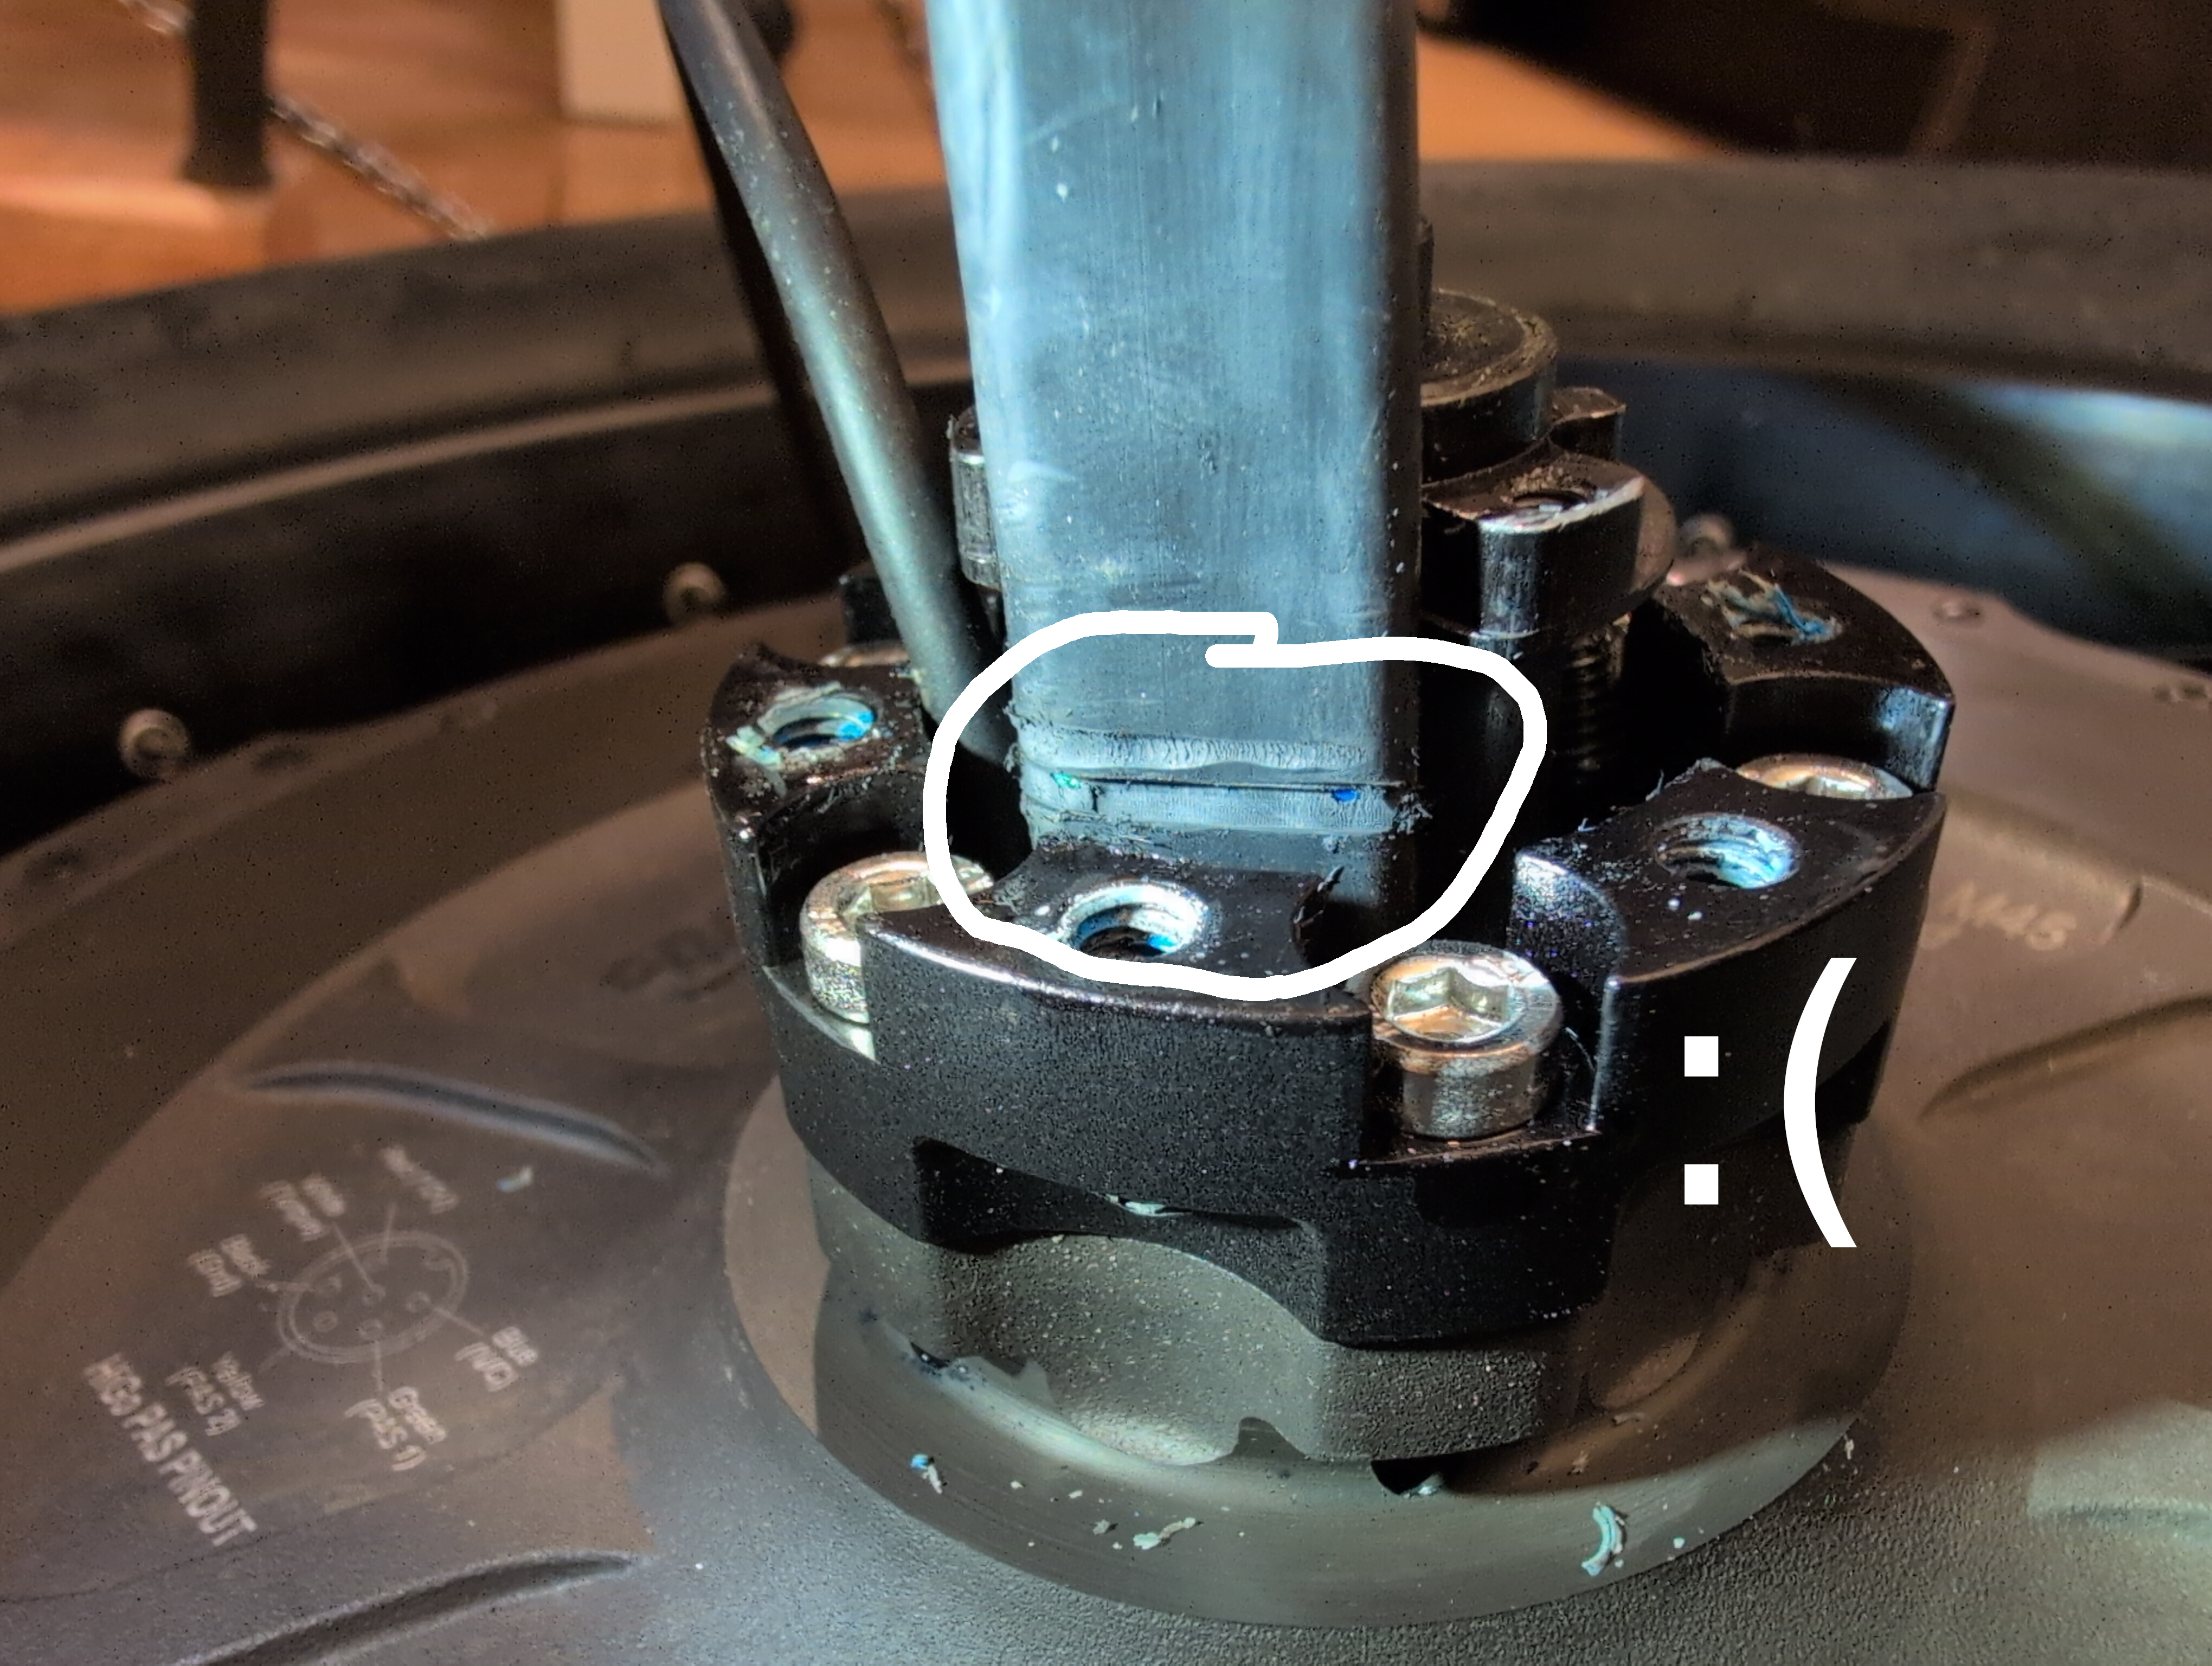
Fortunately I see no exposed conductor, so I don't think it's worth the trouble to replace the motor cable. Grin sells discs that are supposed to clear the cable, but I ended up removing the rotor entirely, and riding for a week with only regenerative braking on the rear wheel. It was still enough to skid the wheel on wet pavement.
Eventually I hand-filed away some material from the rotor and re-installed it on the bike. I also happened to have some Shimano rotor bolts with a ~1 mm smaller diameter head than the Grin-provided bolts. (It seems, from the wear pattern on the motor cable, that those bolt heads also slightly interfered?)
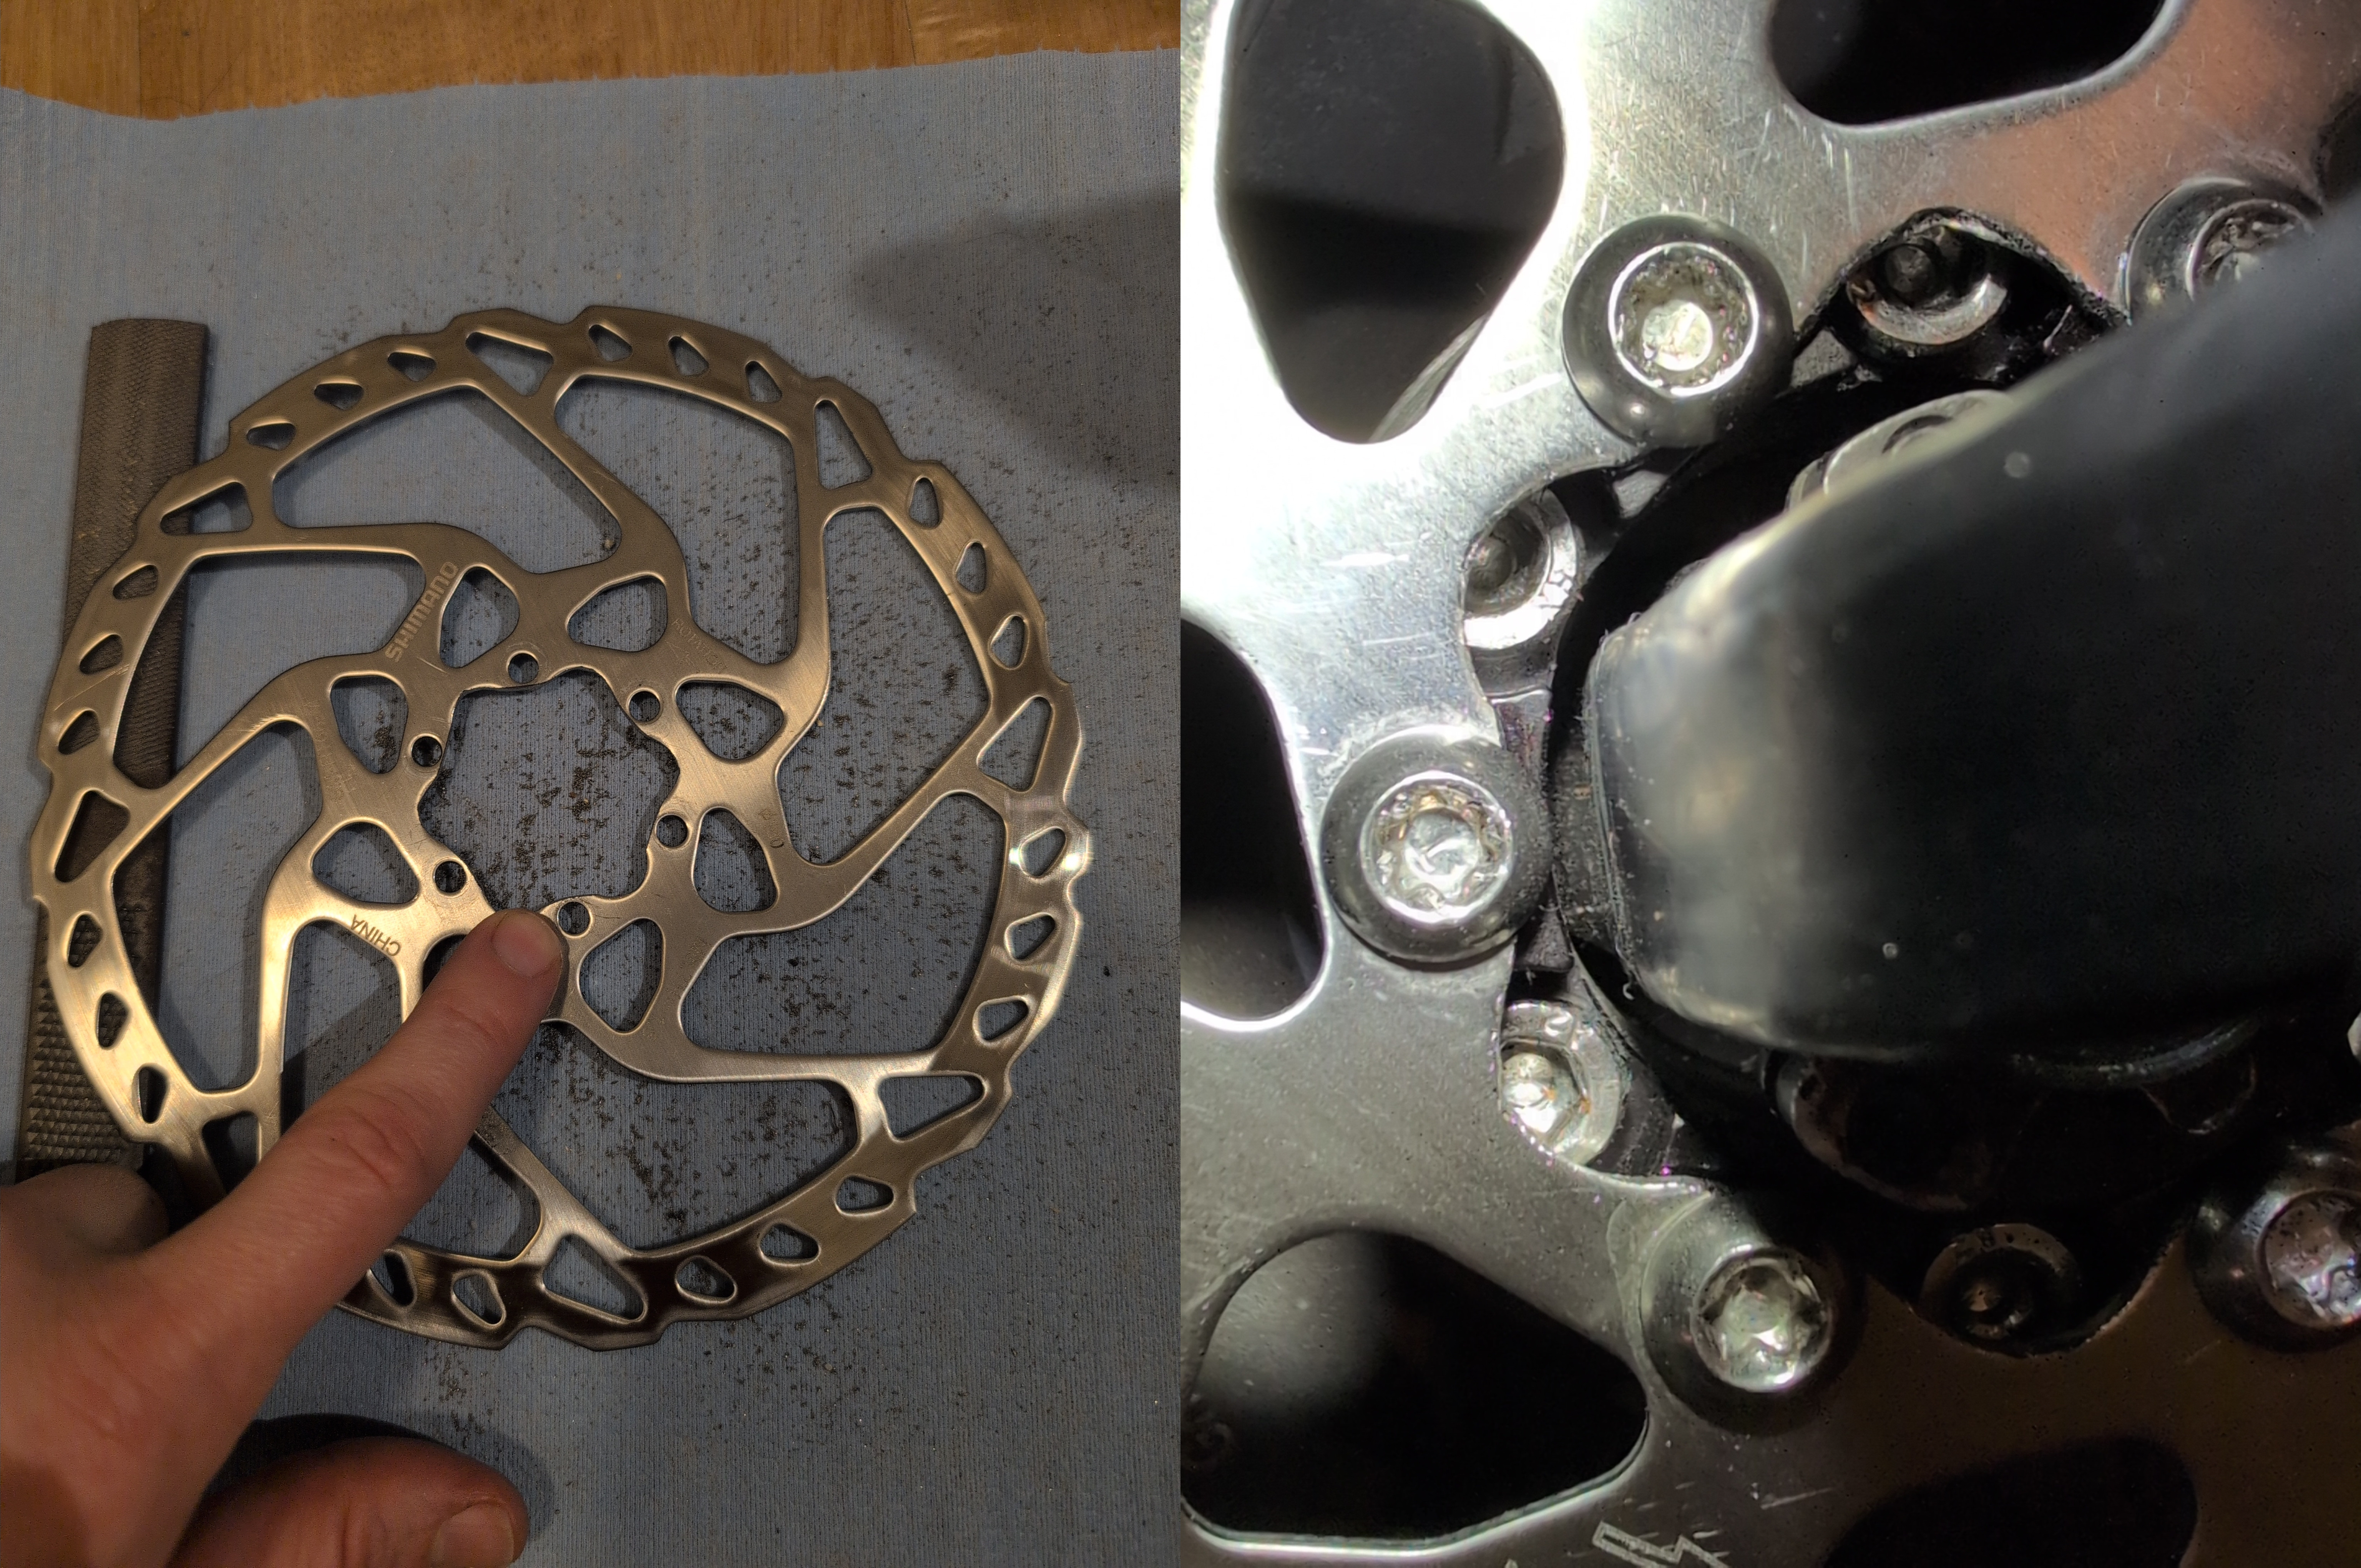
The problem appears solved now.
Build Notes: Battery
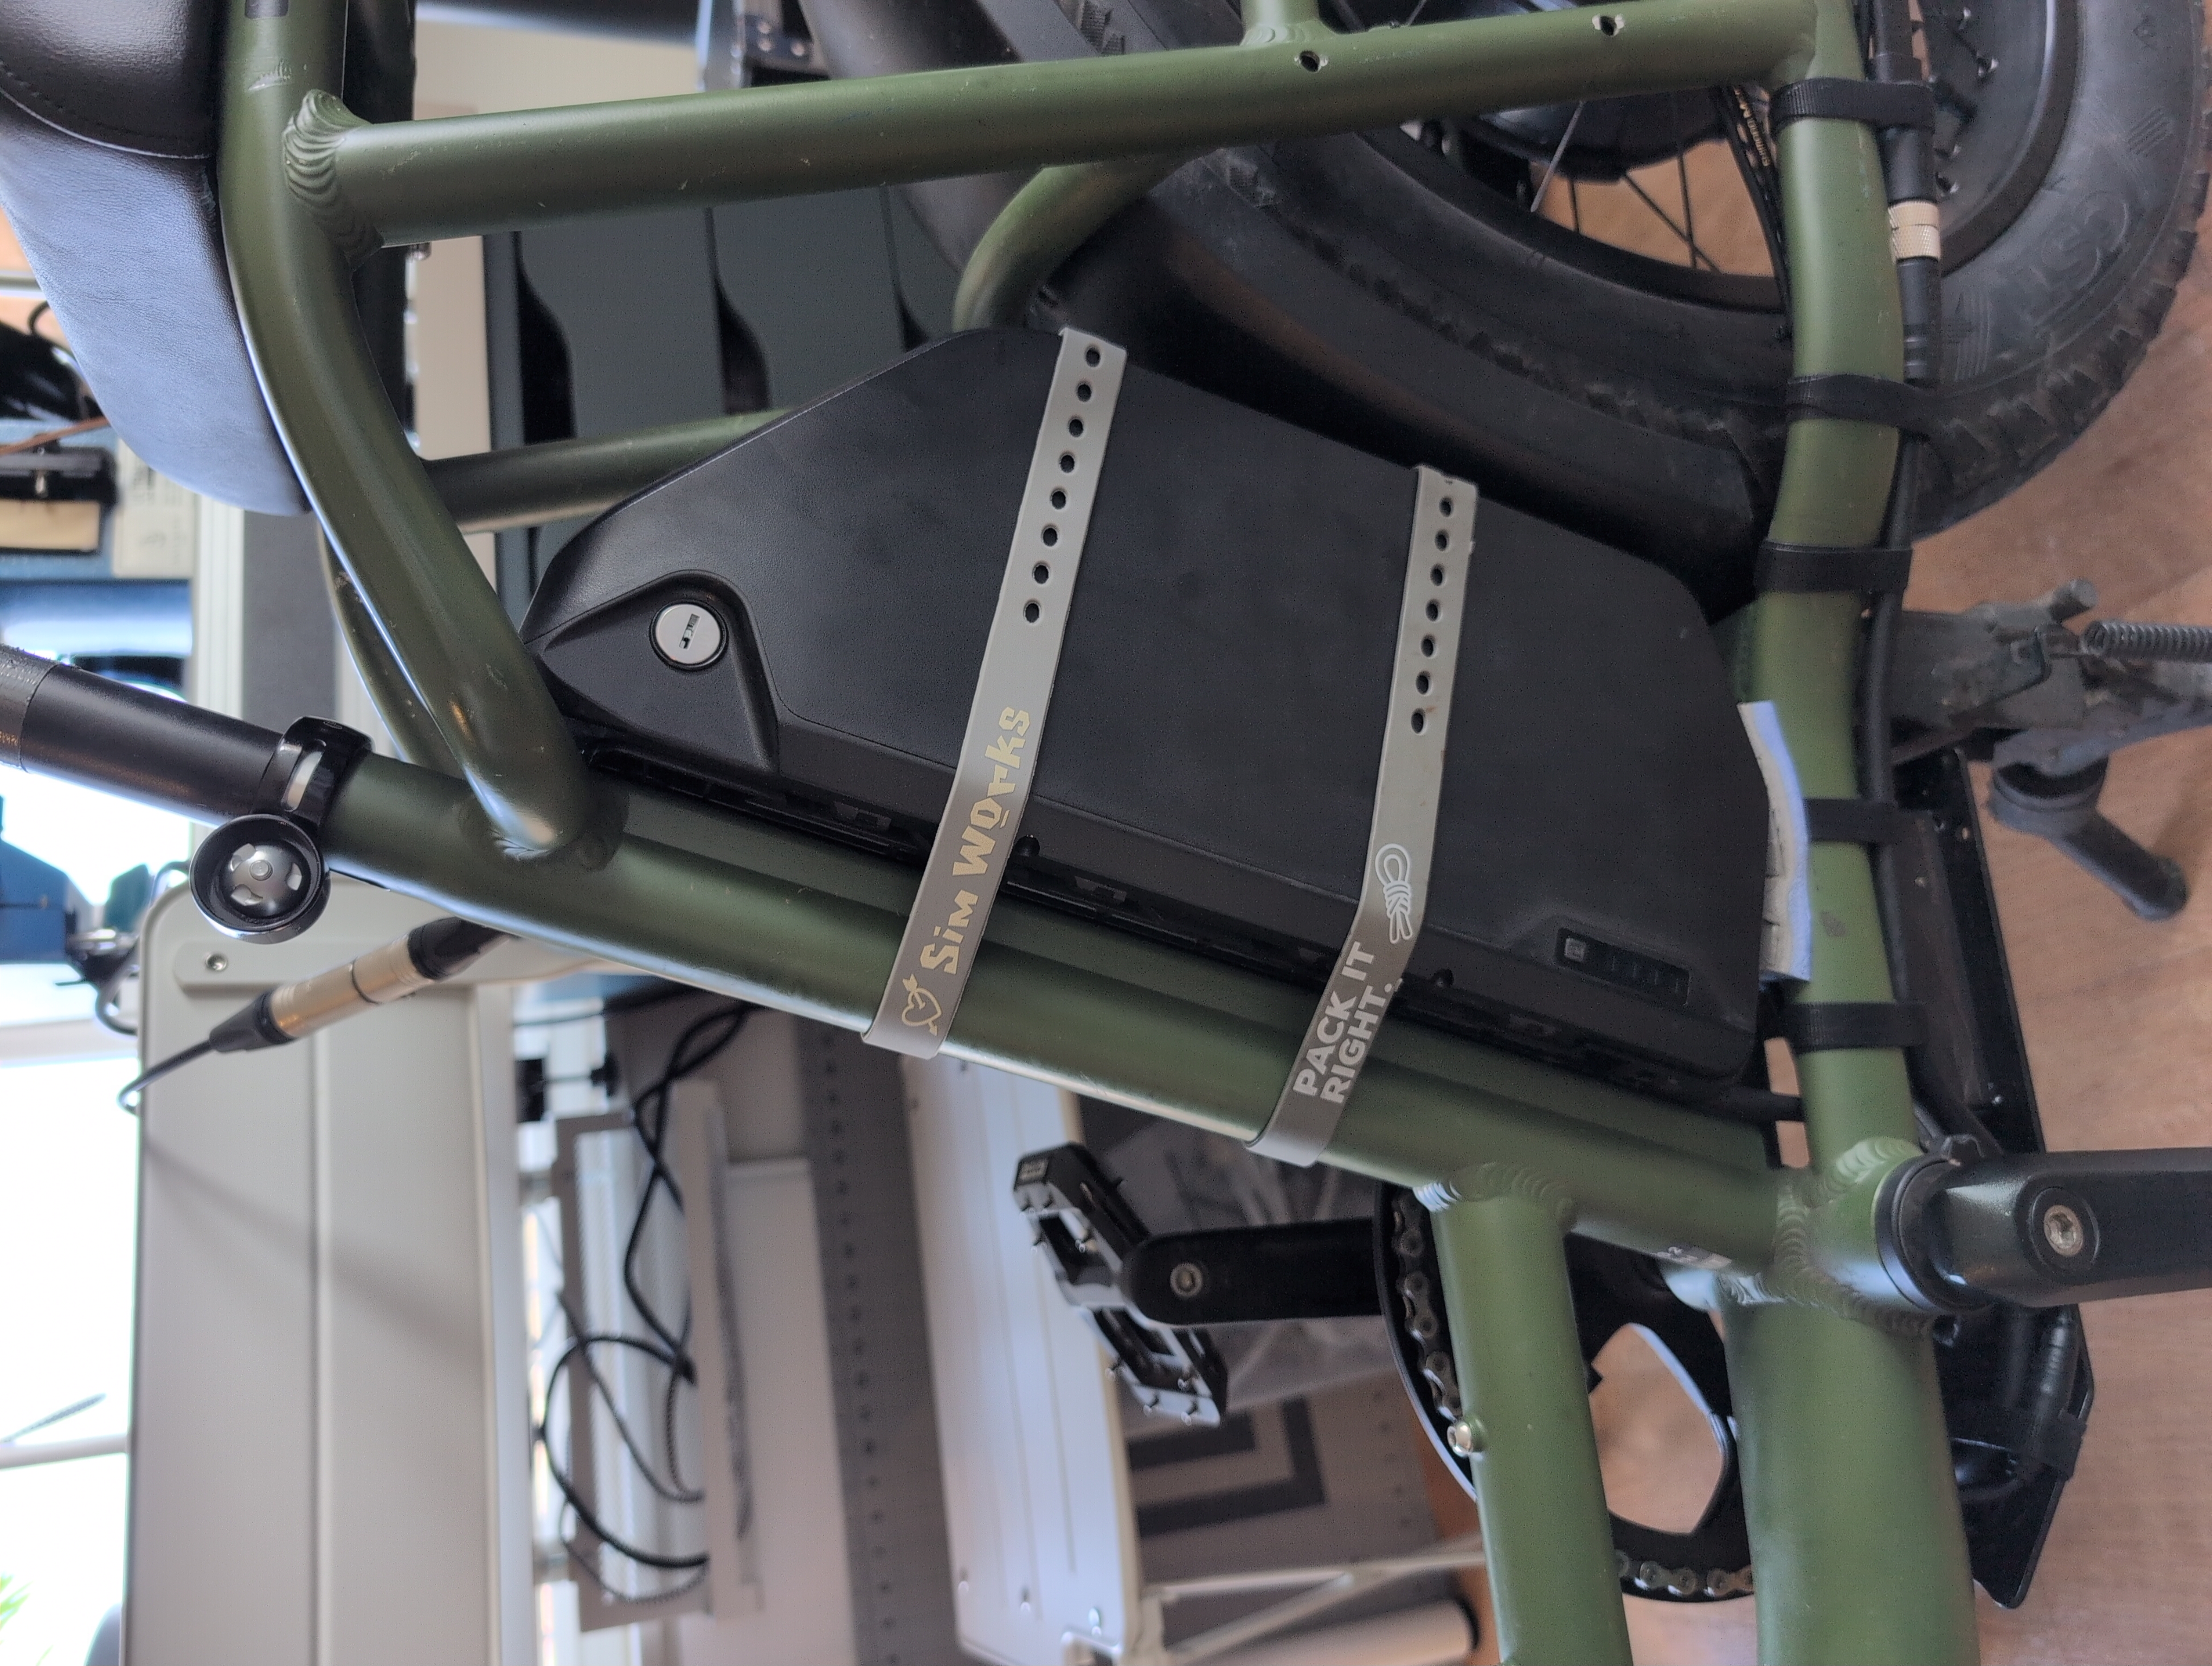
The DP7 battery pack fits on the frame only after temporarily removing the rear wheel and loosening the fender. Unfortunately the slots on the mounting tray only meet two of the frame's three battery mounting holes. The new tray wants 64 mm-spaced bottle cage mounts, but the RadRunner's holes are about 110 mm apart, and there is no room for a Triple Bob without further reducing fender/tire clearance. Fortunately, the pack can slide down to rest on the chainstays, providing two more points of stability. I put a piece of high-density foam under the battery to alleviate pressure points on the ABS plastic case. I also put a couple of Voile straps tightly around the pack and seat tube. It's quite solid and doesn't wiggle at all. Shame there's no room for a daisy print canvas bag around it.
The battery has a Bluetooth-enabled BMS. The JBD BMS Android app connects up to the battery, and I can see some limited information but not configure anything. EBL's video shows that the app should offer to "bind" to the battery, and should show full configuration options (like temperature protection, over-current protection, and cell balancing settings). But, I don't get prompted to bind the battery, and I don't see most of the config options shown in the video. The JBD app appears to have an account-based permissions system, and it's behaving as though someone else already 'owns' this battery.
EBL confirmed that they received a batch of JBD BMSes in "monitor only" mode, and one of them ended up in my battery. They said the workaround is to configure the BMS via UART (which I think means opening up the pack and cutting into the sealing tape), and there is some other wireless workaround that's more difficult. They also offered to exchange my battery for one with an ANT BMS, which I appreciate, though that would put us both through the trouble of shipping and waiting. I don't need to change the configuration now in order to use the pack and ride the bike, but the ability to do so will be valuable for future maintenance and troubleshooting purposes.
Separately, the permissions system means that the JBD BMS app insists on phoning home to its developer every time it opens (and you must log in with an account) before you can see information about the battery. It's unfortunately common for apps to be built this way these days, but it does not respect the user's privacy or autonomy. I don't hold that against EBL, as they didn't design the BMS app -- it's a choice JBD made.
All that aside, for now I can still use the battery as a battery. Amps go in, amps come out, bike goes brrr. I'm jazzed to have so much capacity onboard.
The charge port is a DC barrel connector but has multiple points of contact to the jack, it's not just a single piece of bent steel. The area gets only mildly warm when taking 5 amps from the Cycle Satiator. Most of the time I'm charging only to 80 volts (4.0 volts per cell, ~85% capacity) to prolong cycle life.
I'm resisting the urge to open the pack for a look inside. You can watch EBL build this one, and Myles said that since that video they started putting weatherproof sealing tape around the whole pack. I might put some tape around the seam in the housing where the two halves meet, for even more water intrusion protection.
EBL includes a basic charger with this battery. It's not configurable (to e.g. stop at a partial charge for better cycle life), but it's good to have as a backup.
Build Notes: Motor Controller and Cabling
The RadRunner's original motor controller is mounted to an aluminum "skid plate" underneath the bottom bracket, and this seems like a fine place for the Phaserunner controller. I bought the Phaserunner heat sink kit, but used the heat sink only as a template for drilling new holes in the RR's skid plate. With some countersinking in these holes, the screws included in the kit work perfectly to secure the controller to the plate. The skid plate is the heat sink now.
I don't particularly expect to be pushing controller output at the thermal limits, but I do like my electronics to stay cool.
The battery pack has a 10-inch cable terminated with a female XT60 connector. This plugs right into the Phaserunner and it could have been even shorter. Only once did I accidentally plug it in with the battery switched on, and hear the "pop" of an arc from inrush current. Oops!
For managing excess cables, the area between the battery, chain stays, and skid plate is well-protected and easy to access. I secured the motor and torque sensor cables under the chainstay with velcro cable ties. I don't see these on other e-bike builds, but they are great for cables that you'll need to remove and re-install when (e.g.) fixing a flat tire.
I considered routing the motor and torque sensor cable inboard of the chainstay, but there isn't enough clearance between the fat tire and the fat L1019 connector, and the brake rotor might also interfere (if I install one again). I might figure out a guard for area where the cable exits the motor and bends around, as it could snag on something at a public bike rack. But it's fine for now.
The frame has internal routing for every cable going to the front of the bike. While removing the original controller, I used its harness cable as a fish wire to thread a shifter cable through the frame. Then I flossed that shifter cable back and forth to pull the Superharness and tail light cable through the frame as well. It was only mildly annoying. I tore some flimsy rubber grommets where cables enter and leave the frame, but it doesn't seem like a problem as the holes in the frame don't have sharp edges.

Up in the cockpit the cables are only mildly goofy. It was my first time using spiral wrap to manage wiring, and it's much nicer to work with than corrugated split cable sheath or zip ties.
A stretchy velcro wrap covers excess loops of cable and the Superharness, so it's easy to access the diagnostic LEDs, but more tidy and concealed most of the time. Grin gives you a bracket to mount the Superharness with your stem spacers. I tried this and it worked, but it looked like an octopus sitting on the handlebar stem.
There is no place on the Superharness to attach the original front brake lever's motor cutoff input, but I'm not worried about it.
I may shorten the 180 cm extension cable to the front light, presently it is folded many times and zip-tied underneath the front rack. But skipping that, I was able to finish this build with no wire stripping, crimping, or soldering whatsoever!
Build Notes: Acoustic Drivetrain
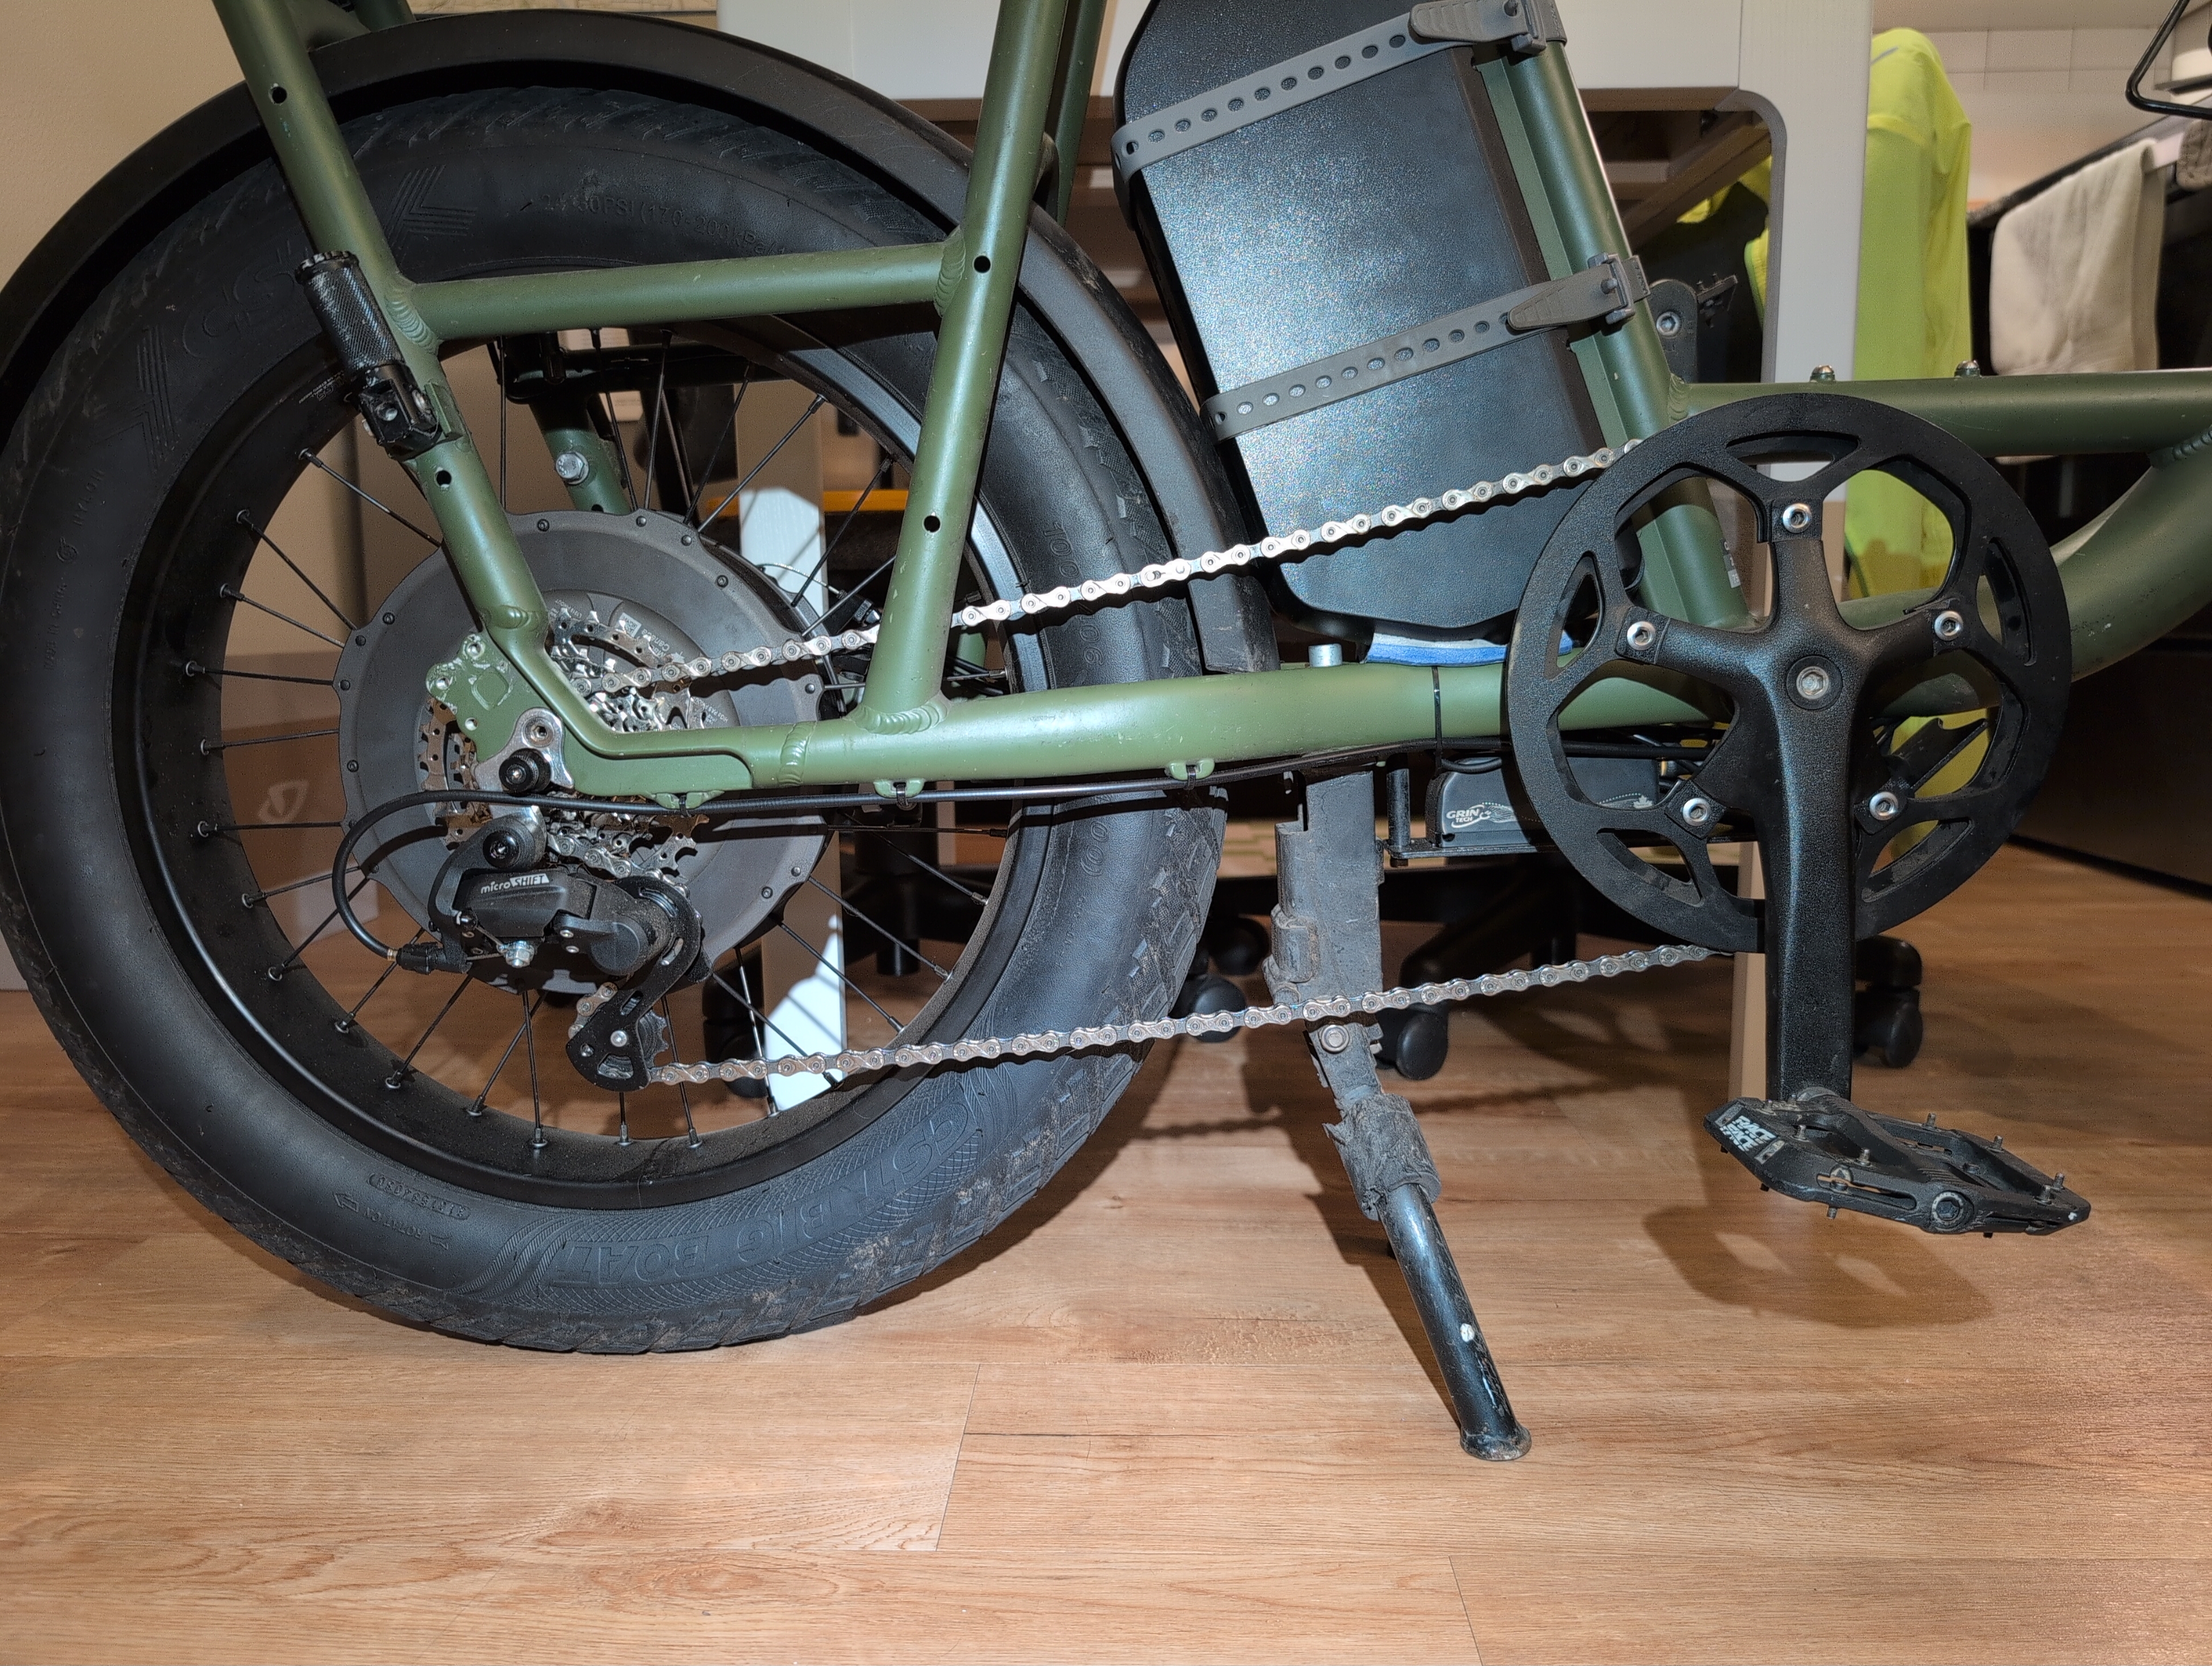
Given the Grin motor's HG freehub body, I also decided to convert the bike from single-speed to a 7-speed cassette. I chose 7-speed mostly to match the RadRunner Plus configuration, hoping for an easy installation. This includes the SL-FT55-7R, a uniquely dorky shifter whose touch points don't interfere with the additional diameter that a twist throttle adds to the handlebar. I didn't expect to be shifting a lot with this kind of bike, so 9+ gears seemed silly when I previously had only one.
The motor kit came with a 1 mm cassette spacer but I needed a ~5.5mm taller stack to fill out the width of a 9+ speed freehub body. The LBS was happy to furnish more spacers and then the cassette snugged right up. The derailleur mounted up in place of the original RadRunner chain tensioner. At this point I could make a chain (using 128 links, 12 more than a standard chain) and index the derailleur.
I opted for a Microshift short-cage derailleur, thinking it would keep the chain further from the ground. It's tidy and enough for the 11-32 tooth cassette, But the tension is weak and the long chain bounces hilariously easily, so I may swap in a clutch derailleur.
With the chainring in its original location on the cranks, the outside of the chain rubs on the inside of the "seat stay" when the chain is in the highest 2-3 gears on the 7-speed cassette. I expect to use these gears more than any others, so I needed to move the chainring and/or cassette further inboard. The chainring has chain guards on both sides (and bolts/spacers for a triple), so it was easy to swap the position of guards and spacers to move the chainring to the very innermost position.
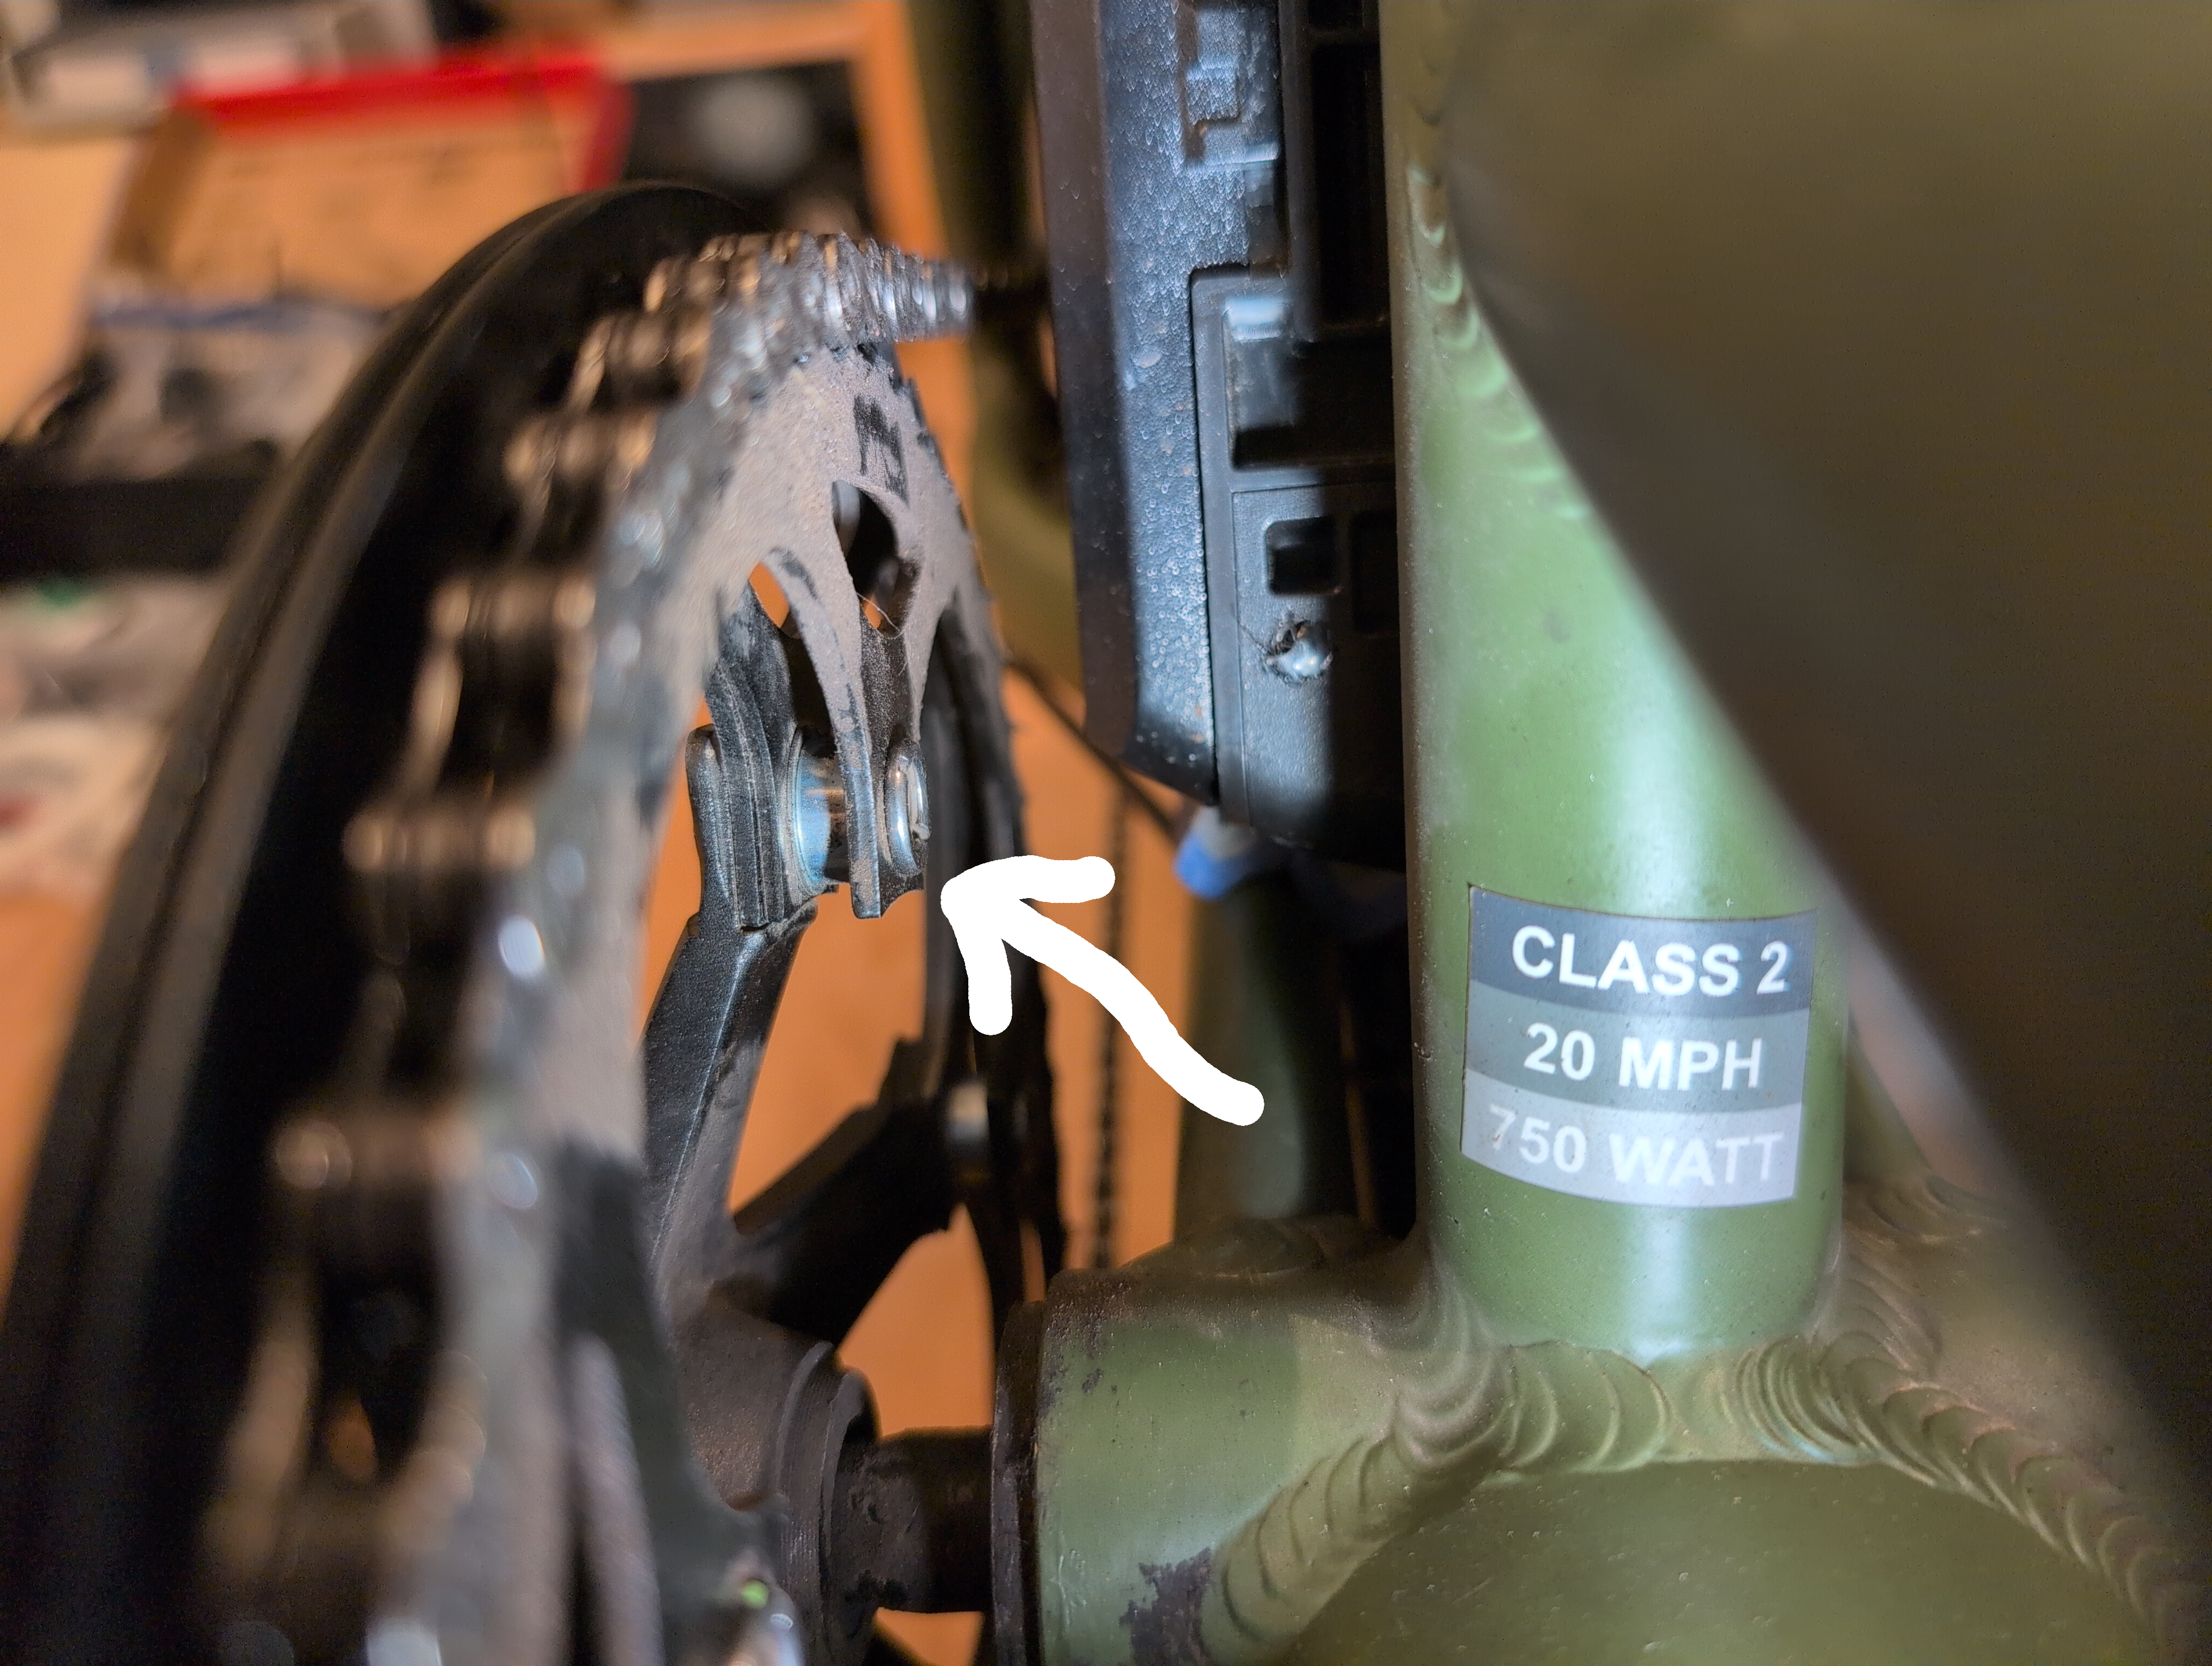
This lost me use of the inner chain guard (which may lead to the chain falling off more easily), but preserves the outer one that keeps your pants clean. Now I can use up to 6th of 7 gears with no rubbing on the frame. To access the tallest 7th gear, I could buy a bottom bracket with 10 mm less spindle, though that would worsen the chainline. It's almost like I need to move the cassette inboard, but the smallest cog has splines that terminate at half-depth and prevent it from going fully onto the freehub body, so I can't move some of the spacers from the other side of the cassette (to go between the cassette and lockring).
Also, after moving the chainring inward the chain rubs against the fender in the lowest 2-3 gears. I eventually cut a little notch in the plastic fender to make space.
In any case, 7-speed was wise because a 9-speed cassette would be 5 mm wider, making the chain clearance issue even worse. I now suspect chain clearance is the reason chuyskywalker found 5 mm more space between the dropouts on his RadRunner Plus. It might also be why Rad Power Bikes didn't use anything physically wider than a 7-speed cassette on their whole lineup of this era.
Build Notes: Lighting
The Benex light output is a big upgrade from the stock RadRunner headlight. The upper cutoff is sharper, the beam center is much brighter, and there is much more downward spill to the road immediately in front of you.
My only nitpick with both lights is there isn't much sideways spill. This is fine with mounting locations that track with the bike's steering, but the original RadRunner bracket was on the underside of the headtube-mounted rack, which doesn't point through corners when you're taking a turn. I resolved this by moving the light to the fork arch, held on with the included handlebar mount.
The Rokim rear light is good too! Not the brightest I've seen on a bicycle, but much brighter than the stock RadRunner tail light.
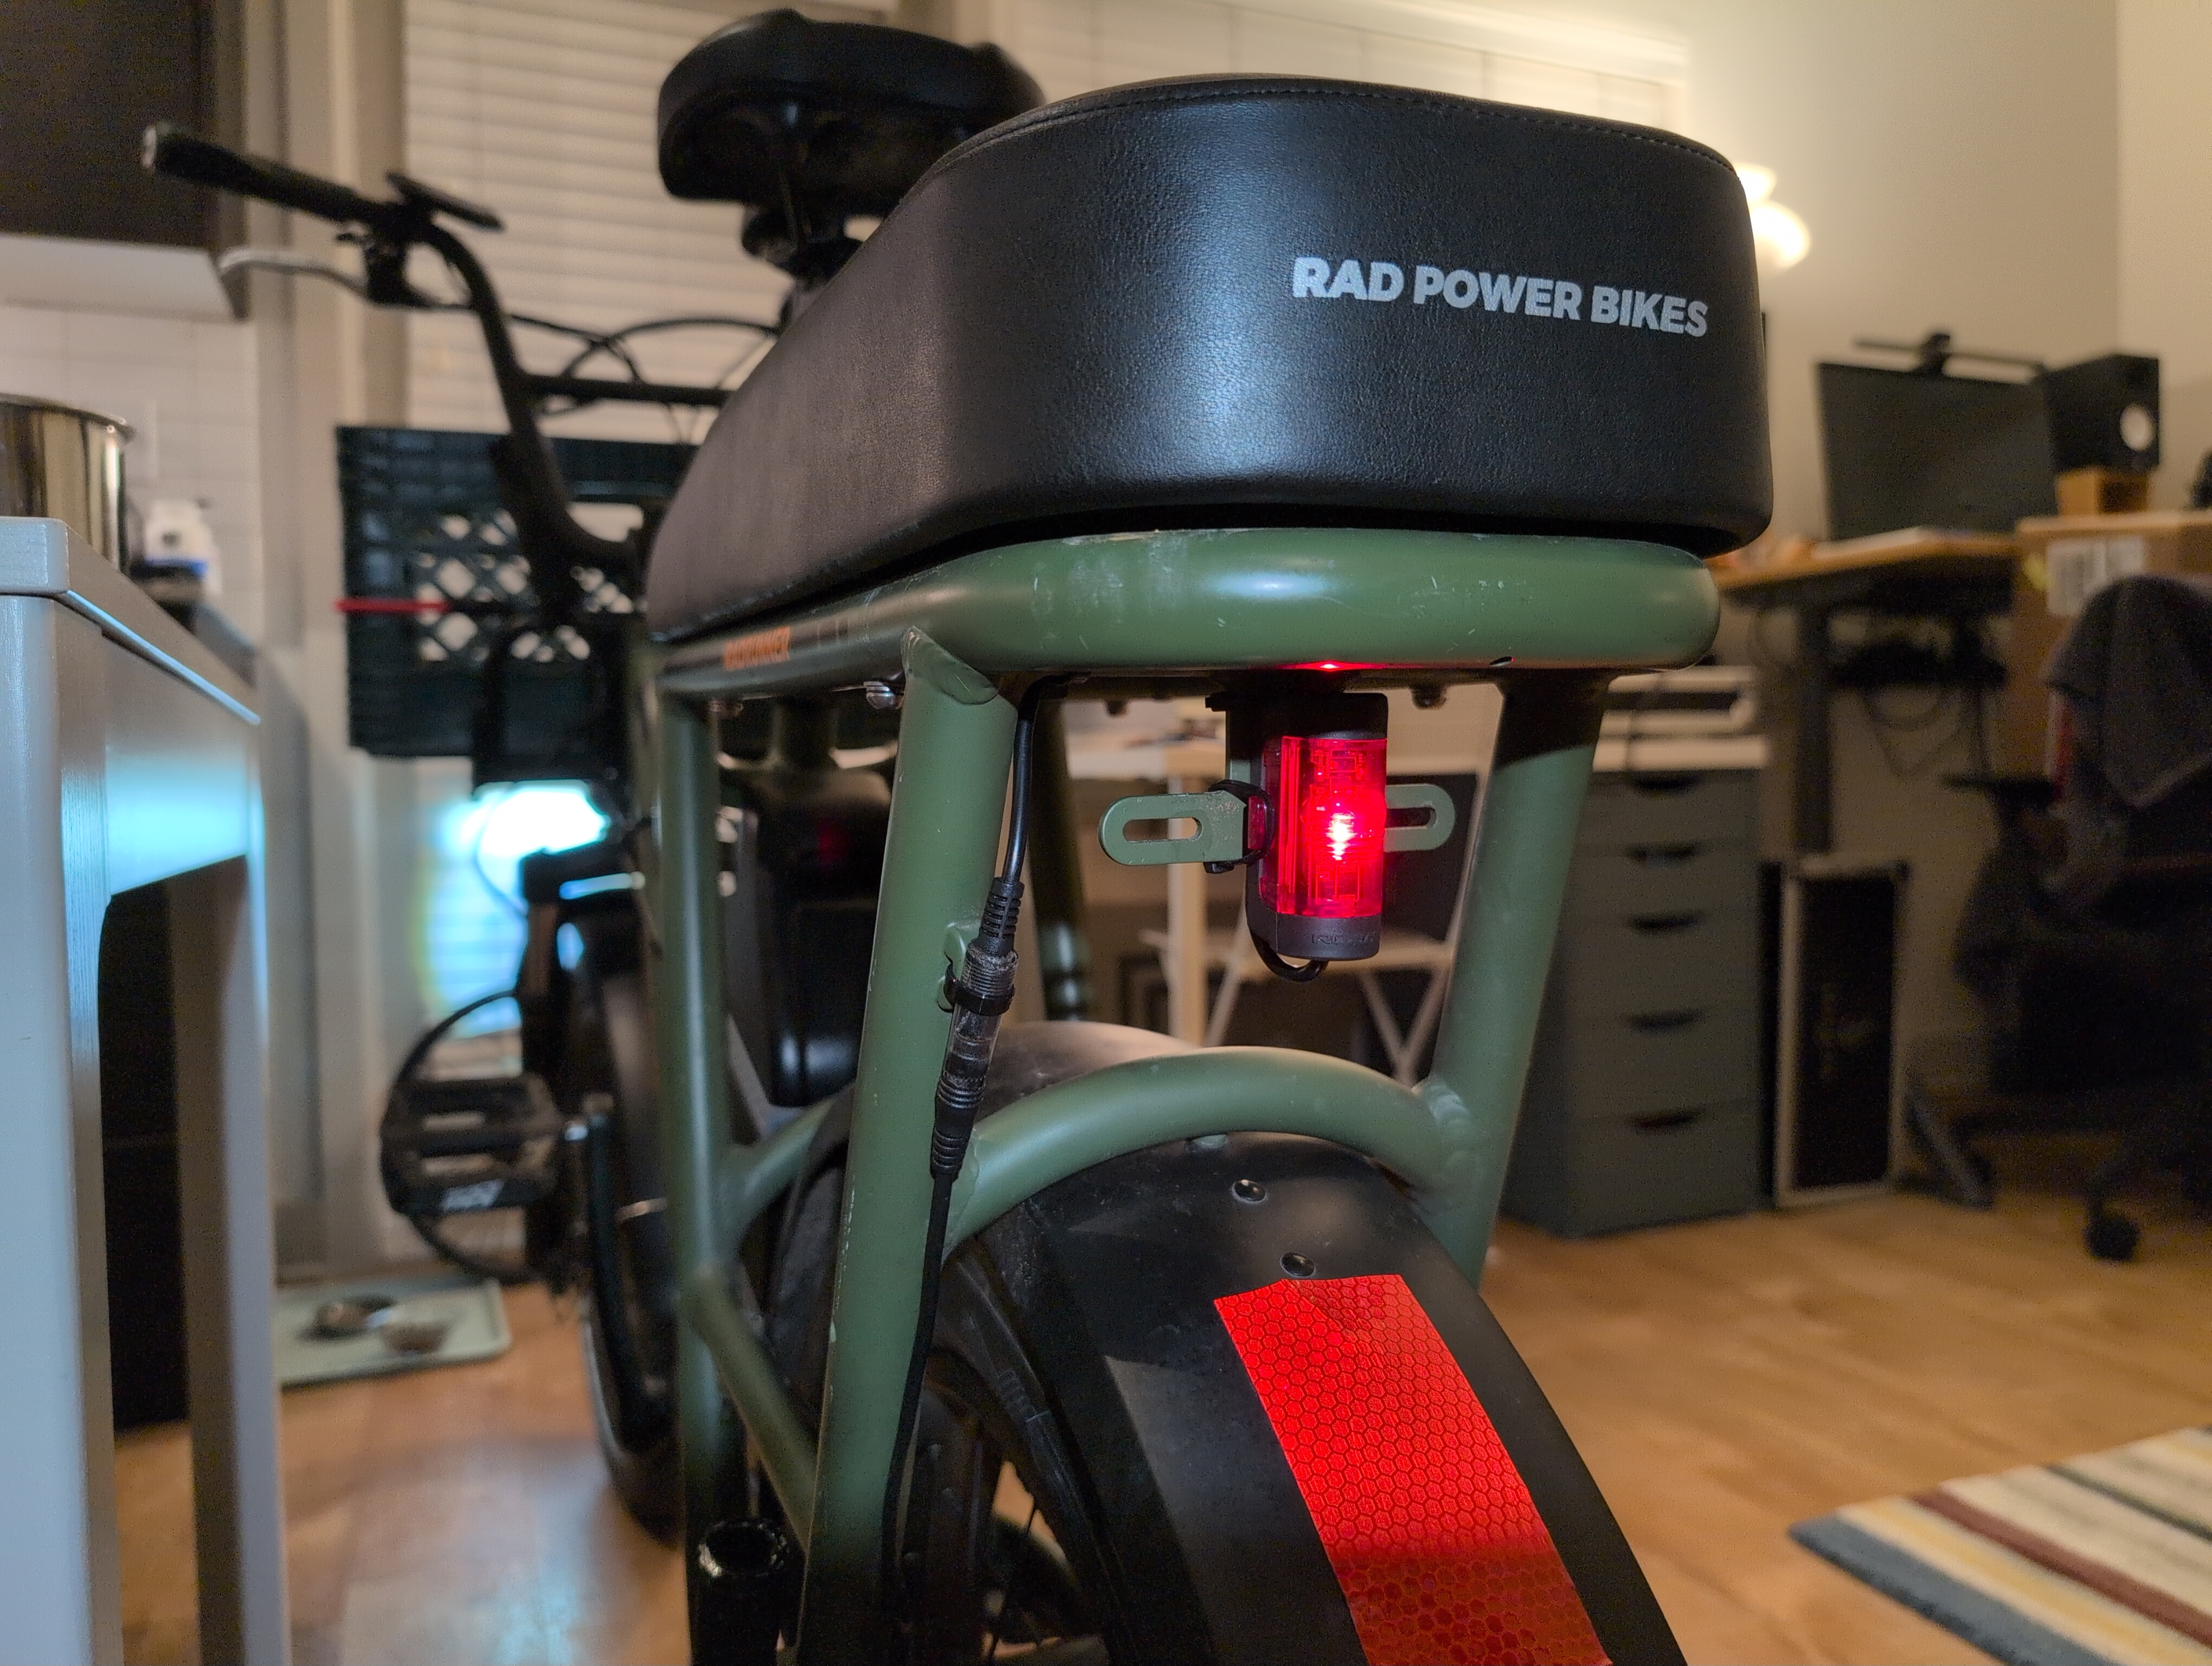
The Superharness' default rear light behavior (blinking when on, steady during braking input) is fine. I'd slightly prefer blinking all the time (for bicycle rather than moto/car vibes) but this doesn't seem to be one of the supported rear port control modes.
Riding Notes
The direct-drive Grin motor is extremely quiet compared to the whiny original geared Bafang motor. It happily pulled me up the steepest grades I could find. This won't be any surprise to the ES crowd, but subjectively, power delivery has three regimes:
1. You get moving without hesitation, though in the first few MPH there is a subtle, transient judder. It's like a milder form of the judder when you get stickshift car moving in second gear instead of first. I don't find it bothersome, and it's still a more assertive launch than the bike's original setup -- especially because Rad's controller had a hilariously slow torque ramping period when you apply throttle.
2. Starting at maybe 6-8 MPH with this setup, power delivery is buttery smooth and very strong when requested. You reach "class 3" speed quickly, and shoot way past unless the Phaserunner is configured for that regulatory envelope.
3. Acceleration seems to slow only when you're a couple MPH short of the top speed given the load, back-EMF, and voltage conditions.
"So cmart, how fast does it go?"
When, uh, configured for a closed off-highway course? My GPS watch shows 37-38 MPH on flat ground. Grin's motor simulator was spot-on predicting this. It feels happy to cruise at 35, even up a moderate grade.
This bike has a fork wobble at certain speeds, only when you take one hand off the bars. Removing the XL milk crate from the headtube-mounted rack might fix this, but the milk crate is the most important part of the whole bike.
Regarding battery current: depending which data sheet you look at, the Samsung 50G cells support 2C "continuous" and 3C "not for continuous" discharge, or 3C continuous up to 30°C and 2C continuous up to 60°C, with the caveat that "Max. discharge current condition does not guarantee the cycle life". I'm presently allowing the Phaserunner to pull up to 3C (58.2 amps) from the battery. In real use it only pulls heavy current for a few seconds (if accelerating hard), then cruises way below 2C. The exception is very steep hills, in which case I'll need to watch the amps readout on the display to keep it under 40? Though I imagine thermal rollback happening due to motor temp before the battery gets hot? It's hard to find a steep enough hill to test this.
I have not tried enabling field weakening because at 37 MPH it's already pushing 2 kilowatts of air out of the way, and it seems stupid to go any faster on a bicycle. It's mildly stupid to go faster than 28 MPH (class 3) so I'll try to avoid even that routinely.
But I will say this setup begs you, begs you to think motorcycle thoughts. It tugs at your root chakra whispering "we could pass that car" and "why are you still pedaling" and "we don't need to use the bike lane". The instant torque tries to melt away whatever you promised yourself about being responsible. Long ago I rode a friend's Zero DSR a couple of times, including a few four-second 0-60 pulls. This bike doesn't go that fast, but at urban speeds it's the closest feeling I've had before.
Regen works really well. It's enough to do all of my "normal" braking. It will skid the rear wheel on wet pavement (as I discovered mid-turn, whee). Grin's analog e-brake lever is easy to modulate. You can regen at your desired intensity all the way to a stop, even going down a hill. Thoughtfully, it sends its minimum voltage about halfway through the lever travel, and it can pull a mechanical brake cable in addition to sending a regen signal. So, you can set up the disc caliper to start grabbing around the point of maximum regen, and have enough lever travel to also modulate the friction brake on top (and probably skid at that point).
The bi-directional throttle is a great idea, but this bi-directional throttle from Grin feels too sensitive, especially in the regen direction. It goes from 0.97 to 0.04 volts in just a few millimeters. You can twist it further mechanically, but the voltage doesn't decrease further, so I don't think you can fix this sensitivity by adjusting the Throttle + Brake Parameters in the Phaserunner Suite. The most you could probably do is play with ramp time or limit the maximum amount of regen available. Since the analog e-brake lever doesn't have this sensitivity problem, I think I'll switch back a uni-directional half-twist throttle. I briefly connected the original RadRunner throttle but the Superharness didn't seem to recognize its signal. Maybe I need to get out the soldering gear and change the pins around.
Electronic freewheeling works a treat. I adjusted it until the wheel spins down nice and gently when off the ground.
Torque Sensing Notes
The default Pedalec Motoring Torque Ramp was set to 500 ms in the positive direction, and 50 ms in the negative direction. I assume the intention behind this is immediate motor cutoff when you stop pedaling, but most people's pedaling force is not uniform throughout the crank rotation -- a bit stompy instead of pure spinny, and in my experience a 50 ms negative ramp makes the motor cut out too eagerly. You get a surge of assist when you step on the cranks from a stop (in a tall gear), but when pedaling gently at cruising speed with low-torque periods at the top and bottom of each stroke, the motor feels stubborn about coming on at all, even at high assist multipliers, unless you push unnaturally hard through the top and bottom of crank rotation.
I've been trying different values of torque ramp parameters, and the most natural feeling so far is 1000 ms in both the positive and negative directions. At a worst case, if pedaling at a very slow (<60 RPM) cadence, your legs have a >500 ms periodicity of torque output, and the motor torque feels a bit wavy. With an 'actual cycling' cadence (like 80+ RPM) the assist feels very smooth across the pedal rotation, and still responds quickly to your intention. It feels as good as everyone says a mid-drive setup is. When I stop pedaling, I do not notice the sub-second overhang of motor torque.
Separately, the torque seen by the freehub body varies with the gear that you're in, so for a given pedaling effort and assist setting, the assist feels stronger in shorter gears than in taller ones. You can compensate by changing assist levels on the display when you shift across the cassette, but I have an idea to improve this UX.
The motor output could scale according to the rider's transmitted power (watts) instead of torque (newton-meters). The controller knows the cassette/motor RPM and force on the sensor, and that's all you need to derive power at the cranks. Scaling motor power from the rider's power (instead of motor torque from cassette torque) may result in a more consistent assist feeling across the whole range of gear ratios, similar to what I would expect a bottom bracket torque sensor to feel like. No idea if the controller firmware could be programmed to do this, but it doesn't seem to be an option right now.
Finally, my torque sensor sends 0.74 volts at no load, so I reduced the offset from the default 0.8 volts -- no idea how much this matters.
Final Thoughts
The motor upgrade added five pounds to the rear wheel, and the new battery weighs eight pounds more than the original. Now the bike weighs 92 pounds (39 pounds on the front wheel and 53 on the rear). I don't notice this while riding, only when lifting the back of the bike to maneuver it indoors.
I'm trying not to write a love letter here, but Grin's engineering and component integration is excellent, as is their ecosystem of videos, documentation, software, and support. Very DIY-friendly company to work with, and after 20 years they're still iterating and developing new products.
I also appreciate Electric Bike Laboratory's transparency to show the complete "how it's made" video for their battery pack, and open-sourcing their cell placement jig. It's reassuring to see the care and attention that goes into building this black box full of angry pixies.
If you have one of these bikes and want to do this project, yes, go for it. So far, I would choose all the same components again (except not the bi-directional throttle). Just make certain that your disc rotor does not touch the motor cable at all, not even slightly. File it down if you need to.
Last edited:


 Safer (but slower) method-- use a small round file. Thinking about it more, using the file could actually be faster overall as you could hold the caliper in your hand (still connected to the hydraulic hose) while filing, instead of disconnecting it to clamp it in the vise, then having to bleed the system.