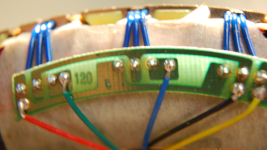
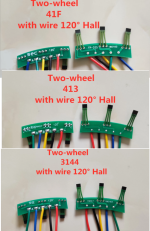
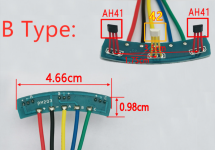
As long as the hall board is made for 120, and has the same physical spacing of the halls as your slots, it would work with your motor/controller. Even if hte halls are a different kind, the motor will probably still operate the same way it did before (if not, it's not usually that big a deal to replace the halls on a PCB, nothing like trying to hand-wire them).
If you have to go without a PCB:
Cut three pieces of black wire to about 3" long.
Cut three pieces of red wire to about 3" long.
Cut about 3" off of the motor cable's red and black wires, to compensate for the above. (you can use those pieces as one each of the above 3 red/black wires).
Cut two pieces of 1/4" or so diameter heatshrink (big enough to just slip over a set of three wires held parallel), about an inch long.
Slip the heatshrink onto each of the motor red and black wires (not the six separate pieces).
Strip one end of each of those six wires and the motor cable's red and black wires about 1/4".
If you can do it, slightly spread the strands of wire on the motor cable's red and black wires, and those of one end of each of the six 3" pieces, so they are like an old paintbrush's bristles, just slightly spread away from each other.
Place all three 3" red wires in parallel, spread ends together, and "insert" the motor cable red wire into the "bundle" of strands, then "twist" the strands together so they trap each other. This may require practice, so use some old wire you don't need to practice this part before doing it with your real wires. The point is to get as much of each wire in contact with each other, so they "hold" each other together and depend least on the solder to hold together.
Solder this joint, and let it cool.
Repeat for the black wires.
Slide the heatshrink up from the motor wires over each joint, and shrink it. The idea is to completley cover all conducting materials.
Now you have power and ground wires for each hall.

Cut 9 pieces of heatshrink or teflon tubing (of a diameter that just barely fits over the leads, so it stays in place without being shrunk) of a length that is *just enough* to cover all but the last 1/4" (at most) of the leads. Use HS that is thin-walled, or else it may be too thick once shrunk to fit between cover and windigns.
Slip that over every lead of every hall. This will protect the leads from shorting to the windings even if winding insulation gets damaged somehow.
Slip each of the halls in the slots of the motor, narrow/beveled-side up, then tape them down with duct tape or something equally sticky, across the lead end of the hall plus a tiny bit of the covered leads.
Cut 9 pieces of heatshrink of a diameter about twice as large as the insulation on the wires you use, and about 1" long. Use HS that is thin-walled, or else it may be too thick once shrunk to fit between cover and windigns. I have an old Amped hub (just like a 9c) that had too-thick HS and it rubbed thru it and shorted a hall lead to the cover over time.

Slip that over every wire you are going to solder to the halls.
Strip the insulation on the end of each of those wires by 1/4" or less.
Use "helping hands" or some method of securing the wire to be soldered to the hall lead in place, so that you are not holding either hall lead or wire, and the bare wire overlaps the bare lead area completely. If the bare wire area is longer than the bare lead area, trim the bare wire till it is the same, so they perfectly overlap, if possible.
The helping hands/etc method will keep you from accidentally pushing on the hall lead back and forth in soldering, which will break them off, or fracture them so that when you flatten the leads against the windings they then break off (or later, after you've closed it all up and are riding, from vibration

).
Note that you can't directly clip the wire to the lead because the clip will suck the soldering heat away and keep it from making a good joint.
Solder the wire and let it cool.
Repeat for all 9 wires.
Slide the heatshrink up from the wire over the solder joints, and shrink them (this is best done all at once so you don't accidentally shrink the tubing on others not slid up onto the joints while shrinking the ones already on joints). The idea is to completely cover all conducting materials.
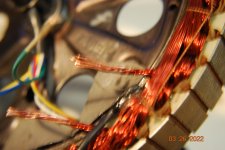
Carefully bend the covered leads straight down over the stator windings; you may form them into a curve by pressing on them, then use string (something that won't melt at potentially boiling water temperatures) to tie them all down to the windings (or to the existing string that's used on the windings, if you can't pass the string under the windings). Make sure your knot(s) is/are to the side of the windings so it doesn't make things any taller, to prevent rubbing on the sidecover.
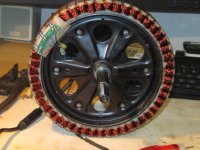


![DSC05513[1].JPG DSC05513[1].JPG](https://endless-sphere.com/sphere/data/attachments/178/178283-a00194049f9c06f72872101c3d52efed.jpg)
![DSC05516[1].JPG DSC05516[1].JPG](https://endless-sphere.com/sphere/data/attachments/178/178284-3c35ba393cf11566ef24ebb47971ac99.jpg)
