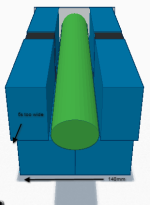
AM dual motor = bafang middrive + rear hub motor

Bit devoed with the zee which I got this morning.

took off 12 teeth worth of chain - was lovely and tight but can't change into the smallest 11t.

Wondering if the cassette can be pulled apart? I'd like to take off the two top granny and then put in a spacer next to the 11t so this zee will line up...

I tried adding back almost all the chainlinks but it didn't want to line up with the 11t...

4 of the middle gears worked well. But if these cassettes can't be customed I both spent a lot of money on this cassette and derailleur. I want to just go to single speed Yess system which I know will give me perfect ground clearance. This bike is shit to pedal anyways, not so much because of the short cranks, but because the motor drag is ridiculous. Very inefficient for anything other than going up on power and down on regen mountains..........

feeling sad.
 
Newb @ http://madmanebikes.com swapped out my fraying cable and put a new casing for it too. This also freed up under the top tube a job which I really needed to do a long time ago. As there are two cable holders in a really annoying place where my batteries are mounted which kill lots of valuable real estate. I plan to dremel them off and a couple of others possibly too, one of these days.

Apart from that he aligned the gears changing as perfect as possible. He got them all working (the granny however must be held tight at the shifter to keep it on the sprocket) Which means my 7 speed shift actuation ratios probably don't match the zee. Maybe I need a 10 speed?

Anyway the zee has given me couple of inches of more ground clearance (haven't measured = maybe more or less but looks smaller for sure)
and more importantly a heap less chain slap because of the clutch system.


Quote Originally Posted by frorider View Post
shim 10spd shifters have nearly a 1:1 actuation ratio, like SRAM. i think it helps the shifting stay in alignment. so it's not like one of those planned obsolescence things that has no value.
Both SRAM and Shimano have similar actuation on the 10 speed stuff (~1.3:1) No more 1:1 for SRAM, and no more 2:1 for Shimano.
From http://www.ridemonkey.com/forums/f19/ze-shimano-zee-249719/index2/

I have no idea what my sunrace is but supposedly http://cgi.ebay.com.au/ws/eBayISAPI.dll?ViewItem&item=161089098172&fromMakeTrack=true&ssPageName=VIP:watchlink:top:en this would work with all shimano gear systems....

Edit:
Went for a long ride up the mountain:

The zee worked great just hold the shifter like throttle to get into granny gear so probably won't bother working anymore on it.
10501727_10152588631249845_3822481927084494372_n.jpg


Did a new track called the hell hole trail, absolutely loved it, seemed more topsoil and less used but still smoothe and ridable apart from a hundred metre bit where I struggled to push the bike without my feet slipping. map http://osm.org/go/ueDfZLYI?layers=C shows where hell hole break is. Red indicates the route I took, green is future ride.
10486405_10152588690674845_2509925968436225751_n.jpg
Red indicates the route I took, green is future ride.
This must be Enoggera creek even deeper toward Mt. Nebo.
10513263_10152588631439845_5508183981587389834_n.jpg


https://fbcdn-sphotos-b-a.akamaihd.net/hphotos-ak-xpf1/t1.0-9/10486405_10152588690674845_2509925968436225751_n.jpg
 
file.php


I let down my shocks last night and measured my spaces.

6cm at the highest point / closest point to the front of the bike and tyre.
47cm from that point to the lowest point possible in front of chain ring or where the cranks narrow.
12cm between the cranks
19cm between pedals

Anyway the main point is 6cm means that only a single brick height would be possible if it were to be a plane rectangular prism. This far from fitting 8 batteries.
 
I like it!!!!!!
 
I've been staring at my bike spaces for ages again and really think although I have bits of space in the triangle and under the seat tube the bike is going to get messy. I really want a way to get it all in one tidy place and not be restricted to smaller AH batteries.

Here I just played around with a free online tool (screen shotted it to avoid their fees etc.) but it gets my idea out better than my drawing skills.

I am thinking 4 5s 8AH bricks on the sides of the downtube oriented to the thinnest width to keep the bike as thin as possible.
Under the downtube having 4 6s 8AH bricks oriented the other way to keep the minimum height away from the front tyre.

I think I'd attach them as close to the front of the downtube to get the weight away from back and also get the width away from pedals.U shaped channel.png
Capacity: 8000mAh
Voltage: 6S1P / 6 Cell / 22.2v
Discharge: 30C Constant / 40C Burst
Weight: 1220g (including wire, plug & case)
Dimensions: 165x69x52mm
Capacity: 8000mAh
Voltage: 5S1P / 5 Cell / 18.5v
Discharge: 30C Constant / 40C Burst
Weight: 1054g (including wire, plug & case)
Dimensions: 170x69x44mm

accurate measured 3d design coming, as I go. Down tube is bit less than 5cm but have just made it a 5 cyclinder all the way to be on the safe side. Given 4cm for now in the centre for wiring with some kind rubber I can cut to shape around the wires.
6S below

5s on the sides

Once enclosed it's hard to see what's happening.
t725.png


EDIT: removed some images as they all changed from their website.
 
First one is a shortened and added music to something that was very long back in the 26" days. Did because I am trying to put together a nice playlist of shorter videos with music.
[youtube]kKjuudZMPR8[/youtube]
Second one was the other day I went up the mountain to do a video but lost patience and it ended up very short and couldn't be bothered editing out anything.
[youtube]tEMHZGmlvrw[/youtube]

All is well in bike land - trying to learn a new 3d cad program as the one used in the last post was not accurate enough.
 
Cool video effects. Looks like bike doing well. Are you still looking into mid drive even though bike is climbing steep hills?
 
Yes, Im still thinking about the aft.

The main reason is doing jumps and drops.

There's nowhere in my penny chopper videos where the rear wheel gets air because I am worried about the breaking spokes/axle. Having said that I did get a bit of air today but it was more a miscalculation of how big a hump was and the speed I took it at...

My concern with the aft is that because its so expensive I will be scared to do jumps and go off road rough with it, defeating the purpose.

I am just waiting for the right time to drop the bomb to my Mrs that I "need" a downhill bike and aft. It could be a year or more before....

Anyhow had a nice ride this morning through burnt out forest without tracks. Couldn't be bothered recording.... just having fun.
[youtube]0ONd2EkEk6c[/youtube]

Might have to go down 20s with 4x6 4x4 lipo

Capacity: 8000mAh
Voltage: 4S1P / 4 Cell / 14.8v
Discharge: 30C Constant / 40C Burst
Weight: 845g (including wire, plug & case)
Dimensions: 166x69x35mm
Balance Plug: JST-XH
Discharge plug: 5.5mm Bullet-connector (without housing)
 

Attachments

  • 5s too wide.png
    5s too wide.png
    15.1 KB · Views: 3,236
Although the extra spaghetti I wonder for the extra strength whether hard cases are worth it.

I'd need 10 of these for 20s which again becomes an uneven number for charging. 8 would be ideal but 16s might be getting a bit slow again.
I'd improve my AHs and c rating a lot however.
38502.jpg

If they fit length ways in the triangle like this I wonder whether if 170mm is wide between the legs?

EDIT removed image because it changed on the tinker website.
 
Your CAD skills are looking great John!

170 wide is a big stretch. 160mm on the raptor V1 did raise a few issues, they revised their width to 140mm. I still think anything below 110mm feels like a bike - perfect for two Lipo bricks wide at about 50mm each , plus metal either side.

Grappling with getting around the sides of tubes is a worthwhile experience, bloody frustrating but a good way to work out what fits where.
Its a shame that downtubes take up so much width. Sing out if you settle a design and you want a box welded in. Freight for the frame down to and back up would be bugger all for the bare frame. Probably less than 500 all up if you don't need it coated.

By cutting almost all of the whole downtube out you can fit quite a long box in, room for a BMS and controller too if needed.
IMG_20140709_224822.jpg
IMG_20140713_195455.jpg

I looked awhile ago at having a seperate box fabbed in order to market it, but it wasn't a whole lot cheaper, as there's pretty much the same amount of material and welding involved. Food for thought.
 
That tinker site I was using automatically just removed all the different views I had put in, and automatically changed them to last one... dam must have been my cookies making it look right for a while... oh well deleted many of the links...
tinkercad.com offers a really quick and easy design but it is not accurate enough for more than that.
I started learning sketch up but it's taking too long to learn to get my ideas out quickly.
I really don't want to chop this frame.
We all love a thin set up, unfortunately even as I have my bike running now it's got one section 18cells wide which I have gotten used to.
I am starting to think about a temporary base plate. strong enough to hang batteries underneath and hold batteries on top of it. Ride with it like that to see if the width really is an issue. The bike is crap to pedal anyway - so the width won't stand out as a weak point. Just will turn heads.

basically a long sheet of alu or stainless with drilled out slits to velcro the batteries and slits for clamps to the tube.

outside cover comes last.
 
John Bozi said:
I let down my shocks last night and measured my spaces.

6cm at the highest point / closest point to the front of the bike and tyre.
47cm from that point to the lowest point possible in front of chain ring or where the cranks narrow.
12cm between the cranks
19cm between pedals

Anyway the main point is 6cm means that only a single brick height would be possible if it were to be a plane rectangular prism. This far from fitting 8 batteries.

Gday John,
was looking at this again last night - the photo with the shocks pumped up looks like a very big gap - is it critical that you are able to let down your shocks?
 
Samd said:
John Bozi said:
I let down my shocks last night and measured my spaces.

6cm at the highest point / closest point to the front of the bike and tyre.
47cm from that point to the lowest point possible in front of chain ring or where the cranks narrow.
12cm between the cranks
19cm between pedals

Anyway the main point is 6cm means that only a single brick height would be possible if it were to be a plane rectangular prism. This far from fitting 8 batteries.

Gday John,
was looking at this again last night - the photo with the shocks pumped up looks like a very big gap - is it critical that you are able to let down your shocks?

What are the dimensions (or a link) to your current packs? Are they 5s packs or 6s fella?
 
Edit: (didn't see the first post Sam)
Yes IMO it is critical to not lose more of what I paid for, I buy a high quality shock with lots of length for off road riding to only limit it to almost no shock again? I can give a centimetre to fit one row of batteries but giving up 6cms is off the charts... Might aswell just go get a steel fork and build a battery box on it.

http://www.hobbyking.com/hobbyking/store/uh_viewItem.asp?idProduct=10288

But I don't want to design around them. They didn't fit the way I thought they might.

I paid the extra price for the dimensions

Length-A(mm) 142
Height-B(mm) 47
Width-C(mm) 59

shortest length and height to sit on the downtube and under the shock valve, yes theyll fit like that but no room for padding or anything else.
 
screenshot-greyborgusa.com 2014-08-10 20-28-16.png

If I could get grey borg to chop above the green line out of the design Id buy one tomorrow

Broke my beloved seat from my old bike that I had on the penny chopper, just picking the bike up holding the seat... Pain in the Ass literally with the original san marco, so have to buy a new super soft seat ASAP....

Not sure if my batteries are aging as I am new to batteries and lipo, so am actively searching for the next battery set up. This is making me question my goals.

Two directions:

1. make everything fit looking cool on the bike and leaving it that.

2. making this get up the super steep parts of the mountains that are laughing at me when I can't conquer them, which points to needing more amps hence new controller and much higher capacity batteries and therefore $$$
 
I had to have extra protection on the batteries in triangle because these cable holders were digging in. However, I soon realised that they actually stabilised the left right swing and even reduced the slide down the top tube. Bit more space but not sure if really improved things...
10603335_10152640094664845_3491075149909377286_n.jpg


broke my seat and urgently need something different as there is so much angle with this crappy temporary one.

Thinking noseless

original.jpeg

$43 from us will take ages though
http://www.fishpond.com.au/Sports_Outdoors/Schwinn-No-Pressure-Bicycle-Seat/0026599741629?utm_source=googleps&utm_medium=ps&utm_campaign=AU&gclid=CMy_4tacksACFQdvvAodPq4AqQ
EDIT:
No more thinking, just paid for it.
$_57.JPG

I'm hoping it fits standard seat posts if I remove those bolt on adaptor thingos.

I realise this might be crappy off road but I need to do something to solve the seat angle (which was less a problem with the old seat I had then with this san marco that came orginally with the hasa). The san marco is so stiff and thin it hurts just to go for a short ride on it.

I'm also wondering whether noseless might open up battery options....

Bulk Charger
Options from BMS battery http://www.bmsbattery.com/alloy-shell/457-alloy-shell-900w-lifepo4li-ionlead-acid-battery-ev-charger.html
2000w 84V18A $250 Can 21s2p 10ah battery handle it? I highly doubt it.

1200w 84V11A $140 EV charger - looks kind of menacing and big jump in price for two amps
alloy-shell-1200w-lifepo4li-ionlead-acid-battery-ev-charger.jpg


900w 84V9A $88 Falls into ebike charger territory.. probably the best option. I know the batteries take up to around 850w on super steep hills with regen now.
alloy-shell-900w-lifepo4li-ionlead-acid-battery-ev-charger.jpg


can't decide.

Also researching on board small balancers. The battery medic style are too big IMO
Balancer http://www.chargery.com/b6.asp
 
I'm interested to see how that seat works for you. I think someone else suggested a similar seat in another thread.

I plan on buying a couple chargers from bms battery. Never bought from them before. Shipping looks expensive though.
 
won't be riding on the new seat soon...

Few emails between me and Justin, worth keeping public for anyone trying what I did with this product.

They are in reverse order...

John Bozi:

Thanks for all your information,

I am not interested in Warranty, just to share info for your products...

I tried 24s charged to 4.16v a cell (actually lower because they are weak cells that usually drop as soon as turn off the chargers) about 99.2v

The controller stopped working, although the Cav3 continues to read.

Are these controllers worth fixing or just replacing?

thanks (enjoyed it while it lasted)

From: info@ebikes.ca
Date: Sat, 7 Jun 2014 02:10:07 -0700

Well yes to both, in a sense. The controller will do regen up to a bus voltage of 88V, beyond that it will no longer do regen.

This behavior is execeedingly important, without a limit then if the battery is disconnected during regen, the voltage will keep going up and up until it blows either the mosfets or the controller bus capacitors.

-Justin
On Fri, Jun 6, 2014 at 9:38 PM, John Boz wrote:
Hi Justin,
Not sure on one point,

If I run over 88v, I can not use regen at all
or
If I run over 88v, regen will be limited to 88v.

I think it is the second...
Thanks again.
From: info@ebikes.ca
Date: Fri, 6 Jun 2014 00:14:03 -0700


Hi John, the controller mosfets and bus capacitors are all 100V rated. The battery range refers to nominal, so 72V nominal is either a 20S lithium or 24S LiFePO4, and hence why the max regen was set to 88V, so above this there is no regen current and you don't risk overcharging the packs.

It's nice to have some headroom, but strictly speaking you won't have an avalanche breakdown of the fets until 100+ V.

Notice that even though the electrical parts in principle are all rated for these voltages, we don't provide warranty above 48V nominal because fundamentally they are not controller boards designed and engineered for these voltage levels, even if they seem to work just fine once they key elements (fets and caps) are upgraded.

-Justin


On Thu, Jun 5, 2014 at 9:06 PM, John Boz wrote:
Hi again,
Justin and co,

I would like some clarification about the controller I bought regarding maximum voltage. I have the far right one on your table.

infineon Maximum 72v, regen to 88v 12 fet.

I have been running 18s lipo up to 75v hot off the charge.

I 'd like to know why it is called maximum 72v and maximum regen 88v, or more specifically what is the true maximum voltage I can run through it. (I suspect 72v is recommended but not sure why? - safety buffer?)

Not that I run to 4.2v a cell but just for illustration...

Basically I would like to run 20s (or even 21s) 20x4.2=84v or 21x4.15=87.15

I am suspecting that if I kept it under 88v there would be no problems...

thanks again.
 
18fet-500x500.jpg

18 fet IRFB4110 Infineon Controller (Motor With Hall Sensors)
Item Number 18F4110 , Program Cable: Yes Please , Battery Connectors: Bare Wire Please , Phase Wire Connectors: Bare Wire Please , Bar Mounted Power Switch: Yes Please

Just paid $230 AU I think... weak Australian dollar and shipping and paypal make an expensive hobby just that more expensive.

I look forward to going 20s 60amps instead of the last controller at 40amps...

EDIT

I got a refund because newb has one locally with higher specs..
 
10359221_10152657957459845_7859114675716631951_n.jpg

10624934_10152657957379845_356522750497472411_n.jpg

10624601_10152657957624845_4907562757348187994_n.jpg


Many more pics in the album.
https://www.facebook.com/photo.php?fbid=10152657958159845&set=ms.c.eJxdy8ENACAIBMGOjAccB~%3B03ZuLHyHeyiw1aUk0Fu4ILT1xT0uKXwrzKczb02ejKAUt0GaE~-.bps.a.10152149607104845.1073741826.531544844&type=1&theater
 
file.php


Got the "widow maker" in my hands - thanks madmanebikes.
Freaky specs on this thing. Have got it set to 60amps for a trial period. Will take a while to get it all connected up.

There are a few things I don't like about it for now:

- Regen is a shame, only set to 75v at the highest, meaning on 21s useless, but suits 18s perfectly. But if were to stick to 18s 40amps infineon had regen to 88v so much better.
EDIT: Newb can be increased using xpd, (something I will look into once I can ride this thing)

- Much longer body than the infineon.
- Wires are too short will need to extend many.
- colour coding wire doesn't match
- unpainted body finish (yes cooler) but doesn't match the black of the bike.
- no on off switch - more wiring and parafanalia to dangle around with and leave on the bike.

penddragon got me onto these - just ordered from the states $5au
10389302_10204811831004762_3254438314042384787_n.jpg

- Lastly, can lightly tap it and here something vibrate like its not seated properly.
1375216_10152660452924845_310943740693229330_n.jpg

Anyway, if it all fails I'll buy another one from Justin and be done with experimenting.
 

Attachments

  • controller screen.png
    controller screen.png
    15.3 KB · Views: 1,214
got the seat today! yay!

It sucks!

Had no idea it was so fat. Its not made for mtb seat post width so the adjustability of the parts under seat are out. It can be clamped on and there is a bit of tilting I can do but it feels like it makes me sit too far forward. Theres pressure on the upper back part of the leg just under your ass cheeks. Makes very hard to peddle unless you sit on the edge and it would be ok for up hill leaning forward.... but anything else yuk yuk

OH DID I MENTION IT LOOKS EVEN MORE RETARDED ON THE BIKE THAN IN THE PICTURE ALONE?

My penny chopper is not everyones taste but to me it looks deadly, and this seat makes it look like a pile of crap....

anyhow got all that out...

Anyone want to buy it off me? ahhhh Ill use it electrified until I find something in between race horse and comfortable...

Controller

Have tons of learning researching changing shit around...

for the record it runs on the first example on the manual. hall yy gb bg phase gg yb by

it wont work on cav3 with throttle plugged into the ca, but it will work with throttle into controller and ca can still work and not affect it when I just removed the 6th pin on mine blue...

Will probably go back down in volts and up in amps. Just cant carry too many batteries
 
While some of batteries were balancing, I tried the bike on 12s, so I could try out the regen.

Wow really strong, actually too strong for 1p 2c charge rate batteries = I saw 14amps going in when pressing regen from going fast..... dangerous stuff.

However on over 75v we still haven't set it so regen will work... that's for next time I get to Newb's.

Running @ 21s "50 amps" I was getting figures around 4.5kw as you can imagine powering it up hills. Momentary amps I got up to 57amps but at that point I am pretty sure the volts are sagging like mad. so the Watts were pretty stable figures...
The bike wiring will need to be redone as I was scared to cut too short before I had put everything on the bike. So for now wires are hanging ugly all over the place.

Most important news

When I was doing all the phase/hall wiring unloaded the CA and power I was seeing all seemed off the mark, and then I researched other threads finding people with this controller needing to mods or unplugging the throttle wire to CA to get the CA to work.

But I plugged in the 6th pin plug again from thottle to controller and discovered much to my surprise and happiness that

ALL CA FEATURES WORK!!!!!! Including things which I sometimes use amp limiting, speed limiting, temperature etc.
this means I don't need to mod the controller!

Obviously the only feature that doesn't work is the throttle settings, and I don't care about fiddling with throttle ramping settings, it works great how it is. I never used that feature in the past anyway.

VERY VERY VERY HAPPY!!!!!!! :mrgreen:
 
Back
Top