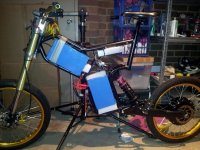
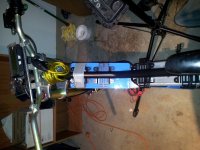
Animalector's Ebike Builds

Pinging while stress relieving is normal, but only for half a rev
Don't know how tight they should be, perhaps JRH could tell you that
I can lend you a spoke tension meter if you want
 
nah it's cool. Thanks for the offer however. I think it will be right as they are pretty tight and if anything, they will loosen off a bit as the nipples settle in the alloy rim.

Still tossing up what to do for the front fork. I considered parting out the Felt and use those forks but I can't get a 44mm OD headset that'l take a 1.5" steerer tube, (except for a Nukeproof 44EOS which is sold out at CRC)

Anyway.. back to it.

Andy
 
Well the nukeproof 44eeos is pretty much sold out all around the world. So using my 1.5" steerer forks from my downhill bike is off the cards. No matter. Tomorrow I am going over to a pit bike repair guy to buy some 730mm pit bike forks. I went through his collection this afternoon and found combinations of forks and triple clamps that will fit the head tube in the borg. So tomorrow hopefully some updated pics of a borg with "beefy" suspension. Bit of extra weight but it will be tough as nails.
Andy
 
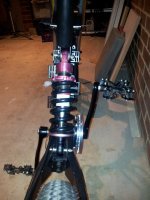
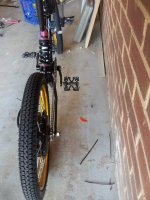
Here's a pretty flimsy mockup.. The front will come up another 25mm once i Have the steerer stem sorted so that'll even out the top of the headset and the seat post. might get some taller risers as well.. to lift the bars a bit.

the guy I got the forks from says he can get me another fork base / axle block thingy (name??) with brake mount and caliper so I can run twin pit bike disc brakes :twisted:


TODO:
Find someone to turn down the steerer to 23.5mm and 22mm so I can use standard tapered pit bike bearings.
Find a 12mm - 20mm sleeve for the front wheel (I have a couple of sleeves, but they are only around 20mm long each and do not support the wheel all the way along
Make a disc adapter ( to fit to the MTB disc mount)
Find a mounting system for the shock.
Battery..... (BIG TODO)

Anyway it's not going to be light that's for sure. I can still lift it pretty easily but not once the battery is in..

Andy
 
Well the steerer is off getting machined
I have the headset bearings ready to go to be fit onto the machined steerer
I have sleeves for the axle in the mail to fit the front wheel
I have bushings for the shock in the mail and 8mm shoulder bolts ready to go
Most importantly I just sold my downhill bike so I have cash for the batteries. Time to order I think
Andy
 
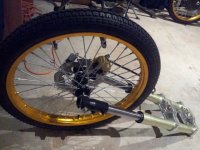
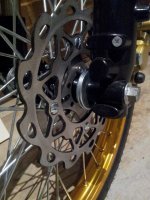
Mock up of the front brake.
20131109_112519 (Small).jpg
The axle sleeves arrived, and I've cut them and fit them. THey are a good fit inside each other and into the 20mm hub.
20131109_112904 (Small).jpg
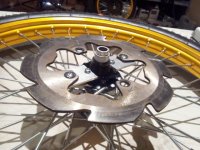
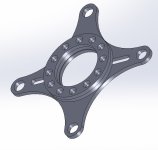
Turns out the disc I have, which is 200mm won't fit the caliper, so I've ordered a 190mm Disc. SO I'm getting a bracket laser cut to convert from the MTB hub to the pit bike disc.
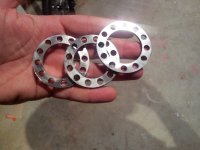
The bracket is 3mm steel, as are the disc spacers. I am getting 4 spacers in total so that should make up for the difference in width between the MTB and moto Forks.
BRakeBRacket.JPG

Should get my steerer tube back this week so I can fit up the front end. THe battery has been ordered. and will probably take 3 - 4 weeks. so perhaps and early christmas present.

Andy
 
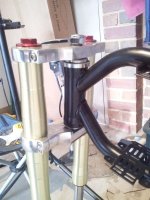
Some updates. GOt the steering stem back, and fitted it all up. The lower bearing cup didn't press all the way into the frame I think the bottom of the head tube had a bit of a shorter recess. It's only protruding about 1mm, so most of the cup is pressed into the frame and I am not concerned about strength.
20131112_072744 (Custom).jpg

Also received back the laser cut brackets and spacers for the disc brake (and a new 190mm disc that will actually fit in the caliper) I need to find a solution for the brake bolts.
20131115_210625 (Custom).jpg
20131115_210646 (Custom).jpg

Bought some shoulder bolts for the rear suspension. The bolts have an 8mm shoulder, and the suspension has a 10mm hole. I am waiting on 10mm - 8mm bushings and then the suspension will be "play free".
20131115_210712 (Custom).jpg

Lastly, I just fit the ATS Speed drive it was a bit of a tight fit and I don't have any chain-ring bolts but the bottom bracket is in. Oh I also had to "modify" one of my old BB tools to tighten the BB Nut, basically I had a tool with 8 pins, I cut 4 off, and it fit perfectly. No chain however :cry:
 
Its looking great Andy!
 
It's A'ride..... A'RIIIIDDDDEEEEE

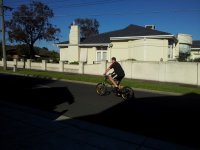
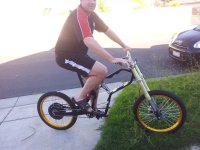
So yes I can finally pedal the greyborg. I'm not going to be going to far on it yet as the front brake is not reliable (needs disc mount bolts) and some threadlock but otherwise a quick pedal around the street. it rolls quite nicely. suspension has a nice plush feel.. it's definitely on the heavy side (which honestly is a understatement)

First issue.. the ATS Speed drive manual says put the chain ring on the inside but I can't get it to fit over the speed drive.
Second issue, I wasn't supplied any chainring bolts (surprising as the chainrings were supplied from Zelena Vozilla.. oversight perhaps?) anyway the ones i got from the bike shop were a bit long so I used a spring washer I had lying around to space it out a bit. this moves the chain ring outwards, chain still lines up ok but it would be better if the chain ring was close in towards the bike.

Some Pics.
20131117_153322 (Custom).jpg
20131117_175959 (Custom).jpg
20131117_180013 (Custom).jpg
A Vid :twisted:
[youtube]OBcIs6b9A0g[/youtube]

looking forward to battery time.
Andy
 
Well I did my first unassisted ride on the Greyborg. It's a not "too" bad to ride unassisted, if you like going slow and working really hard. Down the hills was awesome, and a good indication of what it will be like to ride one I get the batteries in.
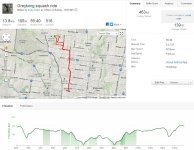
FirstRide (Custom).jpg

It is a heavy pig but rolls quite well. I was surprised at the lack of cogging / drag from the motor, My last bike (a 1kw Conhismotor kit) seemed to drag a lot more than this one. but that was a while ago.

The rear suspension is like riding a trampoline. There is NO... None... Nadda.. zippo... zilch.... damping left in the $20 shock that I got. Although it is a good indication of what the suspension will be like. I need a fastace AR22 or something similar.. $100 new.. probably should bite the bullet and just get it. Tossing up if it's worth trying another 2nd hand jobbie. could always tell the guy I'll test it and bring it back if it's a dud.. might try that??

The front pit-bike brake is ok. you have to pull on the lever hard to get it to perform, and I think the pads are bedding in still as the braking performance got better as my ride wore on.. Unfortunately, I got slower towards the end of the ride (I rode to the squash courts played an hour and a half then rode home), so I was going too slow to really "test" out the braking performance towards the end.

The freewheel on this bike "ticks" once or twice per revolution as you pedal, and sometimes catches when you stop pedaling. I think I will remove it and throw on a better quality unit. I did squish some grease in there before riding it. Also, I might need to tighten the cranks. Towards the end of the ride they were "creaking" a bit under load. they also flex somewhat.

Anyway it was good to get out and get some km's on it just to iron out some of the bugs. so far so good. I think at 250W there should be enough power for ultra long distance leisurely rides along the beach, at >3000W should easily blend with traffic as required on the trip to work.

Anyways no point in pics, it looks the same as before, with the CAV3 fitted, throttle where it should be and the controller mounted in the top section in the frame.

ToDo:
buy a puller, take off rear wheel
pull the side off the HUB, and fit a NTC thermistor - wire to CAV3.
Upgrade phase wires as big as possible
Remove / Replace Freewheel
Tighten Cranks / bottom bracket / Schlumph
Buy rear brake (group buy Tektro Dorado)
Install batteries (due 6th December, but these things often take longer)

Andy
 
Why did you need to add a pvc pipe to your crankset?

And it looks like you machined a lot of part, can't you have anything that would fit directly?
 
no pvc pipe anywhere. The pipe was used to press the swing arm onto the bottom bracket. only because it happened to be big enough to fit over the bottom bracket and onto the big swing arm bearing.

Anywyas there were't really too many machined parts, and I'm no machinist, I only have a grinder, drill, dremel, hacksaw etc. the brake parts i got done at a laser cutter. I did the CAD for it though.

Oh and I got a guy at work who's son has a lathe to turn down the steering tube. But again that's only because I was using the pit-bike fork, and even then, I think a fastace fork stem would have worked without modification because it was standard 22mm and 23.5mm steering tube. Just happens that the no-name brand I have needed "work" to fit the bearings.

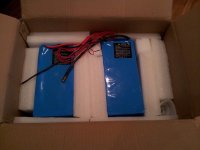
Anyway the reason i was posting tonight was because i now have batteries.... POWER!!!!

20131203_172939 (Custom).jpg
20131203_174751 (Custom).jpg

I still need to unpack and test them

Andy
 
ok cool I'm considering to buy the greyborg but I don't have access to lathe or machine. So ideally if I can have part that fits directly that would be good.

What battery did you get?
 
If you go for just MTB components, like the DNM suspension, or RockShox or Bomber 888 you'll get off the shelf headset bearings that fit no mods, I just wanted a pit bike fork, and didn't want to spend $500 on a set (I got mine second hand for about $130, plus the brakes, rear shock (busted) and bars.. so it was a good deal and worth the effort to get the parts made.

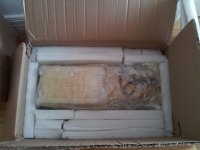
Anyway.. more battery pics.
View attachment 3
20131203_211105 (Custom).jpg
20131203_211120 (Custom).jpg


That's it for tonight.
Bed time.

Andy
 
Looking good! I'm curious to see how the bottom cover fits over the batts, since there is a small indent for the chainring. Awesome job...
 
They're custom built LiNMC in my bike, and LiFePO4 in my mates bike.

Mine's 18S 30AH, comprised of two 9S3P packs.

It is a heavy install but I figured since I was going the "heavy" route, I might as well get the AH capacity to push it around. Plus with 30Ah, pulling 100A is only 3C which is the nominal rating for the cells, well within the 5C rating for peak discharge.

Andy
 
Animalector said:
They're custom built LiNMC in my bike, and LiFePO4 in my mates bike.

Mine's 18S 30AH, comprised of two 9S3P packs.

It is a heavy install but I figured since I was going the "heavy" route, I might as well get the AH capacity to push it around. Plus with 30Ah, pulling 100A is only 3C which is the nominal rating for the cells, well within the 5C rating for peak discharge.

Andy

Very, very nice. Which make/model of cells? Who custom built the packs? These packs look EXACTLY what I am after for a Borg build.
 
Considering options...

Option 1:
dual contactors, aux 12V circuit, ignition switch, DCDC converter, charger, lights, blinkers, hazards, tail light, headlight, tilt switch = Rego? maybe
http://www.ebay.com.au/itm/DUAL-BAT...=AU_Car_Parts_Accessories&hash=item43c2aa3923
I found these online, which look like they would be good as an isolation Contactor at a reasonable price $35 each shipped. Most of my other searches are turning up $100+ for contactors for EV applications. The latest ADR supplement for electric vehicles states you need + and - isolation... anyways that's long term, I'm not going to do this now, I just thought having a contactor fitted up from the start would be a "cool feature"

Option 2:
anti-spark bullet connectors. :twisted: -
http://www.ebay.com.au/itm/Amass-AS..._Parts_Accessories&hash=item4d13262932&_uhb=1ordered.
$T2eC16R,!zIFIeu(sTo4BSRYCif0Ig~~60_3.JPG

I also bought one of these:
http://www.ebay.com.au/itm/Car-Audi...2V-/261269825382?ssPageName=ADME:L:OC:AU:3160
$T2eC16JHJGYE9nooiN!JBSF,CQRKNQ~~60_12.JPG

Intended for use as an on/off switch and will wire a pre-charge in parallel with it
 
Looks like a good circuit breaker Andy, although is it a breaker or a fuse holder. If its a breaker it looks like a great deal.

Loving your updates. 8)
 
Thanks Sam,

it's a breaker / re-settable fuse. I had a 50Amp one installed on my last bike (peak 35 amps). Wired a push button with pre-charge in parallel and used the little red lever as the "key" to start the bike. Worked well..
Plan to do the same here. though I don't know where to mount it on the borg. I don't want to arbitrarily screw into the plastic covers.... anyways it's in the mail apparently. so I will see soon enough.

Update.
So I have my battery, but no charger, and no connectors. SO I raced to Jaycar this morning to buy some 60A terminal strip for a couple of bucks to do a bench test. After soldering nice 5mm gold bullets onto the phase wires, and carefully connecting the battery to the terminal strip, using a sacrificial bullet connector as the switch, I set up my phone camera ready for the virgin test. WHAP.. what a spark...and I have to say I kinda did sh1t myself just a little bit. I was expecting a spark but wow... Kudos to Zombiess and his controllers he must have some mega Capacitors in there.

Anyways CA didn't power up, so I silently swore to myself again and unplugged.. looked at everything, measure the battery to make sure I didn't kill anything expensive, then turn off the camera. Hmmm.

[youtube]6B4Eil2ZKjQ[/youtube]

Unplug the CA because it didn't work and I suspect an issue. Right,so I've got an old throttle lying around from the Conhismotor kit. The connector had been cut off, but I still had the connector, so I soldered it back on, plugged it in directly to the controller bypassing the CA all together. And nothing (except another big spark which I am getting used to). This time I added a 30A fuse (just in case), measured all the voltages.. no problems.. hmm.. Searched the net for a good image of the Infineon Controller Connectors for which there are not very many.. Anyways long story short, incompatibility, and I had plugged into the 3 speed switch plug. So solder on the correct gender connector and go again. SUCCESS - rough forward motion.

Again thanks to Zombiess for testing his version of this motor, and noting the phase / hall combos.. swap those around and smooth as a porn stars... ankle..

[youtube]byAogL8vSu4[/youtube]

Probe the CA connector, power seems to be available, so I plug the CAV3 in again, this time it lights up but doesn't turn on. I un plug and plug in again. This time it actually turns on. hmm.. so I take some video of the symptom. the throttle I am using has an ignition switch which I have wired to the Ignition Wire on the Controller.

[youtube]aitr51eeSdI[/youtube]

So this is where i am stuck.... the Ignition switch isn't permanently fitted, but I did solder it to hold it, and the other end is wired into the strip terminal. THe problem "may" go away once I properly solder the ignition directly to the main supply line. Actually now that i think about it, I soldered to the spade end of the connector, if the crimp on that spade connector is dodgy that could exmplain things.

More tomorrow. I think reasonable success for today

Andy
 
Back
Top