Jeremy Harris said:
......made bolt-on terminals by soldering two bits of nickel sheet with a bit .....
Oh, Thanks;
That reminds me of something I 'invented' a couple of months ago, and intended to report here...
I haven't actually used it to build a pack yet, but it works very well in basic testing. I am planning to build most of MY Headways into 2P4S (12V/20A) sub-packs and make them easily reconfigurable, so I'll be doing this to the pack +&- ends:
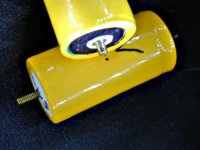
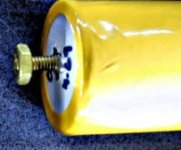
Here is how I did it:
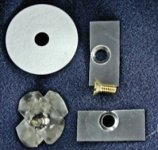
Drill a hole in your nickel tabbing material just big enough for your screw to fit through... I'm using a #8 screw here, but have used #6 and #10 as well.
(For my test, I was sloppy and got off center on all of them... When it is 'for real' I'll use a drill press and a vise or a jig)
Then I used a screw countersink to carve a cavity in a piece of aluminum block to shape the nickel to the screw head.
(I'll go take a photo of that and post it, if anyone really needs me to.)
Then silver solder the brass screws inside the formed hole.
(Not the silver bearing low temp solder most of you are familiar with... I used jewelers silver 'solder' which is actually more accurately called silver brazing because it is a 1200°F process.) You could probably use regular or silver bearing electrical solder, if you are careful, but if you do your CD spot welds over or near where there is low temp solder, it tends to 'squirt out the sides, contaminate your electrodes, and/or vaporize and poison your lungs.
Now that I think about it, if you built a jig to hold them and shaped your electrodes just right, , you could probably use your CD welder to weld the nickel directly to the screw and eliminate the soldering completely.
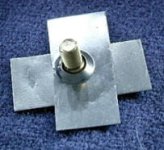
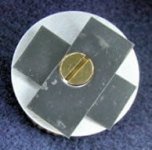
Then use your CD welder to attach the assembly to your battery, just like you would regular tabs.
That white disk in the photos is a very stiff 1/32" thick 'Fiber washer' I got off ebay:
http://cgi.ebay.com/ws/eBayISAPI.dll?ViewItem&item=380049774779
It fits perfectly on the ends of my 32650 LiIon cells... A little bit small for Headways , but the eBay Guy http://stores.ebay.com/RuBBeR-HoUsE will get any size you want.
You could get away with not using the fiber washer, but I really like it for two reasons: Not only does it add mechanical strength, but it provides great electrical insulation safety.... I don't know how many times I was working around the positive end of these batteries with a pair of pliers or other metal tool, and kind of crushed through the heatshrink and/or paper insulation and shorted the battery right at where the negative can crimps over the positive terminal disk.
Use a little glue to stick the fiber washer to the ends of the battery over the screw.
Then put some heatshrink over the whole thing, and you are 'good to go':
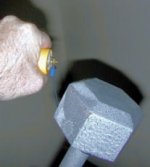
Thats a fifteen pound (7 Kilo) weight hanging from the screw terminal... I can even jiggle it up and down, and it holds just fine, so this is a decently strong assembly and should stand up to at least a normal level of real-world abuse.
Of course If I had been willing to wait until Headway gets their screw terminals batteries into production, this would have been a moot exercise, but the basic idea is adaptable to just about any battery from sub-C on up... Maybe even "A" diameter flat top NiMHs, with #4 screws and a sharp point on the welder electrodes....
When I do this for my Headway sub-assemblies, I'll stamp out round disks of the .01" thick nickel sheet from Admiral instead of using the rectangular tabs like I did above... I bet that with decent welds of that stuff, the terminals will be good for 50 pounds.... Probably pull the positive terminal disk out of the crimp before the screw and nickel base will tear off.


