DIY Toroidal Axial Flux PM

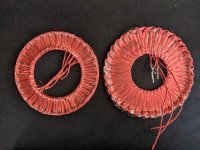
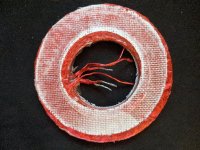
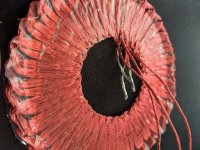
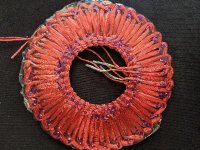
So I picked up the epoxy and finished the new stator. But again there are some issues. This one did not seem to break any wires which is great, however the angles of the pins and the extra length added to the inner and outer diameter pins made this quite a bit bigger, and will not fit in the rotor.

This time I removed the pins in the center before I glued it. This allowed me to flatten the inner diameter as much as the outer, but the wires wanted to go everywhere once I pulled the pins out. So I only did this to the inner diameter. This makes me think that the only reason its thicker is because I didnt properly press it in those spots on the first version of this that I tried.
resized-image-Promo (93).jpeg
resized-image-Promo (92).jpeg
resized-image-Promo (94).jpeg

I am going to try this again, and I will make a jig/press that will allow me to hold the stator in place while I remove the pins, then I can add parts for the inner and outer diameter and press those parts too. I assume the wires will find a place to sit. It might be a bit larger in diameter still, but hopefully a lot less because ill remove the extra set of pins on the inner and outer. this should make it easier to wind as well.

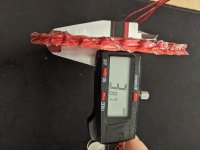
I do worry about the rigidity of all of this. the Epoxy alone does not make it stiff. the stator has the feel of hard rubber. you can deform it pretty easily. I purchased some fiberglass sheet that I was hoping might help if I incorporate it on the top and bottom face, but I still think it will be too flexible. The fiberglass around the inner/outer edge might be needed. But since I got it so thin with the same number of turns. I think I have a little wiggle room for extra material
resized-image-Promo (95).jpeg
 
Great work as always!
Maybe you could add something to the epoxy to make a stiffer composite?
Initial suggestions could be glass fibers or even carbon fibers?
I also know that diamond is very thermally conductive, so adding that would for sure improve the cooling performance, but I don't know if it's too expensive.

Just a few ideas, tale what you want and leave the rest!
 
Vbruun said:
Great work as always!
Maybe you could add something to the epoxy to make a stiffer composite?
Initial suggestions could be glass fibers or even carbon fibers?
I also know that diamond is very thermally conductive, so adding that would for sure improve the cooling performance, but I don't know if it's too expensive.

Just a few ideas, tale what you want and leave the rest!
Be careful with carbon, it's electrically conductive and doesn't play nice around magnetic fields. Not saying it wont work but it seems to be under-researched at the mo, might have a lot of potential for replacing back iron or even laminations but could turn into a charred mess if used without careful consideration.
 
Epoxy shouldn't be that flexible. Compared to pla, the modulus is much higher. 10GPa ish for epoxy, 3.5 for PLA. Maybe not a great mixture? Not enough/too much hardener? Crap epoxy?

Have you not used enough? I was assuming you'd completely saturated it and carried on pouring epoxy in to the full thickness but looking closer maybe you've used the bare minimum to suck the wires down.

Maybe it just needs a few days to fully harden?

A small number of glass fibers will make it substantially stiffer if on the surface.
 
If you use some fiberglass resin, and a few layers of fiberglass cloth on both sides it would be very stiff, but you
might not have much time, 20 minutes or so.

I like your idea using fiberglass sheet, you can get it as thin as .020", (.5mm),.. be sure to sand it first,. One piece
on each side will 'box' it, and it should be stronger than you think. Also protects the wires from the rotors.
(Cutting and sanding fiberglass gets death-dust everywhere in the shop though, take precautions.)

4mm thick!! Congrat's, it just keeps getting better. :thumb:
 
My high temp epoxy needed 10 days for full hardness at ambiant temp and would only had a 50°c glass transition temp then. With 16 hours at ambiant and 16h at 60°c it is full hardness and 115°C TG. Maybe yours as something like this specified !
I've found copper to add good stifness to it also but one fibre glass cloth on each side would for sure had rigidity.
Now that you can get it this thin (contrats !) You might as well optimise thickness/number of turn/number of parrallel strands to get the best power density and the kV you want !
Going too thin has limited return when you could add more copper and keep more stifness I think

Envoyé de mon Redmi Note 9S en utilisant Tapatalk

 
Maybe the epoxy didn't penetrate all the way through the thickness and that makes it less rigid. There is some kind of vacuum setup you can use to minimize trapped air in the structure. Thinner will certainly help with the flux density but it needs enough stiffness to stay in place and it will get hot if you run it hard.
 
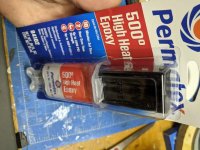
Thank you all for the suggestions. I am sure that the epoxy I am using is not the greatest, but it was something I could buy locally for a pretty cheap price. I found that the epoxy is stiffer where it did saturate the wires, but there are spots that still seem dry, or only seems to contain a little. I think I could probably use a bit more than 1 tube. or going back to the smaller stator might make one enough. This is something I found to be an issue with both stators now. The epoxy is difficult to work with in a large batch, it gets very hot and cures within a couple minutes. So I am mixing smaller batches quickly. I am sure I could do a better job of mixing it I stir the two components for about 20 seconds. When I was using the epoxy gun, it would mix it nicely in the nozzle, but I cannot find a high temperature two part epoxy that I can use in the gun I have.

The kind I have been buying is this, and I cannot get it in any larger batches.
resized-image-Promo (96).jpeg

From reading the back of it, it does not appear to need any cure time. It is to be handled like normal epoxy. So that was how I went about it. but I'm sure there is a trick to making it better. either through adding a stiffener or fiberglass, which leads me to my latest development.

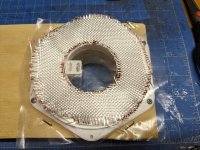
I purchased some fiberglass cloth ahead of the last one I made, but I didn't want to hide the winding pattern on the first one. This next one will hopefully be more turns and with fiberglass cloth integrated into it. This is the first time I have worked with this product before, so it's yet another learning experience. I initially just cut it with a pair of scissors, and that seems to have worked fine, but then I tried to pin it in place and found the strands fall out all over the place.
resized-image-Promo - 2021-09-01T075954.744.jpeg

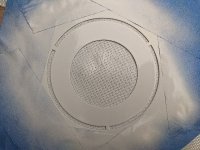
So I decided to make a stencil, where I could paint it in a small spot to hold the fibers together when I cut it.
resized-image-Promo (97).jpeg

Since I won't be able to see the holes I need to pin it to, and just eyeballing it was not good enough for me, so I made jig for the jig to align the pins nicely.
resized-image-Promo (100).jpeg

I also got some enamel spray paint, and made a paint jig for the pins themselves, with some magnets to hold them there. Need to improve this, the magnets force the pins in all sorts of directions, and they touch while I paint them
resized-image-Promo - 2021-09-01T080015.637.jpeg

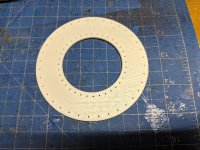
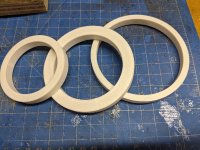
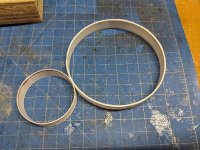
And I made some rings that I can use to hold things in place while I remove the pins, epoxy everything, and compress the windings.
resized-image-Promo - 2021-09-01T075924.291.jpeg
resized-image-Promo (99).jpeg
resized-image-Promo (98).jpeg

I also got all the spools wound up and ready to go. I am hoping to get 8-10 turns while keeping things pretty thin. Ill tackle how to fix it to a hub next. I did not intend for everything to be white either. I guess I just wasnt thinking of that, but maybe it will give it a clean look in the end
 
I think a better epoxy solution should be possible. Just a slow cure would be a step Up.
Did some googling and masterbond ep62 seems absolutely ideal for your purposes.

It cures very slowly at room temp and very fast at elevated temperatures and has a 125c glass transition temp after curing. If only it could be bought by mere mortals..

A quick ebay search came up with this stuff which is still heat cure and high temp compatible and can be bought without sending an email.

https://www.ebay.com/itm/Highside-12001-High-Performance-Heat-Cured-2-Part-Red-Epoxy-/304101602222?mkcid=16&mkevt=1&_trksid=p2349624.m46890.l49286&mkrid=711-127632-2357-0

I have no experience with either product so I am just trying to show that something more suitable probably exists.
 
Vbruun said:
I think a better epoxy solution should be possible. Just a slow cure would be a step Up.
Did some googling and masterbond ep62 seems absolutely ideal for your purposes.

It cures very slowly at room temp and very fast at elevated temperatures and has a 125c glass transition temp after curing. If only it could be bought by mere mortals..

A quick ebay search came up with this stuff which is still heat cure and high temp compatible and can be bought without sending an email.

https://www.ebay.com/itm/Highside-12001-High-Performance-Heat-Cured-2-Part-Red-Epoxy-/304101602222?mkcid=16&mkevt=1&_trksid=p2349624.m46890.l49286&mkrid=711-127632-2357-0

I have no experience with either product so I am just trying to show that something more suitable probably exists.

Thanks for the recommendation. I have submitted an inquiry with masterbond. we will see where it goes. I will keep looking around for a better product, but I honestly think that what I have now should suffice in getting something running, from there I can reevaluate Kv and other parameters. and then go back to improving materials.

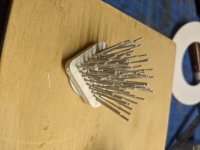
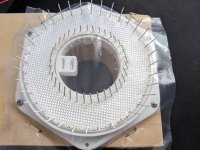
I got all the pins in, just need to wind it up now. You'll notice the shallower angle, this should help keep it from getting larger the taller it gets, also it makes winding the inner turns easier, since there is more clearance between each pin.
resized-image-Promo - 2021-09-01T115653.111.jpeg

On another note, I think my printer broke (again). The bed no longer heats. ugh. ill figure it out
 
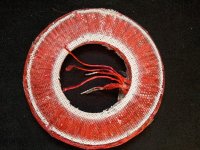
Alright, so I was able to get the stator wound up, and glued. It was not perfect, but I think it might be usable

First, I was not able to get the 10 turns I wanted. I could only get 7, which is kind of a bummer, because I had plenty of wire spooled up, but I'm not sure how far I will get with what I have left. Either way, the issue was the pins in the jig. they were actually too short. The whole stator wants to expand while you're winding. So its difficult to keep the strands down as you get to the later turns. Also the angle I put the pins in helps, but they still bend. They are just too thin. So by the end the pins are bent but in the jig at a different angle.
The fiberglass also made a huge difference. This thing is completely stiff, and painting the edges of the fiberglass with the stencil worked really well. I will continue to do that.
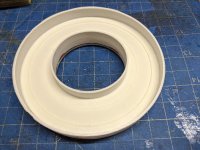
The next time I will definitely cut a larger piece of plastic to separate the stator from the jig. It was not enough to cover the outer walls. Also I need to change some things with the jig. It worked pretty well, but the inner and outer diameter inserts were too thin and flimsy. They worked, but not well. The epoxy oozed out everywhere. Also the three rings works well for holding the stator while removing the pins, but it left imprints on the stator making it different thickness at different diameters. Subtle, but theres a difference.
The biggest thing that went wrong however was the fact that Im a big dumb idiot and forgot the second piece of plastic on top, and epoxied the jig directly to the stator. I had to chisel it out, but it went pretty well, and the jig separated pretty nicely at the fiberglass layer.


resized-image-Promo - 2021-09-09T215922.090.jpeg

resized-image-Promo - 2021-09-09T215947.958.jpeg
resized-image-Promo - 2021-09-09T220029.723.jpeg

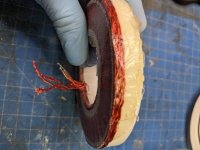
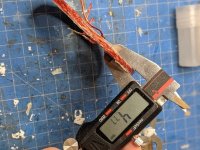
with 7 turns, its less than 5mm everywhere. That's 1.5mm thinner than the mk5, with 2 more turns. Need to find a way to fix this to a hub and give it a test spin
resized-image-Promo - 2021-09-09T215900.373.jpeg
 
fechter said:
How's the stiffness?

Its solid. I remembered that I forgot the plastic when I went to check on things at the 2 hour mark. This meant that it still had a tiny amount of give. but even with that, this version is far stiffer than the last. The last stator I made seemed to take more than 24 hours for it to get to its most solid point, so im sure it will be similar here, but so far so good.
 
One thing to try is to see if the resin you use is holding on your wire. It might not be bonding to the wire well. If it's not bonding the wires could just be slipping in the resin like if they're in little tubes.

One thing that might help this is adding fiberglass tow in with your winding wires before winding. It's basically like fiberglass string. You can do a few tests to see how much / where your tradeoffs are.

Vacuum infusion would help to get the resin all the way into the coils. The idea is to suck all of the air out then open little feeds to have atmospheric pressure push resin into the voids.
Some terms to look up if you think this will help. Flow media, venturi vacuum generator, resin trap, vacuum pot, scrim cloth, vacuum infusion, vacuum bagging, vacuum bagging film, peel ply, release film, fiberglass tow.

After you do all of this you could put it in a pressure pot to cure. This pushes the resin in better, extra resin out, will flatten out and compress the coils, and minimizes air bubbles / voids.
This is basically the benefits of using a press without using a clunky mechanical press but can get expensive and complicated. A local fiberglass / boat repair place might be willing to do the vacuum infusion part for you after you wind it.
 
Jrbe said:
One thing to try is to see if the resin you use is holding on your wire. It might not be bonding to the wire well. If it's not bonding the wires could just be slipping in the resin like if they're in little tubes.

One thing that might help this is adding fiberglass tow in with your winding wires before winding. It's basically like fiberglass string. You can do a few tests to see how much / where your tradeoffs are.

Vacuum infusion would help to get the resin all the way into the coils. The idea is to suck all of the air out then open little feeds to have atmospheric pressure push resin into the voids.
Some terms to look up if you think this will help. Flow media, venturi vacuum generator, resin trap, vacuum pot, scrim cloth, vacuum infusion, vacuum bagging, vacuum bagging film, peel ply, release film, fiberglass tow.

After you do all of this you could put it in a pressure pot to cure. This pushes the resin in better, extra resin out, will flatten out and compress the coils, and minimizes air bubbles / voids.
This is basically the benefits of using a press without using a clunky mechanical press but can get expensive and complicated. A local fiberglass / boat repair place might be willing to do the vacuum infusion part for you after you wind it.

Thanks for this. I understand what you are saying about the wire not bonding well to the epoxy. But im not sure yet if that is an issue. I would suspect it would really only be ab issue at the beginning and end of each phase. But I bet I could also incorporate a few strands of fiberglass tow into the litz wire as I spool things. I also wonder if I would still need the cloth on the top and bottom. I would imagine so.

Thanks for all the search terms. I would love to have a better set up to press/cure these. a local place sounds nice too. Ill shop around.
 
You want it to bond though. That way it can put the wire in tension or compression. That's how it helps rigidity / strength.
 
Jrbe said:
You want it to bond though. That way it can put the wire in tension or compression. That's how it helps rigidity / strength.

Okay I understand better what you are saying now. Makes sense. I may purchase some fiberglass tow and see If I can get it to integrate nicely. I am a little unsure how to tell if its doing its job though. I imagine this will prevent it from bending due to gyoscopic effect in combination with the uneven magnetic field at higher power. I will have to see how this one holds up once I can get it attached to a hub.
 
The results are in, and they are interesting. Long story short, this stator using the same rotors is nearly identical in performance, but I think I can explain why.

I adjusted the stator hub to fit the new stator thickness, but I didn't change the spacing, so its sitting 1mm further away, I didn't want to risk it dragging, and it not being usable on the first go with this method, I also used the same rotor spacer ring that I used on the last one, so it is further away on the other side as well. So, even though there are two more turns, the copper is further away from the magnets, so it experiencing less flux. that's my theory anyway.

I tried a thinner spacer ring that I had printed previously. and it caused the rotor to peel away from the backing. The part I used to fit the magnets in their place, was not epoxied down itself, because I didn't want it to interfere with placing the magnets, due to the short working time of the stuff I had. So easy fix, longer working time epoxy and glue it all. but since this happened. I sorta made it worse in an attempt to fix it, I peeled it back further and got some epoxy in there, and clamped it all down. It stopped it from getting worse, but there is some bend that is permanently there now. However I do not think that is my biggest issue.

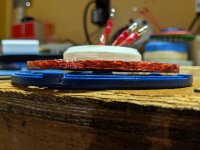
I think the variable thickness of the stator, and the method of fixing the hub to the stator lends itself to some inaccuracy in how flat everything is. comparing this hub/stator to the last one, the wobble that is observed when turning it is a lot less with the last one. This new one's issue seems to be with the stator not the straightness of the part of the rotor that it all sits on. Ill have to think about this issue. I'm not sure a good way to ensure that its all plumb/flush/straight.

resized-image-Promo - 2021-09-13T184508.036.jpeg
resized-image-Promo - 2021-09-13T184445.006.jpeg

The picture doesn't completely do justice to how unlevel it all is.
 
Is it worth maybe ruining it by trying to straighten it? You could try to heat it a bit past it's deflection temperature then flatten it with a weight and allow it to cool.
Could be a toaster oven with foil keeping the ir from burning it.
 
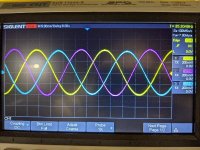
That's really efficient! 9W at 4krpm! My iron core motor that drives my ebike uses about 50W at 3krpm. Is it correct?

You might have missed a trick by not moulding the hub onto the stator at the same time as epoxy and glass fibre ing it. Sure you could get it dead flat that way.
 
Jrbe said:
Is it worth maybe ruining it by trying to straighten it? You could try to heat it a bit past it's deflection temperature then flatten it with a weight and allow it to cool.
Could be a toaster oven with foil keeping the ir from burning it.

I may try that. but the hub is made of PLA, so I think that is going to melt before I can get the epoxy soft. Given that I'm using high temp stuff now. maybe localized heat with a hair dryer....

mxlemming said:
That's really efficient! 9W at 4krpm! My iron core motor that drives my ebike uses about 50W at 3krpm. Is it correct?

You might have missed a trick by not moulding the hub onto the stator at the same time as epoxy and glass fibre ing it. Sure you could get it dead flat that way.

Thanks. I have to imagine the bike motor suffers from cogging due to an iron core. To me that's the biggest appeal to these air core motors. But yeah I made another small video, but I don't think its worth uploading. (ill probably compile it with something else at some point). but I revved it up to max RPM and kept it there for a bit. I only saw it peak at ~11W, but seemed to be happy at 8-10

And you're totally right. doing everything with the hub at once I think is the way to go. Going to need to make another stator, but I have ideas on how to change the winding jig. unfortunately I am having intermittent issues with my print bed, and have not been able to figure it out
 
Bad luck on the print bed. You tried https://m.aliexpress.com/item/1005002748409282.html this glue? I found it works so well i don't even need to heat the print bed for pla.

Losses are to the iron hysteresis and Eddie currents. Strictly, cogging torque is an elastic phenomena and doesn't result in losses... Just noise (very small loss) And vibration, which can indirectly lead to losses.
 
mxlemming said:
Bad luck on the print bed. You tried https://m.aliexpress.com/item/1005002748409282.html this glue? I found it works so well i don't even need to heat the print bed for pla.

I am usually against the glue Idea, but I have already pretty much destroyed the print bed in the process of trying to find the issue. Its probably a hazard to have it heated now. Its just going to make a mess of my nice coated glass :( but if it means the project can continue, I can dig it.

Ive been wanting to get another printer for a bit now... of course the goal was to end up with two.

mxlemming said:
Losses are to the iron hysteresis and Eddie currents. Strictly, cogging torque is an elastic phenomena and doesn't result in losses... Just noise (very small loss) And vibration, which can indirectly lead to losses.

Understood. I would think the air core and litz wire seems to be mitigating those losses in mine. not really sure otherwise, there's a decent wobble to it, so I bet there's room for improvement.

I am currently experimenting with a spray on silicone lubricant to see if I can get it to keep from sticking in place on the jig, eliminating the need for plastic and a flat surface to wind it on. I am trying to do something other than the pins, but if I model in something on the surface of the jig, I cannot get the plastic to form to it. So if I can use fins to wrap things around instead of pins, I can wind it, epoxy and fatten it in place, then pop it off. Hopefully I can reuse the jig. Then I thought I could add the fiberglass layers on top and bottom and maybe install hall sensors and fill the rest with epoxy, and fix it to the hub in a more controlled way.

My concern with this approach is obviously if I will be able to easily get the stator out after the epoxy cures, but also how the multi-step epoxy approach might not be the best for strength, but I don't know enough about it.
 
Back
Top