E-Big Dummy Bobber-100V/HT3525

dequinox said:
liveforphysics said:
Good idea KiM, putting a 1-turn wind onto a hubmotor and gearing it down something like 6:1 would make for a bike with minimal extra weight, but somewhere in the ballpark of 4-6 times the power. That would be perfect for a big beefy extra-cycle bike like this, perticularly with a guy who has some machining tools and skills to make it happen.

What does it mean to have a "1-turn wind" motor? Where's the thread on that if you don't mind me asking?

would be winding your electric motor X number of turns but only completing one
rotation of around the armature..

KiM
 
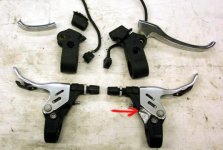
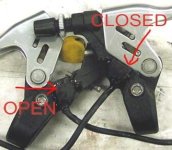
Here's a pic of the levers. On the left is the Shimano LX lever, you can just see the cutout. On the right is the hacked lever. I milled away a 2x2x10 mm area with the dremel in an area near the arrow tip. The wider shiny area is where I scuffed up the surface with an aggressive carving burr. Got to epoxy them up and install.

I think this is gonna work! :wink:
 

Attachments

  • levers.jpg
    levers.jpg
    32.5 KB · Views: 3,889
will_newton said:
I think this is gonna work! :wink:
It did. Super strong and a decent job that looks like OEM gear from a few feet away. Now that they are mounted with all the other handlebar stuff, you can't even tell from 1 foot away.

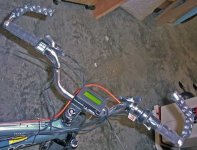
I have the levers mounted, along with the shifters, grips, bar ends, throttle, cruise control and 3-spd switch. I'm Saving the CA for a bit later. All the cords are just temporarily ziptied to the bike. If I get the ESC where I want, then I don't think the e-cables will even need to be extended or trimmed.

I took the bike out for shakedown ride #2 and what a difference! I have good brakes now! The bike rides like a dream and has a plush rear end feel but feels very connected. I pumped the forks up more and it seems good to go! Let's do more exclamation marks!!!!!!!!!!!!!!!!!!!! :lol:

So, it looks like most of the bicycle components are taken care of. I probably have a few more small things to tweak as the cables stretch and maybe fine tune some stuff on the handlebars.

Then it's time for the e-ticket to ride
 

Attachments

  • e-levers.jpg
    e-levers.jpg
    20.8 KB · Views: 3,856
OK, time to start messing with my Methods 100V/100A ESC. Thanks to Patrick for supplying the ESC/hub and other e-parts. He does some good stuff here and I was happy to pick up one of these. So let's get started!

update: I would recommend using the link in the next post to get the best instruction set to date, this is just a walkthough for my build. The next post has a link to the manual I put together.

1. Gather the ESC parts and look up all my PM's and find the info sheet Methods sent along with the ESC.

2. Reread the Methods 100V 100A Programmable Regen Controller thread! http://www.endless-sphere.com/forums/viewtopic.php?f=2&t=13638 and if you can wade through it Re: Instant Start 18 fet Infineon Boards are here... http://endless-sphere.com/forums/viewtopic.php?f=2&t=10312

3. Figure out how to install the software and drivers. This took me a little doing. Thankfully, Patrick supplied the links on his programming thread for all of this. I have compressed them all into a zipped file below. I just had some issues for a bit because I didn't know how to install the drivers, but got the software launched after a bit of tinkering. This install was for Windows Vista, yours may be different, especially Step e.

a. Download all the software from the the Methods ESC link. He has a set of basic instructions there for the esc, but I am keeping my own reference set here.
b. Decompress the Parameter Designer software. I used http://www.7-zip.org/. The PD software probably won't launch correctly until you finish the rest of the installs, so keep going.
c. Decompress the MDU232M-Driver using 7-zip and run the setup.exe.
d. Drag and drop the downloaded Richtx32.ocx and MSCOMM32.OCX files into the directory c:/windows/system32
e. Now you have to register the .ocx files. You can try "open with" on the individual files and browse your way to the system 32 folder and use the app "regsvr32.exe" to open the files and register them. I got an error code (yay Vista!) and had to use the cmd.exe app in the system32 folder running as the Administrator. This opens the command line mode so you can do the registration.
1. Type this at the command line: cd c:\windows\system32
2. Hit return, then type: regsvr32 Richtx32.ocx
You should get a registration successful message.
3. Hit return, then type: regsvr32 MSCOMM32.OCX
You should get a registration successful message.
f. Open the Parameter Designer, which with luck, will open!

5. Use the PD to open one of the "Example Settings" .asv files that Methods lists on his controller page. The program should populate itself with info.

6. Insert the USB programmer into the controllers 4 pin programming harness. The button on the connector goes UP, the visible pins go down (lights go up, as seen later!). For some reason at this point, my computer wanted to install the USB driver, even though I thought I had already installed it. Follow the Windows installer prompts to navigate to Methods driver file folder and open it to install the driver.

7. Realize things aren't cooperating and ask a question in the controller thread. Get answer:
SpeedEBikes said:
You need the dongle attached to the usb cable plugged into the computer. The dongle should appear in the device manager and you should be able see/set what comm port it uses. Fire up the software and set it to the right comm port. Load the asv file, set the parameters and start the upload. Then connect the controller to the dongle. Be careful at this stage to insert the connector appropriately. Since it isn't keyed one can easily insert it upside down or offset. I don' know that catastrophe would ensue if connected wrong, but wouldn't rule out the possibility.

Anyway, once you make this connection, the upload should proceed practically instantly. If for some reason it doesn't, start over.

It took me a while to get this working because I wanted to plug the dongle into the controller first and leave it connected as it's the dodgiest connection top make, but alas it needs to be made last.

Good luck!
AHA! I am putting the USB dongle on upside down. You should be seeing the lights on the dongle and black plastic on the ESC connector (not the metal socket side).

8. NOW, just follow the steps above and the test program should load up!

9. Next, I have to figure out a custom program for my setup. I would refer you back to page 11 of the methods ESC thread now for some info on the Keywin E-bike Lab or Parameter Designer software. I have a post on this page with some info on my setup. http://www.endless-sphere.com/forums/viewtopic.php?f=2&t=13638&start=150 It took me a little while to figure out what each field means and appropriate values,but for a starter setup I am using Method's DC30AC80_65ADC.asv file but added the 3-speed switch parameters and no regeneration. You can see a screenshot of this programming setup on the above link.

10. Upload the custom software and save the file and take a screenshot of the setup.

I think that wraps up the programming for now, but I am probably update this post as I go along to reflect any changes.

That's as far as I have gotten, more later!
 

Attachments

  • Methods ESC files.zip
    356 KB · Views: 91
This post was just a placeholder for me to work up some info about the KEBLPD software. I was having trouble working out some details on the ESC and decided to make a manual out of the info I dug up. It has been moved to the technical reference forum http://endless-sphere.com/forums/viewtopic.php?f=16&t=14836
 
OK, now that I have the ESC programmed, I decided it was time for some looking and thinking. I began test fitting and trying out some configurations of ESC and lipo's. Nothing hooked up, just checking for fit and weight balance.

I am pretty sure the ESC is going to get mounted on the rear seatstays, mostly because it puts the off button in a very reachable place that I can get to while riding if need be. I've had an ESC lock itself into full power mode and had to yank the battery cable out to stop it while riding through a very busy shopping center parking lot. I'd rather not repeat that experience!

I had a few interesting ideas for the batteries, but I am still pretty undecided so far as to where to stick them.
1. I am going to remove the water bottle cages and see what fits in the main triangle.
2. I tried with them in the xtracycle bags, which may seem like an obvious first choice, but I want those bags as clear as possible. I liked this the least, but will use them in the bags for testing.
3. Considered the Hoss rear triangle, but after checking there isn't much room for many batteries in there.
4. My coolest idea was to make a double decker snapdeck. I can make a snapdeck shaped base, then a single layer of batteries, and the original snapdeck. Pros: batts out of the way and compressed. Cons: wierd, longish battery cable runs and slightly top heavy, but not bad.
5. Mounted under the running boards. What running boards? The ones I intend to make of course. :) It gets them out of the way and low, but the longer wiring runs may cause issues.

I also dismantled my 6s4p paralleled packs into 6s1p packs for test fitting. After some considerable thought, I have considered just ordering a completely new set of packs using nine 6s 5800mah packs http://www.hobbyking.com/hobbycity/store/uh_viewItem.asp?idProduct=10288&aff=146283 and making an 18s 17.4ah pack. This will let me cut down on battery real estate without sacrificing much capacity vs. the 20ah setup. The main issue being exposed right now is that my packs are not all of a similar make/vintage, event though the capacities are the same. This will be OK for the very short test runs I am planning, but not as a final package. I'll know more after I test a few different voltage configurations to see what I like.

My goal is 30+ mph minimum, which should be doable. 35+ MPH would be better, 40+ MPH is a bit much for my current needs. I'd add amp hours for range rather than volts once 40MPH is achieved.

Enough cogitation, next I think I'll wire the hub motor to the ESC.
 
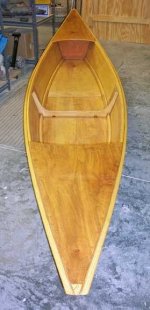
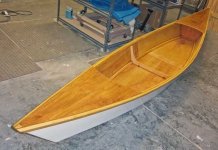
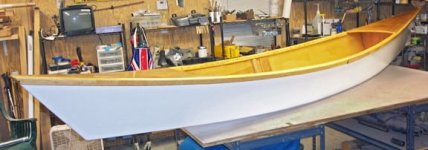
Long time, no see! I started building a canoe during the few days I had free during the holidays and like 97% of all my projects, it's taking a bit longer to finish than planned, imagine that! :roll: Between boatbuilding and Xmas travel madness I have put the bike on hold for just a little bit.
 
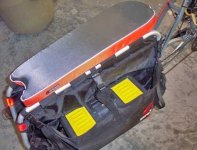
It's baaaack. I literally blew the dust off this project. The story so far: I walked out o get some double stick mounting tape for the CA speed sensor a few months ago and got distracted. I built some cool new stuff and I found a perfect toolbox that hold all the lipos perfectly and fits the bags. This will get me throught he testing phase. I also just shoved the ESC into the opposite bag. I need to start making all the connections now. This is an extremely ghetto setup for some rough testing only, just so i can basically get this thing on the road for a 5 minute test ride to make sure everything works and get an idea of the speed/torque of the motor to see what the final battery config will be.

Here's some pics. Thanks for waiting, my boat is sweet.
 

Attachments

  • bars.jpg
    bars.jpg
    31.3 KB · Views: 3,805
  • battholder.jpg
    battholder.jpg
    30.6 KB · Views: 3,805
  • wholebike.jpg
    wholebike.jpg
    41.5 KB · Views: 3,805
  • 6hrnose.jpg
    6hrnose.jpg
    28.8 KB · Views: 3,805
  • 6hrquarter.jpg
    6hrquarter.jpg
    38.2 KB · Views: 3,805
  • 6hrside.jpg
    6hrside.jpg
    29.3 KB · Views: 3,702
Great work, on the bike and the boat. But the boat needs a trolling motor on there with a foot controller for when your arms get tired :lol: You already have the battery :twisted:

Also I appreciated your take on the Stoke Monkey because that is exactly the hit I got off the system. I know it works for many folks but I will take my fixed gear fix on my fixed gear when I need it. The ability to pedal independently of the motor is way more efficient and vice versa. And yes I know that a freewheeling crank can be used to alleviate this but it just adds more cost to an already expensive system.

I have an extra cycle setup in the pile that I am looking for a Giant LaFree Panasonic chain drive donor for ala this guys setup.
 

Attachments

  • morganfriedlandxtracycle.jpg
    morganfriedlandxtracycle.jpg
    43.1 KB · Views: 3,661
nice bike Mabman!

I am having a bit of trouble here. I am not liking all the weight in the back from the batteries. I'm sure it's no issue for part time loads, but for a fulltime load sitting in the back, well it makes it impossible to lift the rear end. I tried moving the bike with the toolbox just sitting on the top tube and it's more manageable and easier to at least drag the rear end around. I remember a similar comment in Oatnet's xtracycle build about the weight in the back- he was right.

I have to cut battery capacity or voltage or change location to get the bike balanced and obviously, I'm going for relocation. :D The batteries will probably end up in the triangle.

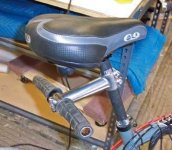
PS- I love my local shop, Don's Bicycle's, he has been good about getting me odd or secondhand parts. Check out the rear stoker bars. $15 for the bar and stem (I had the grips). I cut the bars down and had to get the hammer out to tap the stem on. BTW if you gotta stretch your stem to fit your seatpost, make sure to use a welded stem, not a cast one, or it will crack instead of bend.
 

Attachments

  • bars.jpg
    bars.jpg
    21.3 KB · Views: 3,697
OMG, this bike project is about to get a makeover. I did something naughty, naughty, naughty, but cool.

I hope to take delivery of my parts later this week. I'll have pics then of the parts and a possible divorce notice. :twisted:

anyone want to take a guess at what's arriving?
 
well, it's not going to be here this week, due to some issues with the selling party not actually having the item in stock (they said they did :x ) and then having to have it shipped freight to them and fedex'd to me. Granted this was a special situation due to the size, but you'd think I'd get an e-mail or something about the delay. I only found out because I sent the a "where the heck is my stuff?" e-mail. NO ETA on my Fedex shipping because they can't track the freight shipment, although it's "on the way."

Can you say "Last order from these guys-ever."

Don't worry, I'll be further outing them and dragging them over the coals once I take delivery.
 
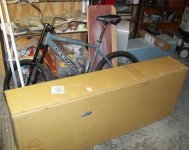
Hey, what's in the box? Isn't that the Hoss in the background? WTF is going on here?box.jpg
 
MUAHAHAHAHA!!!
 

Attachments

  • dumrear.jpg
    dumrear.jpg
    41.7 KB · Views: 3,523
  • dumfront.jpg
    dumfront.jpg
    30.9 KB · Views: 3,523
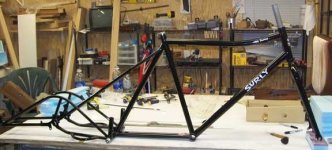
Got this on special from ebikestop.com and I was right pissed about their lack of communication and the fact that this item was represented as in in stock when it's drop shipped to them after they place an order, after I place an order and then gets shipped to me. No e-mails about the delay, no tracking info once it actually shipped. I only got a response by sending an e-mail trying to find out what was going on. Just dissatisfied and will not do business with them again. There are many other bike shops out there that give better service.
 
So, other than the mini-rant, I'm super happy about this frame. It is very nice looking- flawless paint. It's light, but stout in all the right places. Mounting brackets everywhere. The rear end is much nicer than the xtracycle rear end- stiffer, better protection for the bags, thicker dropouts, and room for batteries in the triangle. I almost regret not using the front fork, which is even nicer than my other two Surly forks, beefier too! Who knows, I could go 2WD with it, I have the batteries/ESC, just need a 2nd front hub motor. I just want to get motor one working!

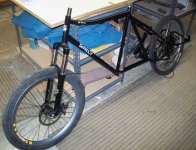
So, now it will go off to the LBS for fitting of a new headset and cranks, then I have to reinstall everything else, maybe it won't take too long. The Hoss is going back to it's original state. It was a hard choice, but it's original buildup made such a nice quality, good fitting MTB that it was a detriment to make it an e-bike and that's the truth. Once I started feeling the weight of this e-bike, I missed the flickability and nimble mountain goat handling of the Hoss almost instantly. The Xtracycle frame (no bags) went onto my Cannondale, which has become my chopper-esque out 69er street sled. I should put up a pic of El Toro, it's a neat bike. The ride is super smooth and fast on the street and it's lighter than most MTB's.

This build seems to be moving slow or even starting from the beginning again, but I am not worried about it. I'm just out here having fun. I hope this frame rides as sweet as it looks.
 
hoy cow, I barely have time to get by this forum anymore and dropped in on my old thread. I do have the cranks and headset installed and just yesterday added the seatpost.

yes, this build is really moving that slow. I got involved building a CNC machine....

maybe in a month or two I'll install a derailleur. :roll:
 
So the most interesting thing about this project is it's ability to take a long f'ing time to get itself done. A quick check on the date since the last post.....OVER THREE YEARS AGO :shock:

So the story thus far: I did build an awesome CNC foam cutter from scratch and built some R/C stuff with it and then gave it to a friend. I then really got into welding and started a couple of interesting frames as can be seen in my Ekick Scooter thread. I then got much deeper into homebrewing beer and less so into electric bikes.

In the meantime I was accumulating a buncha bikes and most of them went into storage. The storage bill has started to bother me, so I decided to put every bike I had into working shape and starting getting rid of them. I also decided to render all frames non-electric and choose one to be my ebike and liquidate some older e-bike stuff

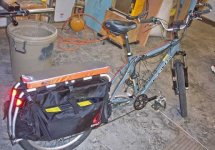
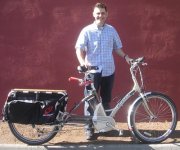
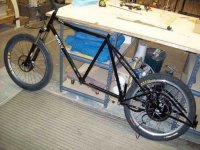
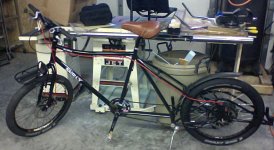
The last thing left to try as an electric is the BD frame. So here we are. I have gotten the BD up and running in bicycle mode. I have started the electrification process and here is where I am at right now! HT3525 rear hub/Methods 100v/100a controller/24S 15ah lipo sitting on 24" rims shoed with Crazy Bob's and BB7 200mm stoppies.bigdummyoncrazybob24s.jpg
 
Rock 'n Roll Will - looking forward to seeing some good video of that BD!
Sending you the props from 27596!
 
Thanks JKB, one of my best friends from college lives near you, that's a nice part of NC. I'm in Wilson.

I am waiting on a few parts. I ended up going with LowePro camera bags that will mount on the rear integrated footrests. Each side holds 2x 6s15ah and parallel boards.

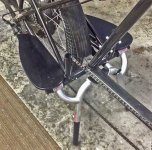
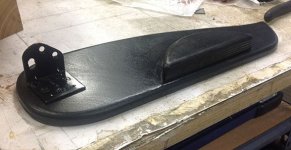
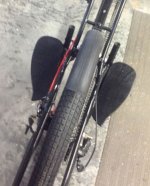
I made some custom footboards for the battery bags, but decided I really wanted a Kickback stand. I am waiting for it to arrive before I finalize the saddlebag mounting position. I have made some custom hangers for the Lowepros too.

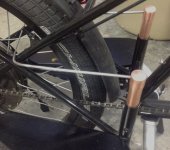
I spent a few hours doing nothing except looking at different locations for mounting batteries and the controller. I tried the big xtracycle racks and bags-too bulky and even kludging on a regular rear rack-too weird looking. The low small bags are going to help keep the bobber motorcycle look and I think the controller will be tucked into the small rear triangle.

I'll post pics after install.
 
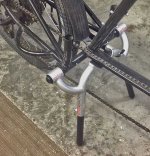
I got the Kickback stand and I ordered a set of the LT Footsies because, well...I thought they might be better than my homemade ones. The Kickback is 100% worth it. The LT Footsies are great as well, but I like mine mo' betta. 8)
cool.jpg
View attachment 1
coolest.jpg
 
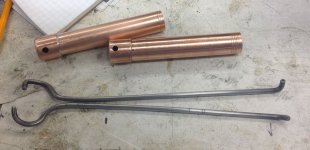
The caps on the end of the Kickback unscrew and you can use the bolt to mount stuff.inverted.jpg
rear.jpg
 
Finally finished the little frame parts to hold the battery bags. I also found some black 1" plastic caps at Lowe's to plug the rear xtracycle holes.parts.jpgframe.jpg
 
Back
Top