OK, time to start messing with my Methods 100V/100A ESC. Thanks to Patrick for supplying the ESC/hub and other e-parts. He does some good stuff here and I was happy to pick up one of these. So let's get started!
update: I would recommend using the link in the next post to get the best instruction set to date, this is just a walkthough for my build. The next post has a link to the manual I put together.
1. Gather the ESC parts and look up all my PM's and find the info sheet Methods sent along with the ESC.
2. Reread the
Methods 100V 100A Programmable Regen Controller thread!
http://www.endless-sphere.com/forums/viewtopic.php?f=2&t=13638 and if you can wade through it
Re: Instant Start 18 fet Infineon Boards are here... http://endless-sphere.com/forums/viewtopic.php?f=2&t=10312
3. Figure out how to install the software and drivers. This took me a little doing. Thankfully, Patrick supplied the links on his programming thread for all of this. I have compressed them all into a zipped file below. I just had some issues for a bit because I didn't know how to install the drivers, but got the software launched after a bit of tinkering. This install was for Windows Vista, yours may be different, especially Step e.
a. Download all the software from the the Methods ESC link. He has a set of basic instructions there for the esc, but I am keeping my own reference set here.
b. Decompress the Parameter Designer software. I used
http://www.7-zip.org/. The PD software probably won't launch correctly until you finish the rest of the installs, so keep going.
c. Decompress the MDU232M-Driver using 7-zip and run the setup.exe.
d. Drag and drop the downloaded Richtx32.ocx and MSCOMM32.OCX files into the directory c:/windows/system32
e. Now you have to register the .ocx files. You can try "open with" on the individual files and browse your way to the system 32 folder and use the app "regsvr32.exe" to open the files and register them. I got an error code (yay Vista!) and had to use the cmd.exe app in the system32 folder running as the Administrator. This opens the command line mode so you can do the registration.
1. Type this at the command line: cd c:\windows\system32
2. Hit return, then type: regsvr32 Richtx32.ocx
You should get a registration successful message.
3. Hit return, then type: regsvr32 MSCOMM32.OCX
You should get a registration successful message.
f. Open the Parameter Designer, which with luck, will open!
5. Use the PD to open one of the "Example Settings" .asv files that Methods lists on his controller page. The program should populate itself with info.
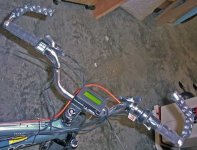
6. Insert the USB programmer into the controllers 4 pin programming harness. The button on the connector goes UP, the visible pins go down (lights go up, as seen later!). For some reason at this point, my computer wanted to install the USB driver, even though I thought I had already installed it. Follow the Windows installer prompts to navigate to Methods driver file folder and open it to install the driver.
7. Realize things aren't cooperating and ask a question in the controller thread. Get answer:
SpeedEBikes said:
You need the dongle attached to the usb cable plugged into the computer. The dongle should appear in the device manager and you should be able see/set what comm port it uses. Fire up the software and set it to the right comm port. Load the asv file, set the parameters and start the upload. Then connect the controller to the dongle. Be careful at this stage to insert the connector appropriately. Since it isn't keyed one can easily insert it upside down or offset. I don' know that catastrophe would ensue if connected wrong, but wouldn't rule out the possibility.
Anyway, once you make this connection, the upload should proceed practically instantly. If for some reason it doesn't, start over.
It took me a while to get this working because I wanted to plug the dongle into the controller first and leave it connected as it's the dodgiest connection top make, but alas it needs to be made last.
Good luck!
AHA! I am putting the USB dongle on upside down. You should be seeing the lights on the dongle and black plastic on the ESC connector (not the metal socket side).
8. NOW, just follow the steps above and the test program should load up!
9. Next, I have to figure out a custom program for my setup. I would refer you back to page 11 of the methods ESC thread now for some info on the Keywin E-bike Lab or Parameter Designer software. I have a post on this page with some info on my setup.
http://www.endless-sphere.com/forums/viewtopic.php?f=2&t=13638&start=150 It took me a little while to figure out what each field means and appropriate values,but for a starter setup I am using Method's DC30AC80_65ADC.asv file but added the 3-speed switch parameters and no regeneration. You can see a screenshot of this programming setup on the above link.
10. Upload the custom software and save the file and take a screenshot of the setup.
I think that wraps up the programming for now, but I am probably update this post as I go along to reflect any changes.
That's as far as I have gotten, more later!

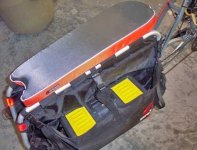
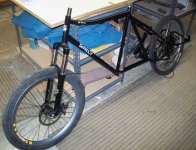
") It gets them out of the way and low, but the longer wiring runs may cause issues.
It gets them out of the way and low, but the longer wiring runs may cause issues.