E-S Stealth Electric Bike Owners

I have tried to delete these post. No point i posting with out Pictures. Seems like Photo bucket have done some changes and become (greedy) and wont allow us to post pictures on this forum anymore without paying 399.99 USD a year...

Does anybody else have the same problem ?
 
I cant see your pics unfortunately, every pic looks like this to me

546259-photobucket-3rd-party-hosting-broken-image.jpg
 
Stealth_Rider said:
stritzky said:
I have been very busy lately building 2 new Sets of Wheels with 19” Mc rims for my Stealth Bomber. ......

Can't see any of your pictures in Google Chrome?

Thats weird I have tested this on several different machines and web browsers since photo-bucket no longer is a usable tool, and it works on all of them.
 
@stritzky

If I check the link of one of the images like
https://lh3.googleusercontent.com/3TECxi2qX3MhONwFQ6NADsv5cTZuUh9CJbQQsWjpC5y4O7JhXjlXVutJ-q_6_IAQRio38SFnH3mbb9pzg4qzbFVuLUqX8tA2MBNAMSa1-2LKO20cxR38WCugOYBPfTJ3SGF3MU15COc9-tOwHPiiJ12Ur6dLV3pmOiCxp2eVLhBCYrxaqMiibLos0-SLSlr66oobj7OR8j1c0S6frCBUIJAorOXYa5ZKYYxZxq0hABYHxuj5CEeO04VRZaQcpp-3JTs5UjIZCyXSrh7X2gUqM3Paj06jVFI5ER_0js5RsFtAbaxjVAy_4_9MqV2Ng9cb9Fr59PHk_2fBmGG_fJ43TqWq25kM4tBqm2YmX-3WMShuvpJ6ikCHsBmht34ID6wixo_KTRMd8rsz7AHeOKVTi8LL6OAEkIsuDyLaE-jCVYC4hxWNXSYlvtDfEh7fO4kOgKuDvoSb77U6rJ8zf8umtzWO5n1tbIws7FEghE-BC2sziM01hh8gVuCKNkl2XW46_N-VaZWttjRXOLPRqKZ5cXYwm2RJ6i2vYlB7oZeOugNUx5FrIHoC14CQD1dSSSx_fwlOvVvIkySNiX0pETpIXutiLooVpVbPUAgTat3K-v2ibEdkC7p8iBQ=w1725-h970-no

It will ask me to sign in with my google account.
So it looks like the place you put your images in requires for people to be logged into google...

But even if I log into my google account, All I see is a forbidden sign, no image. So it looks like the way you posted these pictures do not make them public.
 
Btw for those getting the P7, don't know if you all are aware but it seems EU is making changes to e-bike regulations so that 1 kw motor will be allowed, but still restricted to 25 km/h. Also in the process is an e-bike 45km/h regulation. Don't know if that will be more or less the same as for moped/scooters. What is new is that is will be easier for manufacturer to be compliant with the new regulations as they will not require the same as moped 45 km/h afaik.
 
1abv said:
bend it back I have lost track the number of times I have done that I even made a tool for it… take off both cranks and measure the good one. They are super easy to bend back. The idea behind them is that it bends the crank before the internals get messed up. Take off the pedal, put it into a padded vice and get a long pipe that will fit over the crank arm, cover the arm with a rag and bend it back. Its no big deal…..
Well I've acquired all the tools needed for bending the crank back into shape. Just wanted to confirm that you put the crank end in The padded vice and fit the long pipe over the pedal end when you bend it back into shape. Just wanted to confirm that before I go buy a long pipe to fit over the crank. Also should I use a heat gun to assist with bending them back?

I'm also going to purchase a spare set or two of cranks so I can carry spares in my bag when I ride. It sucks that Suntour has an exclusive contract with stealth that requires you to procure them from stealth. Stealth hasn't gotten back to me but a local dealer priced them at $77 per set plus shipping. It's gonna cost me nearly $100 for one set... Seems like price gouging compared to the single Suntour cranks you can buy elsewhere for $20.

Does anyone have an email for stealth USA? I submitted a questionnaire on the website and the only reply was from stealth Australia saying that they forwarded my message to stealth USA but it's been over a week and still no word from them. Just wanted to see if it's any cheaper ordering from them directly vs local dealer.

Rix I'm also considering getting my replacement sets cryogenic tempured like you did if it actually makes a difference. Do you have the contact info for the company that offers that service?

Thanks for the help y'all.
 
ondabeach247 said:
1abv said:
bend it back I have lost track the number of times I have done that I even made a tool for it… take off both cranks and measure the good one. They are super easy to bend back. The idea behind them is that it bends the crank before the internals get messed up. Take off the pedal, put it into a padded vice and get a long pipe that will fit over the crank arm, cover the arm with a rag and bend it back. Its no big deal…..
Well I've acquired all the tools needed for bending the crank back into shape. Just wanted to confirm that you put the crank end in The padded vice and fit the long pipe over the pedal end when you bend it back into shape. Just wanted to confirm that before I go buy a long pipe to fit over the crank. Also should I use a heat gun to assist with bending them back?

I'm also going to purchase a spare set or two of cranks so I can carry spares in my bag when I ride. It sucks that Suntour has an exclusive contract with stealth that requires you to procure them from stealth. Stealth hasn't gotten back to me but a local dealer priced them at $77 per set plus shipping. It's gonna cost me nearly $100 for one set... Seems like price gouging compared to the single Suntour cranks you can buy elsewhere for $20.

Does anyone have an email for stealth USA? I submitted a questionnaire on the website and the only reply was from stealth Australia saying that they forwarded my message to stealth USA but it's been over a week and still no word from them. Just wanted to see if it's any cheaper ordering from them directly vs local dealer.

Rix I'm also considering getting my replacement sets cryogenic tempured like you did if it actually makes a difference. Do you have the contact info for the company that offers that service?

Thanks for the help y'all.

Yeah that's basically it. Put the fat end in a vice.. Padded if you want, Then take the pedals off and get a long pipe, Mine is 3.5ft and bit of duck tape on the end of it. Put a sock over the crank to help protect from scrapes.. Then bend away. If you want take your good crank off, put it on a table and measure it in a few different spots down the length and write that down. That way you always have the correct numbers to bend to. Remember that you don't want other shit inside the Vboxx to break. The insides of it are like a damn watch. These cranks are designed to be the weak point. I know others have made them stronger but I would just keep them the weak link and bend them back when needed.. Takes all of 1/2 hr
 
ondabeach247 said:
1abv said:
Rix I'm also considering getting my replacement sets cryogenic tempured like you did if it actually makes a difference. Do you have the contact info for the company that offers that service?

Thanks for the help y'all.

The cryo treated cranks aren't any stronger per sei, but they become more "springy". what I meant by this they tend to bend less from impacts. That said, they still bend but spring back a little. Now the downside is, when you have to straighten a cryo treated crank arm, you have to bend it further the other way as well. Hope this helps. I used to have US Stealth's Tech Support email, let me see if I can find it and post it here.
 
Well I try again with jet another picture hosting site.
I have been very busy lately building 2 new Sets of Wheels with 19” Mc rims for my Stealth Bomber. I decided to switch out both the front rims and the rear rims. Why 2 sets of wheels, well for the easy convenience of being able to switch tires or wheels in this case, for different types of riding fast an easy. This Bike is a daily rider. So all down time is a bad thing.
I have made a list of all the parts being used for this build to make it easier for those who want to do the same. I have not being able to find anyone else here that has converted their front wheel to 19” Mc rims.
The rear wheel has been upgraded with Hubsink and Ferro Fluid. All spoke nipples and spokes have been powder coated black. This I had to do myself. Well I did all the work myself.

Back Wheel With Crystalyte 5403 Motor, Parts List

19” X 1.85” Notako Excel Rims (Black)
36 X 125mm Buchanan’s 10 Gauge Stainless Steel Spokes (Powder Coated Black)
36 X Buchanan’s N10329S 10ga / .320” X .900” Stainless Steel Nipple (Powder Coated Black)
70 / 100 CST Surge Tires
70 / 100 Biltema MX Inner Tube
1.5” X 19” Rim Tape
Hub Sink 735mm Circumference, with two additional 30g HY880 Thermal Grease + 8-10 mL Ferro Fluid (according to Grin Technologies)
Biltema High Temp Silicone
e-bike technologies Gore–PMF-100600 Water Proof Vent Valve / breather port
Shimano Deore XT SM-RT86 203 mm Disc Rotor
4 Oz ½ Bottle of Orange Seal (Tubeless Sealant Injection System) 8 Oz Bottle
Shimano Saint Brake Calipers and Brake Handles
1 X Bullet valve cap

DSC_0820.jpg

Original front wheel hub Bought from Stealth drilled out and all edges chamfered to prevent spoke failure in the future.

DSC_0911.jpg


A Gig I made up so the spokes would fit in to my Powder Coat oven. All spokes and nipples powder coated shiny black. All spoke threads greased with Super Lube to prevent locking up and make truing of the wheel impossible in the future.

DSC_0895.jpg


DSC_0908.jpg


DSC_0903.jpg

All gaps and holes sealed with High Temp Silicone. Vent holes plugged with Metal Epoxy and silicone. To prevent the Ferro fluid from being flung out of motor when spinning.

DSC_0902.jpg

Waterproof Vent Valve. To prevent overpressure when hot (risking blowing silicone seals, highly unlightley but) and the motor sucking in moisture when cooling down.

DSC_0900.jpg

Ferro Fluid Enough for 2 motors. I added first 10 mL (as advised by Grin Technologies) and took note of the motor drag and added another 10 mL just to check without any noticeable increase in drag. Or any measurable decrease in performance. So I used 2 X 10mL (more is always better Right). The Ferro Fluid also seems to quiet down the motor somewhat, which is nice.

DSC_0941.jpg

203 mm Disc Rotors front and back.

Shimano Saint brakes front and back. These are just SICK Can block wheels at any speed on any tarain if not careful. But you will get used to them. Highly recommended upgrade.

Front Wheel Parts List

19” X 1.85” Notako Excel Rims (Black)
36 X 220mm Buchanan’s 10 Gauge Stainless Steel Spokes (Powder Coated Black)
36 X Buchanan’s N10329S 10ga / .320” X .900” Stainless Steel Nipple (Powder Coated Black)
70 / 100 CST Surge Tires
70 / 100 Biltema MX Inner Tube
1.5” X 19” Rim Tape
Shimano Deore XT SM-RT86 203 mm Disc Rotor
4 Oz ½ Bottle of Orange Seal (Tubeless Sealant Injection System) 8 Oz Bottle
Shimano Saint Brake Calipers and Brake Handles
1 X Bullet valve cap

Bullet valve caps Bought on Ebay Looks real and goes well with the gold and black them on my bike, I think anyway.

DSC_0943.jpg

Tire / Tube sealant to possible prevent punctures in the future.

DSC_0946.jpg


DSC_0947.jpg


DSC_0944.jpg

The firs sett ready.

DSC_0959.jpg

Back wheel with Hubsink. He had to make a custom piece to fit the 5403 Motor. There were not enoch heatsink paste provided so I used 1.5 tube of 30g extra. All along the edge between the hubsink and the motor housing there is a bead of Black Tec 7 to prevent the cooling paste to be flung out under high speed.

DSC_0960.jpg


DSC_0961.jpg


In conclusion. Yes the Bike has gained some weight compared to the original wheels. I would say about 5 Kg or 10 Lbs in total for both wheels. Witch isn't to bad considering much more solid tires and increased reliability. Not to mention much easier accesses to spear tires in the future. Especially here where I live. To order 2 new Duro Razorbacks will set you back about 500 USD here and they don't last very long on such a heavy bike.

And yes the Ferro Fluid seems to work Wonders. The Hub Sinks seams to become hot to the touch after a few small hills. Something you would not bee able to feel on just the Motor housing without this modification. And the heat needs to somewhere, so it’s better to heat up the air in the atmosphere then to put it back in to your stator and cocking your copper coils and magnets and frying your motor. The summers are relay hot, and the winters are very cold here where I live.

And now for the Problems. Not mentioning the biggest and most obvious the weight increase as mention before and the cost of this upgrade.

DSC_0956.jpg


DSC_0752.jpg

The new motor housing lacks this step-down / edge where the Brake Disk is to be fitted, That the original motor housing with Gator Discs had. witch means that the Shimano Saint Rotor wont fit. This was a big oversight from my side witch i didn't detect before I was in the process of mounting the rear wheel. About 10 hours before I had to leave for Work with the bike.

1499555725127.jpg

So I had to mill down an edge on the motor housing to make the Shimano Disc Rotor fit. Using the old motor as a guide.

Except for that I dint really have any problems except fitting the tires. Witch are extremely stiff. But with some excellent help from Rix and youtube and some serious sett of kit i managed to fit the tires quite easily. I guess you could even run these tires without any air in your tubes on the back wheel.
 
To all future P7 Owners, this was just put out by Stealth On kickstart.

Hi guys,
Things are moving forward with production but we've had a few minor setbacks with our suppliers. We've held back from sending out an update until we were 100% certain of what was happening.
So, our suspension supplier had an issue with the coating process on the new suspension forks. After some back and forth we made a mutual decision to have the forks rebuilt from scratch to avoid any issues.
During testing of the new motor that we will be using, we found a minor issue that was an oversight from assembly. It took the factory a few weeks to disassemble all of the motors and check that everything was ok. Things are back on track now and the shipment is preparing to leave our supplier en route to our Melbourne factory.
Our welders have been busy getting frames built, prepped and checked. We had to make a small design revision once we decided on the new suspension forks, but that's all sorted out now. Powder coating starts this week, so not long now and we can start showing off the colours.

Controllers have been assembled, programmed and calibrated and are ready for action.

Front wheels are laced up and ready to roll,

Tyres, derailieurs, cassettes, shifters, etc have arrived.

So to summarise, we're just waiting on handful of parts that were help up, mostly because of the fact that we updated the componentry that we were originalyl going to use.
Our suppliers should be waving goodbye to all of the remaining parts this week as they set sail for the factory in Melbourne and get ready for final assembly.
On the downside it does appear that we won't be able to ship the first orders out for around 4-5 weeks.
Apologies if this has caused any inconvenience but we really want to make sure that this first batch of bikes goes out once and without any issues.
Thanks for your partience on this one.
 
stritzky said:
Well I try again with jet another picture hosting site.
I have been very busy lately building 2 new Sets of Wheels with 19” Mc rims for my Stealth Bomber. I decided to switch out both the front rims and the rear rims. Why 2 sets of wheels, well for the easy convenience of being able to switch tires or wheels in this case, for different types of riding fast an easy. This Bike is a daily rider. So all down time is a bad thing.
I have made a list of all the parts being used for this build to make it easier for those who want to do the same. I have not being able to find anyone else here that has converted their front wheel to 19” Mc rims.
The rear wheel has been upgraded with Hubsink and Ferro Fluid. All spoke nipples and spokes have been powder coated black. This I had to do myself. Well I did all the work myself.

Back Wheel With Crystalyte 5403 Motor, Parts List

19” X 1.85” Notako Excel Rims (Black)
36 X 125mm Buchanan’s 10 Gauge Stainless Steel Spokes (Powder Coated Black)
36 X Buchanan’s N10329S 10ga / .320” X .900” Stainless Steel Nipple (Powder Coated Black)
70 / 100 CST Surge Tires
70 / 100 Biltema MX Inner Tube
1.5” X 19” Rim Tape
Hub Sink 735mm Circumference, with two additional 30g HY880 Thermal Grease + 8-10 mL Ferro Fluid (according to Grin Technologies)
Biltema High Temp Silicone
e-bike technologies Gore–PMF-100600 Water Proof Vent Valve / breather port
Shimano Deore XT SM-RT86 203 mm Disc Rotor
4 Oz ½ Bottle of Orange Seal (Tubeless Sealant Injection System) 8 Oz Bottle
Shimano Saint Brake Calipers and Brake Handles
1 X Bullet valve cap

DSC_0820.jpg

Original front wheel hub Bought from Stealth drilled out and all edges chamfered to prevent spoke failure in the future.


A Gig I made up so the spokes would fit in to my Powder Coat oven. All spokes and nipples powder coated shiny black. All spoke threads greased with Super Lube to prevent locking up and make truing of the wheel impossible in the future.


All gaps and holes sealed with High Temp Silicone. Vent holes plugged with Metal Epoxy and silicone. To prevent the Ferro fluid from being flung out of motor when spinning.
]
Waterproof Vent Valve. To prevent overpressure when hot (risking blowing silicone seals, highly unlightley but) and the motor sucking in moisture when cooling down.


Ferro Fluid Enough for 2 motors. I added first 10 mL (as advised by Grin Technologies) and took note of the motor drag and added another 10 mL just to check without any noticeable increase in drag. Or any measurable decrease in performance. So I used 2 X 10mL (more is always better Right). The Ferro Fluid also seems to quiet down the motor somewhat, which is nice.

203 mm Disc Rotors front and back.

Shimano Saint brakes front and back. These are just SICK Can block wheels at any speed on any tarain if not careful. But you will get used to them. Highly recommended upgrade.

Front Wheel Parts List

19” X 1.85” Notako Excel Rims (Black)
36 X 220mm Buchanan’s 10 Gauge Stainless Steel Spokes (Powder Coated Black)
36 X Buchanan’s N10329S 10ga / .320” X .900” Stainless Steel Nipple (Powder Coated Black)
70 / 100 CST Surge Tires
70 / 100 Biltema MX Inner Tube
1.5” X 19” Rim Tape
Shimano Deore XT SM-RT86 203 mm Disc Rotor
4 Oz ½ Bottle of Orange Seal (Tubeless Sealant Injection System) 8 Oz Bottle
Shimano Saint Brake Calipers and Brake Handles
1 X Bullet valve cap

Bullet valve caps Bought on Ebay Looks real and goes well with the gold and black them on my bike, I think anyway.

The firs sett ready.

Back wheel with Hubsink. He had to make a custom piece to fit the 5403 Motor. There were not enoch heatsink paste provided so I used 1.5 tube of 30g extra. All along the edge between the hubsink and the motor housing there is a bead of Black Tec 7 to prevent the cooling paste to be flung out under high speed.

[

In conclusion. Yes the Bike has gained some weight compared to the original wheels. I would say about 5 Kg or 10 Lbs in total for both wheels. Witch isn't to bad considering much more solid tires and increased reliability. Not to mention much easier accesses to spear tires in the future. Especially here where I live. To order 2 new Duro Razorbacks will set you back about 500 USD here and they don't last very long on such a heavy bike.

And yes the Ferro Fluid seems to work Wonders. The Hub Sinks seams to become hot to the touch after a few small hills. Something you would not bee able to feel on just the Motor housing without this modification. And the heat needs to somewhere, so it’s better to heat up the air in the atmosphere then to put it back in to your stator and cocking your copper coils and magnets and frying your motor. The summers are relay hot, and the winters are very cold here where I live.

And now for the Problems. Not mentioning the biggest and most obvious the weight increase as mention before and the cost of this upgrade.

So I had to mill down an edge on the motor housing to make the Shimano Disc Rotor fit. Using the old motor as a guide.

Except for that I dint really have any problems except fitting the tires. Witch are extremely stiff. But with some excellent help from Rix and youtube and some serious sett of kit i managed to fit the tires quite easily. I guess you could even run these tires without any air in your tubes on the back wheel.

Let us know if you front hub flange holds up. I drilled out a hub flange once for 10G spokes and it cracked after a couple of months.
 
ondabeach247 said:
1abv said:
bend it back I have lost track the number of times I have done that I even made a tool for it… take off both cranks and measure the good one. They are super easy to bend back. The idea behind them is that it bends the crank before the internals get messed up. Take off the pedal, put it into a padded vice and get a long pipe that will fit over the crank arm, cover the arm with a rag and bend it back. Its no big deal…..
Well I've acquired all the tools needed for bending the crank back into shape. Just wanted to confirm that you put the crank end in The padded vice and fit the long pipe over the pedal end when you bend it back into shape. Just wanted to confirm that before I go buy a long pipe to fit over the crank. Also should I use a heat gun to assist with bending them back?

I'm also going to purchase a spare set or two of cranks so I can carry spares in my bag when I ride. It sucks that Suntour has an exclusive contract with stealth that requires you to procure them from stealth. Stealth hasn't gotten back to me but a local dealer priced them at $77 per set plus shipping. It's gonna cost me nearly $100 for one set... Seems like price gouging compared to the single Suntour cranks you can buy elsewhere for $20.

Does anyone have an email for stealth USA? I submitted a questionnaire on the website and the only reply was from stealth Australia saying that they forwarded my message to stealth USA but it's been over a week and still no word from them. Just wanted to see if it's any cheaper ordering from them directly vs local dealer.

Rix I'm also considering getting my replacement sets cryogenic tempured like you did if it actually makes a difference. Do you have the contact info for the company that offers that service?

Thanks for the help y'all.


In my experience bending the cranks back with a vice / breaker bar causes them never to be the same. You immediately feel a difference when pedaling. Because of this I have always just repurchased new cranks from Stealth direct. Cryo treatment sounds like a decent option, perhaps Ill give that a try as well along with a motor axles shaft.
 
st35326 said:
ondabeach247 said:
1abv said:
bend it back I have lost track the number of times I have done that I even made a tool for it… take off both cranks and measure the good one. They are super easy to bend back. The idea behind them is that it bends the crank before the internals get messed up. Take off the pedal, put it into a padded vice and get a long pipe that will fit over the crank arm, cover the arm with a rag and bend it back. Its no big deal…..
Well I've acquired all the tools needed for bending the crank back into shape. Just wanted to confirm that you put the crank end in The padded vice and fit the long pipe over the pedal end when you bend it back into shape. Just wanted to confirm that before I go buy a long pipe to fit over the crank. Also should I use a heat gun to assist with bending them back?

I'm also going to purchase a spare set or two of cranks so I can carry spares in my bag when I ride. It sucks that Suntour has an exclusive contract with stealth that requires you to procure them from stealth. Stealth hasn't gotten back to me but a local dealer priced them at $77 per set plus shipping. It's gonna cost me nearly $100 for one set... Seems like price gouging compared to the single Suntour cranks you can buy elsewhere for $20.

Does anyone have an email for stealth USA? I submitted a questionnaire on the website and the only reply was from stealth Australia saying that they forwarded my message to stealth USA but it's been over a week and still no word from them. Just wanted to see if it's any cheaper ordering from them directly vs local dealer.

Rix I'm also considering getting my replacement sets cryogenic tempured like you did if it actually makes a difference. Do you have the contact info for the company that offers that service?

Thanks for the help y'all.


In my experience bending the cranks back with a vice / breaker bar causes them never to be the same. You immediately feel a difference when pedaling. Because of this I have always just repurchased new cranks from Stealth direct. Cryo treatment sounds like a decent option, perhaps Ill give that a try as well along with a motor axles shaft.


As long as you measure them correctly they are fine. I've done it a bunch of times even tested them against new ones I had... couldn't tell the difference. Just gotta measure them correctly... hence the bomber board.
 
Rix said:
https://www.youtube.com/watch?v=-ymVpT0nEIg

First 40 seconds of this video made me laugh. :lol:
That was quietrush and I at the first huntervalley EV race :lol:
 
Hyena said:
Rix said:
https://www.youtube.com/watch?v=-ymVpT0nEIg

First 40 seconds of this video made me laugh. :lol:
That was quietrush and I at the first huntervalley EV race :lol:

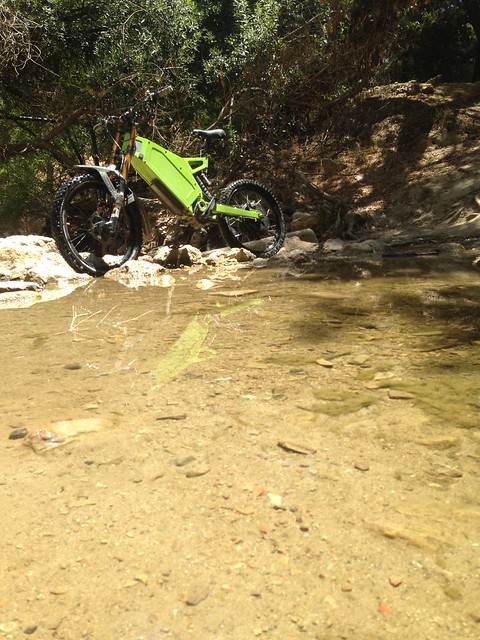
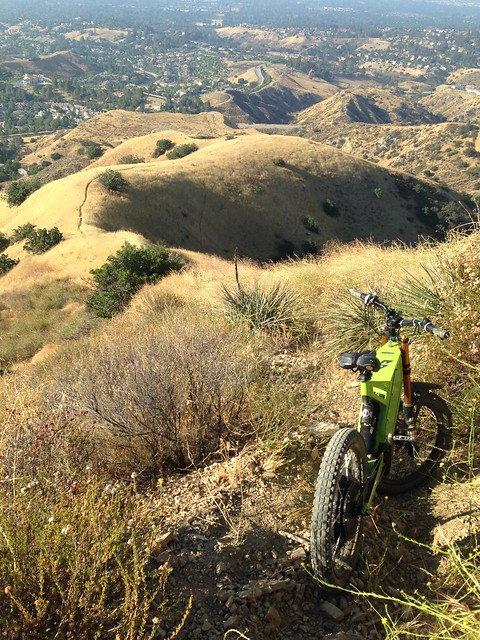
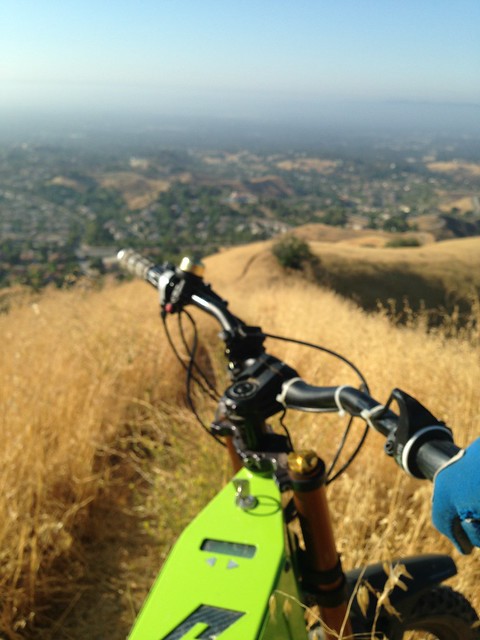
Indeed, need to see a rematch there. @ABV, as usual, scenic pics, sure is dry there.
 
1abv said:
st35326 said:
ondabeach247 said:
1abv said:
bend it back I have lost track the number of times I have done that I even made a tool for it… take off both cranks and measure the good one. They are super easy to bend back. The idea behind them is that it bends the crank before the internals get messed up. Take off the pedal, put it into a padded vice and get a long pipe that will fit over the crank arm, cover the arm with a rag and bend it back. Its no big deal…..
Well I've acquired all the tools needed for bending the crank back into shape. Just wanted to confirm that you put the crank end in The padded vice and fit the long pipe over the pedal end when you bend it back into shape. Just wanted to confirm that before I go buy a long pipe to fit over the crank. Also should I use a heat gun to assist with bending them back?

I'm also going to purchase a spare set or two of cranks so I can carry spares in my bag when I ride. It sucks that Suntour has an exclusive contract with stealth that requires you to procure them from stealth. Stealth hasn't gotten back to me but a local dealer priced them at $77 per set plus shipping. It's gonna cost me nearly $100 for one set... Seems like price gouging compared to the single Suntour cranks you can buy elsewhere for $20.

Does anyone have an email for stealth USA? I submitted a questionnaire on the website and the only reply was from stealth Australia saying that they forwarded my message to stealth USA but it's been over a week and still no word from them. Just wanted to see if it's any cheaper ordering from them directly vs local dealer.

Rix I'm also considering getting my replacement sets cryogenic tempured like you did if it actually makes a difference. Do you have the contact info for the company that offers that service?

Thanks for the help y'all.


In my experience bending the cranks back with a vice / breaker bar causes them never to be the same. You immediately feel a difference when pedaling. Because of this I have always just repurchased new cranks from Stealth direct. Cryo treatment sounds like a decent option, perhaps Ill give that a try as well along with a motor axles shaft.


As long as you measure them correctly they are fine. I've done it a bunch of times even tested them against new ones I had... couldn't tell the difference. Just gotta measure them correctly... hence the bomber board.


Yep don't have one of these and don't know anybody with one. Can they be purchased?
 
nope only made.. super easy I made mine all fancy out of aluminum but you could make one from plywood and mark it out with a marker... hell if you were really lazy you could make it out of a piece of paper.. All you need to do is measure the length of the crank and divide it a few times and measure the height off the plywood and there you go....
 
Back
Top