E-S Stealth Electric Bike Owners

Thank you Amber Wolf. It may be a project for me to pursue with the oversight of someone more electronically inclined. I will have to think on who that might be in my circle of friends. [emoji108][emoji1696]


Sent from my iPhone using Tapatalk
 
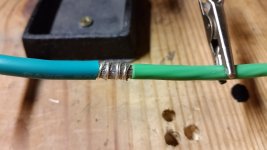
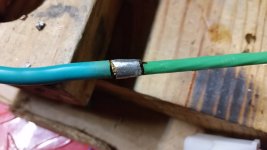
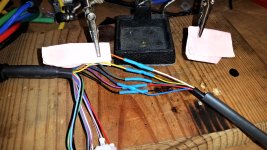
I made my first attempt to solder 8g phase wire tonight. I'm happy with the way I joined the wires together, but my little 60w soldering iron just isn't up to the task. I going to have to ask one of my friends to redo it. I doesn't look terrable, but I don't feel like the solder flowed into the wire very much. Luckily after looking at it on the bike, the joint needs be a little closer to the controller anyway.

20221006_205624.jpg
20221006_225723.jpg
 
Bexxer said:
Ok thanks, I don’t want to waste time buying the wrong one.


Sent from my iPhone using Tapatalk
https://www.aliexpress.com/item/1005004411184746.html?spm=a2g0o.productlist.0.0.43bb2ef7aBQpYb&algo_pvid=1c485d12-ee3d-4594-aea5-563bd19eac33&algo_exp_id=1c485d12-ee3d-4594-aea5-563bd19eac33-5&pdp_ext_f=%7B%22sku_id%22%3A%2212000029088016841%22%7D&pdp_npi=2%40dis%21USD%2171.25%2154.15%21%21%21%21%21%40210318d116651368121053610e8a8b%2112000029088016841%21sea&curPageLogUid=tl5Jvot5ioZG

First search. But make sure you get the right polarity on the xlr socket.
 
Bexxer said:
It’s been a minute since I posted on this forum. Hopefully I’m still doing it right and in the right place. I have Bomber #366. Recently out of the blue my 9 yr old charger stopped charging. I plug it in and it goes red to green a second. My husband checked the output on the pins and found there to be none. So we are assuming it’s the charger. To buy one from Stealth will cost me $250-$300 USD. I am trying to source one online. Any advice gratefully received. My charger is 72v 6amp.


Sent from my iPhone using Tapatalk

I may have a charger, but if your husband swaps out the charging connectors, it will probably work again. When Bomber #143 quite charging, it had exactly the same symptoms of your charger. If you look at the XLR plug on the inside of the frames battery box, you will probably see the plastic melted. The problem with the checking the output on the charger pins is, they will show no power because the power isn't tripped to start charging even though its plugged in to the wall. Please entertain my request and look at the inside of the XLR port mounted on the Bomber's frame. to see it clearly with out removing, you will need both side covers off and the Bomber battery removed, use a flash light, I am betting that plug will be melted.
 
Hi Rix, glad to see you’re still around. Thank you kindly for the info, you rock!


Sent from my iPhone using Tapatalk
 
Theodore Voltaire said:
I made my first attempt to solder 8g phase wire tonight. I'm happy with the way I joined the wires together, but my little 60w soldering iron just isn't up to the task. I going to have to ask one of my friends to redo it. I doesn't look terrable, but I don't feel like the solder flowed into the wire very much. Luckily after looking at it on the bike, the joint needs be a little closer to the controller anyway.

20221006_205624.jpg
20221006_225723.jpg
Thats' a good way to join them (I've used this method for a long time for inline splices), but the iron needs to be one that has a large (massive) tip so it stores a lot of heat energy in it to pass to the wire. It's more important that the tip be large (several times the size of a typical soldering tip) than that the iron be high wattage, because you need to dump the heat into it very rapidly, heating the local (spliced) metal to soldering temperature before it wicks away down the rest of the wire (potentially damaging it's insulation).

The solder should be "soaked in" to the wire, and not be on it's surface the way yours appears to have ended up. Meaning, you should still be able to see the individual surface wires (but should also see that they are now "filled in" between each strand, on both the conductors and the "tie wrap" wire).


I have the older version of this
https://www.amazon.com/Weller-SP80NUS-80-Watts-Soldering-Iron/dp/B00B3SG796
81PTNGkUVdL._AC_SL1500_[1].jpg
that works well for this stuff.

For things that are too massive for that, I use a small butane torch fairly similar to this (mine is about 40 years old, couldn't find one that looks exactly like it)
s-l300[1].jpg
 
I totally agree with everything you're saying amberwolf. I went back to the old drawingboard tonight and tried some test solder joints. The one that worked the best was a propane torch. The solder flowed like water. The problem was the flame is too large and burns the insulation. I need a smaller torch, and it might be pretty easy.

I also need to figure out how much solder to use. Tonight I filled 5 inches of wire with solder, because the wire got so how, I didn't know when to stop. This is going to take a little practice. Hopefully it won't be as much of a problem with a smaller torch.
 
A little butane torch like I pictured works well enough for heavy gauges; it's hard to use on stuff smaller than 6; 10 is likely to wick too much solder and do what you saw, which is why an iron is better for many applications.

You really only want to heat the area being soldered, and heat it as fast as you can and get the heat off it immediately once soldered. And don't set the flux on fire. :lol: It doesn't do it's job of cleaning the wire if it burns. Also if the wire gets too hot it will oxidize and solder won't stick to it. More reasons an iron is better. (even if it's a non-electric iron that you heat with a torch...I have one of those around here somewhere that's got a head/tip at least an inch thick and at least 3-4" long...came in my grandad's toolbox, only ever used it once, for a water pipe, IIRC).


BTW, if your present iron has a removable tip, you can probably get a big fat chisel / hammerhead tip for it to use for this type of situation. If you're creative you could even make one.


If you have to you can use "soldering clips" that are basically clip-on heatsinks something like this
https://www.amazon.com/CLIP-HEAT-SINK-KIT/dp/B0032UYTV6
(i know nothing about that product but it is the right kind of thing)
that help keep some of the heat away from parts past where you are soldering. For larger wires you need larger heatsinks with more contact to the wire being soldered (because the heat still wicks thru the core of the wire while the outside is cooled a bit by the heatsink, the bigger wires will still have some solder wicking, which you don't want).

But if you use a "hammer head" or other fat-tip iron, where the head is at least a few times bigger than the volume of metal you need to heat up, it will correctly heat it for soldering within a few seconds.

Typically when everything is "right" you can place an iron on a surface, count 1000-1, 1000-2, 1000-3, 1000-4 then apply solder, keep counting up to -6, then pull iron and solder away and let cool. It should then be correctly soldered. If it's not, there's either too much or not enough heat, or not enough thermal mass in the iron to heat the joint fast enough to prevent wicking but still fully solder it, etc.

Depending on the setup and parts being soldered, you may need less time than that...but it shouldnt' need more.


If you really have trouble with teh soldering, a crimped connection will be easier, and if done right will be better than soldered anyway. You can get butt-splice joints like these:
https://www.amazon.com/gp/product/B076H3VHGN
and a crimper like these:
https://www.amazon.com/gp/product/B00Y7M7SG6
and make pretty good joints. Better crimpers will do a better job, but these work ok.

If you slip the heatshrink you're going to use over the wires first before crimping, (or soldering) you can also easily insulate the joint. I recommend two layers of heatshrink on things like battery or phase wires, so damage to it doesn't cause immediate exposure of conductor--it has to do it twice in the same spot (usually).

Also, if you stagger the splice points, so there are no splices ever next to each other, you can't have a short between splices in a cable even with no insulation on them at all. Leave at least an inch between them, and it is typically safe enough. (it also means you don't have a giant "bump" or "knot" in the cable from the extra thickness of all the splices together...).
 
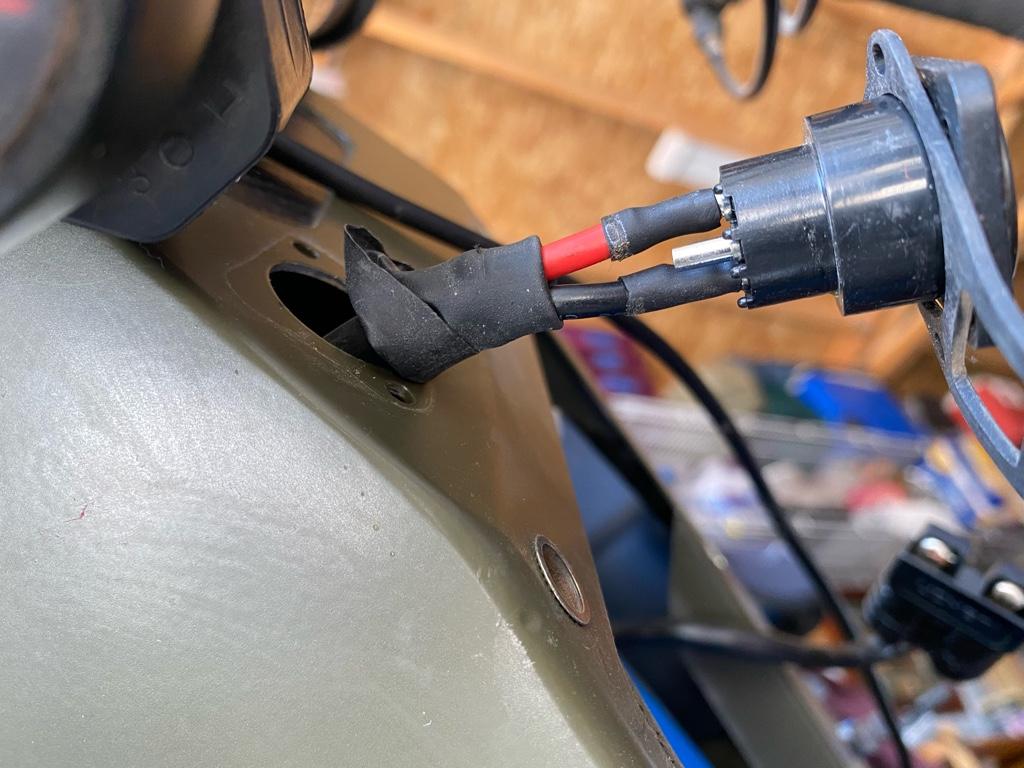
b65f2c4da497cdc22efb671af3fa9280.jpg

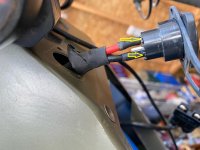
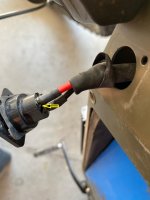
The connections to the xlr look normal inside the bomber but should I removed the shrink wrap?


Sent from my iPhone using Tapatalk
 
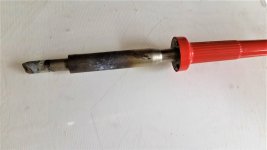
amberwolf really knows what he's talking about. One of my friends let me borrow this 80w wide tip soldering iron. In about 15 seconds the solder is flowing into the wire like water. A few more practices and I'll be ready.

80w.jpg
 
That is almost exactly the same iron I have (mine is a >decade-old Weller, and has a clear plastic ring between orange handle and metal mounting plate that has a simple orange neon light that lights the ring up to ensure you know it's plugged in and on (and therefore probably very very hot ;) ).

The LEDs in the version I linked above would be more useful, lighting up the working area, but anything to tell you it's on in case you are ever careless about it is nice. ;)


BTW, 15 seconds is a long time--it should take about a third of that or less.

If you use some steel wool to insert the hot iron tip into repeatedly until it has scrubbed the oxidized crap off the working surfaces, then immediately tin them so they're shiny, it will work a lot better and take less time.
 
Theodore Voltaire said:
It's not beautiful, but the wire is solid for about 2 inchs.

20221008_213829.jpg
Even better is when it is only solid at the overlapping joint segment. ;)

But at least now it's got the solder within the gaps between conductors in the joint, where it is needed.
 
Bexxer said:
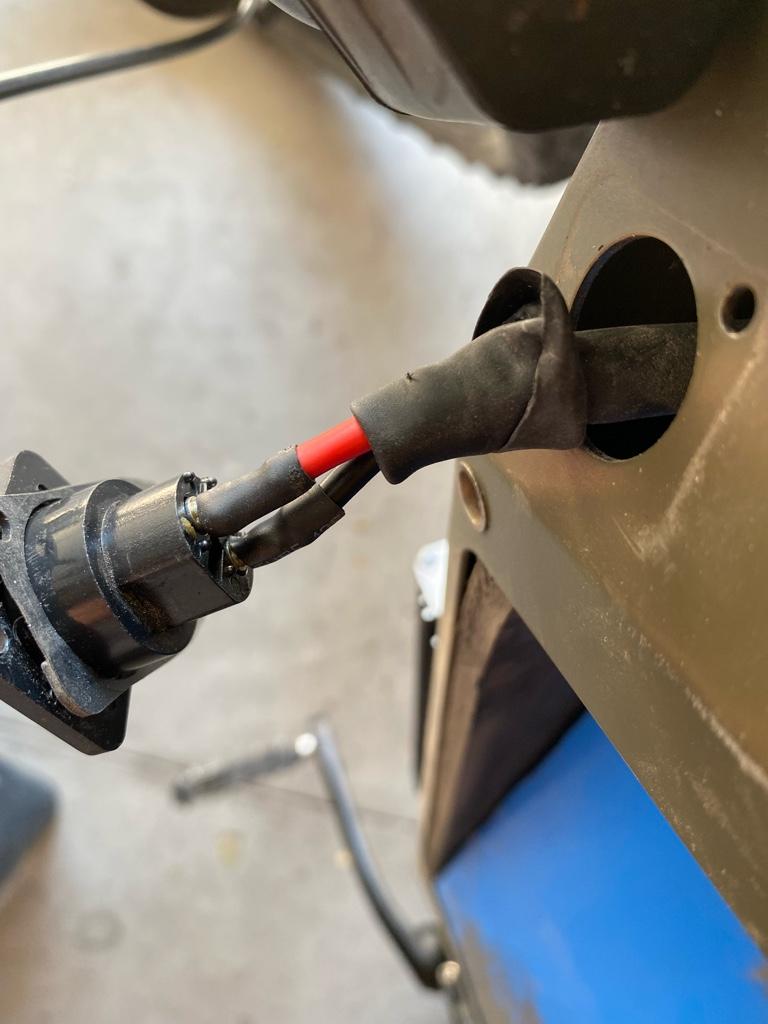
428e4c8fb085353ba129f6660a85c1ea.jpg

…another view…


Sent from my iPhone using Tapatalk

I would remove the shrink just in case. I had this happen to my bike as well. The cables broke at the solder joint under the shrink. I wound up replacing the connector with a speakon. It's not really that hard to do and is much more positive of a connector. You can try to put a multimeter on the output of the charger. If I recall I did this and it showed positive and negative. When I got my battery they had to swap the pos/neg on the charger btw.
 
Theodore Voltaire said:
I'm never going to make fun of 1 abv for taking so long, again.

I'm actually lazy to the extreme...I wound up putting my old controller back on the bike because.. well it still works and I want to ride... At least I have the phase wires, hall sensor wires and temp wires dialed in...
 
1abv said:
Bexxer said:
428e4c8fb085353ba129f6660a85c1ea.jpg

…another view…


Sent from my iPhone using Tapatalk

I would remove the shrink just in case. I had this happen to my bike as well. The cables broke at the solder joint under the shrink. I wound up replacing the connector with a speakon. It's not really that hard to do and is much more positive of a connector. You can try to put a multimeter on the output of the charger. If I recall I did this and it showed positive and negative. When I got my battery they had to swap the pos/neg on the charger btw.
Ok thanks. I’ll ask [mention]Rix [/mention] if he agrees and give it a try. Thanks for all your help. I would be willing to buy your charger too Rix, if the wires look fine.


Sent from my iPhone using Tapatalk
 
Theodore Voltaire said:
I totally agree with everything you're saying amberwolf. I went back to the old drawingboard tonight and tried some test solder joints. The one that worked the best was a propane torch. The solder flowed like water. The problem was the flame is too large and burns the insulation. I need a smaller torch, and it might be pretty easy.

I also need to figure out how much solder to use. Tonight I filled 5 inches of wire with solder, because the wire got so how, I didn't know when to stop. This is going to take a little practice. Hopefully it won't be as much of a problem with a smaller torch.
I've found a wind proof lighter works better than my little butane torch in these applications. The wind proof lighter has a pin point flame that's easier to control with the thumb wheel than the torch control
 
Mikegy said:
I've found a wind proof lighter works better than my little butane torch in these applications. The wind proof lighter has a pin point flame that's easier to control with the thumb wheel than the torch control

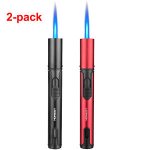
Good to know, I appreciate your input. That's encouraging because I did buy this butane lighter.

Torch.jpg
 
Bexxer said:
[]
The connections to the xlr look normal inside the bomber but should I removed the shrink wrap?


Sent from my iPhone using Tapatalk

Yah, look really close where to the area pointed out, and run an ohm meter there and on the front of the pins. If you see any signs of heat pull back the heat shrink and take closer look.
 

Attachments

  • XLR1.jpg
    XLR1.jpg
    178.7 KB · Views: 1,537
  • XLR2.jpg
    XLR2.jpg
    105.8 KB · Views: 1,536
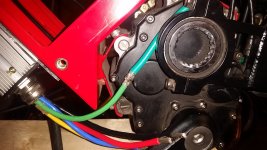
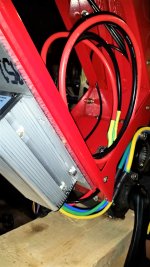
Making a lot of progress today. In addition to the hall wires, I extended to battery cables from the controller, up into the frame. 6 more wires, and I think the controller side is done.

20221010_145730.jpg

Battery cables.jpg
 
I think I dodged a bullet last night. I was working late, and saved the throttle wiires for last. I decided to check the throttle with my diognostic tool at the last minuite. The throttle checked bad. It's on all the time. That might have caused a big problem.

Luckily I ordered more than 1 throttle. I saw one I liked more after ordering this one, but it hasn't arrived yet. I was going to use this one with a separate kill switch. The one that should be here soon has a kill switch built in.
 
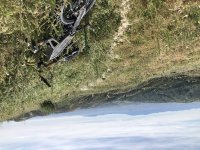
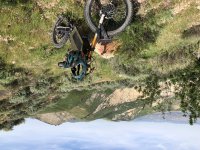
Screw all this technical jibber jabber back to pretty pics….1987E793-7B17-443E-8D0A-096368CB4A8A.jpeg
 

Attachments

  • 55F54316-F917-41CE-B116-1073D7448ACB.jpeg
    55F54316-F917-41CE-B116-1073D7448ACB.jpeg
    5.7 MB · Views: 1,412
Back
Top