Electric Jeepster - New(ish)member new build

I'm hearin you Skunk. I have been prowling pinkbike for some time now. The Trace looks like it would be a great foundation but the DH Comps I think have very close to the same amount of space and are a proven frame for EV. The bonus is that they are considerably older thus cheaper and they come generally with dual crown forks. I have missed out on a couple that sold for good prices close to me simply because I was not ready to pull the trigger. In fact I am not quite ready yet. This current project (though rideable) is still getting some upgrades. But I guy can dream, right?
 
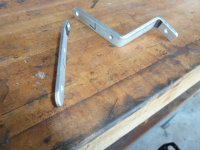
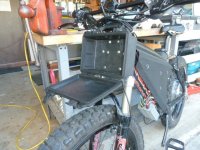
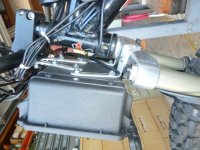
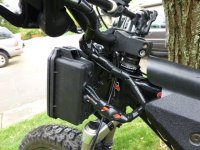
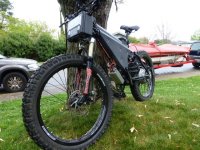
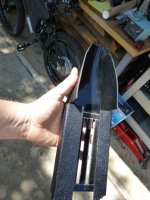
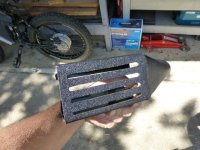
Ok, time for an update. I have made considerable progress on the final phases of this project and the "Electric Jeepster" is living and breathing. So the main thing left for me to do was to do the upgrade for the two additional batteries and bring it up to 18s2p for 66.6V 16aH. I played with the positioning of the batteries in various places but finally decided to mount them on the front below the bars. I found that they fit perfectly in one of the smallest pelican boxes and that they could be had for pretty cheap. So I got one with the idea in my head of mounting it with custom made U-bolts directly to the head tube. I even bought some of the materials before I realized that this would make it stationary and thus get in the way of the bars when steering. So retooled to mount it suspended from the headset on the top and supported on the top of the forks on the bottom. Made up some aluminum brackets that had some pretty funky bends.
image.jpg
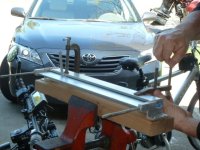
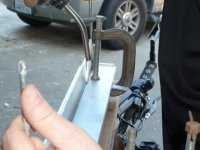
I wanted to make nice tight 90 degree bends and ran across a nice little aluminum bending brake at a garage sale for $2.00.
image.jpg
With a little heat at the bend it worked just fine and the brackets come out nice.
image.jpg
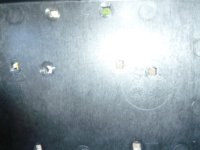
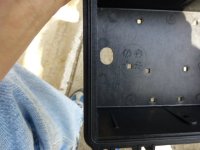
Then it was just a matter of drilling all the holes in the box and in the top of the forks (these I drilled and tapped).
image.jpg
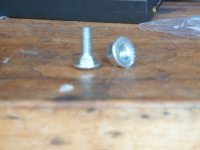
The holes in the box I squared up so that I could use low-profile carriage bolts from the inside out.
Mounted the brackets to the box with whizz nuts after getting the bolts to just the right length.
image.jpg
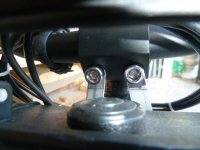
Suspended the top brackets directly from the headset bottom bolts.
image.jpg
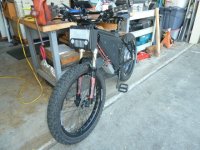
Here are some shots of how it turned out.
image.jpg
image.jpg
And in keeping with the "Electric Jeepster" motif, I added a little logo to the front.
image.jpg
Next installment: installing the batteries.
 
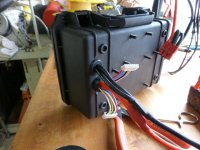
So after getting the battery box mounted, I had to get the batteries in and the wires out. Drilled a hole for the wires and oblonged it to fit the wires properly.
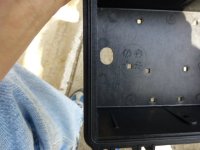
image.jpg
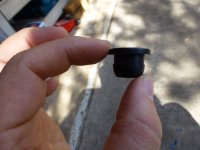
Used one of these rubber grommets I got from the auto parts store.
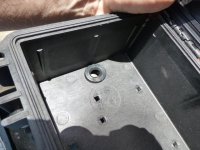
image.jpg
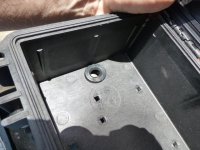
The package claimed it was a PVC grommet for a ford. It fit like this on the inside.
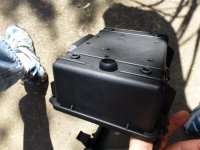
image.jpg
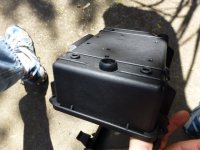
And like this on the outside.
image.jpg
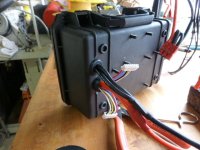
Realized that I had forgotten the balance leads and all of the wires would not fit in the one hole so I put another one in with a slightly different grommet since it only needed to pass two wires. Getting it all to fit was a pain but hopefully I won't need to remove them....EVER! Her is what it looks like loaded.
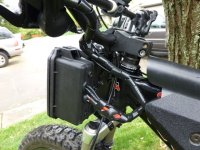
image.jpg
Put a coat of epoxy paint on the brackets, bolts and nuts. And mounted it all back on the bike.
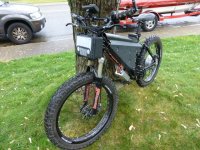
image.jpg
image.jpg

The wiring was pretty easy since I had all of the harnesses made for this eventuality by icecube57 in the first place. It is a significant increase in power goes about 32 mph on the flats and has marginally better hill climbing ability. I think that I am going to have to start dialing in the controller setting and start thinking about venting the side covers of the motor though. All in all though I am pretty happy with this build and short of some minor mods it will likely stay pretty close to its present form. I am really looking forward to testing its abilities off road and in the sand on the beach. Looking forward to seeing a few ES members at the SF makerfair in May.
 
So after getting the battery box mounted, I had to get the batteries in and the wires out. Drilled a hole for the wires and oblonged it to fit the wires properly.
image.jpg
Used one of these rubber grommets I got from the auto parts store.
image.jpg
The package claimed it was a PVC grommet for a ford. It fit like this on the inside.
image.jpg
And like this on the outside.
image.jpg
Realized that I had forgotten the balance leads and all of the wires would not fit in the one hole so I put another one in with a slightly different grommet since it only needed to pass two wires. Getting it all to fit was a pain but hopefully I won't need to remove them....EVER! Her is what it looks like loaded.
image.jpg
Put a coat of epoxy paint on the brackets, bolts and nuts. And mounted it all back on the bike.
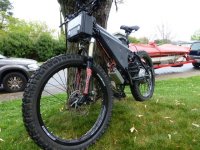
image.jpg
image.jpg
image.jpg
The wiring was pretty easy since I had all of the harnesses made for this eventuality by icecube57 in the first place. It is a significant increase in power goes about 32 mph on the flats and has marginally better hill climbing ability.
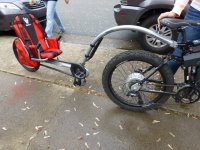
Took the granddaughter out on a ride in the WeeHoo trailer and had to keep my foot off the gas.
View attachment 1
I think that I am going to have to start dialing in the controller setting and start thinking about venting the side covers of the motor though. All in all though I am pretty happy with this build and short of some minor mods it will likely stay pretty close to its present form. I am really looking forward to testing its abilities off road and in the sand on the beach. Looking forward to seeing a few ES members at the SF makerfair in May.
 
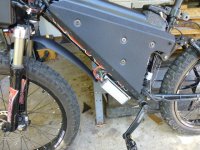
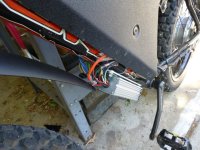
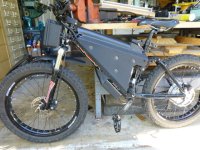
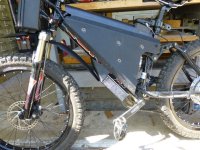
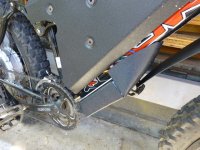
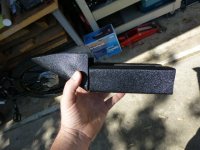
its been a while since I made an update on this project, mainly because i have been having so much fun riding it around. I did want to make a few more changes though and here are some pictures of those. First, I had alway intended to do something about the way the controller looks. Since this bike is mostly black, the shiny controller really stood out and the bundle of wires also removed some of the "stealth" factoras seen below.
P1000402.JPG
P1000403.JPG
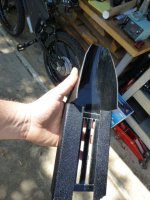
So, expanding on some of the thermo-forming I had done earlier in the project, I made one of these;
P1000404.jpg
P1000406.JPG
I call it a fanortner rod and it must be adjusted with langstrom 7" gangley wrench :roll: . Here is waht it looks like on the bike:
P1000407.JPG
P1000408.JPG
P1000409.JPG
I'm pretty happy with how it turned out and hope it will add some additional protection to the controller. I also finally got around to flashing the controller with some help from Lyen and particularly from Alastor it went pretty smooth. Had to get a friend to help since I don't own any PCs. the best part is that I now have regen braking back (I lost it when I added the two additional batteries and went up to 66.6V nominal). This bike really needs the regen braking since, due to space limitations, I could not go with bigger rotors. I straightened out the regen voltage andd the EBS level to get the regen braking just right. I also got the three speed switch set to where I like it and now all is well. I have been riding it in to work for a couple of weeks now and it is loads of fun and some brisk exercise in the mornings. So that's it for now, I think this is the form I will be taking the bike to the makerfaire in and hope it lives up to the "Electric Jeepster" legend :wink:
 

Attachments

  • P1000405.JPG
    P1000405.JPG
    90.8 KB · Views: 3,646
  • P1000404.jpg
    P1000404.jpg
    78.7 KB · Views: 3,646
Have not gone yet pendragon. The event (the San Francisco Makerfaire) is in the middle of May. I have no idea what to expect but I know that a few people from the sphere lead by Justin from ebikes.ca will be there and I am really looking forward to meeting them.
 
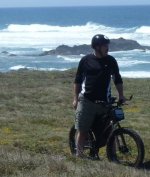
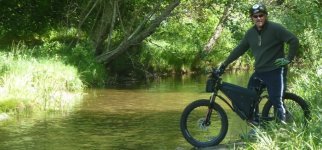
Got to take the bike on a trip to the Mendocino coast and found some great riding there. Here is a pic
image.jpg
Been diligently searching for a DH Comp or Team frame for my next build but the pickings have been slim....UNTIL RIGHT NOW! Saw an add on pink bike from a guy that lives just a short distance from me. Has a (large size) Giant DH Team 2005 in near perfect shape that he is willing to sell to me for $250.00 without the mavic wheel set. With the wheels $400.00. I'm pickin it up in the morning....with the wheels (gloat).
 

Attachments

  • image.jpg
    image.jpg
    108.4 KB · Views: 1,933
Obiwan007 said:
...Giant DH Team 2005 ... pickin it up in the morning...
be aware that the 05 does not have the large triangle! the top tube is bent on that one. i suppose you've see pics tho?

anyway, that's a stunning price for such a bike. go over it with a fine tooth comb at pickup.

so how'd the bike like the sand? you're monitoring the motor temp, right? pushing the motor in sand is a great way to cook the motor!

build is looking great. what's your top speed now? how does the front wheel handle?

does it get a lot of attention? lotta doubletakes?
 
Hey pendragon and GC, yep the tires come in at 3.15" in the front and a bit less in the back since I had to grind off some side tread to get a fit. They go just so/so in the sand although I did not air them down. They sure throw lots of sand though. I don't have a rear fender yet so I stopped wheelin around pretty quick. Later this year we are going camping at a desert lake in Nevada that has lots of long sand beaches. I plan to give it a real test there. As for the handling, it is a dream. I have been using it as my daily commuter for a couple of weeks now to and from the firehouse (about 5 miles). And all is well. The only real problem is a bit of a tendency to get hot. I have been following the motor cooling thread with great interest and plan to vent these covers soon before it gets too hot here. I had a spare side cover that Ypedal gave me along with the motor and I have been testing some venting schemes on it to get the machining steps figured out before I mount up the ones I am going to use. Here is a pic:
image.jpg

The round holes are from earlier testing and won't be in the final project. I will likely have intake holes as close to the center axis as possible. I will likely also add internal fins. I am trying to get my hands on some replacement 408 covers right now so I can do the machining on my little benchmaster


Would like to limit the down time for the motor upgrade if possible.

As for the performance, I could not be happier. It goes 32 mph on flat ground when hot off the charger. If I pedal a lot and control the amp draw it can go 30 miles on a charge. I really don't think I can ask much more from a crystalyte 408. Took it to the SF Makerfaire yesterday and Justin took it for a ride. His first comment when he got back was that he had forgotten how peppy the 400 series were. I took that as high praise. I don't want to overstate the heat issue It is not preventing me from riding all I want but if I push it for extended periods my BBQ sensor warns me and I have to back down for a while. If I can get the heating issue just a bit better I will likely leave this build as/is. So I went to get the DH Team this morning and it turns out that the guy was selling just the frame without the forks but it did come with a great rear shock, the fox coil-over van rc. Apparently it's capable of 3" of travel at the shock. I don't know what that equates to at the wheel but should be significant enough for me. The bike also came with the bottom bracket (sans crank set) and the stem. So no brakes, bars, or headset. The mavic wheels were pretty narrow to my eye so I left them there and bought the rest for $250.00. Probably good for me to build a bike up from the ground anyway since there is a lot I want to learn. Wen finished it will be nice for me and the wife to be able to go on trail rides together. So I will be looking for parts and bits on pinkbike and Craig's. So Greg what's the deal with the 100 mm bottom bracket. Seems like they are hard to find. Have you needed to replace one yet. The one I have with this bike is a bit munched but seems functional, was just looking into it. The guy claimed it was a 2005 but it has the straight top tube. Maybe it's a 2004 that he bought in 2005. I can't find anything on the frame that identifies its year. I have seen some listed on pinkbike as late as 2006 with the straight top tube so I don't know for sure. The rear swing arm does have some off-set but it looks less than the pictures you have posted. The drop-outs are 135 mm. Guess I'll have to hit up Kiwi for some TA adapters. I already checked and the triangle will definately fit 6 of the 8 ah lipos that I used in the Jeepster. Going to go slower with this build and definately use a bigger motor. I'll post the new thread on here when I get started.
 
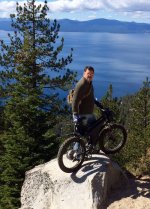
Hey all, just wanted to report that the motor venting mod has been fantastic. Unless I really push it, he motor does not want to overheat at all. I am very pleased. Took the bikes up to the iconic Lake Tahoe flume trail and they did quite well considering two of them are street queens. Started with a 1200' climb over the space of 6.2 miles and had to stop to let me cool several times. Got to Marlette lake and connected to the flume trail (follows the path of an old logging flume so is mostly a slight downhill grade).

image.jpg

Much of the trail is cut into the face of sheer granite cliffs:
image.jpg

The Electric Jeepster did just great and I can't wait to make this run on my new bike. Oh! Did I forget to mention, I got one of methods last V2 Cromotors for the Giant DH Team? :D Obiwan.
 
Lived in this area my whole life and I am ashamed to say I only heard of it this year. But, yes, there is lots of places to ride around here that offer great views. Nothing like this ride though. Apparently people come from all over the world just to ride this trail. If there is any possibility you might be able to go on it you should. And like warren miller always said if you don't do it this year you'll just be one year older when you do.
 
Thanks r3volved it was a really fun build and it's very fun to ride. I commute to the fire station every day with it. I am just about to start a new thread for my new build. I have been gathering the components for months now and am really close. It will be on a Giant DH Team frame. Just got one of methods last cromotors but it was a customer return with apparently a delaminated magnet. Just opened it up today and there are two magnets that are shattered with no hope of glueing back the tiny pieces. Some of the pieces are missing. No knock on methods, I knew what I was getting myself in for. I will be documenting the repair though so look for it. Hope I can find some replacement magnets for it. I have a few feelers out but if anybody knows where to get some please PM me. Otherwise I will be buying the controller and the batteries this week and then I am off to the races. Can't wait to take the new bike on the flume trail :p :shock: Obiwan.
 
Great work. Some things I wish I used for my 29er build back in the day.
Question: what is the standard accepted varnish people use for motors?
Second: where are the threads detailing the use cases for varnish and the corrosion and/or broken down motors resulting from not using varnish (particularly on vented motors)
Third: Again, great work. I learned a new use of the word "spherical" in this thread. I'm proud that I am a spherical.
 
Thanks for the kind words. Motor varnish comes in a few different brands but very few as far as I can tell. I tried to order some from McMaster Carr but they got the order wrong and I ended up going to a local motor repair shop and they had some that was good to 200C as for the threads to corrosion well... I don't remember frankly. Obiwan
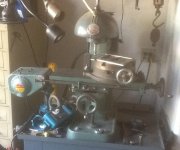
 
Nope, you would think that some one would have access to or know where I could get two of these magnets. Just in case the magnet dimensions I am looking for are L=1.941"(49.3 mm) W=.537" (13.64mm) H=.118 (3mm). Please help!! Obiwan.
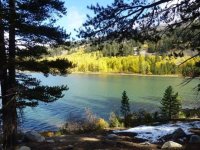
 
thanks for the useful pics. wondered what wheel combination would fit my bomber fork.
 
that's what i'm thinking about.
but what would be the narrowest recommendable rim?
i want to make sure it fits the rear too.
 
Back
Top