Duc998 said:
rear hydraulics clear ok?
the caliper needs 17mm, and i had to add a spacer on the rotor to have it clear. luckily the caliper sits just below the cover plate screw heads, otherwise it wouldn't clear.
i was going to add another spacer, but there wouldn't be enough room for the hs3540 wire, on the inside! the rotor bolt heads would grind it up!
i did need some washers between caliper and IS adapter too. rather have a better spacer, but seems ok for the moment.
of course i forgot to replace the plastic bits on the axle. no wet ride for her until i sort out those issues. segue:
kfong said:
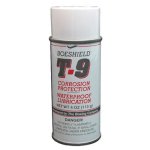
Are you planning to coat the motor with high temp polyurathane?
you guys take such good care of me. is that what i need? or
T-9, as justin writes about on ebikes.ca? i saw the insides painted red somewhere, but can't remember where..
anyway, now with the power train sorted, time to get some power!
i decided not to cannibalize my GT pack, so made cables to parallel and extend the pack leads (soldered join midwire, electrical tape):

and doing individual pack balance charging before closing the hood on the case:

i killed my icharger, so this is a cheap replacement. older balance harnass to the right.