GIANT DH COMP & K2 thousand

reading and reading again and again in the forum rode parts of that thread
http://endless-sphere.com/forums/viewtopic.php?f=2&t=9791&start=120
I got plans, that I haven't seen outathere...if my understanding of the english, reading 1/2 lines...we try to have a better air dissipation/circulation near the magnets/wiring...
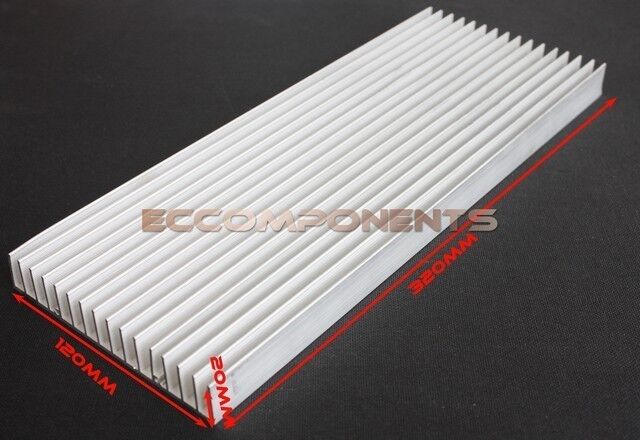
PLAN A
If I can curve (with a press ...) 2 or 3 radiators to the external radius of the Hub, applying thermal grease and soldering (fixing @least)...(this is alloy :wink: and probably not Cromo one as frames...), it won't ad so that much drag, nore inertia, but more dissipation surface...@ least when stopped
$(KGrHqR,!kwE+5)HdV(cBQBRtc3oOw~~60_3.JPG

PLAN B using holes, for circulation I think baldes inside the hub is the best , but we have to work with the best splines design and experiment if the drag does'nt input more power...not to eat more power due to the drag...heating more power to fresh it...the snake biting its tail...
PLAN Y : use the ...what is the name of the magic red paint ?still recommanded ?
PLAN C push more vent inside :
cheap experiment 12V , with a pipe for feeding the top front quater of the hub, considering the flow throw the quater rear @ ground
$(KGrHqF,!hMFBcIHE9!rBQgDz)J3-!~~60_57.JPG

or even with a compressor which can be usefull for inflate, or just if you're stocked waiting for the hub to cool down...
$(KGrHqV,!pcF!H57VsEyBQUZl-h51Q~~60_12.JPG


I would experiment blowing air with 1 or 2 pipes coming for the front with 1 or 2 scoops + a PC airfans+ filter (and a switch for freewheel use with for low speeds) to just push the air on the side of the hub cause it is pretty turbulent around the wheel...
@least again it would help freshing if in need of a stop and could cool the controller if in need too
!B-p-72wB2k~$(KGrHqIOKj4EzYUZ8HpIBM9UM2s2bg~~_12.JPG

4b_1.JPG

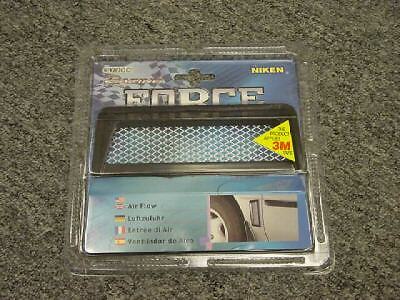
and the best scoop for the end :D
$(KGrHqMOKiUE14p)qYv,BNn80YChYw~~_12.JPG

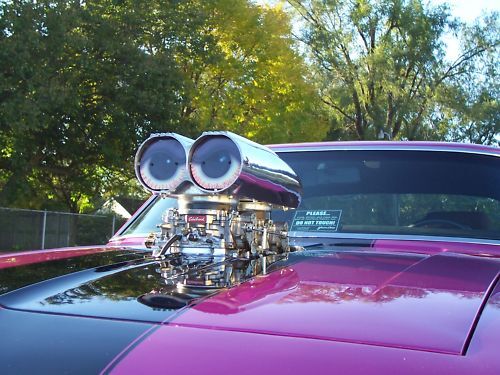
scoops with eyeshots :wink: :wink: :wink:
 
yep yep :D should arrived maybe this morning :D
morning coffe inspiration : does anyone has ever think to make a program to avoid the loose of traction @ starts , on snow/sand when it's rainy ? actually I've seen falls due to it on wet conditions..., could intersting next years for pupils, maybe with an andrino...loose of traction means , sudden drop of torque or increase of acc., I'll keep it somewhere in my head ...
for sure there would be a switch for burns addicts :mrgreen:
found the searchs in ES with google advanced , thks to pendragon and it change the whole stuff :wink: i should read wikis too :D
 
Trying a black ice detector, its a ratio of moisture and temp. Good engineering concepts to learn.

Saying that not likely to find black ice in reunion
 
man, if that chemistry came out it would be literally LIFE CHANGING for all of us. a 100v 30ah pack thats super micro, weighs nothing, high discharge and charge rates...
 
would anyone give me advice on it :
would you plz confirm, If I can wire this way :

I need to activate Maincontactor with 12V (because I use 12V for accessoiries...not 24V)
the question is : can I activate battery connection and power1 by the same time ?
or should I connect power1 in a second time next the main contactor is activated ?
do I need to connect the pink ground ? isn't it internal linked ?
does the controller cut @96V or could it handle 99V ? range is 18V/96V for a nominal 72V

Greensho.jpg


and do you guys use 3x CREE LED or 4 /5 /7 or even 9CREE ? better one or 2 lamps ? and @12V is it ok or it give a lot more Lumens ? What can it handle ? "2 lights gives more horizontal spread"
$(KGrHqN,!h0FCdNFUSyJBQ)geF1T+Q~~60_12.JPG

$T2eC16JHJGYE9nooiM5!BQyC850+Cg~~60_12.JPG


EDIT : ok, I gotch : 1LED=3V so better 4x3V to put @12 DCDDC
 
I'll have a good look in a bit , but firstly, use a 2 stage key switch or key + momentary push button n.o. with button or first stage of key in series with precharge resistor. I'll explain if you don't understand. Very nice diagram though. And a contractor may be a bit excessive but its a good safety measure:)good for that key switch total on off
Edit
Also regarding light...
Check the new thread on lights. Ypedal put a link in there to a light shop. http://endless-sphere.com/forums/viewtopic.php?f=1&t=48040
Edit
Also that second picture: if you wsna take a gamble you SHOULD be able to use the plug pack to run the light from your battery. Check the wattage.
 
yes I can use a push button for the precharge, but I guess with contactor you do not have to unplugged precharge as the current wil take the less R way : contactor, unplugin precharge should be done if you do not have a contactor or Kill switch, if you use Kill switch yes a push button is needed before turning on as soon as the controller is not on there's no current drawn...
 
for starters, i personally don't see the need for a contactor. or a fuse. but i don't use a dc-dc converter either. my lights run off 24-100V on an aux power from my CA.

i use a precharge resistor. when i connect the my controller to the batts, i connect GND and the + through a resistor. wait 3 seconds. then plug in big +. no spark. then i turn controller on with a small switch. no sparks.

dan974 said:
can we turn off the alarm buzzer by openning the ground wire ?
what is that for? got a link to the item?

i'm lost.

is that a lipo buzzer AND temp sensor? if so, you can put a switch on the GND to turn off the temp alarm, if it's beeping like crazy and you don't mind overheating... but if it's a lipo buzzer, i have to think it can also run off the jst-xh connector... plug it in and see! (without the other three wires being plugged into anything!) and if it runs off lipo jst's, you can't turn it off...

now you're talking about a DB25... but i don't understand your question. :roll:
 
ths greg , yes the goal is to let the balance buzzer plugged in // and connected to a DB25 or centronics 36 as jay to check the balance
but for the buzzer not to draw Amp, I'll to disconnect them with a swith, but I wonder if I need to disconnect all 6Wires of the balance plug or just the ground...otherless it will stillrunning put with just a 1cell less if we cut the last V+

it's to run buzzer and being able to unswitch them..
http://www.hobbyking.com/hobbyking/store/__18588__Hobbyking_2_8S_Cell_Checker_with_Low_Voltage_Alarm.html
 
that's it you can manage low and High voltage so to be warned in any case...so I plan to make 2x DB25 or centonics 36 but I don't know if it would be possible to run them in // while charging by the // plug, if it send amp inside I think it's going to burn them, it is only to check cells or while decharging...
 
do a centronics 36.

for the battery only, create a permanent balance harness that connects the female centronix to all of your lipo packs. i forget your config. if it's 24s2p, then create four paralleled pairs...

then, create TWO more cables with Male centronics connectors.
1. for discharge only with 4 lipo buzzers hanging off it.
2. for balance charging only, where all four subpacks are paralleled at 6s... and this is the one that should NEVER be plugged in at the same time that the main discharge leads are connected... this also assumes you've made a plug like mine with bullets or w/ powerpoles and can disconnect them. if however you've permanently wired your pack in series, you CAN NOT balance charge w/o taking them all apart.. c'est claire? :p
 
GCinDC said:
edit; i'm not sure which centronics is male and which is female... just do what hyena did and then say you invented the idea. he gets so mad it's funny. :lol:

NO :shock: I know Hyena did the stuff, and I 'm not saying I invented it @all or my english is worth than I tought...what make you think that Greg ? :shock: :shock:

I even posted that there's dust protector for the male one, I was just wondering if I could make one with buzzers, if it can still being plugged while charging, or linked them to a switch to turn them off, not to drawn Amp fro them...I want to have every thing inside the box and not having to open it...even trying to find a solution for the series links...

there's even one buzzer alarm for unblanced but it's 15$ pcs and I think the range is too wide...
 
dan974 said:
can we turn off the alarm buzzer by openning the ground wire ? or do I need to cut all the cells wires ?

Nope, just cut the ground. And if you want the ultimate convenience find a single throw triple pole switch and wire up the earth of each sub pack to that. Then you can turn on/off all 3 with the single flick of a switch 8) This is how I wired my fighter but in the end didnt end up implementing it as I didnt want the buzzers danging or being bulky off the centronics port while riding. As Greg said though you just make up 2 seperate plugs that go into the battery - once series and one parallel. It doesn't matter if you use male or female really, though the female ones are usually more panel mount and the males have a moulded plug, so it makes since to use the males to plug in and out.

GCinDC said:
just do what hyena did and then say you invented the idea. he gets so mad it's funny. :lol:
haha I just sing praise for centronics over DBs. Hows the weather up there Greg ? Not too cold for fishing I see
E-1.gif


:p
 
icecube57 said:
Everytime I look at Dans Logo all I see is weed.
Lol sounds good to me

Anyway, electronics....
What if you put the buzzers in the battery side with 3pole switch on ground. I would assume that what Dan was thinking from start.. lots of soldering to make that custom harness but would be pretty cool...
 
pendragon8000 said:
icecube57 said:
Everytime I look at Dans Logo all I see is weed.
Lol sounds good to me

you can't imagine how this island is a green mother nature c :wink: reation le zamal lé bon aussi :D even if for me it's too warm and wet ...adding some tropical rhum on top ...is a lasying cocktail kind of Darwin'way...becoming a dodo man is pretty easy :D, lot's of tropical weed medecine overthere...as good as pill's...old knowledge...
images

images

some green tracks...
http://vimeo.com/8797589
my Weekend track...1h by shuttle...down as short as 1h30 in race mode...missing it...second day on my two feet :lol:
http://vimeo.com/52166710
 
Back
Top