migueralliart
10 kW
Yet another GT idrive build...
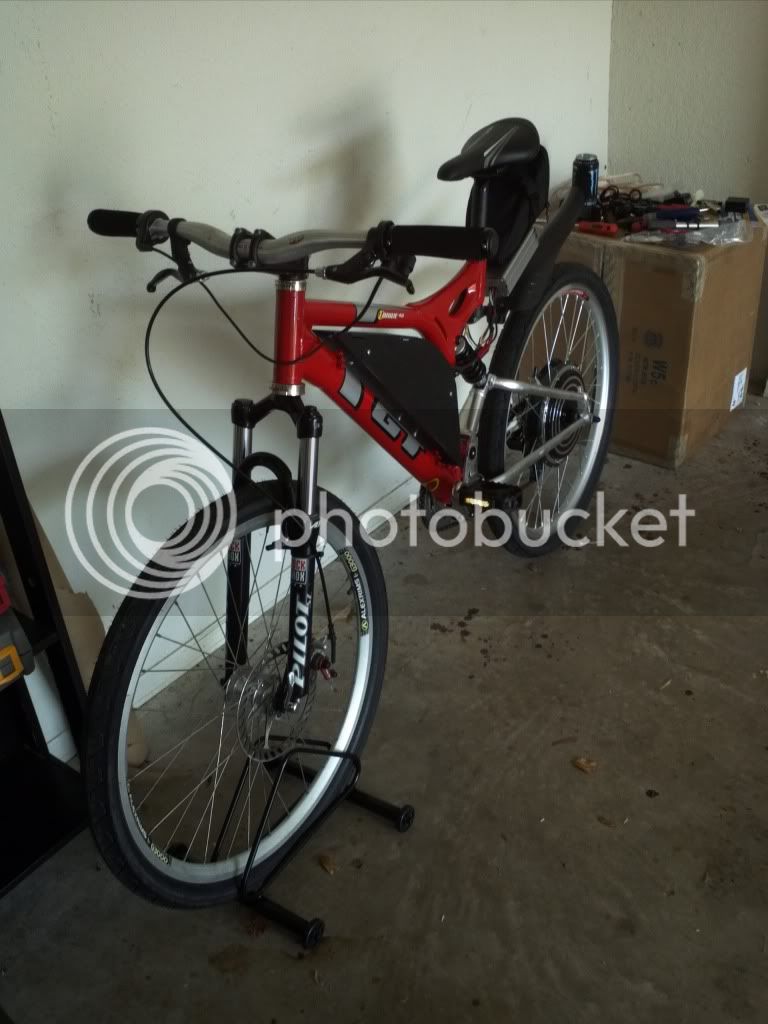
Bought the frame for 125$ from ebay used without the rear shock and no front fork. I added a rockshox used front fork I got off Craigslist for 20$. Ordered the rear shock from ebay for 55$ it is a fox vanilla R. The pedals and crankset came from a EVG PE. Some details of the configuration:
DD yescomusa 36V 800 watt kit rear with 6 speed freewheel
Controller is a Keywin sensorless programmable - currently programmed to 30amps and running 12S mid setting for regen
Batteries are Hobbyking 12S - 2 6S bricks 5000mAh zippy
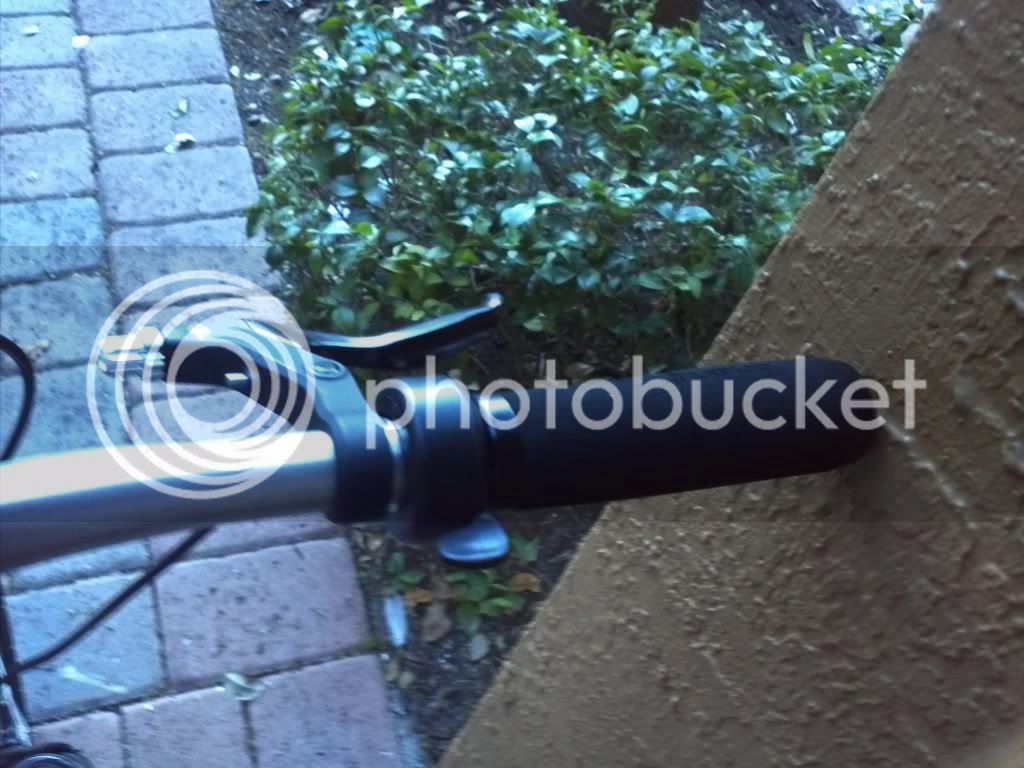
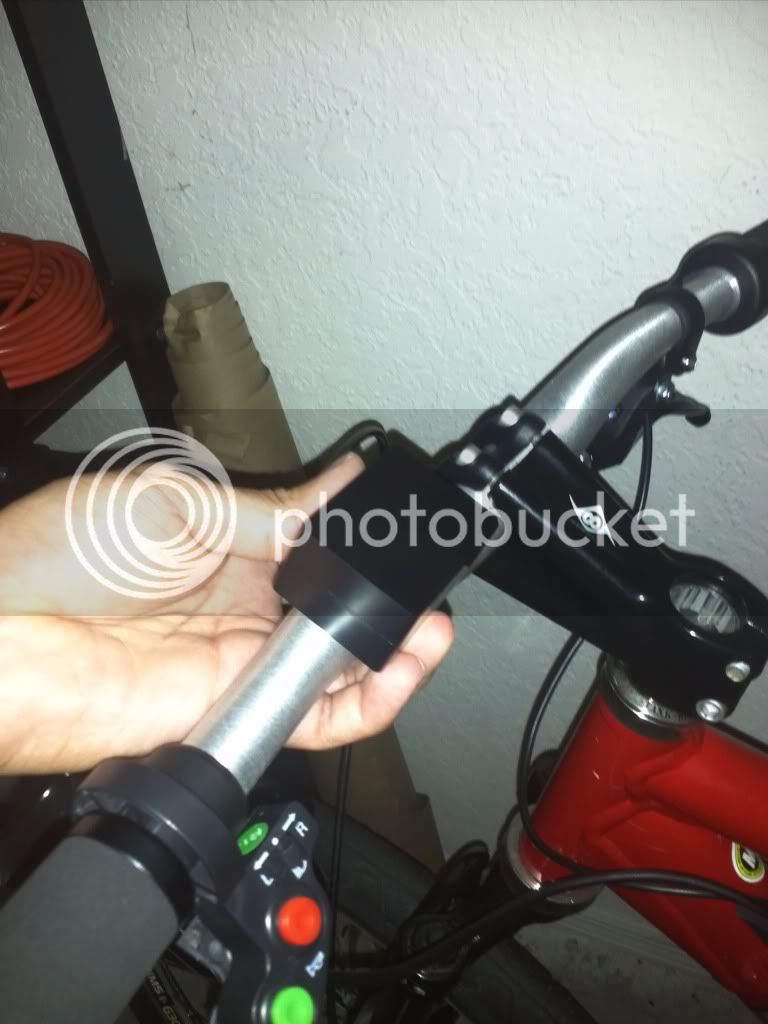
Simple Thumb throttle
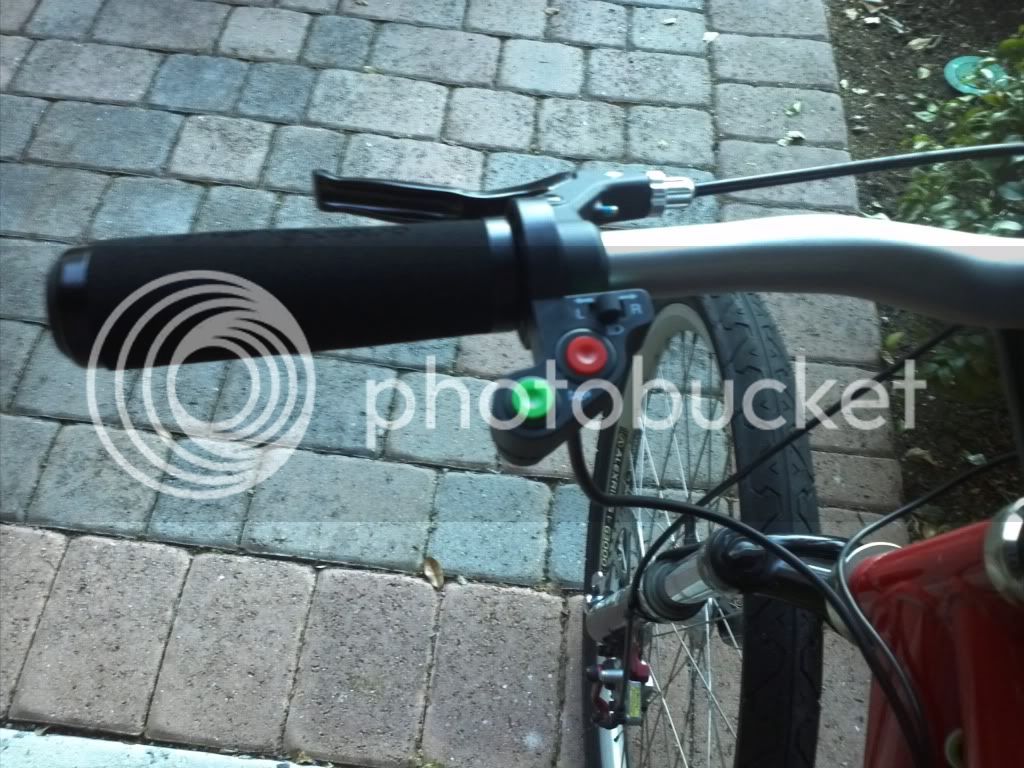
Left handlebar switch for controller and regen
For now I'm running just a front brake and regen on the back will add a rear v brake as soon as I add the rear derailleur and chain+shifter
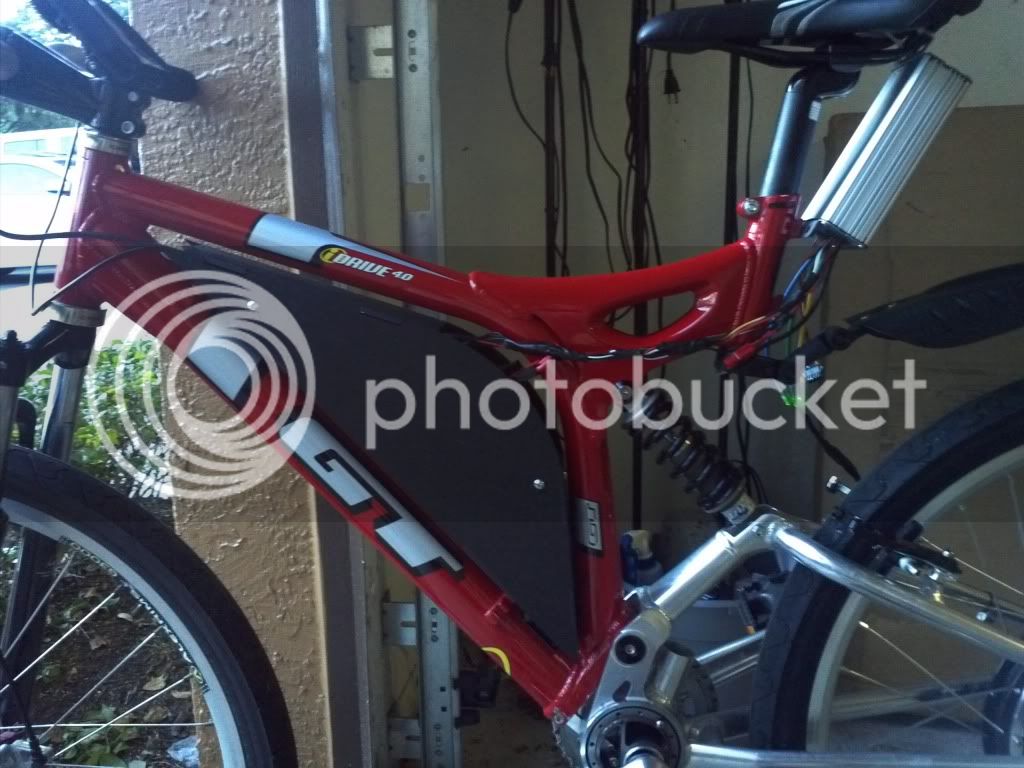
The battery case is a lasercut ABS custom enclosure that holds both bricks and uses the bottle mounts for it. Pretty solid and it is pretty rigid.
I'm getting 24-25 mph with no pedaling just testing the lipo packs for now I've only cycled them 4-5 times so I take em out of the bike each time I use it. It only takes 2 bolts to disassemble the side cover and remove the battery.
Ok enough of the talking now lets get to pictures
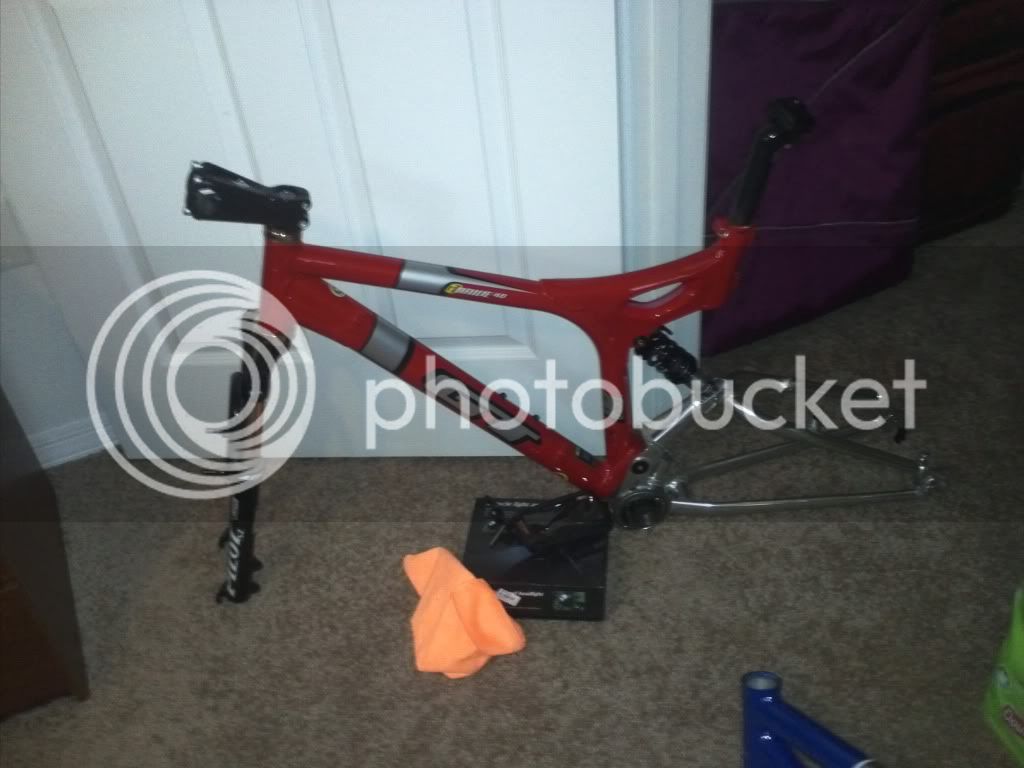
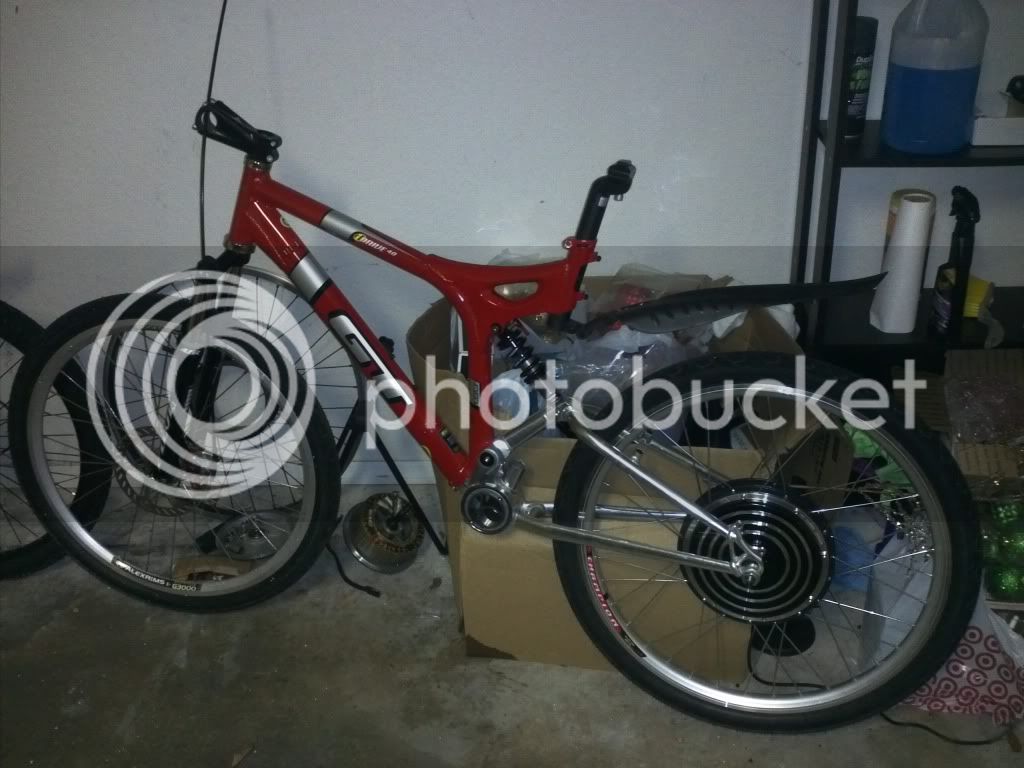
Birth
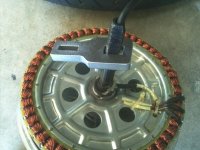
Yescom USA rear DD installed
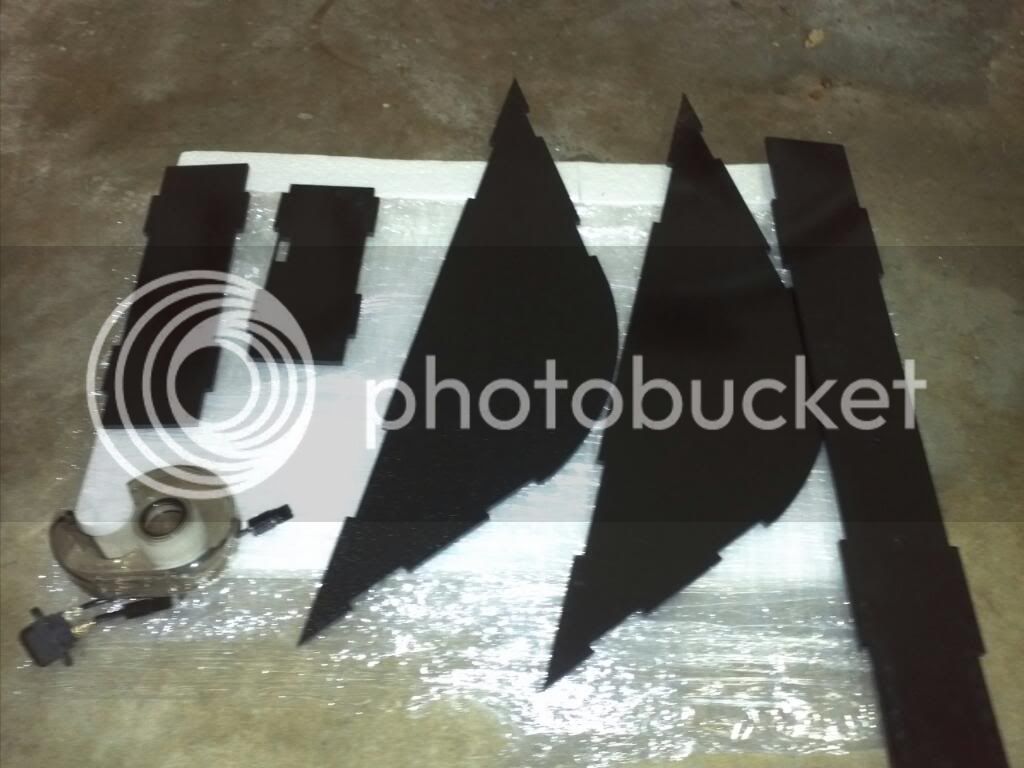
Battery Enclosure lasercut ABS sheets arrived
Harnessing time
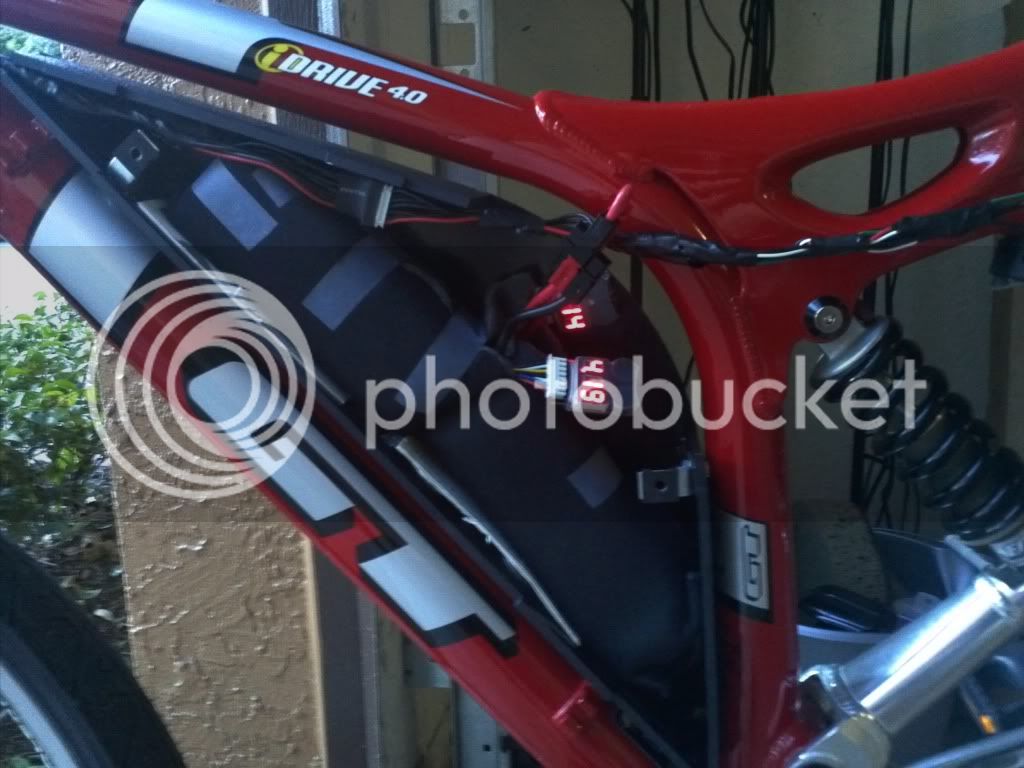
Batteries installed
Throttle
Left handlebar switch , red is the controller on/off switch green is a momentary regen
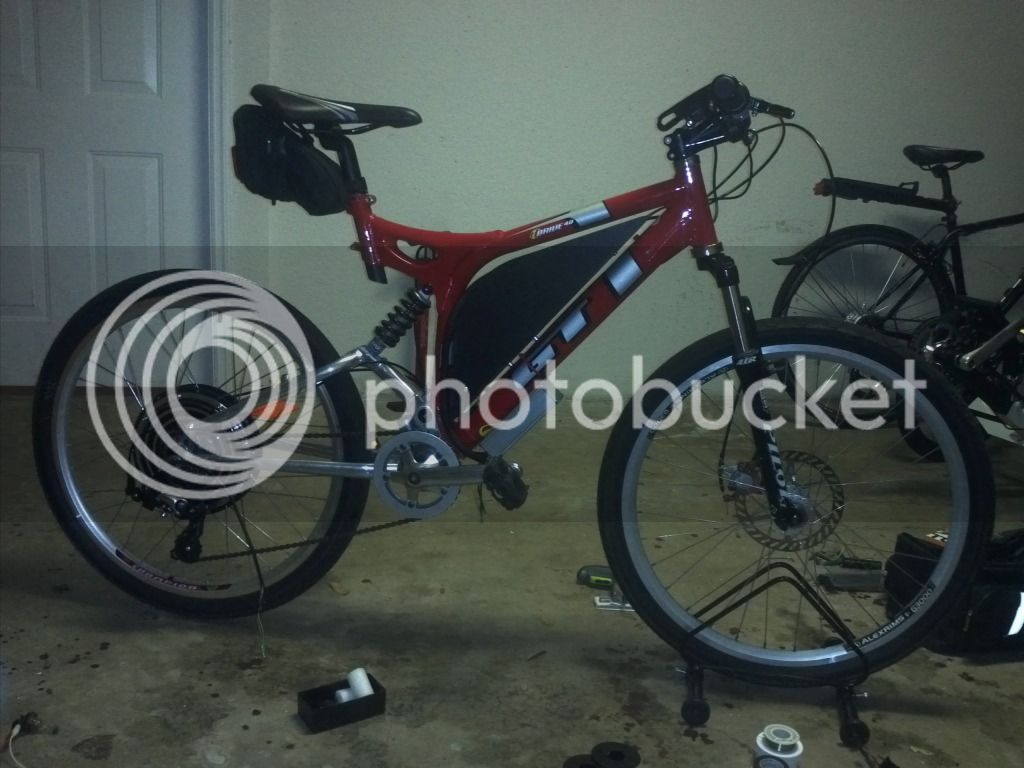
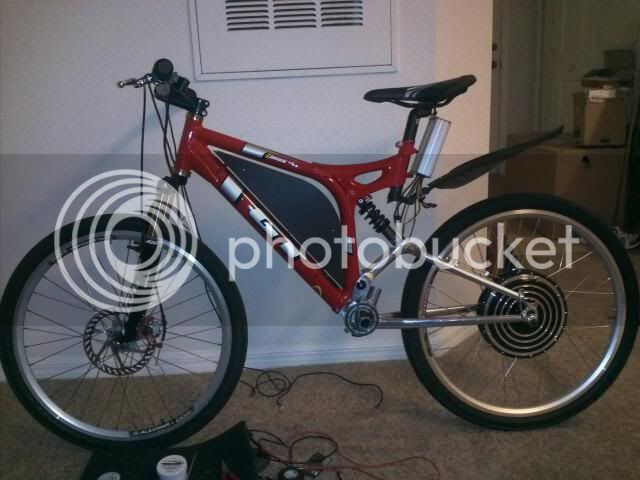
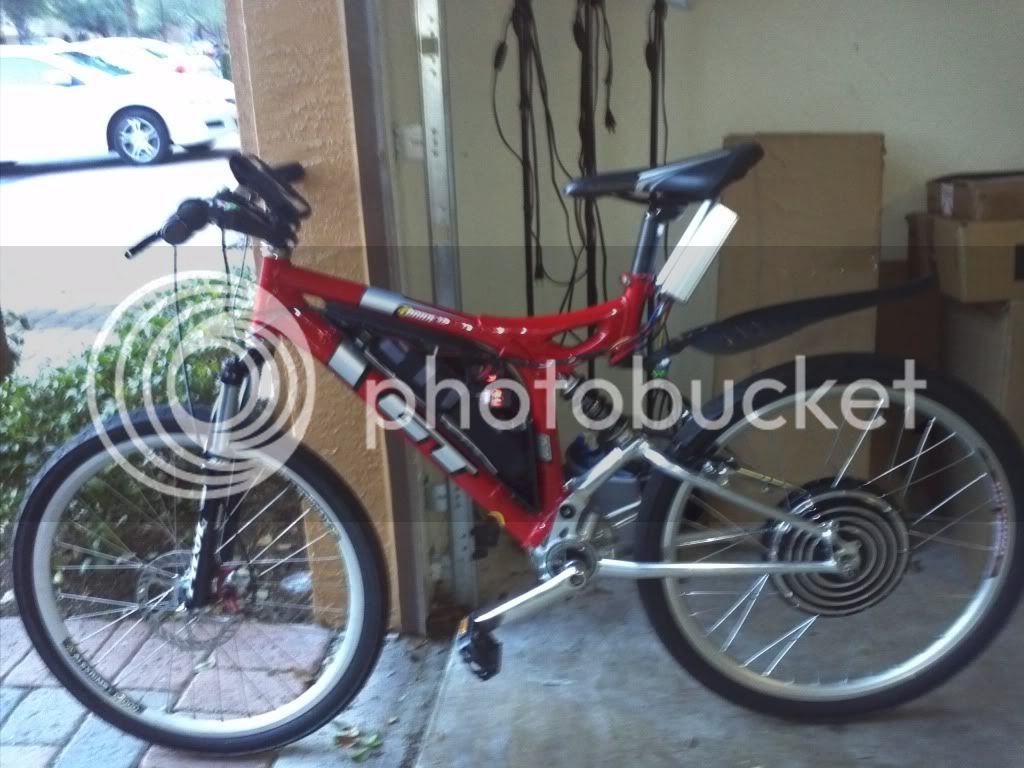
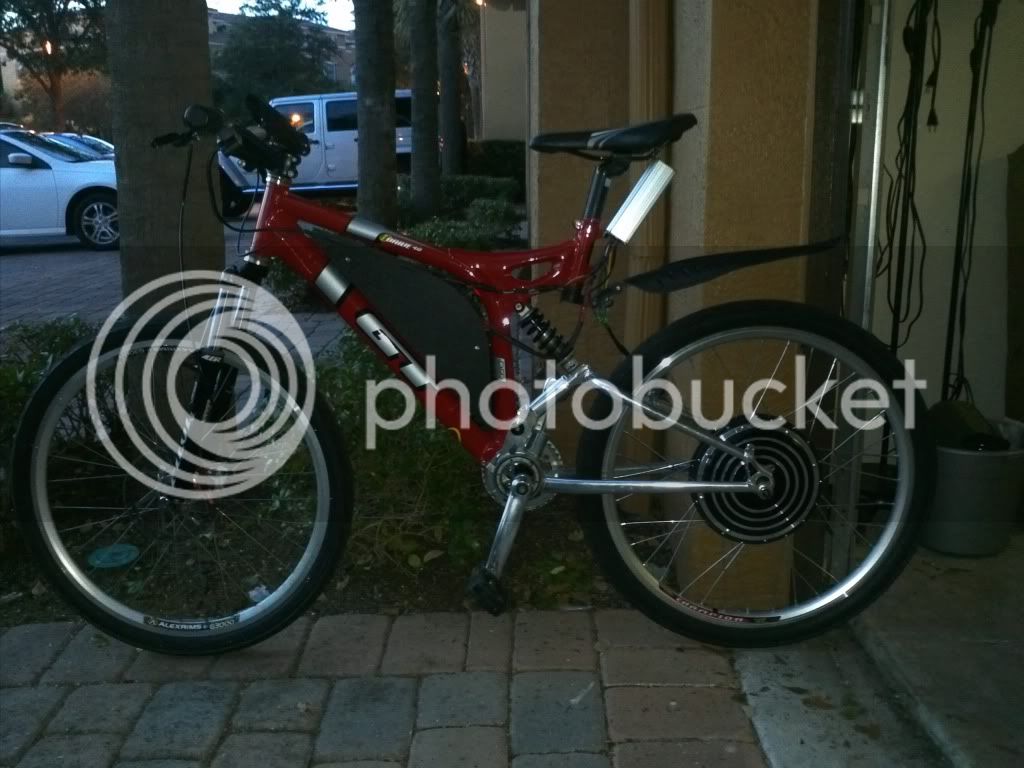
Side view
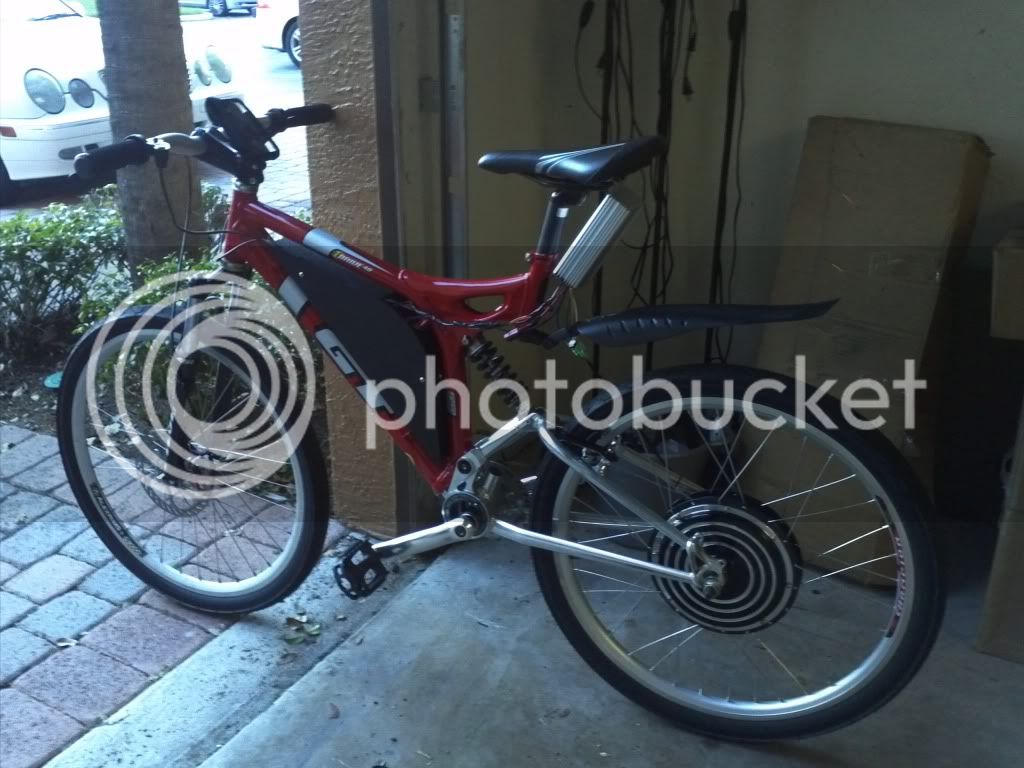
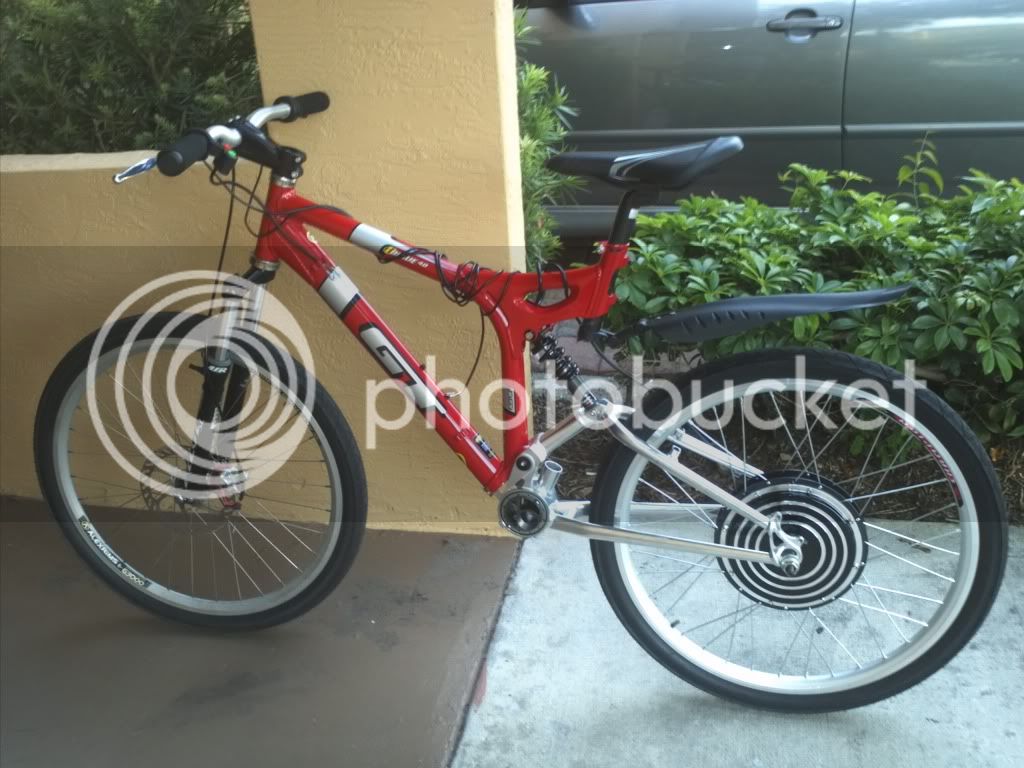
And the WIP running bike
Update 9/01/2012
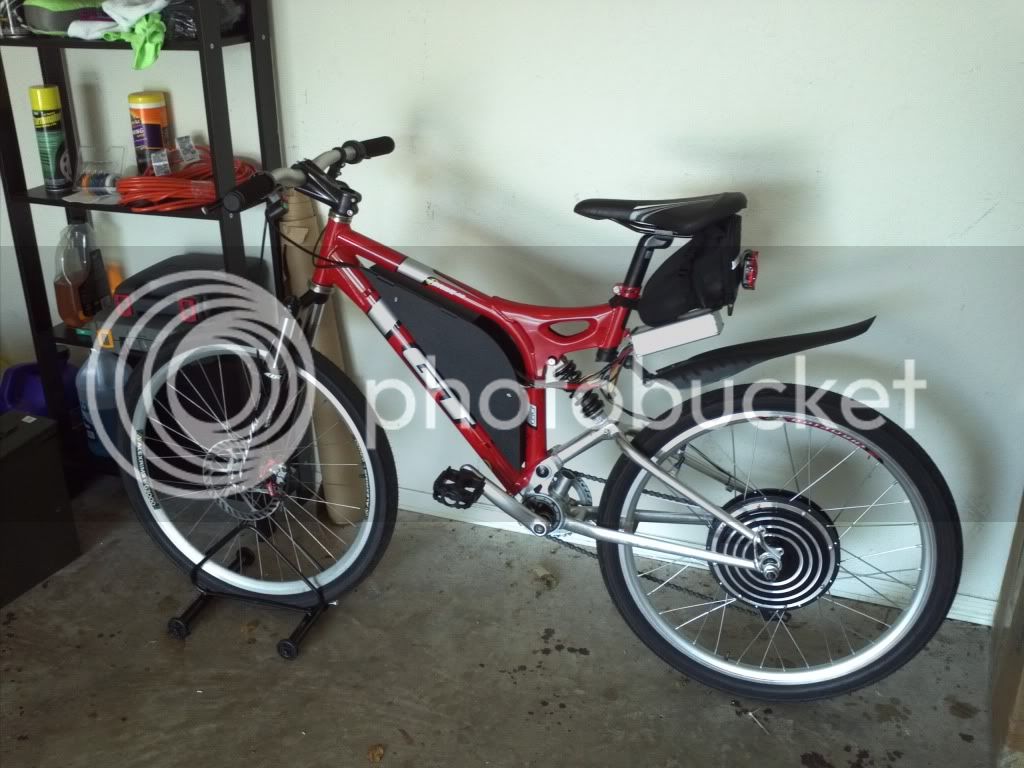
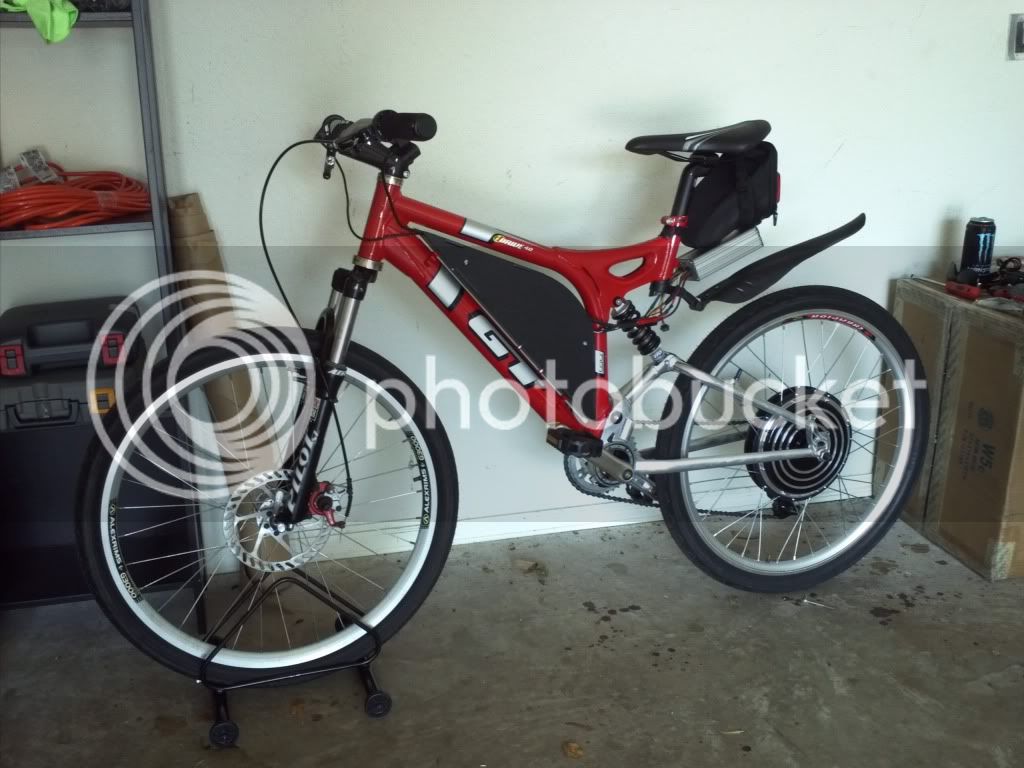
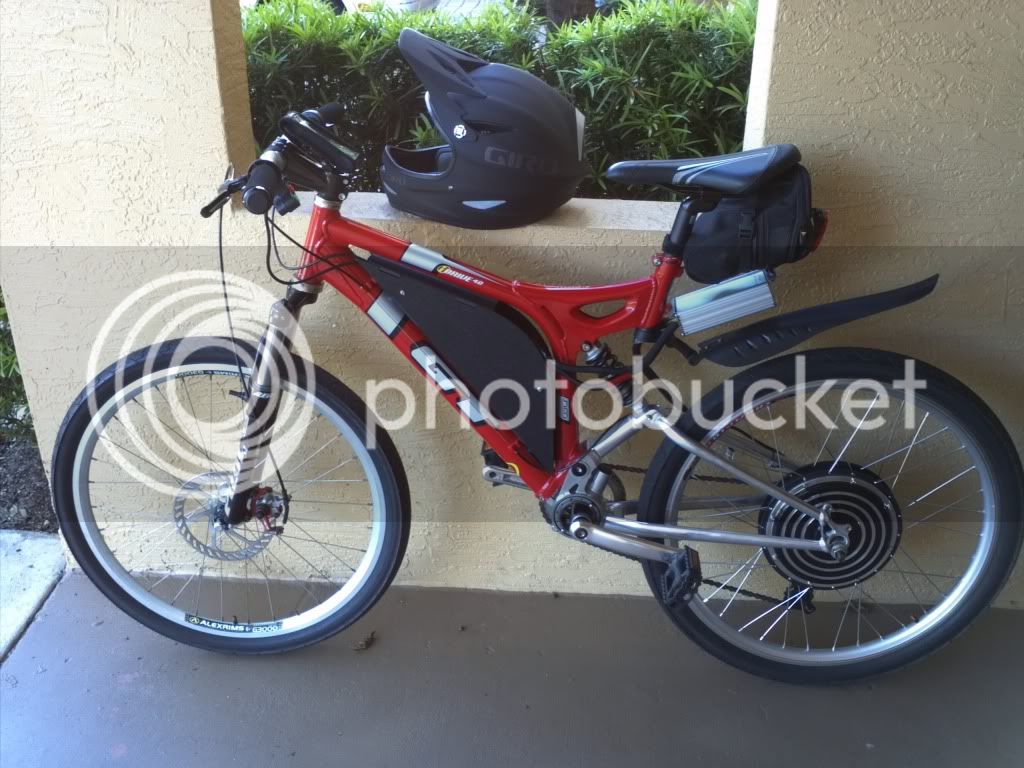
I installed a rear topeak seat bag. The plan is to put 2 more lipo 6S bricks so my total capacity will get to 9AH 12S. For short rides I use two 6s bricks in the main triangle for 12S and add another booster pack on the seatpost bag. I bought some small project enclosures and some voltage meters do to a handlebar install. Will keep updating this thread.

Update 9/24/2012
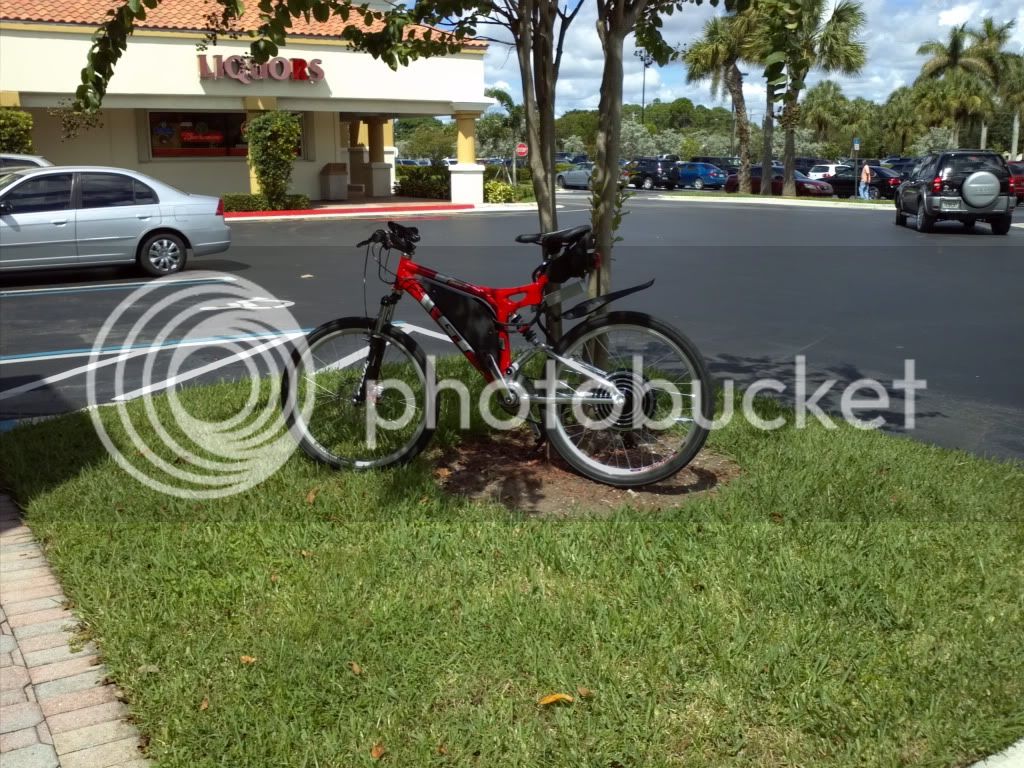
So today I went for a ride to test the range of my simple lipo setup.
Right now In the triangle enclosure I have a 12S 5Ah pack (made out of 2 6S 15C 5Ah zippys. Not the greatest lipo of all time but for my current of 30 amps and all flat terrain is good enough for a test.
Rode the bike full throttle for ~5 miles to a nearby blockbuster to exchange a movie. Used some light regen and didn't do much pedaling.
Parked the bike to a tree and went inside
After that I rode back and stopped by a nearby gas station to buy a bottle of water. Then just getting to my garage one of my 2 lipo alarms set @ 3.6V per cell started beeping under load. I immediately left off the throttle and it stopped beeping.
When I checked the total distance: ~10.3 miles out of my 5AH pack that is great!!!
Cruising at around 24mph. I will add another pair of 6S zippys in the seat bag for a 20 miles range.
So far my torque arm made from the mcmaster thick washer is holding. I even tried getting off (jumping the bike) the sidewalk @ around 20 mph when there were no cars just to test for worst case scenarios and having fun at the same time too of course.
Things to do next....
1-The chain is falling of the crank when it is in top gear (due to the chainline being weird) I need to get a crank chain guide for a good price. If anyone has a recommendation for this let me know.
2-Add rear adapter for disc brake
3-Add front fender
4-Change Pedals
Update 5/11/13
Well it's been quite a while since I update this.
I tried selling this frame locally but people just barter about everything so I decided to stay with it and give it an upgrade.
Changed the rear motor from a YESCOMUSA hub to a cell_man rear MXUS DD 335rpm wind.
Changed the controller from a keywin 12 fet to a 6 fet sensorless from lyen.
Ditched the ABS enclosure and made a small battery pack made out of samsung 18650-20R batteries capable of 20 amps each cell. The current pack configuration is 12S4P. In case you were wondering the pack is in the headset bag (6S4P at each side linked by an ATC 40A fuse holder) The controller is setup as 30 amps battery and ~60A phase current. The battery pack doesn't get warm to the touch after several stops and gos.
Added a rear curved torque arm and 203mm bb7 brake and a elixir 1 hydraulic on the front (still trying to figure out how to make a 203mm front setup work with the elixir's)
Changed pedals and front RIM to black.
Working on adding a seat post clamp , shortening the handle bar and choosing fenders.
It's time to put the trike to rest for a couple of weeks and check pads and stuff plus the temperatures are getting higher now in the summer and I kinda like riding the bikes when it's hot.
The yescomusa will now be the bench motor for testing controllers and throttles.
If you guys have any suggestions for fenders let me know I'm always open to your feedback. I still need to do some wire wrapping here and there specially between the controller and battery.
Pictures as always;


Bought the frame for 125$ from ebay used without the rear shock and no front fork. I added a rockshox used front fork I got off Craigslist for 20$. Ordered the rear shock from ebay for 55$ it is a fox vanilla R. The pedals and crankset came from a EVG PE. Some details of the configuration:
DD yescomusa 36V 800 watt kit rear with 6 speed freewheel
Controller is a Keywin sensorless programmable - currently programmed to 30amps and running 12S mid setting for regen
Batteries are Hobbyking 12S - 2 6S bricks 5000mAh zippy
Simple Thumb throttle
Left handlebar switch for controller and regen
For now I'm running just a front brake and regen on the back will add a rear v brake as soon as I add the rear derailleur and chain+shifter
The battery case is a lasercut ABS custom enclosure that holds both bricks and uses the bottle mounts for it. Pretty solid and it is pretty rigid.
I'm getting 24-25 mph with no pedaling just testing the lipo packs for now I've only cycled them 4-5 times so I take em out of the bike each time I use it. It only takes 2 bolts to disassemble the side cover and remove the battery.
Ok enough of the talking now lets get to pictures
Birth
Yescom USA rear DD installed
Battery Enclosure lasercut ABS sheets arrived
Harnessing time
Batteries installed
Throttle
Left handlebar switch , red is the controller on/off switch green is a momentary regen
Side view
And the WIP running bike
Update 9/01/2012
I installed a rear topeak seat bag. The plan is to put 2 more lipo 6S bricks so my total capacity will get to 9AH 12S. For short rides I use two 6s bricks in the main triangle for 12S and add another booster pack on the seatpost bag. I bought some small project enclosures and some voltage meters do to a handlebar install. Will keep updating this thread.
Update 9/24/2012
So today I went for a ride to test the range of my simple lipo setup.
Right now In the triangle enclosure I have a 12S 5Ah pack (made out of 2 6S 15C 5Ah zippys. Not the greatest lipo of all time but for my current of 30 amps and all flat terrain is good enough for a test.
Rode the bike full throttle for ~5 miles to a nearby blockbuster to exchange a movie. Used some light regen and didn't do much pedaling.
Parked the bike to a tree and went inside
After that I rode back and stopped by a nearby gas station to buy a bottle of water. Then just getting to my garage one of my 2 lipo alarms set @ 3.6V per cell started beeping under load. I immediately left off the throttle and it stopped beeping.
When I checked the total distance: ~10.3 miles out of my 5AH pack that is great!!!
Cruising at around 24mph. I will add another pair of 6S zippys in the seat bag for a 20 miles range.
So far my torque arm made from the mcmaster thick washer is holding. I even tried getting off (jumping the bike) the sidewalk @ around 20 mph when there were no cars just to test for worst case scenarios and having fun at the same time too of course.
Things to do next....
1-The chain is falling of the crank when it is in top gear (due to the chainline being weird) I need to get a crank chain guide for a good price. If anyone has a recommendation for this let me know.
2-Add rear adapter for disc brake
3-Add front fender
4-Change Pedals
Update 5/11/13
Well it's been quite a while since I update this.
I tried selling this frame locally but people just barter about everything so I decided to stay with it and give it an upgrade.
Changed the rear motor from a YESCOMUSA hub to a cell_man rear MXUS DD 335rpm wind.
Changed the controller from a keywin 12 fet to a 6 fet sensorless from lyen.
Ditched the ABS enclosure and made a small battery pack made out of samsung 18650-20R batteries capable of 20 amps each cell. The current pack configuration is 12S4P. In case you were wondering the pack is in the headset bag (6S4P at each side linked by an ATC 40A fuse holder) The controller is setup as 30 amps battery and ~60A phase current. The battery pack doesn't get warm to the touch after several stops and gos.
Added a rear curved torque arm and 203mm bb7 brake and a elixir 1 hydraulic on the front (still trying to figure out how to make a 203mm front setup work with the elixir's)
Changed pedals and front RIM to black.
Working on adding a seat post clamp , shortening the handle bar and choosing fenders.
It's time to put the trike to rest for a couple of weeks and check pads and stuff plus the temperatures are getting higher now in the summer and I kinda like riding the bikes when it's hot.
The yescomusa will now be the bench motor for testing controllers and throttles.
If you guys have any suggestions for fenders let me know I'm always open to your feedback. I still need to do some wire wrapping here and there specially between the controller and battery.
Pictures as always;