GT LTS Build Thread

NeilP

1 GW
Joined
Nov 27, 2010
Messages
5,012
Location
49.17303, -2.05354 Jersey, Europe
Was donated this frame a few months ago...and also swapped a 3 tonne block of steel for a scrap ElectricRider HT kit built bike...I helped the bloke build it but he trashed it..going through multiple controllers, wheel builds etc etc..All I kept was the hub motor , even the throttle as held together with glue

Suspension on the GT was an elastomer bush which was totally gone..so that was the first job...oh, had no wheels either..but that was no issue.

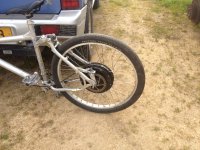
Here it is with some scrap wheels, after I had received the first , too soft, elastomer block from the USA.

View attachment 2

IMG_3293.jpg

10157035_264930480354270_214680813_n.jpg
 
it had a nice set of Pace RC36 carbon front forks, but totally Shot..so sent them off to Tim a "ForkEnglish" for service.

Springs inside were snapped and it was a horrid mix of oil and water in there.

Hope disk units front and rear, rear was a conversion kit for non disk frame...more of that later.
IMG_3257.jpg
IMG_3258.jpg
IMG_3259.jpg
IMG_3260.jpg
IMG_3261.jpg
IMG_3272.jpg


Finally forks back and still not decided about what to do with the rear elastomer. it was way too soft and just with me on it, almost bottomed out..that was with no battery or ancillaries

LIBD0016.jpg
 
The elastomer was really too short and too soft.

LIBD0015.jpg

LIBD0009.jpg

And dropped the bike an inch with just the bikes own weight, that was after the gap left by the too short bush was taken up.
LIBD0010.jpg LIBD0011.jpg

Tried making a collar to both boost the height and also restrict the compression of the block, but was no good. So I sent that block back and ordered a firmer one. Even that is not idea, but will do for now


IMG_3329.jpg
 
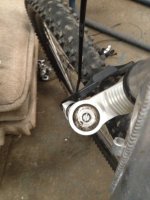
Next job was to fit up the rear rub so that the disk adapter would work with the hub motor...these next 10 photos ended up as three days work with lathe and mill to make adapter fit, leaving space for wires and still getting clearance to the hub.

IMG_3269.jpg


Bored out the side cover to take a bigger that original collar
View attachment 9

View attachment 8

As you can see slot for wires not yet machined...already I was getting concerned about space.

The "C"shaped cut out is where the brake adapter is to sit

IMG_3312.jpg

IMG_3313.jpg

IMG_3314.jpg


Clearance was not enough, and spacing was always a botch job..so i decide to see how much I could machine off the back of the calliper. I did a great job. measured it up and knew exactly how much material I could remove from the back to give me more clearance. if only I had spotted the the cross drilling


Yes that hole is going to let fluid escape...bugger bugger bugger :(

A few weeks later on e-bay and MTB forums I ended up with three new rear calliper units...these i machined a little more carefully!


IMG_3315.jpg

IMG_3316.jpg


Still need to sort torque arms...clamping unit is the plan
IMG_3317.jpg


Tight but plenty clearance. But damn it..I really wanted to sue a bigger disk, no chance with that adapter.

Also note the side plate screws sit out proud.

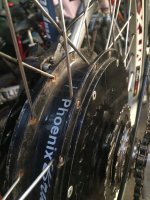
It also transpired that I WAS NOT going to have as much room for the phase wires as I hoped...and I was going to add hall sensors too
IMG_3318.jpg
 
So the next session in the workshop involved:

Fitting hall sensors
Countersinking the side plates and using c/s allen head cap screws instead.
Also found a bigger disk too.

So that all required turning down another nylon adapter/spacer.

I now regret not fitting a spare wire or two in there, Am going to have to strip it again to run just one single wire down for the the CA v3 temp thermistor.

New side cover cap screws
View attachment 5

Counter sunk
IMG_3357.jpg


IMG_3358.jpg


IMG_3360.jpg


halls in and wired with 30 gauge TFE wire RS Components part number 177-0643 for the green


IMG_3361.jpg

Big disk fitted and plenty of space.


When re assembling a motor wire side, always fit bearing to the shaft so the wires can be fitted neatly without damaging them..then you can press the cover over the bearing after...Don't try it the other way around..you are very likely to damage the wires.


Of course with the new nylon collar and big 210 disk, the hope original adapter was no use. So I had to do more work there.
 
So, before I tried to make an adapter for the caliper of the bigger disk, it was better that I made up the torque clamps..

A nice easy job...and yes it was...until I tried to fit the derailleur, the old one was too short, so had to make a new extended derailleur too.

IMG_3327.jpg

IMG_3347.jpg

IMG_3346.jpg

IMG_3341.jpg

IMG_3343.jpg

IMG_3344.jpg

IMG_3350.jpg

IMG_3354.jpg

IMG_3359.jpg
 
Making up, jigging and welding the new brake mounting bracket was surprisingly , a walk in the park. compared to the previous hassles

IMG_3328.jpg

View attachment 3

IMG_3336.jpg

IMG_3337.jpg


And lots of clearance now for the calliper to hub

IMG_3338.jpg
 
I could finally get the motor fired up and give the bike a run.
Took it out for a quick blast with the old wheels with the broken spokes and an 18 FET controller, :twisted:

IMG_3406.jpg

I had also been busy outside the workshop, ordering wheel rims, measuring up, finding a front hub, getting spokes sorted.

So I got on with lacing the new wheels.
Rims are SunRingle MTX33's

IMG_3319.jpg


Tyres are Schwalbe Marathon Plus Reflective Tour Bike Tyre
Spokes are 13/14 butted spokes from the excellent graham@tillercycles.co.uk. Tiller Cycles
He also supplied me with NOS front hub and the friction shifters

Graham will send out spokes the same day, as long as you get your order to him by early morning..10 or 11 am

that done did a quick run up with the 6 FET and a quick blast in to town to see the chaps who would fold me the battery box.

IMG_3436.jpg

This is of course about the time i started to think about properly bleeding up the brake system. and also when I found out that the Hope brakes use DOT fluid....OH shit...my Magura hydraulic brake switch ...needs mineral fluid.

that is when my hear sank...OH no..my new welded on brake adapter was made to fit the Hope brakes.

Thankfully the Hopes are a standard pattern, and any standard issue hydraulic callipers will fit ...phew big sigh of relief. You can just see the Shimano calliper on the back


View attachment 3


Now at the stage of how to wire up the bars...got the CAv3 fitted with TDCM crank...gonna have to strip the hub again to fit thermistor.,..shit shit shit

Need to get my head around how I am going to wire it all up...what switches do what etc etc.


I went to friction shifters to give more handle bar space and a 6 speed freewheel...still need to get an 11 - ?? rear and a bigger chainring

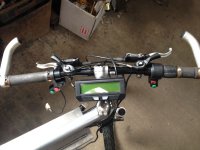
Wasted nearly 5 hours today re arranging the handle bars and stem. Must have tried 5 different stems, 4 sets of bars and countless arrangements of different switches and throttles.

The big problem is knowing how I want to do it. what to make each switch to do etc..do I need High beam/Low beam, independent front and rear light switch? What to use the Aux v3 input for ...working it out is harder than wiring it up !

IMG_3643.jpg

IMG_3645.jpg
 
In between times I have also been playing with the CA v3, fitting the TDCM crank and getting that calibrated, and just getting an understanding of it.

Running the v3 as High voltage setup...CA run from 12volt 5 amp supply with resistive divider for voltage monitoring. The Switch mode AC-DC unit runs fine at 20 series and seems to work just fine.


The CA shunt figure has been calibrated using the iCharger method of passing current backwards 'up' the controller. See CA v3 UUG on the CA v3 thread for details of that


Battery pack is a low capacity affair..just an 8Ah pack made of four Zippy Flightmax 8Ah packs as 20s1p
 
When I built up the bike, I fitted the only 7 speed freewheel I had kicking around, but it needed changing at some point. It was a 14 - ?? and I needed an 11T. So after a 6 week wait, the new one arrived..but it was wider than expected, different to the other DNP freewheels I have.

Picture here from teklektik showing the older 11-32 freewheel on the left, with a thinner back, and the new 11-28 on the right, with the thicker collar at the back. It was one of those that I tried to 'machine' down.


file.php


See this topic for more details.

Basically I managed to trash it within 12 hours of receiving it :x


On previous freewheels I have been able to turn some metal off the back with a lathe or milling machine, but the big machines are at a mates place and I only have a small hobby machine in my workshop. I tried with the small machine, but could not hold the cluster properly and I was so impatient and tried with the 9 inch grinder, what an idiot. The following picture was the result, less the cross cut that I made later to see the profile of the back of the unit.

Further details of how to strip a DNP Epoch can be found in a new thread.

file.php
 
Well I finally finished the rear sprocket a few months ago

IMG_4194.jpg


Also had a new elastomer arrive.

So last month I finally got it all running and wired up with the exception of the three beam lighting system I had hoped to fit. I kept burning up the LED drivers :(

Well the new elastomer for the suspension also arrived from Suspension Fork Parts
But it split within 100 miles ...first long ride out ( 8 miles) and it ended up like this

split elastomer.jpg


They are sending me a new on FoC :) But I was too impatient to wait so i have modified and fitted a spring damper.

There are kits available to upgrade later GT LTS frames to more modern rear shocks, but they (Full Moon Cycling) don't offer a kit for the GT LTS4 :(

So I had to do it myself. More info here. but basically a day of matching and tinkering with an old el cheapo shock to make it fit, while still not damaging or altering any of the original from components.
Now I know it works in theory , I'll probably try and re make the black nylon spacer in alloy, and find a suitable spring , rather than hacking the old one down with an angle grinder as I had to do yesterday.
View attachment 6
opened.jpg
IMG_5138.jpg
IMG_5142.jpg
IMG_5143.jpg
fitted.jpg
 
Neil,

I built up a GT LTS 2 for my wife:

http://endless-sphere.com/forums/viewtopic.php?f=3&t=50685

You've put a lot of work into those TA's !

I went with a ready made after market disc brake boss.

http://www.ebay.co.uk/itm/GT-LTS-STS-Rear-Disc-Brake-Mount-Adapter-Universal-Blk-/151314829398?pt=Cycling_Parts_Accessories&hash=item233b111056

You can also get a converter unit for the rear suspension so you can replace it with a standard rear shock but I can't find a link to it just now.

I really like the way it rides with the rear suss and big open triangle for batts.
 
That is a nice build. Mine too came from a skip

I have a thread going here where I posted up lots of other suitable frames, full sus with big open triangles, there are a surprisingly large number out there.


Actually the TA's were very minimal work, just some alloy angle , cut to fit and bolted down. They clamp together with helical inserts to give greater thread strength. Same as the holes that secure them to the frame. the frame holes were threaded and fitted with 5mm helical inserts too.

The good thing about the home made adapter for the brakes is that without any further adapters, the calliper fits directly to a 210mm disk without extensions. Makes the whole thing a bit more rigid.


If you could find a rear suspension adapter link I;d be really happy. I guess that is what you fitted to yours? I did not think the early GT LTS's had springs so I guess since yours has, that must be the adapter set. I was going to make my own up at some point, but if an off the shelf option is there, it will save me time.
 
Just ordered a DNP Epoch 11-28 7 speed freewheel. popping down the workshop now to measure the BCD of the crank...The front chain ring is way too small at the moment.

Might just be easier to swap the whole unit out...will have to see.

The RFID units arrived today ..but I thing the range is too short. I wanted to keep a RFID key in my back pocket to activate the bike when I sit down..but that won't work with this unit.

http://www.ebay.co.uk/itm/370485500429?_trksid=p2059210.m2749.l2649&ssPageName=STRK%3AMEBIDX%3AIT

I'll put further updates to the built in the reserved posts above.
 
Neil,

the GT lts platform was my first hi power ebike.

Here's a few stores that still stock elastomers and bushing rebuild kits for them:

https://www.benscycle.com/hawksearch.aspx?keyword=gt lts

http://www.suspensionforkparts.net/eshop/gt-lts/gt-lts-rear-elastomer-refresh-kit.html

[youtube]52qd3Z8cl4Q[/youtube]

personally, I would just get the lts 3 and retrofit it like the you tube vid...


Cheers,

Len
 
The new elastomer came from your second link, Suspensionfork parts. But even the heavy one was not designed for e-bike weights, and it was too short.

I am know there are lots of other frames available, but this was a free one, so it had to be used
 
Back
Top