jackal
1 mW
Hello everyone, new user here bitten by the electric bug!
I've started thinking about building an electric motorcycle since early March I believe. It started small and it grew into a 2wd motorcycle idea. It probably is overkill, wasteful and suicidal but hell, if I'm going to do something from scratch (frame included!) it has to be exciting and challenging to keep me going, right? otherwise I might drop it and lose interest.
Anyway, it has gotten to that part where I've got my design sketches pretty much where I want them and I'm starting to look at the details so I can order parts to start fitting and testing. Oh boy, so much to read, so many calculations to do, so many inquiries...
I'm super new to this but hopefully I've done enough research by now that I don't sound like a complete idiot here. Word of warning though, I'm still an idiot, so components and calculations might not be properly matched, and I might have not grasped certain concepts yet! which is why I'm reaching out to the forum!
So here's the plan so far:
2 x QS273 40H or QS205 50H 5T (one on each wheel)
Each motor would have a 20s2p 74V 20Ah battery pack out of "Turnigy Graphene Professional 10000mAh 4S 15C" and a suitable controller for it (still TBD).
Now, I don't want to cook the motors beyond the spec sheet, I want durability. I want to always stay in parameters, so if the QS205 has a 3kW continuous rating and 6kW peak, I just want to do that. If anything, since the batteries could deliver 300A, try that for a short amount of time (which by the way, I'm still not sure if it's that straightforward)
I've read someone here recommending controllers for an application like this that have: "24fet with IRFP4468 or IRFP4568 at minimum, ideally 36fet". Haven't found a controller that fits this description (either manufs. hide this very well or my google-fu sucks), Kelly seems to use a different version of fets in their KBL72301X (would this one work?). It's important that the software suite is good and easy to work with.
I also have a slight problem if I go with the 273... it seems really hard to fit it inside an 18in rim without using some radial lacing (big no-no for me). So I might have to fall back to a QS205. It also needs to be something like 2.5 in wide to fit the tires (eg. 110/80-18 Kenda K761 Dual Sport Tire), something QS doesn't offer but I've asked them about it. Still waiting for a reply.
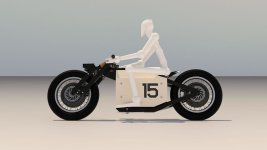
Anyway, thanks for having read this wall of text, sorry for the potential cringes you might have experienced! Probably not the first and not the last haha. Might post a render of what I'm envisioning later if there's interest. Any advice would be immensely appreciated.
Cheers!
I've started thinking about building an electric motorcycle since early March I believe. It started small and it grew into a 2wd motorcycle idea. It probably is overkill, wasteful and suicidal but hell, if I'm going to do something from scratch (frame included!) it has to be exciting and challenging to keep me going, right? otherwise I might drop it and lose interest.
Anyway, it has gotten to that part where I've got my design sketches pretty much where I want them and I'm starting to look at the details so I can order parts to start fitting and testing. Oh boy, so much to read, so many calculations to do, so many inquiries...
I'm super new to this but hopefully I've done enough research by now that I don't sound like a complete idiot here. Word of warning though, I'm still an idiot, so components and calculations might not be properly matched, and I might have not grasped certain concepts yet! which is why I'm reaching out to the forum!
So here's the plan so far:
2 x QS273 40H or QS205 50H 5T (one on each wheel)
Each motor would have a 20s2p 74V 20Ah battery pack out of "Turnigy Graphene Professional 10000mAh 4S 15C" and a suitable controller for it (still TBD).
Now, I don't want to cook the motors beyond the spec sheet, I want durability. I want to always stay in parameters, so if the QS205 has a 3kW continuous rating and 6kW peak, I just want to do that. If anything, since the batteries could deliver 300A, try that for a short amount of time (which by the way, I'm still not sure if it's that straightforward)
I've read someone here recommending controllers for an application like this that have: "24fet with IRFP4468 or IRFP4568 at minimum, ideally 36fet". Haven't found a controller that fits this description (either manufs. hide this very well or my google-fu sucks), Kelly seems to use a different version of fets in their KBL72301X (would this one work?). It's important that the software suite is good and easy to work with.
I also have a slight problem if I go with the 273... it seems really hard to fit it inside an 18in rim without using some radial lacing (big no-no for me). So I might have to fall back to a QS205. It also needs to be something like 2.5 in wide to fit the tires (eg. 110/80-18 Kenda K761 Dual Sport Tire), something QS doesn't offer but I've asked them about it. Still waiting for a reply.
Anyway, thanks for having read this wall of text, sorry for the potential cringes you might have experienced! Probably not the first and not the last haha. Might post a render of what I'm envisioning later if there's interest. Any advice would be immensely appreciated.
Cheers!