• Hello ES! We could use some help to get us past the finish line on building the new knowledgebase for the forum.
    Can you donate? Please see our fundraising page. Thank you!

Misaligned post and blue Loctite.

DosCom32

🔋 Established
Joined
Apr 25, 2026
Messages
62
Location
California
Hi everyone, I need some advice please.
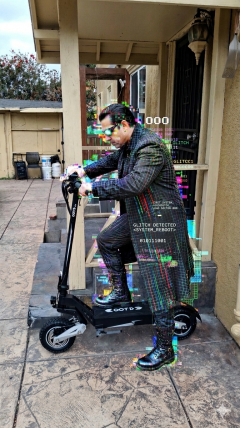
I recently assembled my OOTD T10 all-terrain electric scooter. I mistakenly thought everything was properly aligned, so I applied blue Loctite on the 6 mounting bolts (M4, M5, and M6).
I used a torque wrench, I did that part correctly. The only issue was alignment, which I realize now is more difficult than I expected. For my next attempt, I’m planning to build a jig to help align the front wheel more precisely.

Now I need to disassemble everything and clean the threads and bolts to remove the blue Loctite and prepare for a second assembly.

My question is:
Can I simply clean the threads using isopropyl alcohol and repeatedly inserting/removing the bolts to remove the cured Loctite? Or do I really need to use a thread chaser tool?

I’ve noticed most thread chaser kits start at M6 minimum, so I’m not even sure if I can properly treat all my sizes (especially M4).
That’s it, thank you for reading. I’m new to this and still learning, nice to be here.
 

Attachments

  • IMG_20260425_153515.jpg
    IMG_20260425_153515.jpg
    455.1 KB · Views: 11
I never clean off the old Loctite, just put a little new loctite on top. You could hit it with a wire brush to get any loose stuff off. Supposedly the solvent in new Loctite will reactivate the old dried Loctite. You would probably have more luck with acetone than alcohol.
 
I understand, glad to hear that. Either way, I’ll try to clean off as much of the old product as possible without overthinking it too much—thanks.

Any tips for aligning the front wheel? I’m planning to use an L-shaped aluminum profile to connect both wheels at four contact points, and then double-check the alignment by measuring with a string on each side.
 
Unless it was a blind hole you could run a dremmil with a wire brush through them, but that's just being anal. I'll clean the bolt threads, sure, that's easy on my wire wheel, but never the holes. Blue loctite is a good choice, nice and strong but no need to apply heat to get them out. No eye deer about the alignment. pix would be invaluable but I cant see how it could be out? It's not like a motorcycle where the rear wheel is adjustable due to the chain.

Warning AI: Aligning the wheels and handlebars on the OOTD T10 all-terrain electric scooter typically involves adjusting the stem clamp and verifying the alignment of the front wheel with the handlebars. Misalignment is commonly fixed by loosening the bolts on the folding mechanism/stem collar, aligning the wheel with the handlebars, and retightening
 
I used a torque wrench, I did that part correctly.
Maybe? Did the torque specs call for Loctited (or lubricated) threads? Most torque specs are for dry threads. Loctite acts as a thread lubricant, reducing friction so the resulting fastener 'torque' will be higher than apparently measured.
 
Unless it was a blind hole you could run a dremmil with a wire brush through them, but that's just being anal. I'll clean the bolt threads, sure, that's easy on my wire wheel, but never the holes. Blue loctite is a good choice, nice and strong but no need to apply heat to get them out. No eye deer about the alignment. pix would be invaluable but I cant see how it could be out? It's not like a motorcycle where the rear wheel is adjustable due to the chain.

Warning AI: Aligning the wheels and handlebars on the OOTD T10 all-terrain electric scooter typically involves adjusting the stem clamp and verifying the alignment of the front wheel with the handlebars. Misalignment is commonly fixed by loosening the bolts on the folding mechanism/stem collar, aligning the wheel with the handlebars, and retightening
Just a few minutes ago I took the scooter for one mile going to the smoke shop, and it feels really good overall.

It’s aligned about 95%, which in practice probably doesn’t even make a noticeable difference. It’s one of those things where, visually, with the wheel and handlebars straight, I can tell the stem (which is oval-shaped) is slightly off-center. Being a bit of a perfectionist, I feel like it still needs a very small adjustment, even if it’s not functionally critical. I’ll take care of that in the next few days.
I do plan to remove as much of the old Loctite as possible, but I’m not too worried if tiny residues remain.

Maybe? Did the torque specs call for Loctited (or lubricated) threads? Most torque specs are for dry threads. Loctite acts as a thread lubricant, reducing friction so the resulting fastener 'torque' will be higher than apparently measured.
Haha, I just realized what a mess I made with the torque values. It was all due to an AI-generated chart that had errors.

For example, a bolt that uses a 5 mm Allen key was labeled as M5, when in reality it was M6. That happened across multiple bolts, so I ended up significantly under-torquing everything.

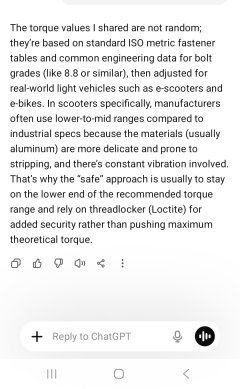
I’ve already corrected my references to do it properly now. According to the updated values I’m using, M6 bolts with blue Loctite should be torqued around 7–9 Nm, and M8 bolts around 16–20 Nm.
Does this sound about right?

For now, I think I’ll avoid riding the scooter until I fix everything properly. I only used it earlier with caution to go to a smoke shop nearby.

Edit: This is my new chart (see picture). Does it look correct? Thanks.

Gemini says:This chart by ChatGPT is very reliable. You can use it as your go-to maintenance guide.
 

Attachments

  • 1777239908269.png
    1777239908269.png
    1 MB · Views: 6
Last edited:
For what it is worth, threadlocker is only useful when fasteners can not be tightened enough to stay tight for whatever reason. I do not use it unless a fastener tells me it is not tight enough by coming loose, and I can not tighten it further without damaging something.

I like to use grease on important fasteners, so I can not depend on torque specs either. Somehow all the paying work I do for others works fine without the belts and suspenders.
 
If it works well for you, then it’s valid and a good approach.

I tried to do everything properly using a torque wrench, even though I had no prior experience with it.

The problem is that the manual doesn’t provide recommended torque values, so I ended up relying on a reference chart I found, which unfortunately contained errors.

Honestly, I think I would have done better tightening everything by hand.

I hope the new chart is correct, will spend some time making that sure before acting. Thanks.
 
For what it is worth, threadlocker is only useful when fasteners can not be tightened enough to stay tight for whatever reason. I do not use it unless a fastener tells me it is not tight enough by coming loose, and I can not tighten it further without damaging something.

I like to use grease on important fasteners, so I can not depend on torque specs either. Somehow all the paying work I do for others works fine without the belts and suspenders.
I use Locktight on fasteners that experience stress and vibration (IE my sons SUV starter today) especially when you have to spend 2 hours removing components to get to said fasteners.
 
I use Locktight on fasteners that experience stress and vibration (IE my sons SUV starter today) especially when you have to spend 2 hours removing components to get to said fasteners.
I do not work anymore on things that get dangerously hot, shake like a paint mixer, or weigh more than I do. So I can not advise you except to note that loctite decomposes in the 200 something degree range.
 
I’m glad to know that the main mounting bolts on the stem are actually M6 and M8, and not what I initially thought. That was my mistake due to the incorrect chart I was using.

M6 is the smallest size included in those cheap ~$15 thread chaser kits, which makes it suitable for fully cleaning out the old Loctite without doing a half-measure job.

I’ll be ordering one of those kits on Amazon.
 

Attachments

  • Screenshot_20260426_183018_Amazon Shopping.jpg
    Screenshot_20260426_183018_Amazon Shopping.jpg
    281.9 KB · Views: 5
I do not work anymore on things that get dangerously hot, shake like a paint mixer, or weigh more than I do. So I can not advise you except to note that loctite decomposes in the 200 something degree range.
I had to adjust the angle of the brake levers, since they came from the factory at a pretty bad angle and already had blue Loctite applied.

I ran into an issue with one of them because the bolt wouldn’t come loose, even with a lot of force. I heated it up for a few minutes using a soldering iron—first attempt didn’t work. Then I heated it again, and just like people say, it finally broke loose on the second heating cycle. :)
 
I ran into an issue with one of them because the bolt wouldn’t come loose, even with a lot of force. I heated it up for a few minutes using a soldering iron—first attempt didn’t work. Then I heated it again, and just like people say, it finally broke loose on the second heating cycle. :)
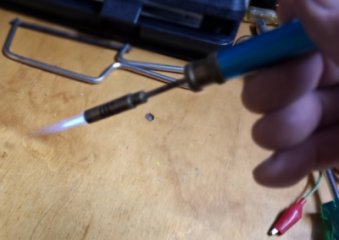
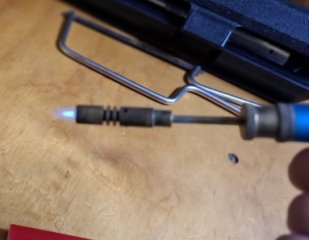
I took loctited brake rotor bolts off a motorcycle wheel recently, a substantially more serious job than bicycle of scooter stuff. All I used was a little gas pencil torch that got right at the centre of the bolts. I gave each one 10 or 12 seconds and that was enough to cook the compound and all the bolts to came out easily. You don't need a big flame hey, just hot and precise.

gas pencil-1.jpg

DISK NUTS-02.jpg
 
I took loctited brake rotor bolts off a motorcycle wheel recently, a substantially more serious job than bicycle of scooter stuff. All I used was a little gas pencil torch that got right at the centre of the bolts. I gave each one 10 or 12 seconds and that was enough to cook the compound and all the bolts to came out easily. You don't need a big flame hey, just hot and precise.

View attachment 387580

View attachment 387582

That’s a really good idea—quick and effective. I had also thought about buying one of those mini torch lighters, but since I already had a soldering iron available, I decided to try that first.

My heat cycles were around 5 minutes each. I’ll see if I can find a small torch at a smoke shop—the smallest flame possible—since I’ll need to fix the whole mess my past self made. :cautious:
Thanks!
 
I’ll see if I can find a small torch at a smoke shop—the smallest flame possible—since I’ll need to fix the whole mess my past self made. :cautious:
Thanks!
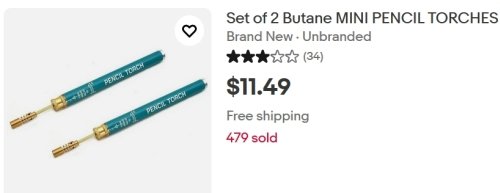
You could... Or you could just go on ebay and buy a couple of those little blue ones, the smoke shop ones probably wouldn't give you the same needle point flame and level of control. I have one, I use it for heat shrink etc.

SMOKE TORCH.jpg

SMOKE TORCH-PEN.jpg

SMOKE TORCH-PEN-2.jpg
 
I once had one of these mini torch lighters. They look like a regular mini lighter, but they’re actually a torch with a very thin, small flame—ideal for this kind of application. I’ll see if I can find one of these again, thanks.
 

Attachments

  • Mini-Torch-Lighters-Green_Mini-Torch-Lighters-front.png
    Mini-Torch-Lighters-Green_Mini-Torch-Lighters-front.png
    200.9 KB · Views: 0
Change of plans, I’ve decided not to buy a thread chaser kit. It seems too risky, especially with cheaper kits.
Instead, I’ll use acetone and a set of thin drill-mounted brushes to clean the threads. (y)
 

Attachments

  • IMG_20260425_154051.jpg
    IMG_20260425_154051.jpg
    333.2 KB · Views: 10
  • 1777280098744.png
    1777280098744.png
    1.9 MB · Views: 8
Honestly, I think I would have done better tightening everything by hand.
Agreed, especially if you have prior experience with fasteners in different types of materials.

If the mfr. supplies torque specs, they went through the effort so those are usually worthwhile following, but a generic, or even AI generated list-- not so much.

As for heat-freeing loctited screws and bolts, I have successfully used a common electric heat gun with concentrateor nozzle.
 
Certain components I like to leave a little looser, such as brake levers and mirrors, so in a crash for example the lever could twist away rather than snap off.
 
Certain components I like to leave a little looser, such as brake levers and mirrors, so in a crash for example the lever could twist away rather than snap off.
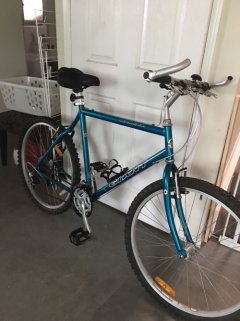
It's a good idea if they don't move in normal use. Out of the factory motorcycles typically have long levers and a narrow section 3/4 of the way out, a sort of sacrificial joint that will snap in the event of a fall and still leave you with enough lever for getting home. It's quite common to swap those levers out for 'shorties' that sit more inboard. Looking at my pushbikes just now I see they all have very similar design shorty levers, two finger brake levers basically. Even one bike that's gotta be nearly 30 years old! That's a beautiful bike, I must start riding it some. $80, what a steal.

BOLDER (5)-s.jpg
 
Would anyone recommend using the torque values from this chart?

I don’t have much experience tightening bolts, and doing it without a torque wrench leaves me unsure if I’m actually getting it right. The fear of stripping or breaking something might make me under-tighten them.

That’s why I was thinking of sticking to the minimum torque values from the chart and using Loctite, maybe as a safer approach rather than guessing.

I just want to know if those M6 and M8 values look correct, since those are the bolts that hold the stem. Any advice to help me get this right when I work on it would be really appreciated. Thanks!

Screenshot_20260428_025111_ChatGPT.jpg
I think what it said convinced me. :oop:
 

Attachments

  • 1777239908269.png
    1777239908269.png
    1 MB · Views: 1
Last edited:
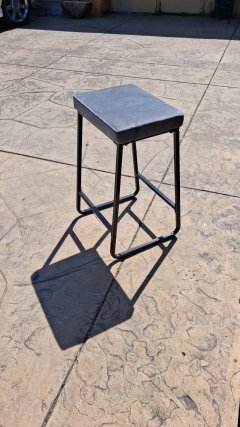
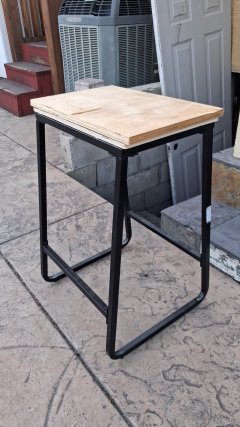
I already got my e-scooter maintenance stand for $20 at a second-hand shop (Goodwill). I was looking for something like this to connect both wheels with a long aluminum bar and properly align the front wheel, that board is 18.5" long which is a little bigger than the scooter deck. ☺️

I didn’t know you could align the wheels with just a tight string. I’m still learning as I go, so I don’t have much experience, but I think it’s better to use something like an aluminum bar. Besides aligning, you can clamp it in place to lock the alignment, so you can work on top without worrying about it shifting underneath, one less problem as a beginner.
 

Attachments

  • IMG_20260501_152339.jpg
    IMG_20260501_152339.jpg
    467.2 KB · Views: 3
  • IMG_20260501_190347.jpg
    IMG_20260501_190347.jpg
    395.8 KB · Views: 3
Last edited:
After the first assembly, I sold my torque wrench set without realizing I would still need it again very soon. Now I have to wait a bit before buying the digital one I want, since I’ve had several expenses lately. In the meantime, I decided to tighten the bolts using simple Allen keys to give them a more appropriate torque so I could keep riding the scooter right now. Remember that I previously had low torque values because the first torque chart I had was incorrect. So I did it by hand, tightening reasonably firmly without overdoing it. Honestly, I feel like I did a pretty good job. Once I get a torque wrench again, I’ll go back to using more professional torque values and add blue loctite.
 
Last edited:
Back
Top