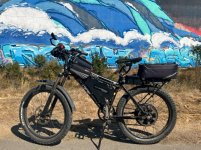
My econo-e-bike

ZeroEm said:
You ride like me don't like to change my peddle assist for the odd hill just hit the throttle and zip up. depends on how much I ride but 75-150w was all that was needed unless was tired and heading home and used the throttle a lot.

I've been riding pretty slow lately, just cruising around seeing stuff I never noticed before. I'll set my cruise control to around 10 mph, pedal as much as I feel like and just ride around all over. I start out at 83V and by the time I'm about 20-25 miles from home, I'll be around 81V. And, by that time I've gotten as much exercise as I want, so I can pedal, not pedal, or ride the bike as easy or hard as I want for the rest of my riding and usually have used around 8.5Ah when I pull back into the garage.

The charger for my 52V pack only provides 5A, and I charge my 6S lipos at 14A, so I usually start charging the 52V pack first, then after an hour or two, I plug in the lipo charger which will fully charge them in less than an hour, at which point I leave for my ride. Not too bad of a routine, but now that I ordered the adjustable 72V (84V) charger, I can bulk charge at 10A or so and be within the recommended charge rate for the 35E cells in the pack. That way I can bulk charge the lithium ion pack, in series with the lipos, in about an hour. This will make things a lot easier. I think this should work, based on my observations of how the lipos and lithium ion packs discharge, which stay very close at the cell level in the range that I use them in. Meaning the 28Ah 52V pack will have a very similar voltage as the 24Ah of 6S lipos, at the cell level, with the amount of discharge of a typical day of riding. I'm hoping to see something similar when bulk charging them, but of course I'll be monitoring the voltage independently when charging.

I decided that I'm done with temperature testing the Leaf motor. Climbing the same hill (800 ft elevation gain) several times a 20 mph yielded similar results or around 90C, with a starting temp under 40C. Using the Grin simulator, 20 mph seemed to be a good speed, relative to the time to meltdown for other motors. Higher speeds have a shorter time to meltdown. That made today's ride up the hill enlightening. I decided to just climb the same hill at 40mph, just to see the temps at the top. The surprise is that at the top, my motor temp was only 78C!! So even though the motor is heating up faster, getting up the hill in half the time, made the final temps lower. At this point, I think I have enough data to add the heat sinks and be able to detect an improvement, although I may do one more test up the steeper hill that I hit 114C on, and see if climbing faster can keep it under 100C.

I think my next series of tests will be to compare the power consumption of climbing the same hill at 20 mph vs 40 mph. I might do some regen testing concurrently while I'm at it.

The temp sensor is really a game changer when it comes to being able to climb a hill, with confidence that I won't melt the motor. I haven't even gotten to the point where the CA scales back power, since I stopped to let it rest, but have comfort knowing the automatic protection is there. I'm convinced the Leaf literally can climb any hill, up to where the tires lose traction, but the temp sensor and CA provide the buffer before anything gets damaged. I think my case for building a mid drive will have a very narrow application at this point, limited to very slow steep climbing, but it might still happen.

On that note, I saw a Santa Cruz Blur, full suspension conversion on Craigslist the other day. I thought about it for a while, but decided to pass, but the bike looked in very good shape, and the claim was the whole setup was "lightly used". It was very clean in the pics. Anyway, asking around $980; Luna Wolf Pack, BBS02 and the bike. Claimed the conversion cost $1500, which made me think BBSHD at first, but looking at the close ups, looked like BBS02 due to the size and the cooling fins. I'd say around here, $650 for that bike alone, used, or maybe $$450-$500 for a quick sale. So whether the lightly used BBS02 and Luna pack are worth $330, I'm leaning more toward likely than unlikely. Didn't take long for someone to snag it. I would have probably jumped on it if it were the BBSHD.
 
We are all old men of various ages, like to get out and ride our ebikes for a little fitness. Slow it has been for me, as time moves on I ride slower and funny enough, I ride longer and go further distance. :thumb: I like a steady cadence, with little extra stuff to worry about like pathway bumps, pathway puddles etc. I like to get in the zone, I seek out long stretches to cruise, 3-4.5" from the right side, and I absolutely F'ing love it. Speed-wise I have no clue, 20mph. Probably better with less stuff to look at. A little dash of Ferro Fluid never hurt no one either.

E-HP said:
ZeroEm said:
You ride like me don't like to change my peddle assist for the odd hill just hit the throttle and zip up. depends on how much I ride but 75-150w was all that was needed unless was tired and heading home and used the throttle a lot.

I've been riding pretty slow lately, just cruising around seeing stuff I never noticed before. I'll set my cruise control to around 10 mph, pedal as much as I feel like and just ride around all over. I start out at 83V and by the time I'm about 20-25 miles from home, I'll be around 81V. And, by that time I've gotten as much exercise as I want, so I can pedal, not pedal, or ride the bike as easy or hard as I want for the rest of my riding and usually have used around 8.5Ah when I pull back into the garage.

The charger for my 52V pack only provides 5A, and I charge my 6S lipos at 14A, so I usually start charging the 52V pack first, then after an hour or two, I plug in the lipo charger which will fully charge them in less than an hour, at which point I leave for my ride. Not too bad of a routine, but now that I ordered the adjustable 72V (84V) charger, I can bulk charge at 10A or so and be within the recommended charge rate for the 35E cells in the pack. That way I can bulk charge the lithium ion pack, in series with the lipos, in about an hour. This will make things a lot easier. I think this should work, based on my observations of how the lipos and lithium ion packs discharge, which stay very close at the cell level in the range that I use them in. Meaning the 28Ah 52V pack will have a very similar voltage as the 24Ah of 6S lipos, at the cell level, with the amount of discharge of a typical day of riding. I'm hoping to see something similar when bulk charging them, but of course I'll be monitoring the voltage independently when charging.

I decided that I'm done with temperature testing the Leaf motor. Climbing the same hill (800 ft elevation gain) several times a 20 mph yielded similar results or around 90C, with a starting temp under 40C. Using the Grin simulator, 20 mph seemed to be a good speed, relative to the time to meltdown for other motors. Higher speeds have a shorter time to meltdown. That made today's ride up the hill enlightening. I decided to just climb the same hill at 40mph, just to see the temps at the top. The surprise is that at the top, my motor temp was only 78C!! So even though the motor is heating up faster, getting up the hill in half the time, made the final temps lower. At this point, I think I have enough data to add the heat sinks and be able to detect an improvement, although I may do one more test up the steeper hill that I hit 114C on, and see if climbing faster can keep it under 100C.

I think my next series of tests will be to compare the power consumption of climbing the same hill at 20 mph vs 40 mph. I might do some regen testing concurrently while I'm at it.

The temp sensor is really a game changer when it comes to being able to climb a hill, with confidence that I won't melt the motor. I haven't even gotten to the point where the CA scales back power, since I stopped to let it rest, but have comfort knowing the automatic protection is there. I'm convinced the Leaf literally can climb any hill, up to where the tires lose traction, but the temp sensor and CA provide the buffer before anything gets damaged. I think my case for building a mid drive will have a very narrow application at this point, limited to very slow steep climbing, but it might still happen.

On that note, I saw a Santa Cruz Blur, full suspension conversion on Craigslist the other day. I thought about it for a while, but decided to pass, but the bike looked in very good shape, and the claim was the whole setup was "lightly used". It was very clean in the pics. Anyway, asking around $980; Luna Wolf Pack, BBS02 and the bike. Claimed the conversion cost $1500, which made me think BBSHD at first, but looking at the close ups, looked like BBS02 due to the size and the cooling fins. I'd say around here, $650 for that bike alone, used, or maybe $$450-$500 for a quick sale. So whether the lightly used BBS02 and Luna pack are worth $330, I'm leaning more toward likely than unlikely. Didn't take long for someone to snag it. I would have probably jumped on it if it were the BBSHD.
 
I'm limited to 4hrs on my trike. Only go faster than 10-15 mph if going a distance. It seems the older you get enjoying the ride does not mean speed. Taking it all in and enjoying being out side is the thing of life.
 
I agree with the last two posts. What's funny is the steady cadence that I prefer makes me imagine being a steam engine in the 40's back when the trails were still railroads.
 
thundercamel said:
I agree with the last two posts. What's funny is the steady cadence that I prefer makes me imagine being a steam engine in the 40's back when the trails were still railroads.

The cruise control works pretty well on my controller (not using it on the CA because I can't stand it automatically engaging, and like to control it with a push button), and maintaining speed. I like setting it low, like 9 or 10 mph and it feels like a tank just lumbering along and just chugs up short hills.

My general riding pattern is slow speeds for long rides, and faster for short rides, which are usually around 1 hour, riding around twisty roads and hills, like I'd do on a motorcycle. I'm finding these Specialized tires have pretty good grip even when leaning pretty far over, but I haven't gotten to their limits yet. I still get a knot in my stomach when I spot gravel the curves though, but no wipeouts yet.
 
Man, I need to upgrade my electronics. Just finally got regen working on the controllers, but still don't have a good pedal assist, 3-speed switch, or any sort of cruise control. I was leaning through a long curve by my house and hit a patch of gravel. Front tire slid over a couple inches, rear did the same, and we just kept rolling thankfully. Always fun on two wheels :p
 
Reconfigured my controls and CA3 several times trying out different configurations. Left side has a single pull for dual front disc brakes and shifter for front chain rings.

Right side has throttle, a push button for regen, takes the place of the rear brake the trike does not have. It is my go to for 90% of braking. Have the digital and Analog controls piggybacked going to the CA3. Have switched the function and settings more than a few times.

Have more or less settled on the Digital switch controlling the PAS level. You can configure it for as many levels as you want. Each level is a percentage of the total power configured for PAS. Example: Max pas pwr 500w with 10 levels each pass level is adds 50w to the last level and level 0 is off for pas or 0w.

Use the Analog switch for throttle pwr levels. It is a percentage of total power which is regulated thru the CA3, have it set at 35A not to stress the Battery. Have had it at 40A or max for the controller. Have the switch's "low" set around 900w-1200w, this is all it takes for me to zip up a hill while assisting. "Med" is more of a performance mode for taking off and going up hills faster, set around 1700-2000w. Then High is set at 100% which gives what ever the Amps are set at and the voltage level is. Most of the time it's above 2,500w and can be 3,200w. When riding once in a while I tweak the levels low and Med by changing the percentage. Example low is around 35%.

Have a speed limit set around 46 kpm/28 mph. This if to stay legal in the city. Out on the open roads with speed limit removed and in High it will ride around 32 mph and 28 mph up hills. This is the result of having a 7T leafmotor running around 80v in a 26" wheel.

Could have more power but don't need it on this trike and my longest ride is about 60 miles but can go farther but limited by time.
 
ZeroEm said:
Reconfigured my controls and CA3 several times trying out different configurations. Left side has a single pull for dual front disc brakes and shifter for front chain rings.

Right side has throttle, a push button for regen, takes the place of the rear brake the trike does not have. It is my go to for 90% of braking. Have the digital and Analog controls piggybacked going to the CA3. Have switched the function and settings more than a few times.

Have more or less settled on the Digital switch controlling the PAS level. You can configure it for as many levels as you want. Each level is a percentage of the total power configured for PAS. Example: Max pas pwr 500w with 10 levels each pass level is adds 50w to the last level and level 0 is off for pas or 0w.

Use the Analog switch for throttle pwr levels. It is a percentage of total power which is regulated thru the CA3, have it set at 35A not to stress the Battery. Have had it at 40A or max for the controller. Have the switch's "low" set around 900w-1200w, this is all it takes for me to zip up a hill while assisting. "Med" is more of a performance mode for taking off and going up hills faster, set around 1700-2000w. Then High is set at 100% which gives what ever the Amps are set at and the voltage level is. Most of the time it's above 2,500w and can be 3,200w. When riding once in a while I tweak the levels low and Med by changing the percentage. Example low is around 35%.

Have a speed limit set around 46 kpm/28 mph. This if to stay legal in the city. Out on the open roads with speed limit removed and in High it will ride around 32 mph and 28 mph up hills. This is the result of having a 7T leafmotor running around 80v in a 26" wheel.

Could have more power but don't need it on this trike and my longest ride is about 60 miles but can go farther but limited by time.

OK, those are some ideas to think about. I need to redo all of my controls once I get less lazy.

The Grin digital switch is just sitting on my desk, waiting to be installed. I have a non-operational push button on the left that I was using for coasting, apply 50W of throttle, but one of the wires popped out of the connector I was using, and just left it, so need to remove that, the voltage divider, and the button. I have a potentiometer to adjust PAS level also on the left, but it's too long a reach and too sensitive, so I need to redo the voltage divider and use a smaller range pot. Left side also has my cruise control button and controller on/off. 7 speed Grip Shift is on the left, but I have a 6 speed on my desk to swap out since I switched over to a 6 speed freewheel (I also have the 6 speed freewheel with the 12T small cog on my desk, ready to swap out). Less complicated on the right side. Throttle and bell, and light switch under the handlebar.

I think it would be nice to use the digital switch for switching between presets. I might use them more if they I didn't have to use both hands to change the setting vis the CA. I haven't looked into it yet on whether it's an option, but I'll look at that too when I'm less lazy.
 
Never got into using the presets in the CA. Could be that a stop is needed so it can be reached. My CA is mounded on what you would call the Bottom Bracket or at my feet.

The digital switch is great can not imagine all the things you can do with it. I used speed limits before but feel I have more control if the power is predictable. With speed limits if the speed dropped then here comes the power. Did a lot of city paved trail riding around people. Could be my set up. High turn leaf running on 82v. Moves the torque up a bit. Did not want to lug the motor.

In the planning on my first build was thinking about two motors, because i'm so big, found out one leafmotor is enough.
 
If I may use a bit of E-HP's thread, these are the 3 controllers I have:

1000 watt 12 FET with 6-pin combination throttle and on/off connector (no display), unknown 4-pin connector, got regen working
AM-JKLU3EWdYmA1Qtpa4IX3O1pQJ7YAPiwHzw1Zw6NzFao3mg-XXT_hUyWzlkq02xiNTZkINgaZpCohutxlhnvKLI_uzlt4tSwLu8dUO4C8YTz-jpZ5M_FWOzMwbWnH3p1PjCLirqtpf9GZ5NV3Pdd7VseZA=w1460-h1946-no

AM-JKLUKOCkcJ_YxhskxVoKHsW9xkuzE0KC36R5BqyKCy2M2HpNJyo_RxBeai1lN1u4Nyi3M-RhG74V9ella9ecT23O5PJO2zxWVHDuAZb7RoXddz_yqFgSBx8wMLH_8LCx1bNRGNWZn1KoatHn5oRFte2OE=w3459-h1946-no


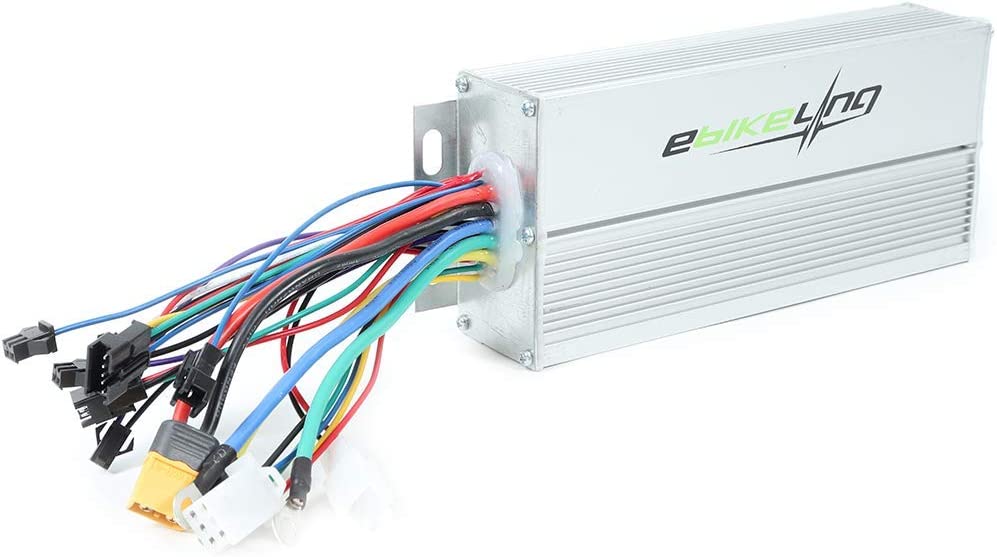
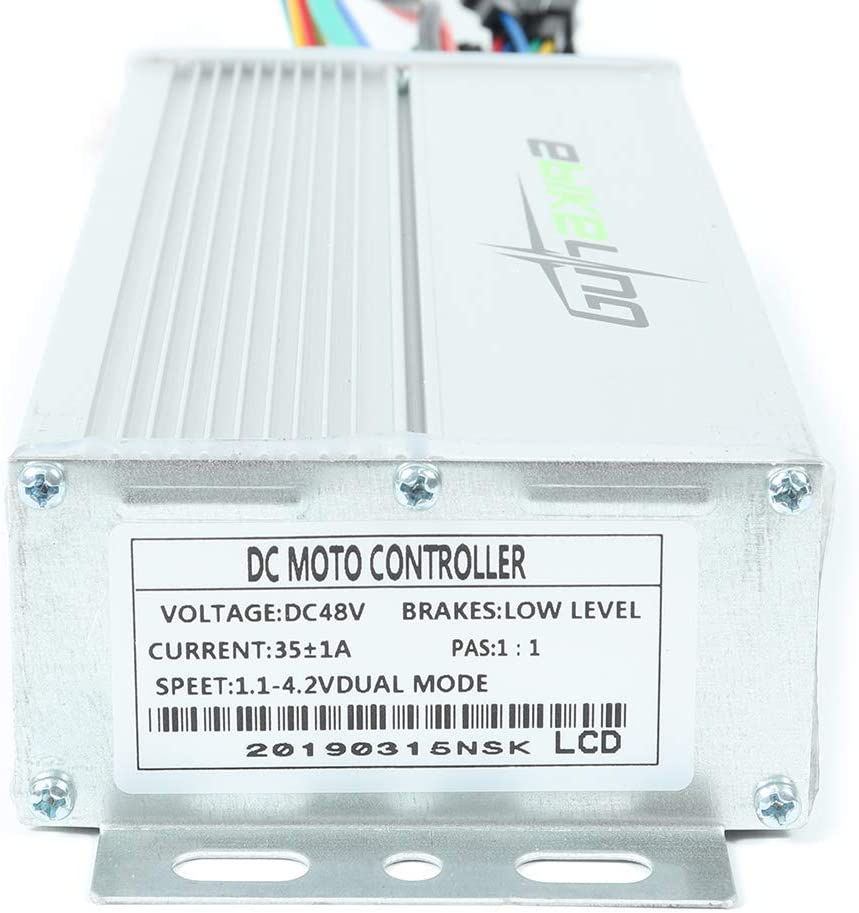
Ebikeling 1500 watt 15 FET with 5-pin SW900 connector and 3-pin throttle. I got regen working at least
51AjY1YCR+L._AC_SL1000_.jpg

61jNTFJizOL._AC_SL1000_.jpg

AM-JKLXfBydjNh6FyPmSXd7hQIRFDjTgB0xLZKbKViSccMTskmBSRFUK5ZdgQhOpTA4-n_zguhx_x2YaxTdQD9Lc63OmbUIkS_9By2coimiTUdcTBz8-H-8nwfbkPSrmp4p0Eg7mQ5ktsJdg9zmBuzGjgF5A=w3459-h1946-no

AM-JKLXNfrpMmHLoB7gPWKYhKahGXhu2wN5R8URCOFPBCKHGUihYS4WsoU2iBq5U2dmCkBiGW4ho-SKCZDfioNnJxl8QLw5ipUPsea_BoDoYNN69dnUjZxVKRIxsa4IlhvuelGRU6RsW14bAuIb-IwipHnug=w3459-h1946-no


KT 1500 watt 18 FET with 5-pin LCD3 connector and 3-pin throttle. I have not opened this one yet, and the display doesn't even show speed so far, though it does show an odometer.
AM-JKLX2ADzHtCwHFJOP6WOXvZ4IzNBMnVZ5IZyaqV0HwCX7nM1IMyLuDgc_3570LXOFWeNJ9iOeCvZ8wy85BIPIF7uwIPFkLEtlfsSSCt1jxQZqumMIjpuyBE3tCvv1kLUn_yTt3jlxs6oEZW29HClBRolm=w3459-h1946-no


EDIT: For the KT controller, just learned that if I set the C7 parameter to 1 and then hold the up button, the PAS level should change to C for cruise mode. Not sure if that will work at the moment, since I can see a small crack in the LCD. PAS level, speed, power and temp have never displayed anything on this display, but I went through the parameters at least once and the digits worked there...
 
thundercamel said:
KT 1500 watt 18 FET with 5-pin LCD3 connector and 3-pin throttle. I have not opened this one yet, and the display doesn't even show speed so far, though it does show an odometer.
AM-JKLX2ADzHtCwHFJOP6WOXvZ4IzNBMnVZ5IZyaqV0HwCX7nM1IMyLuDgc_3570LXOFWeNJ9iOeCvZ8wy85BIPIF7uwIPFkLEtlfsSSCt1jxQZqumMIjpuyBE3tCvv1kLUn_yTt3jlxs6oEZW29HClBRolm=w3459-h1946-no


EDIT: For the KT controller, just learned that if I set the C7 parameter to 1 and then hold the up button, the PAS level should change to C for cruise mode. Not sure if that will work at the moment, since I can see a small crack in the LCD. PAS level, speed, power and temp have never displayed anything on this display, but I went through the parameters at least once and the digits worked there...

I forgot about the cruise control on the KT. It worked well, but I used it very rarely because PAS worked so well. I used PAS 90% of the time. No 3-position switch though. Now that I have a 3-position switch, I'm not sure I could live without it; it's such a quick and easy way to limit power.

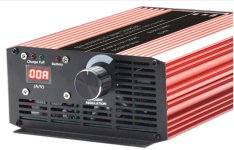
So my new charger arrived, 84V, 0 to 12A variable charge current, to bulk charge my Frankenstein battery setup. My previous charge routine was to start charging my 14S lithium ion pack (28Ah) 2-3 hours before a ride, and then at around an hour before, I charge my 6S of lipos (24Ah). I actually have 32Ah at 14S, with 14S of 4Ah lipos in parallel which have been working surprisingly well, staying in balance and bulk charging off the lithium ion pack after maybe 20 charge cycles.
New 0 to  12.jpg

I haven't adjusted the new charger yet, but I'll be setting it to 83V since I charge to 4.15V/cell right before riding. So now I have about 4 charge cycles using the new charger and it's really simplified things, but I still need to settle on a routine. I've been starting out at 11A, and then dropping it to 6A or so at the end to the finish and that works pretty good. The standard charge rate for the lithium ion pack should be around 17A, and for battery longevity, is 9A; but with the piggy back lipos paralled, I figure 11A should be fine, but at that rate the pack will look to be at a higher voltage, then settle down a volt or so when taken off the charger, so dropping to 6A lets the Frankenbattery get to 4.15V at the same time for all cells. Sounds complicated, but basically about an hour and a half before going out, I start charging, then 20 minutes before, I turn down the current to top it off. Not feeling any heat, but I think I'll add a temp sensor to my lithium ion pack for more data.

Yesterday evening I did another temp testing run on the Leaf. I think I'll do one final test before doing my heat sink mod. I did a 16 minute, 4 mile loop around the neighborhood. Max uphill was 18% and max downhill was 20%, so my last test will be in the opposite direction with the shorter 1 mile 20% section up front. This was a more real world test, with light pedaling, maybe contributing 80W. I decided to GoPro it, but was pretty disappointed that I didn't clean the lens, and there's a big blotch of grease right of center and fingerprints all over making for a pretty foggy looking video, but the weather was cool and crystal clear. Oh well, still good for documenting conditions.
My starting voltage was 83V and motor at 42C, and at the top of the hill I'm at 79.8V and 79C. I regen down the steep 1 mile hill at 16mph-18mph and the Frankenpack is at 81.2V at the bottom. No brakes used in the full loop except at the very end. Almost no cars, so it was a really nice sunset ride. 3-position switch set to low, so 4300W limit.

The long boring fuzzy video of a fun short ride; and there's even evidence of me pedaling:
4.6 miles
Minimum elevation 57ft
Maximum elevation 800ft
~750 ft elevation gain
Max uphill grade 17%
Max downhill grade 20%
Starting temp 42C
Max temp 79C
Max speed 35mph
16 minutes.

PS. I noticed that 11A at 84V actually warms up the 120V power supply input cable :shock:
I'm getting used to the buzzing of these tires, and sort of like it, but there are times that I just want to slap on some Hookworms and ride silent. The buzzing does give some warning to pedestrians without having to ding the bell, so that's nice.

EDIT: 07-17-22
Yesterday had perfect weather for riding. I've been wearing a light wind breaker even though it's sunny, since the breeze off the bay can get cool. I have to remember to put sunscreen on my hands, because I look like I'm wearing brown gloves when I don't have the jacket on.

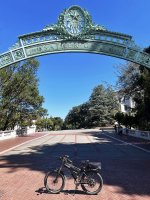
I rode around the Berkeley campus for a while again; now that school is out, and commencement done with, the campus is pretty quiet. Only a few tourists, or parents bringing their high school kids around to see the campus. What's nice about a college campus is that it's very ebike friendly. It's ADA compliant, so there are ramps to get to almost anywhere on the campus, so there's a lot of small quiet areas and rooftop garden areas that students would usually use to study, that are empty making it interesting to explore and look at the architecture. I spent a couple of hours just cruising around, pretty peaceful.

Don't usually see it this empty in the middle of the day.
Sather sm.jpg

Haas sm.jpg

EDIT 07-19-22
I can't figure out how to adjust this charger's ending voltage. It's different from the other cheap chargers I have, in that it doesn't have any voltage on the output leads until it's hooked to a battery and charging is triggered. There's one visible pot, and it looks like it's only used to calibrate the voltage display, which I fine tuned slightly to match the CA voltage reading (right or wrong) as closely as possible. Given the charger display has no decimals, I tweaked the current output so the voltage was 82.4V and adjusted the charger display to 82V. I then tweaked the current just enough to the output hit 82.5V, then adjusted the charger display to just start to switch over to 83V. I repeated a couple of times to get it perfect.
I'm not sure if the voltage being displayed has any impact on when the charger stops charging. I guess I could get the pack to just under 84V, then adjust the charger display to 84V to see if it stops charging, but I doubt it.
 
Last edited:
I did my final/last temp test during lunch, riding up the 20% hill, with light pedaling (not much contribution since I was ascending almost faster than I could pedal). 1.1 miles total, starting elevation 79ft, ending elevation 794ft. Starting temp was 37C and temp at the top was 98.7C. I was sure I'd exceed 100C, but was just short of that. I let the motor cool down to 74C and started regenning down the hill, but I ended up having to stop twice, since regen quickly increased the heat to over 100C within a couple blocks. I guess there's still a lot of residual heat soaked up by the stator, so the windings heat up more quickly; just a guess.

Video starts at a very gentle grade of 2%-3%, but you can see when it starts getting steep in the last 0.6 miles, the steepest section is 22%.

So now I can add my heat sinks, and probably replace the chewed up spoke nipples and re-true the wheel at the same time. If I can make it up the same hill, with the same starting temp, but with an ending temp in the low 90s or below, I'll call it a success. Now I just have to find some time where I'm not feeling lazy, and more likely when the weather gets worse.

EDIT: I guess there could be one more test of going up the hill fast without pedaling. On my earlier ride up, throttle only, I kept it to 20mph and was already over 90C by 3/4 of the way up, and I've already observed that going faster seems to work better for temps. I wasn't looking at the power this time, but doubt it ever exceeded 4300W, but if I go near full throttle (I'd worry about cross traffic at the intersections, or taking flight over them) I'll set it to medium and see if I can keep it at 30mph. Simulator says 28.5mph at 80V on a 20% grade, and I'll probably be at 82V or so when testing. On this run, I backed off the throttle on the last block, because the temp was climbing so fast at that point, but I didn't want to stop that close to the top. That's likely why it stayed under 100C. I think I need to study the simulator a little more. Even though it doesn't have temp data for the Leaf, maybe studying the efficiency data will help.

Another totally anecdotal observation, but, I noticed that up to around 15%, the Leaf with Statorade runs pretty happy, relatively cool (under 70C), but over that, and the heating accelerates. I'd be happy with heat sinks if I could keep it cool up to 17%.
 
Last edited:
E-HP said:
So now I can add my heat sinks, and probably replace the chewed up spoke nipples and re-true the wheel at the same time. If I can make it up the same hill, with the same starting temp, but with an ending temp in the low 90s or below, I'll call it a success. Now I just have to find some time where I'm not feeling lazy, and more likely when the weather gets worse.
Might you then have to adjust for lower ambient temp?
 
99t4 said:
E-HP said:
So now I can add my heat sinks, and probably replace the chewed up spoke nipples and re-true the wheel at the same time. If I can make it up the same hill, with the same starting temp, but with an ending temp in the low 90s or below, I'll call it a success. Now I just have to find some time where I'm not feeling lazy, and more likely when the weather gets worse.
Might you then have to adjust for lower ambient temp?

I got too lazy to record the ambient temps after doing it a couple of times. Almost all of my temp testing happens when the whether is just right for riding anyway, around 65F or so, so I just don't test if it's hot out, or too cold. That said, ambient temps probably makes more difference once the heat sinks are added to the equation.
 
thundercamel said:
Man, I need to upgrade my electronics. Just finally got regen working on the controllers, but still don't have a good pedal assist, 3-speed switch, or any sort of cruise control. I was leaning through a long curve by my house and hit a patch of gravel. Front tire slid over a couple inches, rear did the same, and we just kept rolling thankfully. Always fun on two wheels :p
Well I know that past performance is not indicative of future results, so I'm confident that those upgrades will be in place within one or two years...
https://endless-sphere.com/forums/viewtopic.php?f=6&t=97945&start=25#p1494110

Looks like none of those 3 controllers support a 3 speed switch, looking at the manuals on the Ebikeling site, and KT's don't use them. All support PAS, and it looks like you have regen figured out. I think your best bet is to replace the defective KT display, and then you have regen, PAS, cruise, and if you set P3 to 0, then it's kind of like having a 5 position switch, kinda sorta.

I wonder if flashing the display with the OSF would fix it, and get you other goodies, too. I'm thinking of converting my wife's old mountain bike using my old 1000W motor and KT controller, and flashing the display so I can use a torque sensing PAS. That will work better than cadence PAS, with the number of stops and starts we'd have. Since she hasn't even ridden a bike in a long time, I'm trying not to add throttle to the mix of all of the controls to deal with, even on a normal bike. So I figure with the torque based PAS, she won't have to downshift when she comes to a stop; just brake, then pedal to start back up. That reduces the hand controls to brakes, and the level switch.
 
Thermal roll back works!
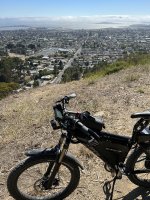
I rode up the same steep hillside but via an off road trail. About 1/3 of it was ~25%; I saw a couple of mountain bikers start pushing at ~10%. Temp was hovering around 85C when I hit another steep section, and just before cresting the hill, I started losing power, looked down and the Leaf was running at 118C, so I stopped to let the motor cool. To be honest, I stopped looking at the temp because the trail was very rough with big ruts, making my wheel spin, until the rollback started. The trail turned to pavement after climbing 450ft, so the last 250ft to the top, while steep in parts, was a lot easier on the motor.
Cooling.jpg

The Cycle Analyst and temp sensor are an awesome combination. I could have easily fried my motor without them. This will be another good hill to compare before and after once I add heat sinks. On the way down I was reminded how much heat regen creates, and thermal rollback doesn't help there. :shock:

Cooling 2.jpg

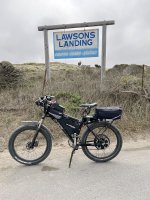
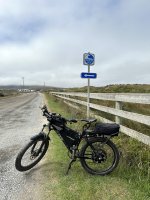
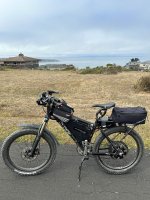
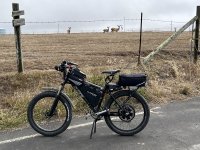
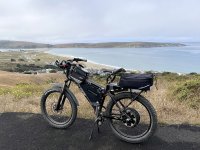
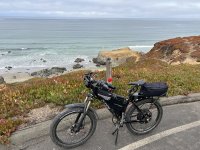
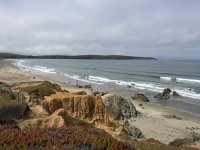
EDIT 07-26-22 - We took a trip out to Bodega Bay up the coast. This is the first time I've transported my ebike to go riding somewhere else, but a set of tie downs from Harbor Freight made for a secure transport on my truck bed. Stopped at Lawson's Landing, where there is a large campground on and next to the beach. I rode from there, up the coastal hills above Dillon Beach. The hills didn't look as big as near my house, but it looked like the views would be great. The hills ended up being pretty steep, maxing at 26% and around 23% a lot of the way up. The steep section was only 1/2 mile, so the Leaf didn't break a sweat, peaking at 88C. The view was fantastic, overlooking the ocean, Bodega Bay off to the right, and Tomales Bay off to the left.

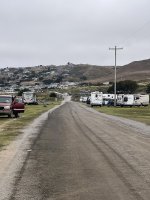
Leaving Lawson's Landing, toward the hills in the background.
Lawsons.jpg

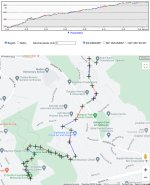
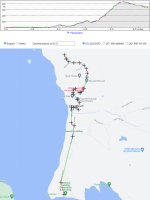
The route and terrain, all paved.
Lawsons 0 to 433.jpg

Here's a video of the climb, starting at 129ft and dipping down to 89ft, right before the steeper climb (you can see on the graph above at around 1.5 miles. 42C from the start, 88C at the top. Ambient temp 60F.
 
Last edited:
Well I live near the coast, but I guess that's not the same as living right on the coast. I had to park my bike outside, albeit under an overhang, so partially sheltered, but that coastal ocean mist is crazy. Every exposed piece of steel had surface rust, or more by morning. Throttle was working funny too, so I had to work it back and forth a few times so that it would shut off. The CA had dew on it, but seems to still function correctly. The bike started working right after about 15 minutes.
ERust.jpg
More pics from riding around Lawson's Landing and Dillon Beach. The area is very secluded with not a lot going on, so I could probably ride up and down every street in a couple of hours. But there's a lot of wildlife, between the deer, hawks, a ton of bunny rabbits (not hares/jack rabbits that are common), and other critters.
Lawsons.jpg

I tried going up the road, but it was private property. Of course if a tidal wave was coming, the private property sign wouldn't be a deterrent...
Tsunami.jpg

Top of the hill
Top View.jpg

Other direction
Deer Trio.jpg

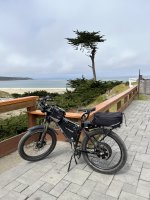
Dillon Beach
Dillon Beach.jpg
Cypress.jpg
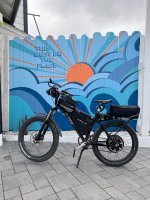
The Place.jpg

I love the rocky north coast. It reminds me of fishing off the rocks as a kid, or going to dig for clams or getting mussels or abalone at low tide. Not the warm sandy beaches like down south. I think the great whites are migrating now.
Rocky Coast.jpg
Rocky Coast 2.jpg

I've gotten a few funny looks riding up these hills at 20 mph, usually a double take. Nobody rides bikes on the hills, but I saw a few pedal bikes on the flats down by the beach. My deferred chain maintenance finally caught up to me, because with no lube, the whole chain and freewheel were completely rusted. I didn't have any chain lube, so my temporary solution was to coat the chain and freewheel with extra virgin olive oil. It actually worked, LOL. I guess I'll get around to fully lubing it when I get home, after cleaning off the surface rust. :shock:
 
Last edited:
Nice adventure!

My KMC chain came pre-lubed with the best stuff that stayed clean and dry. Kept most of the dust from building up. When I finally had to clean it, the degreaser finally spread the dirt everywhere because it now looks darker. Replaced it with Finish Line dry lubricant in an attempt to keep the dirt from sticking more. You very well may have your own preferences of course. I ride on a lot of gravel trails, and the dust sticks to traditional wet lube.

EDIT:
E-HP said:
Well I know that past performance is not indicative of future results, so I'm confident that those upgrades will be in place within one or two years...
https://endless-sphere.com/forums/viewtopic.php?f=6&t=97945&start=25#p1494110
Thank you man :)
 
The sell a wax lube that the road bikes use. I'm cheap and buy the canning wax at the store. Have a 10" skillet, put it on the pit burner outside and get it hot and soak the my chain. Try to get it out before the wax hardens and hang it up until it don't burn me. Guess it's a pain but the wax works it way on all the gear teeth and redo in 2-3 months with a lot of riding. stays clean, lot better than oil. Might get lazy and buy the spray on. They say to clean the chain in solvent, I don't, just change the wax when it starts getting dirty.
 
Well I learned my lesson about keeping my bike outside when on the coast. Next time I’ll need to bring something to cover my bike at night; I think I have an old motorcycle cover in the garage that would work. I’m still recovering from the trip. I sprayed the chain and freewheel with a bunch of WD40, and used a brass brush to get rid of the surface rust first. I guess I forgot how smooth the drivetrain is when you lube it once in a while, LOL. I had a bunch of electrical issues for about a week; throttle not working right, my aux analog input to my CA was acting flaky and floating around, odd surging, etc. WD40 on the connectors and spraying into the potentiometer helped with most of that, and helped with the sticky half throttle too. I still need to wire brush the nuts and bolts to get rid of the surface rust, and make sure to clean up the rust I’m seeing around the spoke heads.

I spent about 2 hours making small tweaks to my CA that were overdue. Little changes to AGain and WGain, adjusting the throttle and PAS ramps, and dialing in all of my PAS settings. I have it set now so that for every gear change down, the assist will go up about 50W as the cadence increase, which I’m going to test for a while. I used PAS on flat ground to moderate hills, so I adjusted the max assist down too. With the current setup, if I get to a small hill and downshift, I get more assist, and between that and the gearing change, my pedaling effort remains constant, which I prefer.

That, the other setting adjustments, and fixing the physical issues, makes it feel like a new bike. Throttle response is super smooth now, and no bucking or oscillations. I shouldn’t have waited so long. But at least there’s still a few months of good weather for riding. I've been riding 30 miles per day consistently for the last week to take advantage of it.

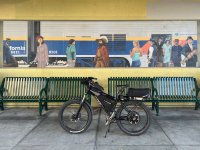
I took a late afternoon ride yesterday, and the weather was about perfect. Not hot, not too cool, just perfect balmy weather. Everything is a lot less busy, and very relaxing.
Amtrak.jpg
Starting get self conscious about my busted up wiring connector box. Looks like crap but just too lazy to fix it until the winter maintenance season comes. So far that, and replacing my spoke nipples and truing the back wheel are at the top of my winter list. Plus the digital CA switch, and a big list of minor items.

I made it down to the bay right as the sun was about to set; perfect riding weather time of year.

And even after the sun went down, the temps and conditions still were great, so I switched on my headlight and took one last ride up the hill, just as the sun set. If the weather keeps up, I’ll need to remount my tail light, wire up my second headlight (never got around to it), and do some longer night rides.
I've been wanting to do some offroad trail riding at night...

EDIT: Update on charging my franken-battery. The current setup is is 24Ah of 6S Graphene Lipos (3 8Ah in parallel), in series with my 14S8P Samsung 35E (28Ah) that has 3Ah of regular Turnigy lipos in parallel (2 x 4S, 2 x 3S), so 14S @ 31Ah total. I've been bulk charging the whole Franken-pack with my 20S charger at around 8A initially, then cranking it down to 5A to finish the charge.

After maybe 20 cycles (I only use a small portion of capacity riding my usual 30 miles), everything is staying balanced at both the sub-pack level (6S lipos and the 14S sub-franken pack) and at the individual cell level, when measuring everything this morning. I've concluded that this arrangement or ones like it, work if the cell are all matched, in their respective sub-packs.

This solidifies in my mind that when I end up building my 21700, I'll spend a lot of time testing the cells so they are as matched as possible before assembly. Also, the piggy back pack (lipos) parallel to my lithium ion pack actually work very well for eliminating voltage sag, although an odd setup, it does allow me to use high energy/capacity cells, and still get high output cell performance with respect current and sag.

EDIT2: I ordered a new saddle and it arrived today. Same WTB Rocket, but wide rather than medium. The old one was the last saddle I got for my full suspension bike, and is 20 years old. Not that I was young then, but I was in better shape, and the medium saddle was fine, and narrower was better in order to get behind the seat in a steep descent. Got chromoly rails instead of titanium since I don't care about weight anymore, which cut the price in half.

I just went for a test ride. I could feel the difference as soon as I got on the bike. After riding around for 5 miles, I could tell that I could probably handle 50+ miles with this seat and not be sore.

EDIT 08-21-22: I finally got around to adjust the custom displays and available displays when the bike is moving and at a stop on my Cycle Analyst. I didn't like how the temp/mi/Ah were cycling on the main display, when I wanted to focus on monitoring rising temps. I ended up setting that field to temp only, and using the mileage stat screen to view the trip miles. I removed all the but trip miles screen from the screens available to toggle through while the bike is moving, and set the auto return to main screen to on. Now I have everything I usually monitor while riding on the main screen, and if I want to check trip miles, I just press one of the CA buttons. It will return to the main display automatically, so should work great now. For the screens when not moving, I left all on, except the two human stat screens which I don't care about, and are inaccurate anyway, since I have my PAS set up for tricking the CA for PAS RPM ramping. Weather is clearing up outside, so time to do some testing. :eek:
 
Last edited:
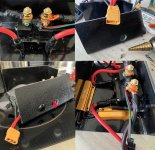
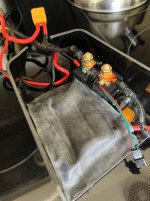
While I'm running on my spare controller, after killing some FETs in in my Power Velocity controller (Searching for a spare/upgrade controller), and trying unsuccessfully to get the small Flipsky FOC controller working, I finally decided I need to replace my connector box. I've been riding around with the wires exposed and bungeed to the rear rack, plus my new breaker switch and external shunt, zip tied and taped to the rack. But since I was switching controllers back and forth, I was too busy.

I decided to take a few hours and at least get started on it today. I decided to use 3/16" ABS, and just bend it with my heat gun. The old one only needed room for the wires and the breaker, but I added the shunt, and also decided to add a pre-charge button.

Test fitted the breaker and shunt; drilled the mounting holes; and mounted the breaker/switch, and pre-charge push button.
I'm using two 30 ohm 100W resistors in series for the pre-charge button.
New Box.jpg

I covered everything with a piece of inner tube, hot glued down, to keep those parts separate from the other controller wiring. I'll need to shorten some of the battery wiring to make thing neater. I used a JST on the shunt signal wires to make it easy to swap between controllers.
New Box Inside.jpg

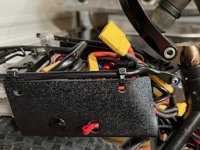
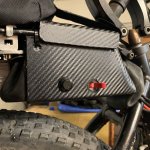
I'm using zip ties to mount it to the rack, and will make a cover that attaches with velcro to make it easy to access. I'll probably cover it with some of that fake carbon fiber wrap; not sure yet.
New Box Test Fit.jpg

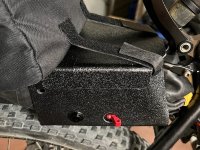
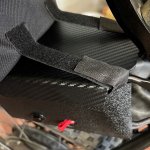
I didn't need velcro after all. The rack bag and the straps that hold it on to the rack in the front secure the lid pretty well. Ready for a test ride.

New Box Covered.jpg
 
Last edited:
thundercamel said:
Looking good! Tidying up cables on ebikes is a labor of love, isn't it?

I definitely need to do it once in a while just to keep things safe; and I've been having some lingering issues since taking the bike to the coast. I installed a new throttle on Saturday, since I had two episodes last week of the bike going full throttle by itself, before I hit the power off button (no brake cutoffs connected on the temp controller). I believe I had a poor ground connection under the shrink wrap where I needed to do a splice). I also have a safety concern with my serial/parallel harness that I noticed, where there could be the potential of connecting two of my XT90s inadvertently, which wouldn't be good. The other connectors are more or less foolproof, so I'd like to eliminate that risk when I tidy up the battery wiring.

EDIT: first attempt at applying the fake carbon fiber wrap. It's actually pretty easy to work with and you just need to heat it up if you make a mistake or need to straighten it out and stuff. It will be more work to unhook everything to remove the main connector box, in order to apply it.
CF wrap.jpg

EDIT: Wrapped the rest of the box. Looks better in real life, and the cover is tilted in the pic and I was too lazy to take another. Way better than hanging wires though.
box wrapped.jpg

New spare/replacement controller installed and working! Human error made the install frustrating, when it shouldn't have been, but now that it's up and running, not going to complain. Pretty happy with it so far.

controller installed.jpg

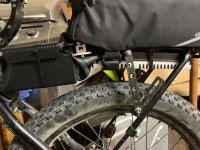
I'll make some adjustments to the rack tomorrow. I'll need to cut that adjustable support and drill new holes for the screws. I'll also be making some changes to the connector box after i get the rack set up right.

EDIT 09-17-22
This new no name controller is impressive. Definitely performs well above the Power Velocity controller. I took it for a short ride, 20 miles, and it was still a little scary after getting used to it. I kept dialing down the throttle ramp, and now am thinking that I shouldn't have snipped those "soft start" wires. I left some pigtails, so I think I may add a soft start switch. I don't like having to lean forward whenever I stop and start. Everywhere else in the range it's great. I tried out medium then high when there was a clear spot on the trail. It was pulling hard at 43 when I had the grab the brakes before a blind curve. I think the batteries are handling it. I'm getting less than 3V sag from 80V when on the throttle.

I adjusted the rack so now I need to make some adjustments to the connector box, mainly for aesthetics.
Current 091722.jpg

Had to get in another ride since it's supposed to start raining tomorrow. I was on the way back, when I decided to take a detour up the hill and back. It was a good test for the new controller. It performed great. It makes the Leaf run really smooth and quiet.

The starting elevation is 75ft and 728ft at the top. Peak motor temp 82C. Controller wasn't even lukewarm. I was missing regen on the way down since my brakes were showing some fading near the bottom. That bumps the hydraulic brake upgrade up a notch on the upgrade list.

I found some royalty free music online, so playing with that to see if it makes my GoPro stuff less boring. Work in progress.
9 minute hill loop.jpg

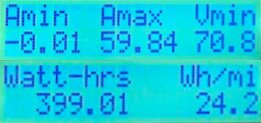
I realized after looking at the CA trip data that I forgot that my "Off Road" setting on my CA is capped at 60A. My unlimited setting has no current limit, and Bypass throttle mode, and I'm not ready to try that out (the bypass throttle). I may up the current limit to 80A to see if it pulls that much. Low in the 3 speed switch seems to be limited, so my earlier observation of ~4300W may not be the switch, but the CA.
New Controller CA stats.jpg
 
Last edited:
I've decided that I'm going to stick with the 80A no name controller for now, and live without regen. This means that I'm moving my hydraulic brake upgrade to the top of my list, since the current ones aren't cutting it with the number of hill descents they need to deal with.

I ordered the cheap Tektro knockoff 4 piston calipers from Amazon (Meroca M4), and a pair of magnetic brake cut off switches. They should arrive tomorrow and I'm hoping for a quick hassle free installation :eek: . Not expecting miracles, but hopefully noticeably more stopping power and less fade. https://www.amazon.com/gp/product/B0B5TG287V?ref=ppx_pt2_dt_b_prod_image

EDIT - I finally got around to processing some old GoPro stuff, so I added a video of my ride on the Bay Bridge, from my June post.
 
Last edited:
Back
Top