There are several design objectives to consider when mounting a moto Enduro seat to a bike frame.
1. Utilize a seat post that telescopes into the seat tube [allows some seat height change]. Seat posts with a single bolt for seat angle articulation work better than the 2 bolt models for the adaption/support methods I show.
2. There are 3 planes of rotation that come into play much more with a 30" enduro seat than with a standard long nose 10" Mtn Bike Seat. We have to stop rotation of the seat post in the seat tube [maybe a seat post clamp is not enough?], stop lateral rolling around the top tube axis and reduce or restrict seat sag or rotations especially in front of the seat post.
3. Make the seat and support frame so they can be easily removed as one [dedicated] unit from the seat tube. Some setups may be require one additional fastener near the front to stabilize rotation or one hellishly tight seat clamp.
A typical moto enduro seat has 5 points/zones along its bottom for attachment and stabilization.
1. Near the tip of the front end is a
semi open cylinder with hole in the bottom lid that accepts a bolt with washer to fasten the top to the frame.

2. Usually just in front of where the seat's flat profile steepens there is a
tongue like projection, that on the seat's OEM frame, would allow the tongue to slip/wedge into a confining pocket. The tongues on the 2 Kawasaki enduro seats I have are off center enough that center mounting it will result in an offset section of seat in this vicinity and the tip of the seat will be off center.

3. The
load carrying zone is a flattish zone under the middle of the seat which may have transverse ribs or keel like projections to concentrate the rider load. There may be no actual fastening means in this zone.

4. At about 80% of the distance from the tip will be some sort of
mechanical fastener involving thread inserts or right angle stand offs.

5. Next to the end of the seat are a couple of
tail end flat pads that with stops added under them will keep the tail from sagging when sitting that far back.

There are 2 methods of plate frame configuration for the enduro seat mount that are quite simple and stable as opposed to making 2 meshing shape profiles and achieving continuous support along the top tube and continuous support along the bottom of the seat. The seat base is strong enough that continuous support is not needed. If you can equip a 10" mtn bike seat as the mounting base to an enduro seat of this length and restrict seat rotations adequately you can skip the rest of this post.
The simplest mount is to have a distribution plate mounted on top of the seat post with some distant means for arresting unwanted seat rotations. A second method and likely more stable than the above mentioned one is to make a 4 point distribution plate involving the seat post and the top tube for anchors/stabilizers. In either case the seat post is firmly attached to the distribution plate including the seat angle adjusting hardware.

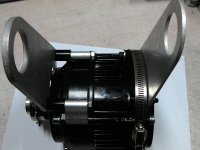
The steel rolled down nose base plate used above is a Masterlock 1500 winch portable ball hitch winch mount plate at about 5 3/4" wide x 9" long.

The wooden base plate shown above is made from a knot free piece of "Hobby" Oak 1/2" thick x 5 1/2" wide.
After choosing the base type and mounting the seat post the enduro seat is fastened to the base. Usually the seat tongue and the mechanical fastener are the points of attachment for the seat to the base. The tongue anchor & mechanical fasteners are tightened to pull the loading zone onto the base material. You may need to route-out some material for the seating of transverse keels.
Attaching the base plate [you choose] to the seat [you choose] can require some very specific hardware but I will show a few instances of how I did the fastening.


In the application below the tongue is not fastened to the plate but rests on the top tube and does prevent seat sag when loading there. To stop rotation about the seat tube a wide cable tie was fastened around the front end of the seat and the top tube. Tightening the cable tie pulled the front seat anchor onto the top tube.

Here is a glimpse of an almost finished Kawasaki 250EX enduro seat mounted to an edirtbike. The oak base needs trimmed corners and some flat black spray paint -- too cold now.

I have seen a Honda enduro seat mounted on the OEM plastic Honda enduro seat
fairing attached to a gas powered mtnbike. The engine was Yamaha ha ha. Again with this means of attachment you will have to figure out how to attach an irregular surface to the bike contours.
The starting measurement is the distance from the top of your current seat to the BB axle [less 1/2" to 1" as the seat is somewhat widerthan a mtnbike seat] and along with knowing the thickness of your enduro seat you will have enough data to start working on the mounting platform and its location.
The standard seat post does not allow for much angle dipping from level towards the front but with shims you can create more dip in that direction.

It may seem mounting the enduro seat to a flat board will make it too flat, but you can add shims to elevate the seat and achieve the desired contour. Or if you have a seat with quite a bit of curvature it is often possible to pull it more flat without hurting the plastic base or puckering the upholstery material.
If you cannot make up your mind as to what enduro seat to get, the KTM Enduro
high seat 530EX year 2009[rides the best] [others years may work fine & mount differently] is an easy mount if you use the Master Lock winch plate shown above. The Kawasaki Enduro seat rests on the oak plane readily and has less special ribs and keels to embed than the KTM Enduro has. Or the KTM SX-85 mini enduro seat years '13, '14, & '15 has got to be the easiest mount and still better than the vintage banana set.